A wood slice wreath is what happens when rustic charm, weekend crafting, and “I saw this on Pinterest and now I must own it” energy all meet at the same kitchen table. It looks handmade in the best possible way: warm, textured, natural, and just imperfect enough to feel expensive. The best part? You do not need a professional workshop, a lumberjack beard, or a mysterious barn full of tools. With wood rounds, a wreath form, hot glue, ribbon, greenery, and a little patience, you can make a DIY wood slice wreath that works for fall, Christmas, farmhouse decor, woodland weddings, cabin walls, front doors, or that one empty spot in the hallway that has been judging you since 2021.
This guide walks you through how to make a wood slice wreath from start to finish, including the best materials, layout tips, decorating ideas, sealing advice, and common mistakes to avoid. Whether you use store-bought wood slices or cut your own branches, the process is beginner-friendly and surprisingly satisfying. You will dry-fit the slices, layer them for depth, secure everything properly, and finish the wreath with greenery, burlap, pinecones, berries, ribbon, or seasonal decorations. Translation: your door is about to get a personality upgrade.
What Is a Wood Slice Wreath?
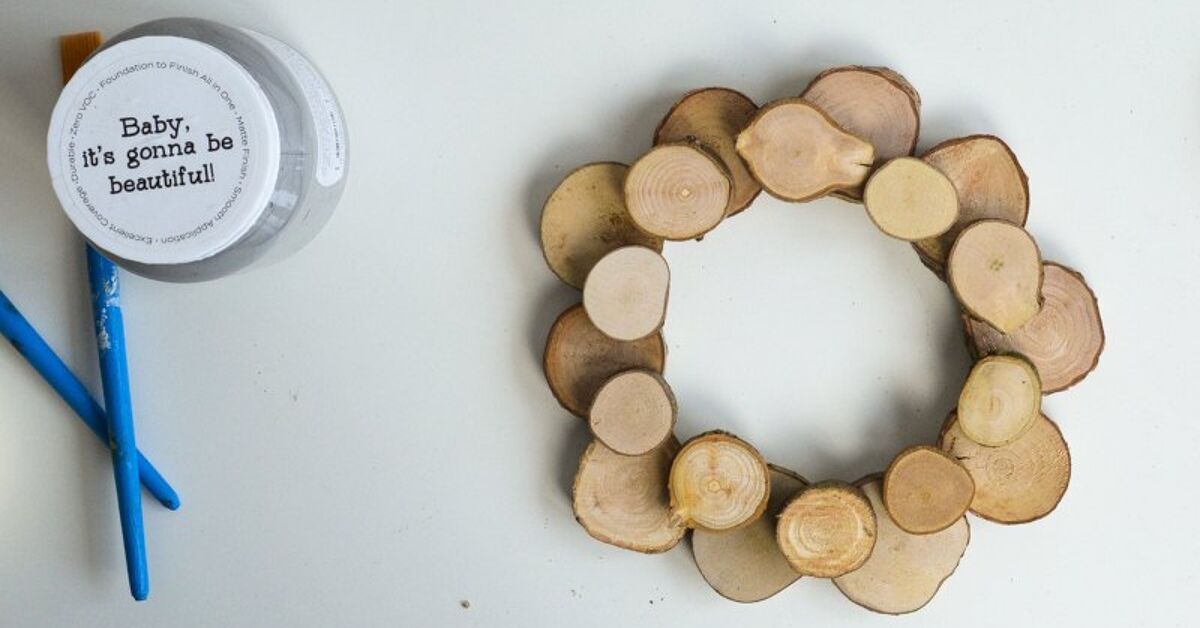
A wood slice wreath is a decorative wreath made from small, flat rounds of natural wood. These slices are usually arranged in a circle and attached to a base such as cardboard, wire, grapevine, foam, or a wooden ring. The design can be simple and clean, with just the exposed wood grain, or highly decorated with faux florals, eucalyptus, berries, pinecones, bows, bells, lights, or painted accents.
The appeal comes from the texture. Unlike plastic decorations that shout “holiday aisle,” wood slices add warmth and depth. Each piece has its own rings, bark, color, and tiny quirks. A small crack here or a darker grain there makes the wreath feel organic rather than mass-produced. This is why wood slice wreaths are popular in rustic home decor, farmhouse Christmas decorating, woodland nursery styling, cabin interiors, outdoor wedding backdrops, and handmade gift projects.
Why Make a DIY Wood Slice Wreath?
There are plenty of wreaths you can buy, but making your own gives you control over size, color, fullness, and seasonal style. It also costs less than many boutique wreaths, especially if you already have ribbon, faux greenery, or leftover craft supplies waiting in a drawer like tiny decorative goblins.
A homemade wood slice wreath is also easy to customize. For a fall wreath, add faux maple leaves, mini pumpkins, wheat stems, and burlap. For Christmas, use evergreen sprigs, pinecones, red berries, velvet ribbon, or battery-operated fairy lights. For spring, add pastel flowers and soft greenery. For a year-round rustic wreath, keep the design neutral with eucalyptus, twine, and a linen bow.
Supplies You Will Need
Before you start gluing wood pieces together with the confidence of a craft-store wizard, gather your materials. A little preparation makes the project cleaner, stronger, and less likely to end with glue strings in your hair.
Basic Materials
- Wood slices in assorted sizes, usually 1.5 to 3 inches wide
- Wreath base: cardboard ring, wire wreath form, grapevine wreath, foam ring, or flat wooden wreath form
- Hot glue gun and plenty of glue sticks
- Wood glue or heavy-duty craft glue for extra strength
- Jute twine, ribbon, or floral wire for hanging
- Faux greenery, flowers, berries, pinecones, or seasonal decorations
- Wire cutters or scissors
- Sandpaper, medium and fine grit
- Clear matte sealer or polyurethane, especially for outdoor use
- Cardboard, newspaper, or a silicone mat to protect your work surface
Optional Extras
- Burlap ribbon for farmhouse style
- Velvet ribbon for a holiday look
- Mini ornaments or jingle bells
- Paint, stain, or whitewash
- Wood-burning tool for letters or patterns
- Battery-operated fairy lights
- Felt pads for the back if hanging on glass or a painted door
Choosing the Right Wood Slices
You can buy pre-cut wood slices from craft stores, online retailers, dollar stores, or home decor suppliers. These are usually dried, smooth, and ready to use. For beginners, this is the easiest route. Store-bought slices are more consistent in thickness, which helps the wreath sit flat and prevents the finished piece from looking like it got into a disagreement with gravity.
If you want a more natural look, you can cut your own slices from branches. Choose dry hardwood branches when possible, such as birch, maple, oak, or fruitwood. Cut slices about 1/4 to 1/2 inch thick. Thin slices are lighter and easier to glue, while thicker slices look chunkier but can become heavy. If the wreath is going on a front door, weight matters. Nobody wants a wreath that knocks like a medieval battering ram every time the wind blows.
Should You Keep the Bark?
Bark gives the wreath a beautiful rustic edge, but it can loosen over time. To improve the chance of keeping bark attached, use dry wood, avoid very fresh branches, and seal the slices before assembling. If some bark flakes off, do not panic. A few missing edges can still look natural. For a cleaner modern wreath, remove loose bark and sand the edges smooth.
Step 1: Prepare the Wood Slices
If your wood slices are rough, lightly sand both sides and the edges. Start with medium-grit sandpaper, then finish with fine grit for a smoother surface. You do not need to sand away every natural mark. The goal is to remove splinters, dirt, and uneven bumps while keeping the character of the wood.
If the slices feel damp or cool to the touch, let them dry fully before using them. Fresh wood can shrink, crack, or grow mold if trapped under glue and decorations. Lay slices in a single layer in a dry, ventilated place for several days or longer, depending on thickness. If you cut your own, expect the drying process to take more time. Craft patience is annoying, but moldy wreaths are worse.
Step 2: Seal or Stain the Wood
Sealing is optional for indoor wreaths but recommended for wreaths displayed on a front door, porch, window, or humid area. A clear matte sealer protects the wood from moisture and helps stabilize bark. Apply a thin coat to the front, back, and edges, then allow it to dry completely.
If you want a richer look, use wood stain before sealing. A light oak stain creates a warm farmhouse style, dark walnut gives a dramatic cabin look, and whitewash creates a soft Scandinavian or winter effect. Always test stain on one slice first because wood absorbs color differently. One slice may turn honey-brown, while another decides to become espresso. Wood has opinions.
Step 3: Choose Your Wreath Base
The base determines the structure and durability of your wood slice wreath. A cardboard ring is affordable and easy to cut, making it great for lightweight indoor wreaths. A wire wreath form is stronger and works well when you glue slices across the rings. A grapevine wreath adds extra rustic texture and gives florals and greenery places to tuck in. A flat wooden wreath form is sturdy and ideal if you want a polished, long-lasting design.
For most beginners, a flat cardboard or wooden ring is easiest. Trace two circles: one large outer circle and one smaller inner circle. Cut out the center to make a donut shape. If you use cardboard, choose thick corrugated cardboard or double up two rings for strength. Paint the base brown or black before adding wood slices so any tiny gaps are less visible.
Step 4: Dry-Fit the First Layer
Do not start gluing immediately. This is the moment when restraint saves the day. Arrange the first layer of wood slices around the wreath base without glue. Move the slices around until the circle looks balanced. Mix large and small pieces so the design feels natural, not like a wooden army standing in perfect formation.
Place larger slices first, then fill gaps with smaller ones. Try to keep the inner and outer edges fairly even. The wreath does not need to be perfectly symmetrical, but it should look intentional. Step back and look at the shape from a few feet away. If one side looks heavier, adjust before glue enters the chat.
Step 5: Glue the First Layer
Once you like the layout, lift one slice at a time and glue it to the base. Hot glue works quickly and is convenient, but wood glue adds strength. For a sturdier wreath, use a small amount of wood glue for the bond and a dot of hot glue to hold the slice in place while the wood glue cures. This hybrid method is especially useful for heavier wreaths.
Press each slice firmly for a few seconds. Continue around the wreath until the first layer is complete. Keep checking the circle as you go. Hot glue sets fast, which is great unless you glue something crooked and then have to negotiate with it using a butter knife.
Step 6: Add a Second Layer for Depth
A single layer can look charming, but a second layer gives the wreath a fuller, more professional appearance. Place the second layer so each slice overlaps two slices beneath it. This staggered pattern covers gaps and creates dimension. Use smaller slices on top if you want a delicate layered effect, or use similar-sized slices for a bold, chunky look.
Before gluing the second layer, dry-fit it just like the first. Leave one area slightly open if you plan to add a large bow, greenery cluster, or floral arrangement. This creates a focal point and keeps the wreath from looking too busy.
Step 7: Create a Focal Point
A focal point is the decorative area that catches the eye first. On a wood slice wreath, it usually looks best on the lower left, lower right, bottom center, or top center. Asymmetrical designs often feel more modern and expensive. Symmetrical designs feel classic and balanced. Both work; choose the style that matches your home.
For a year-round rustic wreath, try eucalyptus stems, lamb’s ear, white berries, and a linen ribbon. For fall, use orange leaves, wheat, mini pinecones, and a burlap bow. For Christmas, use evergreen sprigs, red berries, bells, and a plaid or velvet ribbon. For spring, use small faux blossoms, fern pieces, and pastel ribbon. The wood is neutral, so it plays nicely with almost everything except maybe neon flamingos. Although, honestly, someone could make that work.
Step 8: Attach Greenery and Decorations
Trim faux stems with wire cutters so they are short enough to tuck neatly into the wreath. Bundle small pieces together with floral wire before gluing them down. This makes the arrangement easier to control and gives the finished wreath a more intentional shape.
Start with greenery first because it creates the base. Add larger flowers, pinecones, or ornaments next. Finish with small filler pieces such as berries, seed pods, dried orange slices, bells, or tiny bows. Use hot glue for lightweight decorations and floral wire for heavier pieces. If the wreath will hang outside, wire is more reliable than glue alone.
Step 9: Add a Bow or Ribbon Hanger
A bow is optional, but it can soften the hard texture of the wood. Burlap ribbon gives a farmhouse look. Wired plaid ribbon feels festive. Velvet ribbon makes the wreath look dressier. Linen ribbon keeps the design neutral and elegant.
To make a simple bow, create two loops, cross them, pull one loop through the center, and tighten gently. Trim the tails at an angle or notch them for a finished look. Attach the bow with floral wire or hot glue. If the bow is large, wire it on so you can remove or replace it later.
For hanging, glue or staple a loop of jute twine, ribbon, or floral wire to the back of the wreath. If the wreath is heavy, use wire rather than hot glue alone. Add a felt pad or fabric strip to the back if the wreath will touch glass, metal, or painted wood.
Step 10: Check the Back and Reinforce Weak Spots
Before hanging your wreath, turn it over and inspect the back. Add extra glue where slices meet the base. If you used a wire form, make sure each wood slice has enough contact with the metal. If you used cardboard, check that the ring is not bending. A little reinforcement now prevents the dramatic front-door collapse no crafter wants to witness.
Gently lift the wreath by the hanger and give it a light shake. If anything wiggles, reinforce it. Let the wreath dry flat for several hours, especially if you used wood glue. Once everything is set, remove hot glue strings with your fingers, tweezers, or a quick pass from a low-heat craft tool.
Design Ideas for Every Season
Fall Wood Slice Wreath
Use faux maple leaves, acorns, wheat stems, cinnamon sticks, and a burlap bow. A few mini pumpkins can look adorable, but keep them lightweight. Too many pumpkins and your wreath may start resembling a tiny produce department.
Christmas Wood Slice Wreath
Add evergreen sprigs, red berries, pinecones, bells, plaid ribbon, and warm white fairy lights. You can also wood-burn a seasonal word such as “Joy,” “Noel,” or “Merry” onto a few larger slices.
Spring Wood Slice Wreath
Choose soft faux flowers, fern stems, eucalyptus, lavender, and pastel ribbon. Keep the wood visible so the wreath still feels natural and not overloaded.
Minimalist Wood Slice Wreath
Skip bright decorations and use only greenery, twine, and a small neutral bow. This style works well for modern farmhouse, Scandinavian, cabin, and woodland decor.
Common Mistakes to Avoid
The first mistake is using wet wood. Damp slices can warp, crack, or grow mold. The second mistake is skipping the dry-fit stage. Wood slices vary in shape, and arranging them before gluing helps avoid awkward gaps. The third mistake is relying only on tiny dots of hot glue for a heavy wreath. Use enough adhesive, and reinforce with wood glue or wire when needed.
Another common issue is overdecorating. Wood slice wreaths look best when the natural texture remains visible. If every inch is covered in ribbon, flowers, ornaments, berries, and glitter, the wood slices become expensive background actors. Let the wood grain do some of the talking.
Can You Hang a Wood Slice Wreath Outdoors?
Yes, but place it in a protected area when possible. A covered porch, storm door, or sheltered entry is ideal. Direct rain, strong sun, and humidity can weaken glue, fade decorations, and loosen bark. For outdoor use, seal the wood slices, use weather-resistant faux greenery, and reinforce the hanger with floral wire or small screws if the base allows.
If you live in a very humid or rainy climate, bring the wreath indoors during storms. A handmade wreath is durable, but it is not a submarine. Treat it kindly and it can last for several seasons.
How to Store a Wood Slice Wreath
Store the wreath flat in a plastic wreath container, cardboard box, or breathable storage bag. Avoid crushing the decorations. Keep it in a dry place away from extreme heat, which can soften glue and warp wood. If your wreath has delicate florals or ribbon, wrap it loosely in tissue paper.
Before storing, dust the wreath with a soft cloth or use a cool hair dryer on a low setting to blow away debris. Check for loose pieces and repair them before packing the wreath away. Future you will be grateful. Future you has enough to do.
My Real-World Experience Making a Wood Slice Wreath
The first time I made a wood slice wreath, I had the classic beginner confidence: too much optimism, not enough glue sticks, and absolutely no plan for where the finished wreath would hang. I bought a bag of assorted wood slices, dumped them onto the table, and immediately realized they were not identical. Some were round, some were oval, and one looked like a potato that had taken a woodworking class. At first, I thought this was a problem. Then I realized the irregular shapes were what made the wreath interesting.
My biggest lesson was to dry-fit everything before gluing. When I arranged the slices first, I could rotate each piece until the grain looked good and the gaps were smaller. I started with the largest pieces around the outside edge, then used smaller slices near the inner ring. That one step made the wreath look planned instead of accidental. Without dry-fitting, I probably would have ended up with a lopsided circle and called it “organic” in self-defense.
The second lesson was that hot glue is fast, but it is not magic. For lightweight slices, hot glue worked fine. For thicker slices and decorations, I got better results by adding wood glue underneath and using hot glue to hold the piece in place while it dried. This made the wreath feel much sturdier. I also learned to work in small sections because hot glue cools quickly. If you spread glue across half the wreath and then casually sip coffee, the glue will be hard before you attach anything. Ask me how I know.
Decorating the wreath was the most fun and the easiest place to overdo it. I started with eucalyptus, then added berries, then pinecones, then ribbon, then stood back and realized I had built a tiny forest wearing a scarf. I removed a few pieces and the design instantly looked better. A wood slice wreath needs breathing room. The wood is the star, and the accents should support it, not tackle it to the ground.
I also recommend choosing one main color palette. For my favorite version, I used natural wood, muted green eucalyptus, cream berries, and a simple burlap bow. It looked good in fall, stayed up through winter, and did not scream any specific holiday. That is useful if you enjoy seasonal decorating but do not want to remake your front door every three weeks like it has its own social calendar.
Another practical tip: check the back before hanging. My first wreath looked beautiful from the front, but the back had glue bumps and one sharp twig stem that could have scratched the door. I added felt pads and trimmed the rough spots. That small fix made the wreath safer for painted surfaces and easier to hang flat.
Finally, do not chase perfection. The charm of a DIY wood slice wreath is that it looks handmade. A slightly uneven slice, a small bark gap, or a bow tail that refuses to behave will not ruin the project. In fact, those little details make it feel warmer. The finished wreath should look like something created with care, not something stamped out by a factory machine named Brad. Take your time, enjoy the process, and remember: if a gap bothers you, greenery exists for a reason.
Conclusion
Learning how to make a wood slice wreath is a simple, rewarding project that turns basic craft supplies into a warm piece of rustic home decor. The key steps are easy: prepare and seal the wood slices, choose a sturdy wreath base, dry-fit the layout, glue the slices in layers, add a focal point, and finish with ribbon or greenery. With a few thoughtful details, your wreath can suit any season, from a cozy fall entryway to a festive Christmas front door or a clean year-round farmhouse wall accent.
The best DIY wood slice wreaths balance natural texture with decorative restraint. Let the wood grain show, reinforce the structure, and choose accents that fit your home’s style. Whether you are crafting for yourself, making handmade gifts, decorating a wedding, or refreshing your porch, this project offers plenty of room for creativity without requiring advanced skills. In other words, it is beginner-friendly, budget-friendly, and charming enough to make visitors ask, “Where did you buy that?” You may then smile mysteriously and say, “Oh, I made it,” which is legally the best part of crafting.
Note: This article is written in original standard American English and synthesized from practical DIY, home decor, wreath-making, and wood craft guidance.