Adding images to candles is one of those crafts that looks wildly impressive but does not require a secret art degree, a studio with perfect lighting, or a personality that says things like “I hand-pour wax before sunrise.” With the right method, you can turn plain pillar candles, flameless candles, jar candles, or candle holders into personalized gifts, wedding favors, memorial keepsakes, holiday decorations, or branded products that look custom-made.
The best part? There is more than one way to do it. You can transfer printed photos onto wax candles with tissue paper and heat, apply water-slide decals for a clean printed look, use vinyl designs on candle jars, decoupage napkins onto flameless candles, or create polished printed labels for container candles. Each technique has its own personality. Tissue paper is charming and handmade. Waterslide decals are sleek and precise. Vinyl is bold and modern. Decoupage says, “Yes, I own scissors and I am not afraid to use them.”
This guide explains how to add images to candles safely, beautifully, and without accidentally turning your craft table into a wax-based crime scene.
Before You Start: Choose the Right Candle and Image Method
Before printing Grandma’s wedding photo or your dog’s majestic side profile, decide what type of candle you are decorating. The surface matters because wax, glass, metal, and plastic-backed flameless candles behave differently.
Best Candle Types for Image Transfers
Pillar candles are the classic choice for tissue paper photo transfers. Their smooth wax surface gives the image a clean background, especially if the candle is white or ivory.
Flameless LED candles are the safest choice for paper, napkin, vinyl, and decoupage projects. They offer the cozy glow without an open flame, which is ideal when your design includes paper, glue, or decorative materials.
Jar candles are perfect for custom labels, vinyl decals, and printed stickers applied to the outside of the glass. This keeps decorative materials away from the flame and melting wax.
Taper candles can be decorated, but they are narrow and curved, so small designs work best. Save the giant family reunion photo for a pillar candle unless you enjoy wrestling with tiny paper edges.
Important Candle Safety Rules
Decorated candles are beautiful, but candles are still open flames. That means safety is not optional; it is the unglamorous friend who keeps everyone from making bad decisions.
Keep decorative materials away from the wick and flame. Do not place paper, vinyl, ribbon, dried flowers, glitter, or labels near the top of a candle where they could catch fire. If the candle will be burned, keep decorations low on the outside surface and never let them extend into the melt pool.
For the safest result, treat decorated wax candles as display pieces or use flameless candles. If you plan to burn a decorated candle, monitor it closely, place it on a heat-resistant surface, trim the wick to about one-quarter inch before lighting, and never leave it unattended. Keep burning candles away from curtains, books, bedding, dried greenery, party napkins, and anything else that looks innocent until it meets fire.
Method 1: Add a Printed Image to a Candle with Tissue Paper
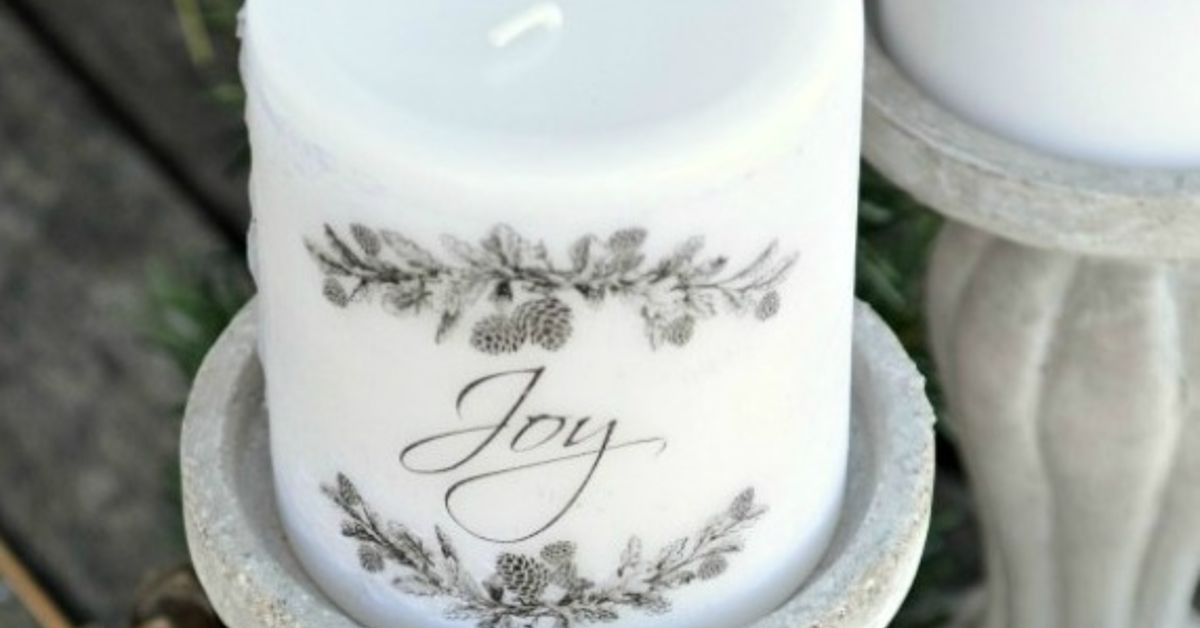
This is the most popular DIY photo candle method because it creates the illusion that the image is embedded into the wax. The trick is simple: print the image onto tissue paper, place it on the candle, cover it with wax paper, and gently heat it until the candle’s surface softens just enough to absorb the tissue.
Supplies You Need
- White or light-colored pillar candle
- White tissue paper
- Regular printer paper
- Tape
- Inkjet or laser printer
- Scissors
- Wax paper
- Heat gun or embossing tool
- Clean cloth or oven mitt
Step-by-Step Instructions
Step 1: Prepare your image. Choose a high-resolution image with good contrast. Bright photos, black-and-white portraits, botanical illustrations, monograms, line art, and holiday graphics all work well. Resize the image to fit your candle. A design that is slightly smaller than the candle’s front curve is easier to apply than one that wraps all the way around.
Step 2: Attach tissue paper to printer paper. Cut a piece of tissue paper slightly smaller than a standard sheet of printer paper. Tape the tissue paper smoothly onto the printer paper, securing the edges so it will feed through the printer without crumpling. The tissue paper should be flat, not wrinkled like it just woke up from a nap.
Step 3: Print the image. Print the design onto the tissue paper side. Let the ink dry completely before handling it. If your image smears, wait longer or try a lower ink setting.
Step 4: Cut out the image. Trim close to the design. The less extra tissue you leave around the image, the cleaner the final candle will look. If the candle is white, tiny edges will usually disappear into the wax.
Step 5: Position the image on the candle. Place the printed tissue image against the candle. Wrap a piece of wax paper tightly over the image, shiny side facing the candle. Hold the extra wax paper at the back like a handle.
Step 6: Heat carefully. Use a heat gun or embossing tool on a low or moderate setting. Move the heat source slowly over the image. Do not hold it in one place too long. You are gently melting the surface wax, not roasting marshmallows. As the wax warms, the tissue paper will appear to disappear into the candle.
Step 7: Peel and inspect. Let the candle cool for a moment, then peel away the wax paper. If any edges are still visible, cover the area again and apply a little more heat. Smooth, patient passes are better than one dramatic blast of hot air.
Best Uses for Tissue Paper Candle Transfers
This method is excellent for wedding memorial candles, baby shower centerpieces, Christmas photo candles, Mother’s Day gifts, family portraits, pet memorials, handwritten recipes, vintage botanical prints, and custom party decor. It gives candles a soft, handmade look that feels warm and personal.
Method 2: Use Waterslide Decals for a Clean Printed Look
Waterslide decal paper is a favorite for crafters who want a sharper, more professional finish. Instead of embedding tissue into the wax, you print an image onto special decal paper, seal it, soak it in water, and slide the design onto the candle surface.
Supplies You Need
- Waterslide decal paper for inkjet or laser printer
- Printer
- Clear acrylic spray sealer, especially for inkjet prints
- Scissors or craft knife
- Bowl of lukewarm water
- Paper towel
- Smooth pillar candle or flameless candle
How to Apply Waterslide Images to Candles
Design and print your image on the glossy side of the waterslide paper. If you are using inkjet paper, apply several light coats of clear acrylic spray after printing so the ink does not dissolve in water. Let it dry according to the product instructions.
Cut around the image, leaving a small border. Soak the decal in lukewarm water until the backing begins to loosen. Slide the decal gently onto the candle and position it with your fingertips. Blot away extra water with a paper towel and allow the candle to dry completely.
Waterslide decals are especially useful for logos, fine lettering, colorful illustrations, and images that need crisp edges. They work beautifully for wedding favors, small business branding, baptism candles, birthday candles, and personalized gift sets.
Method 3: Add Vinyl Images to Candle Jars
Vinyl is a great option when decorating glass candle jars, tins, or holders. Instead of applying the image directly to wax, you place the design on the outside container. This is cleaner, safer, and easier to customize.
Best Vinyl Candle Ideas
- Monograms on glass candle jars
- Names and dates for wedding favors
- Holiday silhouettes such as trees, snowflakes, or pumpkins
- Minimalist line art
- Business logos for handmade candle brands
- Funny labels such as “Smells Like I Cleaned”
To apply vinyl, clean the glass with rubbing alcohol and let it dry. Cut your design with a craft cutting machine or use pre-cut vinyl decals. Apply transfer tape, position the design, press firmly with a scraper, then peel away the tape slowly. For curved jars, start in the center and smooth outward to avoid bubbles.
Vinyl should not be placed where it can touch flame, hot wax, or the inside of the candle. It is best used on the outside of a container candle or on flameless candles intended for decoration.
Method 4: Decoupage Napkins or Printed Paper onto Flameless Candles
Decoupage is perfect for flameless candles because you can use paper designs without worrying about open flame. Decorative napkins, wrapping paper, book pages, floral prints, and vintage illustrations can all be applied with decoupage medium.
Start by separating the top printed layer of a paper napkin from the plain backing layers. Brush a thin coat of decoupage medium onto the candle surface, gently place the napkin image over it, and smooth it with clean fingers or plastic wrap. Add another thin coat on top and let it dry. The result can look soft, romantic, rustic, modern, or delightfully grandma-chic depending on your paper choice.
For flameless candles, this is one of the easiest ways to create seasonal decor. Try lemons for summer, leaves for fall, toile prints for farmhouse style, or tiny stars for Christmas. Because LED candles do not burn down, the design lasts longer than your motivation to organize the craft drawer.
Method 5: Create Custom Candle Labels with Images
If you sell candles or want a polished gift, custom labels are often the best choice. Labels allow you to add images, scent names, branding, instructions, and safety warnings without altering the wax itself.
For jar candles, use waterproof or oil-resistant labels when possible. Candle containers can become warm, and fragrance oils or handling can affect ordinary paper labels. Choose a label size that fits the container without wrinkling. For round jars, flexible film labels often apply more smoothly than thick paper labels.
A good candle label may include the candle name, scent, wax type, net weight, brand name, and a small image or illustration. The bottom of the candle should include a safety warning label with basic burn instructions. Even if you are making candles only as gifts, a warning label is a smart finishing touch.
Design Tips for Better Image Candle Projects
Use High-Contrast Images
Images can soften when transferred onto wax, especially with tissue paper. Choose photos with clear faces, strong outlines, and simple backgrounds. If the image looks muddy on your computer, it will not magically become a museum piece on wax.
Match the Background to the Candle
White candles are the easiest base because tissue edges blend into the wax. For dark candles, use images with dark backgrounds or try waterslide decals designed for dark surfaces.
Keep Designs Away from the Top
Place images on the side of the candle, not near the wick. A beautiful image is not worth turning into a tiny flaming poster.
Test Before Making a Full Set
Always make one sample before creating twenty wedding favors, especially if guests are arriving tomorrow and your emotional support coffee is already gone. Testing helps you check image size, color, heat settings, drying time, and overall durability.
Common Mistakes and How to Avoid Them
Wrinkled tissue paper: Tape the tissue smoothly to printer paper and feed only one sheet at a time through the printer.
Image smearing: Let printed images dry fully. For waterslide decals, seal inkjet designs before soaking.
Wax melting unevenly: Keep the heat gun moving and use gentle heat. Too much heat creates dips, drips, and regret.
Visible paper edges: Trim close to the design and use a candle color that matches the paper.
Vinyl bubbling on jars: Clean the surface first and apply from the center outward. Curved glass requires patience, not panic.
Unsafe decorations: Use flameless candles for paper-heavy projects, and never burn candles decorated with flammable materials near the flame.
Creative Ideas for Image Candles
Once you understand the techniques, you can customize candles for nearly any occasion. For weddings, add the couple’s initials, venue sketch, or wedding date. For Christmas, use vintage Santa illustrations, family photos, or handwritten holiday messages. For memorial candles, choose a portrait, meaningful quote, or favorite flower. For birthdays, add childhood photos or inside jokes. For small businesses, use branded labels, logos, and scent-specific illustrations.
You can also create themed candle collections. A travel set might include city maps and skyline graphics. A garden set could use botanical drawings of lavender, rosemary, and rose. A cozy fall set might feature pumpkins, leaves, and warm typography. The design possibilities are almost endless, which is wonderful until you spend two hours choosing between twelve fonts that all look “kind of farmhouse.”
Hands-On Experience: What I Learned While Adding Images to Candles
The first thing you learn when adding images to candles is that wax has a personality. It looks calm and cooperative sitting there on the table, but the moment heat enters the conversation, it becomes very opinionated. A little warmth helps tissue paper melt beautifully into the surface. Too much warmth creates a shiny dent that says, “This crafter was overconfident.”
For beginners, the easiest project is a white pillar candle with one medium-sized black-and-white image. White tissue paper disappears better on white wax, and black-and-white images hide small printing imperfections. A portrait, simple quote, or botanical sketch is much easier than a full-color family photo with fifteen people, three dogs, and someone blinking in the back row.
One of the most useful tricks is to hold the wax paper tightly around the candle while heating. If the tissue shifts, the image can wrinkle or blur. Think of the wax paper as a tiny seatbelt for your design. It keeps everything in place while the heat does its work. Another helpful tip is to stop heating as soon as the image looks slightly darker and more blended into the candle. That is usually the sweet spot. If you keep going because you want it “extra attached,” you may melt the surface too much.
Waterslide decals feel more precise but require patience during sealing and drying. The image quality can be excellent, especially for logos and colorful artwork. However, rushing the clear spray step can cause the ink to bleed when the decal hits water. Light coats are better than one heavy coat. The decal should slide easily from the backing; if you have to fight it, give it a few more seconds in water.
Vinyl on candle jars is the least messy method and the best option for a clean, modern look. It is also ideal if you are making gifts in batches. The most common issue is alignment. Round jars make straight lines look suspiciously crooked if you apply the decal too quickly. Placing the jar between two towels or books can keep it from rolling while you work. Cleaning the glass first also makes a big difference because fingerprints and dust are tiny enemies of good adhesion.
Decoupage on flameless candles is forgiving and fun. It is the method I would recommend for kids, group craft nights, or anyone who wants pretty results without using a heat gun. Thin napkins blend nicely, and small wrinkles often add texture instead of ruining the design. The key is using thin layers of decoupage medium. Thick glue creates bumps, cloudy patches, and a finish that looks like the candle got caught in a craft-store rainstorm.
The biggest lesson is to match the method to the purpose. If the candle is a display piece, tissue paper transfers are beautiful. If it is a favor or branded product, labels or vinyl on jars look professional. If the design includes lots of paper or glue, flameless candles are the safest choice. When in doubt, make a sample first. A test candle costs a few dollars; a ruined batch of centerpieces costs your peace of mind and possibly a dramatic snack break.
Conclusion
Learning how to add images to candles opens the door to thoughtful gifts, personalized home decor, creative party favors, and small-business branding that feels polished without being boring. The best technique depends on your candle type, your design, and whether the candle will be burned or displayed. Tissue paper transfers create a soft embedded look on wax pillars. Waterslide decals offer crisp detail. Vinyl works beautifully on jars and containers. Decoupage is perfect for flameless candles. Printed labels give container candles a professional finish.
Whatever method you choose, keep safety at the center of the project. Avoid placing flammable materials near the wick, use flameless candles when decorating with paper or glue, and never leave burning candles unattended. A custom candle should be memorable because it is beautiful, not because it caused an emergency involving oven mitts and shouting.
With a little testing, a steady hand, and a healthy respect for heat, you can turn ordinary candles into personalized pieces that look charming, meaningful, and gift-worthy. Plain candles are nice. Custom image candles? They have stories, style, and just enough handmade magic to make people ask, “Wait, you made that?”