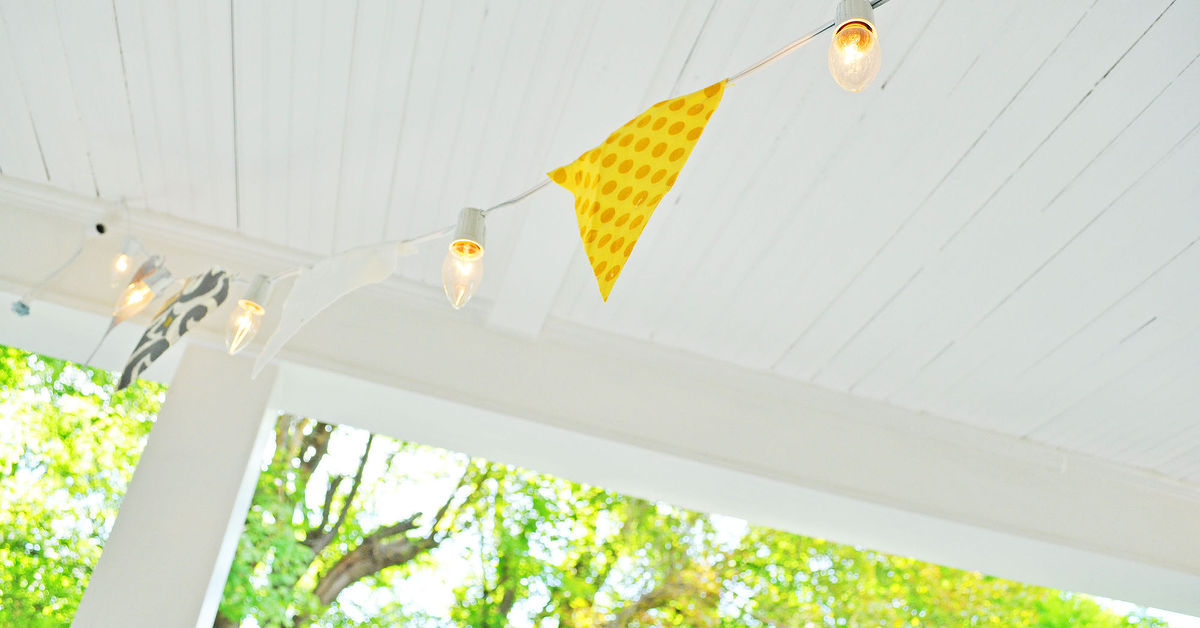
There is something deeply satisfying about taking a forgotten box of Christmas lights and turning it into décor that works in July, October, or on a random Tuesday when your living room needs more personality. This DIY pendant banner string lights project combines the warm glow of ordinary holiday lights with the playful shape of a handmade pennant banner.
The result looks custom, but the process is surprisingly approachable. You do not need to rewire anything, install a permanent fixture, or convince an electrician that your glue gun is a professional tool. You simply decorate a safe LED light strand with lightweight triangular flags positioned between the bulbs.
Use the finished lighted banner above a party table, across a bedroom wall, over a reading nook, along a mantel, or as a cheerful photo backdrop. Change the colors and patterns, and the same basic project can work for birthdays, weddings, holidays, nurseries, game rooms, and backyard celebrations.
What Are Pendant Banner String Lights?
Despite the wording commonly used for this project, the decorative pieces are technically pennants: small triangular flags arranged in a row. “Pendant” refers to something that hangs, so the popular title is not completely unreasonable. Either way, the idea is simple: ordinary Christmas lights become an illuminated banner by adding handmade flags between the sockets.
The pennants remain separate from the electrical components. They do not cover the bulbs, enter the sockets, or alter the wiring. That distinction is important. This is a decorative craft project, not an electrical modification.
Why this project works so well
String lights already provide rhythm because the bulbs repeat at regular intervals. A pennant banner creates a similar visual pattern. Combining them produces a balanced decoration that looks intentional rather than like someone forgot to remove the Christmas lights in February.
The project is also easy to personalize. Scrapbook paper creates crisp, colorful flags. Fabric adds softness. Kraft paper produces a rustic look, while metallic cardstock makes the lights feel party-ready. You can add letters, painted patterns, names, numbers, stars, flowers, or seasonal symbols.
Choose the Right Christmas Lights
Use a modern LED mini-light strand that is in excellent condition and approved for the location where you plan to hang it. LED bulbs use less energy and normally operate much cooler than traditional incandescent holiday bulbs, making them the better choice around lightweight decorative materials.
Look for a recognized safety certification mark on the packaging or product label. Use indoor-rated lights indoors and outdoor-rated lights only when decorating outside. A covered porch is still outdoors from the light strand’s point of view; electricity is not impressed by your roof overhang.
Inspect the entire strand
Before crafting, unplug the lights and check the cord from end to end. Do not use a strand with cracked sockets, exposed wire, loose connections, damaged insulation, scorch marks, or a plug that becomes unusually warm. Replacing a questionable strand is cheaper than introducing a questionable electrical situation into your home.
Plug the bare strand in briefly to confirm that every section works. Then unplug it again before attaching decorations. Never cut the cord, remove sockets, splice wires, drive staples through the cable, or apply glue directly to electrical contacts.
Materials and Tools
Most of the supplies are inexpensive, and several may already be hiding in your craft drawer under seventeen dried-out markers.
- One tested LED Christmas light strand
- Cardstock, scrapbook paper, kraft paper, felt, or lightweight fabric
- Cardboard for making a reusable triangle template
- Pencil
- Metal ruler
- Scissors or a craft knife
- Cutting mat if using a craft knife
- Small hole punch
- Double-sided craft tape, removable glue dots, or mini clothespins
- Thin ribbon, baker’s twine, or small reusable zip ties
- Removable decorating hooks or proper light clips
- Optional letter stickers, paint pens, stamps, or stencils
Avoid heavy cardboard, thick embellishments, long fringe, loose glitter, metal fasteners, and anything that could weigh down the light strand. The electrical cord should not become the structural support for a small craft-store chandelier.
Plan the Banner Before Cutting
Lay the unplugged light strand on the floor or a large table and measure the usable illuminated section. Do not include the unlit lead wire near the plug unless you intentionally want decorations there.
Decide how many pennants you need
You can place one pennant in every gap between bulbs, but that often looks crowded. Attaching a flag in every second or third gap gives the light room to shine and makes the individual patterns easier to see.
For example, a strand with 50 closely spaced bulbs may need only 12 to 18 flags. A shorter strand with wider spacing may look best with 8 to 10 larger pennants. Arrange paper scraps along the cord before cutting your final shapes to test the spacing.
Select an appropriate flag size
A good starting template is approximately 3.5 inches wide and 4.5 inches tall, plus a half-inch rectangular tab across the top. The tab folds over the support twine or insulated section of cord, allowing the flag to hang neatly.
Scale the template to match the room. Tiny flags suit mirrors, shelves, and dorm rooms. Larger flags work above party tables or across wide walls. Keep them light enough that the strand does not sag excessively.
How to Make DIY Pendant Banner String Lights
Step 1: Create a pennant template
Draw a rectangle on thin cardboard. Mark the center of the lower edge, then draw diagonal lines from the upper corners to the center mark. Add a narrow rectangular tab along the top edge. Cut out the completed template.
The template keeps every flag consistent and dramatically reduces the possibility of ending with a banner that looks as though each triangle was designed by a different committee.
Step 2: Trace and cut the flags
Place the template on your chosen material and trace around it. Cut each flag carefully. A craft knife and ruler create the cleanest edges on cardstock, while sharp fabric scissors work better for felt and woven material.
If you are using thin fabric, apply a lightweight fusible backing before cutting. This reduces fraying and helps the flags hold their shape without making them too heavy.
Step 3: Arrange the colors and patterns
Lay all the cut flags in a row before attaching anything. Alternate large and small patterns so the design does not become visually chaotic. A simple sequence such as floral, solid, stripe, solid usually feels more balanced than placing every dramatic print beside another dramatic print.
For a cohesive palette, choose one dominant color, one supporting color, and one accent. Warm white lights work beautifully with muted paper, natural kraft tones, pastels, jewel colors, and metallic details.
Step 4: Add letters or decorative details
Decorate the flags while they are still flat. Add adhesive letters for a name or message, stamp small motifs, draw borders with a paint pen, or use a stencil to create repeated shapes.
Keep embellishments lightweight and firmly attached. Sequins and small paper shapes are acceptable when secured well, but avoid dangling metal charms or loose items that could contact the electrical strand.
Step 5: Fold the top tabs
Use the ruler to score a straight line where each top tab meets the triangle. Fold the tab toward the back and press it flat. This creates a clean channel for attaching the flag.
For the safest and most reusable construction, run a separate piece of thin twine beside the light strand and fold the pennant tabs over the twine. Secure the tabs with double-sided tape. Then connect the twine to the insulated light cord at a few widely spaced points with loose reusable ties.
This method allows the twine to carry the weight of the banner rather than forcing the electrical cable to support every flag. It also makes it easier to remove the decorations later without damaging the lights.
Step 6: Position the flags between the bulbs
Place every pennant in a clear gap between two sockets. Confirm that no paper, fabric, tape, ribbon, or twine rests against a bulb. Keep the decorations away from plugs, fuse compartments, controllers, and strand-to-strand connectors.
Do not tighten zip ties aggressively around the cord. They should hold the decorative twine in position without pinching or deforming the insulation. Trim excess tie material carefully without nicking the wire.
Step 7: Hang the finished banner
Install removable decorating hooks, cup hooks, or purpose-made light clips suitable for the mounting surface. Support the strand at multiple points so its weight is distributed evenly. Never hang electrical lights with nails, metal staples, or screws that could puncture the cable.
Create a shallow curve rather than stretching the wire tightly. Gentle swags look relaxed and prevent unnecessary tension at the plug and end connections.
Step 8: Perform a final check
After hanging the banner, inspect every flag and connection. Make sure the bulbs are unobstructed, the cord is not trapped behind furniture, and the plug is fully inserted into an appropriate outlet.
Turn on the lights and watch them for several minutes. The flags should remain stable and well separated from the bulbs. Turn the display off before leaving home or going to sleep. A plug-in timer can make that routine easier.
Design Ideas for Every Occasion
Birthday banner lights
Use bright cardstock and spell out “HAPPY BIRTHDAY,” placing one letter on each flag. Add the guest of honor’s name on smaller pennants between the words. Multicolor LED lights create a playful carnival effect, while warm white bulbs make the display feel more polished.
Nursery or children’s room
Choose soft colors, felt flags, and simple shapes such as clouds, moons, woodland animals, or stars. Hang the strand well out of a child’s reach and secure the cord so it cannot be pulled down.
Wedding or shower decoration
Combine cream paper, translucent vellum accents, botanical prints, and gold lettering. Display the banner behind a dessert table, guest-book station, or photo area. Use warm white lights for a flattering glow that does not make everyone look as though they are standing beneath supermarket fluorescents.
Patriotic celebration
Alternate red, white, and blue flags for a Fourth of July cookout. Stars, stripes, gingham patterns, and denim-inspired paper all fit the theme. Use only outdoor-rated lights and weather-resistant pennant material if the display will be outside.
Halloween display
Try black, orange, purple, and acid green pennants with silhouettes of bats, cats, ghosts, or crooked houses. Purple or warm orange LED lights can make the banner feel festive without requiring a fog machine or a neighbor dressed as a groundskeeper from a haunted estate.
Everyday farmhouse décor
Use kraft paper, linen-look fabric, ticking stripes, muted florals, and jute-colored twine. This version works above an open shelf, along a mantel, or across a breakfast nook long after the holiday storage bins have returned to the attic.
Common Mistakes to Avoid
Using incandescent lights
Older incandescent bulbs generate more heat than LED mini lights. They are not the right choice for a project involving nearby paper or fabric. Begin with a cool-running LED strand rather than trying to adapt the decorations around hot bulbs.
Covering the bulbs
A paper flag is not a lampshade. Do not roll the pennants into cones, place paper cups over the lights, or surround bulbs with enclosed decorations unless the light manufacturer specifically designed the product for compatible shades.
Attaching flags with staples
Metal staples can damage wire insulation and create an electrical hazard. Use a separate support twine, removable adhesive, mini clips, or loose plastic ties that never pierce the cord.
Making the flags too heavy
Thick chipboard, wood pieces, layered beads, and bulky artificial flowers can pull the strand out of shape. Lightweight materials create a cleaner line and place less stress on the mounting points.
Ignoring the plug location
Plan where the cord will reach before mounting the first hook. Do not stretch a strand across a walkway or hide an extension cord beneath a rug. Route the cable where it will not create a tripping hazard or be crushed by furniture.
Practical Experience: What the Project Is Really Like
The first thing most makers notice is that the cutting takes longer than the assembly. The project looks as though it should require ten minutes, one pair of scissors, and a heroic amount of confidence. In practice, carefully tracing and cutting a dozen matching pennants is the difference between a polished banner and a row of triangles that appear to be slowly melting.
Creating one sturdy template is therefore worth the extra few minutes. Thin packaging cardboard works especially well because it is firm enough to trace but still easy to trim. Once the template is accurate, the remaining pieces become repetitive in a pleasant, almost meditative way. This is an excellent stage for listening to music, a podcast, or an increasingly dramatic audiobook.
Another common discovery is that every attractive scrapbook pattern does not necessarily belong in the same banner. Individually, the floral paper, gold chevrons, tiny polka dots, watercolor lemons, and vintage bicycles may all be charming. Together, they can resemble a stationery store caught in a tornado. Limiting the palette makes a surprisingly large difference.
A useful approach is to cut two or three extra flags and arrange everything on the floor. Take a phone photo of the sequence before attaching the pieces. The photograph makes awkward color clusters easier to spot and preserves the order when the cat, dog, child, ceiling fan, or careless adult inevitably disrupts the layout.
The separate-twine method also tends to produce a better experience than attaching every flag directly to the light cord. The banner can be built flat on a table, adjusted easily, and moved without twisting the electrical strand. When the decorative twine is loosely paired with the lights, the two layers appear to be one unit from normal viewing distance.
Spacing is where the project usually changes from merely homemade to genuinely stylish. Filling every gap with a flag sounds logical, but the finished banner can become dense and block much of the glow. Leaving one or two bulb spaces between flags gives each triangle a distinct silhouette. The empty areas are not unfinished; they are breathing room.
Installation presents its own lesson: more support points create a smoother banner. Two hooks at the ends may be enough to keep a short strand off the floor, but the center will often sag more than expected. Adding one or two intermediate hooks produces controlled curves and reduces strain on the cord. Marking the hook positions with painter’s tape before installation helps prevent the classic sequence of hanging, stepping back, sighing, and moving everything two inches to the left.
The first lighting test is usually the rewarding moment. Patterns that looked flat on the worktable gain depth, metallic accents catch the glow, and the repeating triangles create soft shadows on the wall. Warm white LEDs are especially forgiving because they make inexpensive materials look richer. Even basic kraft paper can appear cozy and intentional under the right light.
It is also normal to make a few changes after seeing the banner illuminated. One pattern may become visually dominant, a letter may be difficult to read, or a pennant may hang too close to a socket. The best DIY projects are adjusted rather than declared perfect on the first attempt. Unplug the strand, reposition the problem pieces, and test again.
Storage deserves more thought than it usually receives. Removing the banner and dropping it into a holiday bin almost guarantees creased flags and tangled wires. Wrap the unplugged light strand loosely around a piece of cardboard, allowing the pennants to lie flat against it. Add a layer of tissue paper and store the project in a shallow box. Future-you will be delighted not to spend forty minutes negotiating with a glowing knot.
Perhaps the best part of the experience is how reusable the concept becomes. After making one banner, it is easy to create interchangeable pennant sets for different seasons. The same LED strand can support pastel flags in spring, patriotic colors in summer, warm leaves in fall, and traditional patterns during the holidays. One ordinary set of Christmas lights becomes a flexible decorating system rather than a once-a-year object waiting patiently beside the plastic tree stand.
Care, Storage, and Long-Term Use
Check the light strand and mounting hardware periodically, especially after moving the display or using it outdoors. Replace loose adhesive, damaged ties, or bent hooks. If a wire becomes frayed or a socket cracks, stop using the strand rather than attempting a decorative repair.
Paper pennants are best for dry indoor areas. For a protected outdoor event, choose synthetic fabric, laminated paper, or another lightweight moisture-resistant material. Bring the banner inside during rain, high wind, or severe weather unless every component is expressly intended for those conditions.
Holiday light strands are generally designed as temporary decorative lighting. For a permanent year-round installation, choose a product specifically listed and marketed for continuous or year-round decorative use.
Conclusion
DIY pendant banner string lights prove that ordinary Christmas lights do not have to spend most of the year tangled in a box. With a safe LED strand, lightweight pennants, thoughtful spacing, and proper mounting clips, you can create a custom illuminated banner without changing a single electrical component.
The project is inexpensive enough for casual experimentation but attractive enough for weddings, parties, bedrooms, mantels, and seasonal displays. More importantly, it is endlessly adaptable. Change the paper, lettering, pattern, and color palette, and the same simple technique delivers an entirely new look.
Just remember the non-negotiable rules: inspect the strand, use cool-running LED lights, keep every decoration away from the bulbs, avoid metal staples, follow the manufacturer’s directions, and turn the lights off when they are unattended. Creativity should brighten the roomnot produce an unexpected call to the fire department.