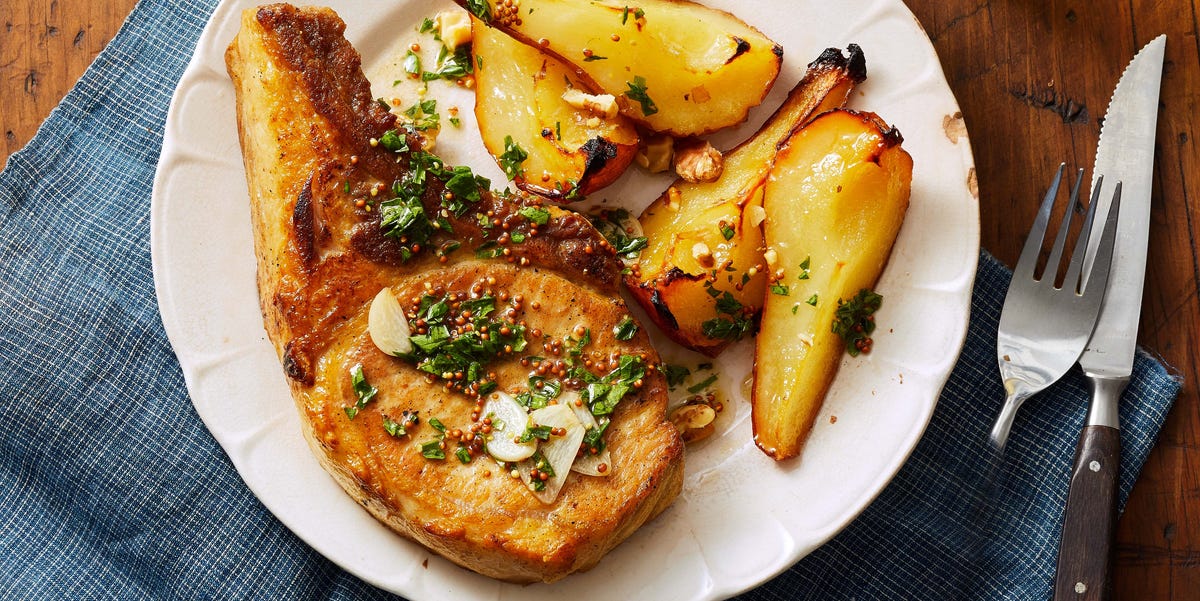
Roasted pork chops and pears are what happens when an ordinary weeknight dinner puts on a nice sweater and suddenly looks ready for company. The pork is savory and deeply browned, the pears become tender and lightly caramelized, and a cider-Dijon pan sauce ties everything together with sweetness, acidity, and just enough mustardy attitude.
This one-pan roasted pork chops and pears recipe feels elegant, but it does not require culinary acrobatics. You brown the chops, soften the fruit and onions, stir together a simple glaze, and let the oven finish the job. The result is a complete autumn-inspired dinner with fewer dishes and no mysterious restaurant techniques.
The main secret is not a complicated marinade or an expensive cut of meat. It is temperature control. Thick pork chops remain juicy when they are cooked only until done, while firm pears hold their shape instead of becoming pear-flavored wallpaper paste. Follow the method below, and dinner should be ready in about 40 minutes.
Why Pork Chops and Pears Work So Well Together
Pork has a mild richness that welcomes fruit, especially fruit with both sweetness and acidity. Apples may be the traditional partner, but pears bring a softer floral flavor and a buttery texture that feels slightly more sophisticated. They also absorb savory pan juices beautifully.
The supporting ingredients are equally important. Red onion provides sweetness and structure, thyme adds an earthy aroma, apple cider vinegar prevents the glaze from becoming sugary, and Dijon mustard contributes sharpness. A little maple syrup rounds everything out without turning dinner into dessert.
Roasting also concentrates the pears’ natural sugars. Their edges brown while the centers soften, creating a side dish and sauce ingredient at the same time. Efficient, delicious, and suspiciously clever for something that mostly happens while you stand near the oven feeling accomplished.
Roasted Pork Chops and Pears Recipe
Prep time: 15 minutes
Cook time: 25 minutes
Total time: About 40 minutes
Yield: 4 servings
Ingredients
- 4 bone-in center-cut pork chops, approximately 1 to 1 1/4 inches thick
- 1 1/2 teaspoons kosher salt, divided
- 3/4 teaspoon freshly ground black pepper, divided
- 2 tablespoons olive oil, divided
- 3 firm-ripe Bosc or Anjou pears
- 1 medium red onion, cut into thick wedges
- 2 teaspoons fresh thyme leaves, plus more for serving
- 2 garlic cloves, finely chopped
- 1/2 cup low-sodium chicken broth or apple cider
- 1 tablespoon apple cider vinegar
- 1 tablespoon Dijon mustard
- 2 teaspoons pure maple syrup or honey
- 1 tablespoon unsalted butter
- Optional: 1/4 teaspoon crushed red pepper flakes
Recommended Equipment
- Large oven-safe skillet, preferably cast iron or stainless steel
- Instant-read meat thermometer
- Sharp knife and cutting board
- Small bowl or measuring cup
How to Make Roasted Pork Chops and Pears
Step 1: Preheat the Oven and Prepare the Pork
Preheat the oven to 425°F. Pat the pork chops thoroughly dry with paper towels. Moisture on the surface creates steam, while a dry surface encourages flavorful browning. Season both sides with about 1 teaspoon salt and 1/2 teaspoon black pepper.
There is no need to leave the pork on the counter for an hour. Focus instead on drying it well, seasoning it evenly, and using a thermometer during cooking. Those steps have a much greater effect on the final texture.
Step 2: Cut the Pears and Mix the Glaze
Quarter the pears lengthwise and remove the cores. Cut each quarter in half to create thick wedges. Peeling is optional. Leaving the skin on helps the pieces retain their shape and adds color to the finished skillet.
In a small bowl, whisk together the chicken broth or cider, apple cider vinegar, Dijon mustard, maple syrup, and red pepper flakes, if using. Set the mixture aside.
Step 3: Brown the Pork Chops
Heat 1 tablespoon olive oil in a large oven-safe skillet over medium-high heat. When the oil is shimmering, add the pork chops without crowding them. Sear for 2 to 3 minutes per side, or until a deep golden crust develops.
The chops do not need to be fully cooked at this point. Browning builds roasted flavor; it does not seal moisture inside the meat. Transfer the chops to a plate while you prepare the pears.
Step 4: Sauté the Pears and Onion
Reduce the heat to medium and add the remaining tablespoon of olive oil. Arrange the pear and onion wedges in the skillet. Season with the remaining salt and pepper, then add the thyme.
Cook for 4 to 5 minutes, turning the pear wedges once, until their cut surfaces begin to brown. Add the garlic and cook for approximately 30 seconds. Garlic moves from fragrant to charcoal briquette surprisingly fast, so do not wander away to reorganize the refrigerator.
Step 5: Build the Cider-Dijon Sauce
Pour the prepared broth mixture into the skillet. Scrape the bottom gently with a wooden spoon to release the browned bits left by the pork. Those bits contain concentrated savory flavor and deserve a better fate than being scrubbed down the drain.
Let the liquid simmer for 1 to 2 minutes. Return the pork chops to the pan, nestling them among the pears and onions. Spoon a little sauce over each chop.
Step 6: Roast Until Juicy
Transfer the skillet to the preheated oven. Roast for 6 to 12 minutes, depending on the thickness of the chops and how much they cooked during searing.
Begin checking early with an instant-read thermometer inserted horizontally into the thickest part of the pork without touching the bone. The chops should reach at least 145°F, followed by a minimum three-minute rest. Because their temperature may continue rising after they leave the oven, you can remove especially thick chops shortly before they reach the target if you understand your pan’s carryover cooking.
Step 7: Finish the Sauce
Transfer the pork chops to serving plates and allow them to rest. Place the skillet over medium-low heat and stir the butter into the sauce. Simmer for 1 to 3 minutes if the liquid needs to reduce.
Taste before adding more salt. Spoon the roasted pears, onions, and glossy sauce over the pork. Finish with fresh thyme and serve immediately.
How to Choose the Best Pork Chops
Thick, bone-in center-cut chops are the most forgiving choice for this recipe. Chops measuring at least 1 inch thick have enough time to develop a brown exterior before the center overcooks. The bone may also help shield part of the meat from direct heat.
Boneless pork chops work, but they generally cook faster. Begin checking their temperature after only a few minutes in the oven. Thin chops measuring around 1/2 inch may cook almost entirely during searing, so the pears should be partially cooked before the pork is added back to the skillet.
Look for chops with a pinkish-red color and some fine streaks of fat. Excessively lean chops can still be delicious, but they offer less protection against overcooking. Regardless of the cut, a thermometer is more dependable than cooking time, meat color, or optimistic guesswork.
Which Pears Are Best for Roasting?
Bosc pears are the first choice because their dense flesh and honeyed flavor respond well to baking, broiling, and roasting. They soften without immediately collapsing. Anjou and Concorde pears are also good options.
Choose pears that are firm but show a slight yield when pressed gently near the stem. Pears ripen from the inside outward, so pressing the round bottom is not an accurate test. If the entire pear feels soft, save it for a sauce, smoothie, or baking project rather than this skillet dinner.
Bartlett pears can be used, but they soften quickly. Cut them into larger wedges and watch them closely. Asian pears remain firmer and offer a pleasant crunch, although their texture will be less buttery than that of European varieties.
Tips for Perfect Roasted Pork Chops
Dry the Surface Before Searing
Patting the chops dry is one of the easiest ways to improve browning. A wet chop cools the pan and steams before it sears.
Do Not Crowd the Skillet
Use a pan large enough to hold the chops in one layer. If the meat overlaps, cook it in batches. Crowding traps moisture and makes browning difficult.
Use Firm Pears
Very ripe pears can dissolve into the sauce. That may still taste good, but it changes the dish from roasted pears to accidental pear gravy.
Check Temperature Early
Ovens, skillets, chop thicknesses, and bone sizes vary. Start checking several minutes before you expect the pork to be done.
Balance the Sauce
If the sauce tastes too sweet, add another teaspoon of vinegar. If it tastes too sharp, stir in a small amount of maple syrup. If it seems thin, remove the meat and simmer the sauce briefly.
Flavor Variations
Rosemary and garlic: Replace thyme with finely chopped rosemary for a more assertive, woodsy flavor.
Balsamic pears: Substitute balsamic vinegar for apple cider vinegar. The sauce will be darker, sweeter, and slightly richer.
Blue cheese finish: Sprinkle a small amount of crumbled blue cheese over the pears before serving. The salty cheese contrasts beautifully with the sweet fruit.
Apple and pear combination: Replace one pear with a tart apple such as Granny Smith. The mixed fruit creates more varied texture and acidity.
Holiday version: Add a handful of dried cranberries during the final few minutes of roasting and garnish the skillet with toasted walnuts or pecans.
Extra-savory version: Add thinly sliced fennel or shallots with the onion. Their aromatic sweetness complements both the pork and pears.
What to Serve With Pork Chops and Pears
This dish already includes fruit, onion, protein, and sauce, but it appreciates a simple side that can catch the pan juices. Mashed potatoes, creamy polenta, wild rice, or buttered egg noodles are excellent choices.
For a lighter plate, serve the pork with roasted Brussels sprouts, sautéed green beans, steamed broccoli, or an arugula salad dressed with lemon. Crusty bread is also highly recommended, primarily because leaving sauce in the skillet would be a small culinary tragedy.
Storing and Reheating Leftovers
Allow leftovers to cool, then refrigerate the pork, pears, and sauce in an airtight container for up to three or four days. Store the sauce with the meat whenever possible because it helps protect the pork from drying out.
Reheat gently in a covered skillet over low heat with a splash of broth, cider, or water. You can also place the leftovers in a covered baking dish and warm them in a 300°F oven. High heat may make the pork tough before the center becomes warm.
Freezing is possible, although the pears will be softer after thawing. For the best texture, freeze the cooked pork and sauce separately and prepare fresh pears when serving the leftovers.
Frequently Asked Questions
Can I Make This Recipe Without an Oven-Safe Skillet?
Yes. Brown the pork and cook the pears in a regular skillet, then transfer everything to a lightly greased baking dish. Add the sauce and roast as directed. The baking dish will not retain heat exactly like cast iron, so monitor the pork carefully.
Can I Use Boneless Pork Chops?
Yes. Use chops at least 1 inch thick and begin checking the internal temperature sooner. Boneless chops often finish several minutes faster than thick bone-in chops.
Should Pork Chops Be Brined?
Brining is optional. It can season the meat more deeply and provide additional protection against dryness, especially with very lean chops. For a simple dry brine, season the pork with salt and refrigerate it uncovered for several hours. Reduce the salt added later in the recipe.
Why Are My Pork Chops Tough?
Overcooking is the most common reason. Pork chops are relatively lean and can dry out quickly when cooked far beyond 145°F. Thin chops are particularly vulnerable, which is why both thickness and thermometer use matter.
Can I Prepare Anything in Advance?
The sauce mixture can be whisked together one day ahead. The onion can also be sliced in advance. Cut the pears shortly before cooking so their surfaces do not discolor or soften excessively.
A Realistic Home-Cooking Experience: What to Expect
Making roasted pork chops and pears is less stressful than the finished skillet suggests. The dish arrives at the table looking like a carefully planned fall dinner, even though most of the work consists of cutting fruit and checking a thermometer. The busiest period is the first 15 minutes, when the pork is seasoned, the pears are sliced, and the sauce is mixed. Once the skillet enters the oven, the kitchen becomes noticeably calmer.
The first useful lesson is that not every pork chop finishes at the same moment. One chop may be slightly thicker or may sit over a hotter portion of the skillet. Checking each piece individually prevents the thinner chops from sacrificing themselves while the largest one catches up. Removing finished chops to a plate is not cheating; it is good cooking.
Pear ripeness also changes the experience. Firm Bosc pears develop browned edges while retaining a satisfying shape. Softer pears release more juice and partially melt into the sauce. The second version is not necessarily a failure. It produces a thicker, sweeter pan sauce that feels almost like chutney. It simply looks less tidy in photographs.
The aroma is one of the best parts of the process. Pears, thyme, onions, and browned pork create a warm, savory smell before the skillet even reaches the oven. When the cider-Dijon mixture hits the hot pan, it loosens the browned bits and sends up a sharp, fruity burst of steam. That is generally the moment when anyone nearby begins asking when dinner will be ready.
Another practical discovery is that restraint improves the sauce. Adding extra maple syrup may sound tempting, but too much sweetness can flatten the mustard and make the pears seem dessert-like. A balanced sauce should taste savory first, fruity second, and gently sweet at the finish. Vinegar is the adjustment that often rescues a sauce that tastes heavy.
The recipe is also friendly to substitutions. Thyme can become rosemary, cider can replace broth, and pears can share the skillet with apples or fennel. However, the basic structure should remain intact: browned meat, firm fruit, aromatic vegetables, a small amount of liquid, and enough acidity to balance the pork.
Serving the meal directly from the skillet creates the best presentation. The golden chops, burgundy onion wedges, pale pears, and glossy sauce already look arranged. Add a few fresh herb leaves and place the skillet on a heat-safe surface. Suddenly, a practical one-pan dinner appears to have received professional styling assistance.
The most satisfying part is the contrast in each bite. The pork provides a savory, meaty base; the pear adds soft sweetness; the onion supplies caramelized depth; and the mustard-vinegar sauce keeps everything lively. Even diners who are skeptical about fruit with meat often understand the combination once they taste the complete forkful.
For a first attempt, the best approach is to keep the side dishes simple and concentrate on the pork temperature. Mashed potatoes or bread can wait patiently, whereas a pork chop will continue cooking whether you are paying attention or passionately searching a drawer for the “good” serving spoon. Prepare the sides first, keep the thermometer nearby, and let the skillet be the star.
Final Thoughts
The best roasted pork chops and pears recipe succeeds because it balances flavor, texture, and convenience. Thick chops remain juicy, firm pears become tender and caramelized, and the cider-Dijon sauce turns simple ingredients into a complete one-pan dinner.
Dry the pork well, use pears sturdy enough for roasting, and monitor doneness with a thermometer. Those three habits matter more than rigid cooking times. Master them, and this cozy pork chop dinner can move easily from a quiet weeknight to a holiday table without changing its comfortable, uncomplicated personality.
Note: Cooking times are estimates because pork chops vary in thickness and ovens vary in performance. For food safety, cook whole pork chops to a minimum internal temperature of 145°F and allow them to rest for at least three minutes.