A spool of ribbon may look innocent, but give it ten minutes, a pair of scissors, and a little holiday ambition, and it can become one of the most charming ornaments on your Christmas tree. This Christmas ribbon ornament craft transforms short ribbon scraps into a miniature tree-shaped decoration that is colorful, lightweight, affordable, and almost impossible to make without smiling.
The project is especially useful for leftover gift-wrapping ribbon. Instead of placing those awkward final inches back in a drawer where they will quietly form a tangled ribbon civilization, you can turn them into handmade Christmas ornaments. The basic version requires only ribbon, a small twig or wooden dowel, scissors, glue, and a hanging loop. From there, you can personalize the ornament with bells, beads, buttons, name tags, tiny stars, or whatever festive treasure is currently hiding in your craft box.
This in-depth guide explains how to make a polished ribbon Christmas tree ornament, choose coordinating materials, avoid common mistakes, create several design variations, and turn the activity into a memorable family tradition.
Why Make a Christmas Ribbon Ornament?
Homemade ornaments bring something to a tree that perfectly matched store-bought decorations cannot always provide: a story. A ribbon ornament can preserve fabric from a special gift, use the colors from a wedding, represent a child’s favorite pattern, or commemorate a family milestone. It is decoration with a tiny résumé.
This craft is also appealing because it works at nearly every skill level. Beginners can make a simple ornament by tying ribbon strips around a twig. Experienced crafters can add layered bows, decorative stitching, beads, or carefully coordinated textures. The design is forgiving, too. Slightly uneven knots often make the finished tree look more natural and whimsical rather than incorrect.
Other advantages include:
- It uses inexpensive and widely available materials.
- It can repurpose ribbon scraps that might otherwise be discarded.
- The ornament is light enough for delicate tree branches.
- Colors and textures can be customized for almost any decorating style.
- Finished ornaments make thoughtful gifts, package toppers, or stocking decorations.
- The project can be adapted for children when adults handle cutting and hot glue.
Materials for a Ribbon Christmas Tree Ornament
Essential supplies
- One straight twig, cinnamon stick, craft stick, or thin wooden dowel measuring approximately 5 to 7 inches
- Eight to twelve ribbon strips in assorted colors or patterns
- Sharp fabric scissors
- Twine, narrow ribbon, or cord for the hanging loop
- Craft glue or a low-temperature hot glue gun
- A small star, button, bead, bow, or wooden shape for the topper
- A ruler or measuring tape
Optional embellishments
- Miniature jingle bells
- Wooden beads
- Sequins or rhinestones
- Small pom-poms
- Letter beads or name charms
- Metallic thread
- Fabric-safe fray sealant
- A fine-tip permanent marker for adding a date
For a child-friendly version, use blunt-tip scissors, washable non-toxic glue, larger decorations, and pre-cut ribbon. Small beads and bells should be kept away from young children, and hot glue should always be handled by an adult.
How to Choose the Best Ribbon
The ribbon determines the personality of the ornament. Velvet feels rich and traditional. Grosgrain adds crisp texture and is easy to knot. Satin creates a smooth, elegant finish. Plaid gives the ornament farmhouse warmth, while metallic ribbon contributes sparkle without requiring enough glitter to permanently colonize the dining room.
Use two or three coordinating colors
A controlled palette usually looks more intentional than a completely random assortment. Traditional red, green, and cream work beautifully, but they are not mandatory. Blue and silver create a winter theme, blush and champagne feel romantic, and black, white, and gold produce a modern ornament. Candy-inspired combinations such as red, pink, mint, and white are playful without becoming visually chaotic.
Mix texture, not just color
A polished DIY ribbon ornament benefits from contrast. Combine matte grosgrain with shiny satin, soft velvet with rustic jute, or patterned ribbon with solid colors. Repeating each texture at least twice helps the design feel balanced.
Choose an appropriate width
Ribbon between 3/8 inch and 1 inch wide is easiest to tie around a small ornament base. Very narrow ribbon can look sparse, while extra-wide ribbon may overwhelm the twig and create bulky knots. Wider material can still work when cut into thin fabric strips.
Consider wired ribbon carefully
Wire-edged ribbon holds curves and shapes well, making it excellent for bows and structured loops. However, it can be stiff when tied around a narrow twig. Use it as an accent or topper rather than for every branch of the miniature tree.
Step-by-Step Christmas Ribbon Ornament Craft
Step 1: Prepare the ornament base
Select a straight twig, dowel, cinnamon stick, or craft stick. A natural twig creates a rustic appearance, while a painted dowel looks cleaner and more modern. If using a twig from outdoors, make sure it is dry, clean, and free from loose bark or insects. Trim it to approximately 5 to 7 inches.
Step 2: Plan the color pattern
Arrange the ribbon on the table before cutting. Decide whether you want alternating colors, a gradual transition, or a relaxed mixed pattern. Planning takes only a minute and prevents the classic crafting dilemma of discovering that the perfect plaid ribbon was used three knots too early.
Step 3: Cut the ribbon strips
Cut eight to twelve strips measuring approximately 7 to 10 inches each. Longer pieces are easier to tie and can be trimmed later. For a fuller tree, use more strips placed close together. Cut the ribbon ends diagonally or in a V-shaped dovetail to create a decorative finish and reduce visible fraying.
Step 4: Tie the ribbon around the base
Begin near the bottom of the twig. Place the center of one ribbon strip behind the twig, bring both ends forward, and tie a firm single knot. A double knot can create unnecessary bulk, so use one secure knot unless the ribbon is especially slippery.
Continue adding strips upward, pushing the knots close together. Rotate the direction of the knots slightly so the tree looks full from the front and sides. Leave approximately half an inch exposed at the bottom to resemble a trunk.
Step 5: Shape the tree
Once all ribbon strips are attached, lay the ornament flat. Trim the bottom ribbon strips so they are longest. Gradually shorten each row as you move upward, creating a triangular Christmas tree silhouette. Trim conservatively at first. You can always remove another quarter inch, but persuading ribbon to grow back is generally unsuccessful.
Step 6: Add the hanging loop
Cut a 7- to 9-inch length of twine or narrow ribbon. Form it into a loop and knot the ends together. Attach the knot to the back of the twig with strong craft glue or a small amount of hot glue. Allow it to dry completely before testing the ornament.
Step 7: Attach a topper
Glue a miniature wooden star, button, bow, bell, or bead to the top. A simple topper helps define the shape and covers the attachment point for the hanging loop. Keep it lightweight so the ornament hangs evenly.
Step 8: Inspect and finish
Check every knot and glued connection. Trim loose threads and apply a small amount of fabric fray sealant when necessary. Write the year or recipient’s name on the back of the wooden base. Let all adhesive cure before hanging or wrapping the ornament.
Creative Ribbon Ornament Variations
Farmhouse plaid ornament
Combine red plaid, cream grosgrain, burlap, and narrow green ribbon around a natural twig. Finish the tree with a wooden star and a jute hanging loop. This version pairs well with pinecones, dried orange slices, wooden beads, and other rustic Christmas decorations.
Elegant velvet ornament
Use narrow burgundy, forest green, navy, or ivory velvet ribbon. Add small sections of metallic gold ribbon for contrast and attach a pearl-like bead at the top. The rich texture makes the finished ornament look surprisingly luxurious.
Candy-cane ribbon tree
Alternate red-and-white striped ribbon with solid red, pink, and white strips. Add a peppermint-colored button or tiny red bow as the topper. This cheerful design works especially well on kitchen trees and children’s bedroom trees.
Memory ribbon ornament
Create a keepsake using ribbon saved from a wedding bouquet, baby shower, birthday gift, graduation celebration, or meaningful package. Add a dated charm or handwritten tag explaining the ribbon’s history. The result becomes more than seasonal décor; it becomes a small family archive.
Monochromatic ornament
Choose several shades of one color and vary the textures. For example, mix pale blue satin, navy grosgrain, blue velvet, and silver-edged organza. A single-color approach can look sophisticated while still showing plenty of visual detail.
Child-made ornament
Adults can pre-cut wide ribbon strips and prepare the hanging loop. Children can select the order of the colors, tie simple knots, and decorate the topper. Expect charmingly uneven branches. Those are not errors; they are authenticity with a glue stick.
Ribbon-wrapped bauble
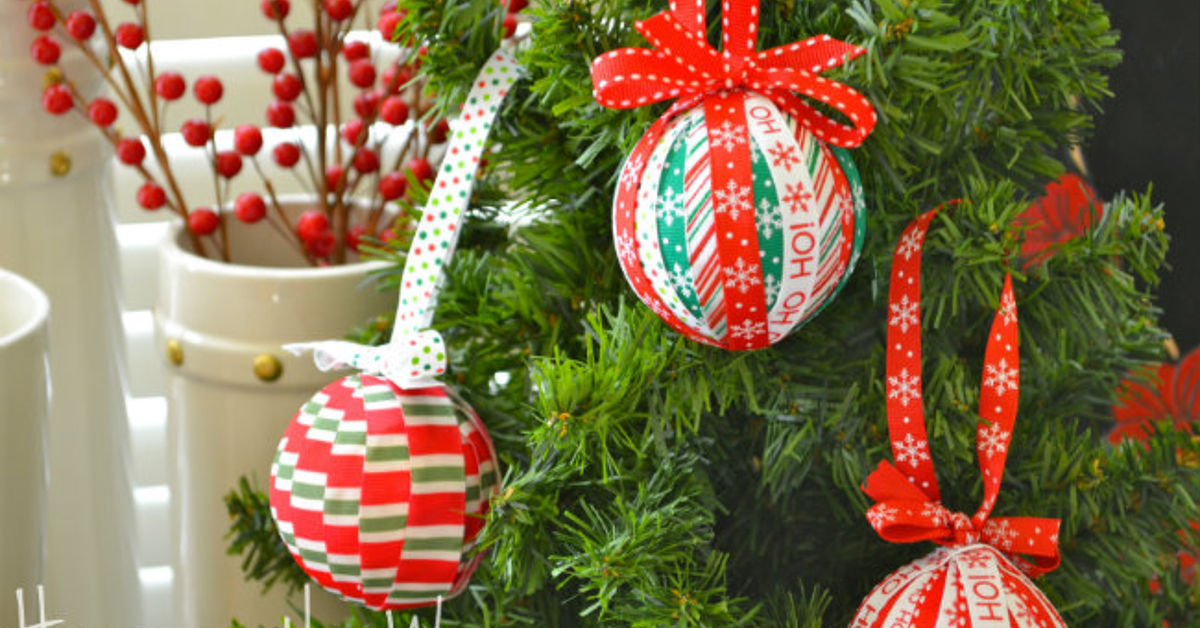
For a different shape, wrap narrow ribbon around a lightweight foam ball or a shatter-resistant ornament. Secure the ribbon at the top and bottom with glue, overlapping each strip slightly. Finish with a bow and hanging loop. This variation is useful when you want a round ornament rather than a miniature tree.
How to Make the Ornament Look Professionally Finished
The difference between a charming homemade ornament and a craft that appears unfinished often comes down to a few small choices.
Repeat visual elements
Use each major color or pattern more than once. Repetition gives the design rhythm and prevents a single ribbon from looking accidental.
Keep the knots consistent
Tie all knots with similar tension and orient them in roughly the same direction. They do not need to be mechanically identical, but extreme differences can distort the tree’s shape.
Trim from large to small
Shape the ornament only after every ribbon is tied. Cutting strips to precise lengths before knotting is difficult because each ribbon behaves differently. Velvet, satin, and grosgrain may lose different amounts of length in the knot.
Step back before adding more
Miniature ornaments can become overcrowded quickly. Place embellishments temporarily before gluing them. If the tree already has bold patterns, one simple star may be enough.
Hide adhesive
Use the smallest amount of glue that will hold the decoration securely. Position hanging-loop knots and glue spots on the back. Remove hot-glue strings after the adhesive cools.
Common Problems and Easy Fixes
The ribbon slides around
Smooth satin ribbon may shift on a polished dowel. Add a tiny dot of craft glue beneath each knot, or lightly sand the dowel to give it more grip.
The tree looks lopsided
Lay the ornament flat and compare both sides. Trim the longer side gradually rather than cutting a large amount at once. You can also rotate a few knots to redistribute the ribbon.
The ends keep fraying
Cut the ribbon with sharp fabric scissors. Apply fabric fray sealant sparingly, or use ribbons such as grosgrain that tend to hold their edges better. An adult may carefully heat-seal certain synthetic ribbons, but this should be done only with proper ventilation and fire-safety precautions.
The ornament hangs sideways
Check whether the hanging loop is centered and whether the topper is too heavy. Reposition the loop or replace a bulky embellishment with a lightweight wooden or felt shape.
The finished design looks too busy
Remove one or two competing patterns and replace them with solid ribbon. A useful rule is to combine one bold print, one subtle pattern, and two or three solids.
Displaying, Gifting, and Storing Ribbon Ornaments
Hang ribbon ornaments near the ends of branches where their texture and movement can be seen. Because they are lightweight, they also work well on tabletop trees, garlands, wreaths, cabinet knobs, and wrapped gifts. A ribbon ornament tied to a package becomes part of the present rather than disposable wrapping.
For gifting, place the ornament on a piece of cardstock inside a shallow box or paper envelope. Include a small note with the year, materials, and care instructions. Personalized sets can represent family members through different colors, initials, or charms.
At the end of the season, make sure the ornament is clean and completely dry. Store it flat in an acid-free tissue-lined box or place it in an individual compartment within an ornament organizer. Avoid crushing velvet loops or bending wired ribbon sharply. Keep the container in a dry, temperature-stable area rather than a damp basement or extremely hot attic.
Experience Notes: What You Learn After Making a Batch
The first lesson from making several Christmas ribbon ornaments is that the project is faster when the materials are organized before the first knot is tied. A table covered with twenty unrolled spools may look creatively inspiring for approximately thirty seconds. After that, it resembles a festive octopus. Cutting the selected ribbons into manageable strips and grouping them by color makes the work calmer and prevents tangles.
The second lesson is to cut every strip longer than seems necessary. Short ribbon is difficult to tie, especially when working with velvet or stiff grosgrain. It is much easier to knot a generous strip and trim it afterward. The offcuts do not have to be wasted; tiny pieces can become bows for gift tags, miniature wreath accents, or confetti-like embellishments for clear ornaments.
Another useful discovery is that an ornament usually looks best before the maker believes it is finished. There is a powerful temptation to add one more bell, one more bow, three more beads, and perhaps a small decorative sleigh. Resisting that urge gives the ribbon room to be the main feature. A good topper and a neat hanging loop are often all the ornament needs.
Making ornaments in a group changes the experience. Children tend to choose colors based on immediate joy rather than design theory, which can produce combinations adults would never plan and may secretly love. One child might pair neon pink with tartan plaid and gold glitter ribbon. Another might use only green because “trees are green.” Both ornaments become memorable because they reflect the maker rather than a catalog photograph.
Adults often approach the project differently. They may begin with a strict palette, carefully arranged ribbon, and ambitious plans for perfect symmetry. Around the fourth knot, the process becomes more relaxed. That shift is part of the charm. Handmade holiday décor does not need to imitate factory production. Small irregularities create warmth and distinguish one ornament from another.
Batch-making also reveals which materials are easiest to handle. Grosgrain ribbon is cooperative, holds knots, and trims cleanly. Satin looks elegant but may slide until secured. Velvet is beautiful, although thick velvet can create bulky knots. Burlap adds rustic texture but may shed fibers. Combining two easy materials with one more dramatic texture creates a good balance between appearance and practicality.
The most satisfying moment comes when the finished ornaments are hung together. Individually, each piece may seem simple. As a collection, the repeated tree shapes and varied ribbons create a coordinated display with depth and personality. A group of six can decorate a small tree, fill a garland, or become a gift set for neighbors and teachers.
The craft also changes the way leftover materials are viewed. A short ribbon from a memorable package no longer looks useless. It becomes a potential branch on next year’s ornament. Over time, a collection can quietly document family colors, celebrations, and changing tastes. One ornament may contain ribbon from a baby’s first Christmas gift, while another uses fabric from a wedding or graduation. The object is inexpensive, but the accumulated meaning is not.
Finally, the experience proves that holiday crafting is most enjoyable when perfection is not invited to supervise. Prepare carefully, use safe tools, and make deliberate color choicesbut leave room for humor, improvisation, and slightly crooked knots. The ornament will still hang beautifully, and the story behind it will matter far longer than whether both sides were trimmed to precisely the same angle.
Conclusion
A Christmas ribbon ornament craft is simple enough for a relaxed afternoon yet customizable enough to become a treasured holiday tradition. With a handful of ribbon scraps, a small wooden or natural base, and a few thoughtful details, you can create an ornament that feels festive, personal, and polished.
Start with a limited color palette, combine contrasting textures, tie the ribbons securely, and shape the tree only after all the knots are in place. Add a lightweight topper, record the year, and resist the urge to decorate every available square inch. The best handmade ornaments often leave a little room for the materialsand the memoriesto speak for themselves.
Note: Adults should supervise children, handle hot glue and sharp cutting tools, and avoid small detachable decorations when crafting with young children.