A ponytail may be one of the simplest hairstyles ever invented, but give it a flipped end, a little crown volume, or one gloriously unapologetic scrunchie and it becomes a full retro moment. The best part? You do not need professional styling skills, a vintage beauty kit, or three hours in front of the mirror.
This guide covers three distinct ways to make a retro ponytail: a polished 1950s-inspired high ponytail, a voluminous 1960s bouffant ponytail, and a playful 1980s side pony. Each style can be adapted to different hair textures, lengths, and occasions. Grab your brush, choose your favorite decade, and prepare to give an ordinary hair tie a surprisingly glamorous job.
What Makes a Ponytail Look Retro?
A modern ponytail often emphasizes simplicity, while a retro ponytail relies on a recognizable silhouette. Flipped ends suggest polished midcentury glamour. A teased crown immediately recalls the dramatic volume of the 1960s. High side placement, curls, bows, and colorful scrunchies bring unmistakable 1980s energy.
You do not have to reproduce a historical hairstyle strand for strand. The goal is to borrow a few defining details and make them wearable today. One strong retro feature usually looks chic; piling on every feature at once may leave you resembling the entire cast of a decade-themed musical.
Tools and Products You May Need
- A paddle brush or smoothing brush
- A rat-tail comb or teasing brush
- Covered hair elastics
- Bobby pins that closely match your hair color
- A curling iron or flat iron
- Heat-protectant spray
- Volumizing mousse or texture spray
- Flexible-hold hairspray
- Optional ribbon, scarf, bow, headband, or scrunchie
Prepare Your Hair First
Most retro ponytail hairstyles need some grip and structure. Extremely silky, freshly washed hair can slide out of an elastic, while heavily oily hair may look flat at the roots. If your hair is freshly washed, work a small amount of mousse through damp strands before drying. On dry hair, a light texture spray can add manageable grip.
Detangle before teasing or gathering your hair. If you plan to use a curling iron, straightener, or hot brush, apply heat protectant and use the lowest effective temperature. Hair should be completely dry before it touches a flat iron. Excessive heat and repeated tight styling can contribute to breakage, so the finished ponytail should feel secure rather than scalp-liftingly heroic.
Way 1: Make a 1950s-Inspired High Ponytail With Flipped Ends
This polished retro ponytail features a smooth base, elevated placement, and ends that curve outward. It works especially well on medium-length or long hair and pairs beautifully with a side-swept front section, cat-eye makeup, or a simple ribbon.
Step 1: Create a Side Part and Front Swoop
Make a side part using the pointed end of a rat-tail comb. Separate a front section about one to two inches wide and clip it out of the way. This piece will eventually sweep across the forehead or tuck behind the ear, giving the hairstyle its classic pinup-inspired shape.
Step 2: Gather a High Ponytail
Brush the remaining hair upward toward the crown. An easy placement guide is to follow an imaginary diagonal line extending from your cheekbones. Secure the hair with a covered elastic. Before tightening, check the sides and back for unwanted bumps.
For extra lift, divide the secured ponytail into two halves and gently pull them in opposite directions. You can also slide one or two bobby pins vertically beneath the ponytail base, positioning them inside the elastic for support. The pins should not poke or create uncomfortable tension.
Step 3: Form the Signature Flip
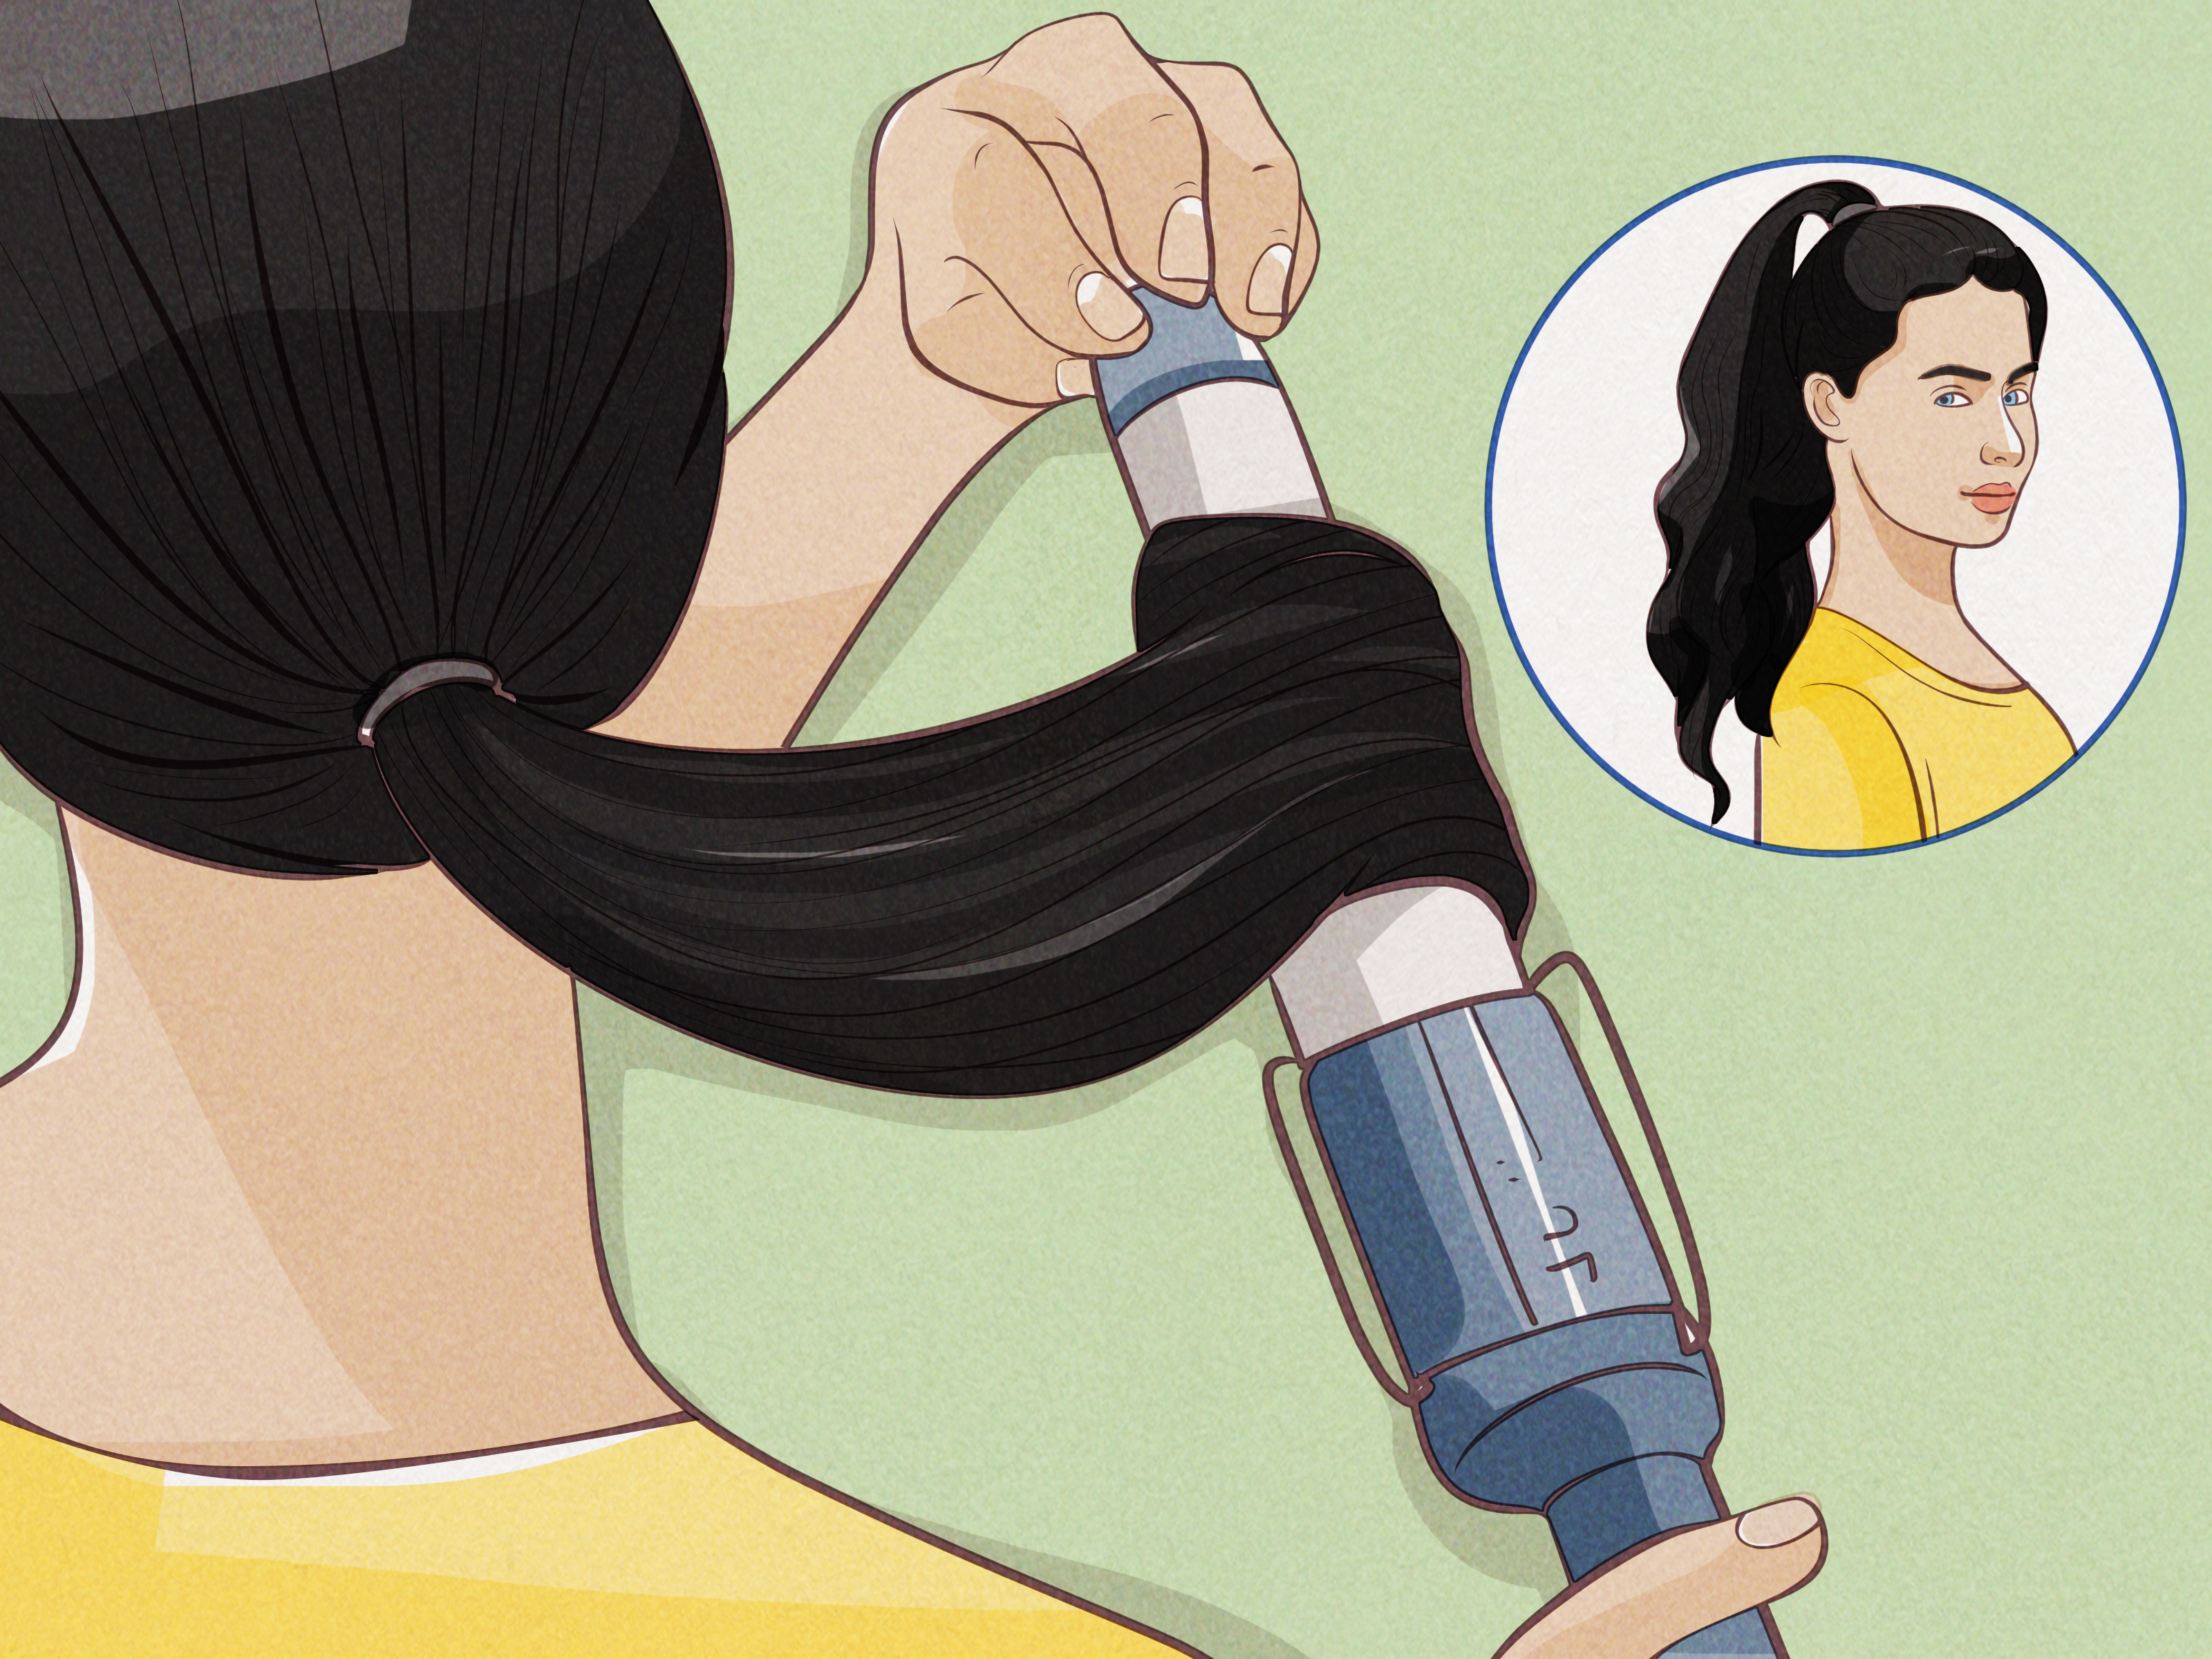
Divide the ponytail into two or three manageable sections. Use a curling iron or flat iron to turn the bottom two to three inches outward, away from the neck. Curl each section in the same direction so the ends form one deliberate curve rather than several curls having a disagreement.
If your hair already has a natural curl pattern, skip the hot tool and shape the ends with a small roller set or flexi rods. Allow the hair to dry completely before removing them.
Step 4: Finish the Front
Release the front section and sweep it across the forehead. Tuck it behind the ear or wrap its end around the ponytail base. Secure it discreetly underneath with a bobby pin. Mist the finished style with flexible-hold hairspray, concentrating on the flipped ends rather than soaking the entire head.
Modern variation: Wrap a narrow strand of hair around the elastic for a sleek finish. For a more literal vintage look, tie a satin ribbon around the base and let the short tails hang freely.
Way 2: Create a 1960s Bouffant Ponytail
The 1960s bouffant ponytail is all about controlled volume at the crown. It can look glamorous, romantic, or casually Bardot-inspired depending on how much texture and face-framing hair you leave loose.
Step 1: Section the Crown
Separate the hair from roughly temple to temple, including the crown but leaving the front hairline free if you want soft bangs. Clip the lower hair out of the way. Divide the crown section into thin horizontal layers.
Step 2: Build Volume Gently
Hold the first layer upright. Place a teasing brush several inches above the roots and make two or three short downward strokes. Repeat with the remaining layers, keeping the topmost section smooth and unteased so it can conceal the backcombing.
More teasing does not automatically mean better teasing. The goal is to create a soft internal cushion, not a nest capable of housing migratory birds. Fine hair may need only a little texture spray, while thick or naturally textured hair may hold the shape with almost no backcombing.
Step 3: Shape the Bouffant
Lay the smooth top section over the teased foundation. Lightly brush the surface without pressing out the volume. Gather the crown section at the back and push it forward until the desired height appears. Secure it temporarily with crossed bobby pins or a small clear elastic.
This separate crown method is useful for beginners because it lets you adjust the bouffant before creating the main ponytail. It also reduces the temptation to tease every strand into submission.
Step 4: Form the Ponytail
Gather the remaining hair into a ponytail directly beneath the pinned crown section. Place it at mid-head height for an everyday version or slightly higher for a more dramatic silhouette. Secure it firmly but comfortably.
Wrap a strand of hair around the elastic and pin it underneath. Add loose waves to the tail with a curling iron, alternating the direction of the curls for fuller movement. Gently separate the cooled curls with your fingers.
Step 5: Add the Final Details
Pull out two narrow pieces around the face if you prefer a softer finish. A wide fabric headband creates an unmistakable 1960s effect and can hide the transition between the smooth hairline and lifted crown. Finish with a light, even veil of hairspray.
Curly-hair variation: Smooth only the surface around the crown, leaving the ponytail naturally curly. The contrast between a structured bouffant and springy curls produces plenty of retro drama without requiring every strand to be heat-styled.
Way 3: Style an 1980s High Side Ponytail
The 1980s side ponytail is playful, deliberately asymmetrical, and ideal for parties, concerts, costumes, or any Tuesday that needs more personality. A polished version can also look surprisingly current when paired with a simple outfit.
Step 1: Add Texture and Body
Apply volumizing mousse to damp hair and blow-dry with a round brush, lifting at the roots. If your hair is already dry, use a light texture spray through the midlengths. Straight hair can be curled in alternating directions for movement; naturally curly or coily hair can keep its existing texture.
Step 2: Choose the Placement
Create a deep side part. Brush the hair diagonally upward and gather it above and slightly behind one ear. Keeping the ponytail a little behind the ear makes it look intentionally retro without causing the tail to fall directly across your face.
Secure it with a strong covered elastic. If your hair is especially thick, use two elastics rather than wrapping one uncomfortably tight. Smooth the sides for a refined version or loosen the roots with your fingertips for an energetic, lived-in finish.
Step 3: Increase the Volume
Divide the ponytail into sections and lightly tease the underside near the base. Smooth the visible surface with your fingers. For additional fullness, curl small sections in different directions and allow them to cool before separating them.
If your ponytail tends to collapse, insert two bobby pins into the underside of the elastic with the ridged sides facing the hair. Angle the pins downward so they act like small supports. Stop immediately if the placement feels sharp or tight.
Step 4: Add an Accessory
Cover the elastic with a bright scrunchie, oversized bow, patterned scarf, or fabric ribbon. Neon provides maximum decade commitment, while black velvet or satin gives the same silhouette a more sophisticated finish.
Complete the look with flexible hairspray. The 1980s side ponytail should have bounce, so avoid coating it until it becomes a single rigid object with its own zip code.
How to Adapt a Retro Ponytail to Your Hair
Fine or Shorter Hair
Use a small amount of mousse before drying and apply texture spray in layers. A double-ponytail technique can create the illusion of additional length: secure the lower half near the nape, then place a second ponytail above it so the top tail conceals the lower elastic.
Thick or Long Hair
Work in sections rather than forcing all the hair into one elastic immediately. Create the main ponytail first, then smooth smaller side sections into it. Strong covered elastics and U-shaped pins can provide support without requiring excessive tension.
Curly, Coily, or Textured Hair
Let your natural texture become part of the silhouette. Use gel or edge control only where you want definition, and avoid repeatedly brushing delicate edges. A scarf can smooth the perimeter while styling products set, while a loose high pony lets curls supply authentic volume.
Experience Notes: What Usually Makes or Breaks a Retro Ponytail
The first lesson people often learn when trying a retro ponytail is that placement matters more than the number of products used. A 1950s ponytail placed too low loses its buoyant silhouette, while an 1980s side pony positioned directly over the ear tends to swing into the face. It helps to secure the hair provisionally, check the shape from the front and side, and then tighten the elastic only when the placement looks right.
Another common experience is discovering that freshly washed hair can be almost too cooperativeit lies flat, slips through pins, and politely refuses to hold volume. A small amount of mousse or texture spray usually works better than repeatedly applying hairspray. Product should create grip while preserving movement. If the hair begins to feel gritty, sticky, or surprisingly architectural, it has probably received enough assistance.
Flipped ends are often the trickiest part of the first style. Curling tiny sections produces separate ringlets, while grabbing the entire ponytail at once can create an uneven bend. Two or three medium sections usually provide a cleaner, unified flip. Letting the hair cool in its curved position before touching it also makes a noticeable difference. Brushing immediately can erase several minutes of careful work in one enthusiastic swipe.
The bouffant teaches a different lesson: volume needs an internal structure and a smooth exterior. Beginners sometimes tease the top layer, then struggle to hide the resulting texture. Leaving one unteased surface section solves that problem. It is also easier to add height gradually than to flatten an enormous bump after it has been sprayed. Retro glamour is welcome; a mysterious second head is optional.
With the side ponytail, accessories have more influence than expected. The same hairstyle can look like a costume with a neon scrunchie, romantic with a floral scarf, or polished with a black bow. Anyone nervous about wearing an overtly retro hairstyle can start with a neutral accessory and modest volume. The silhouette still references the 1980s without demanding matching leg warmers.
Comfort is the best final test. A ponytail that causes scalp soreness, pulls around the hairline, or creates a headache is too tight. Loosen it, use an additional elastic for support, or move the base slightly lower. Repeatedly wearing tightly pulled ponytails can stress the hair and contribute to breakage or traction-related hair loss. Alternating hairstyles and giving the hairline regular breaks are smarter than sacrificing comfort for a few extra millimeters of lift.
Finally, photographs are useful during styling. A mirror shows the front, but a quick side-view photo reveals whether the bouffant is balanced, the flip is visible, or the ponytail is drifting off-center. Small adjustmentslifting the crown, repositioning a pin, or loosening one face-framing strandoften improve the finished hairstyle more than another round of curling.
Conclusion
Learning how to make a retro ponytail is mostly about choosing the right silhouette. Try a high ponytail with flipped ends for polished 1950s charm, a bouffant ponytail for romantic 1960s volume, or a high side pony for playful 1980s attitude. Once you understand placement, texture, and proportion, each style becomes easy to personalize.
Begin with manageable amounts of product, keep heated tools at a sensible setting, and secure the hair without painful tension. Then add a ribbon, bow, or headband and enjoy the fact that one ordinary ponytail can time-travel more successfully than most science-fiction plots.