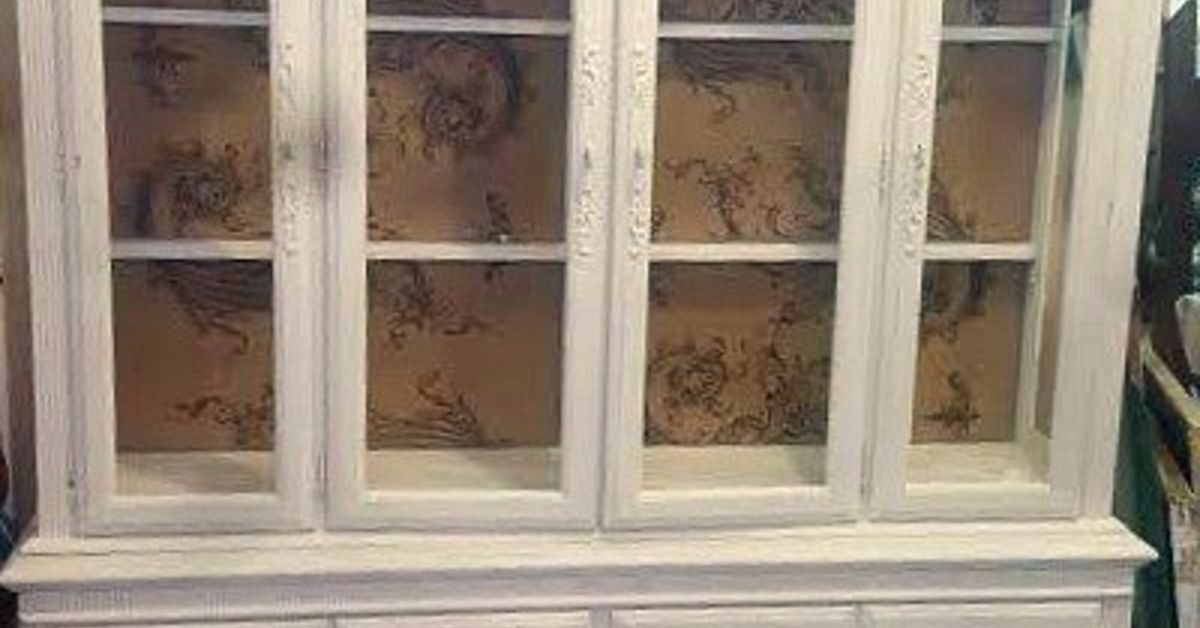
A vintage hutch is the golden retriever of old furniture: loyal, sturdy, slightly oversized, and often sitting in someone’s garage waiting for a second chance. The problem? Many traditional hutches were built for formal dining rooms, crystal goblets, and “do not touch” china collections. Today, most homes need flexible storage, smaller-scale furniture, and pieces that look intentional rather than inherited-by-accident.
That is exactly why upcycling a vintage hutch into 2 new pieces is such a smart DIY furniture project. Instead of forcing one massive china cabinet into a modern floor plan, you separate the top and bottom, then give each section a fresh purpose. The base can become a buffet, media console, coffee bar, craft-room cabinet, or entryway storage piece. The hutch top can become a wall cabinet, bookshelf, bathroom storage unit, plate rack, laundry-room cabinet, or even a charming coat-rack shelf.
This project is budget-friendly, sustainable, and surprisingly satisfying. It saves a solid piece of furniture from the landfill, gives your home custom-looking storage, and lets you say, “Oh, I made that,” with the casual confidence of someone who now owns three kinds of sandpaper.
Why Split a Vintage Hutch Instead of Painting It as One Piece?
Painting a hutch is nice. Splitting it into two usable pieces is better. Many old china cabinets are tall, heavy, and visually bulky. They may have beautiful bones, but their size can make them hard to use in apartments, open-concept homes, smaller dining rooms, or modern kitchens.
When you divide the hutch, you instantly solve the scale problem. The bottom section usually already has drawers, doors, and a strong cabinet frame. With a new top surface and updated hardware, it can look like a custom buffet or console. The upper section, meanwhile, is usually full of shelves, glass doors, trim, and character. Once mounted safely or placed on a new base, it becomes a completely different storage piece.
The Best Candidates for a Hutch Upcycle
Not every hutch deserves a makeover. Some deserve a polite goodbye and a ride to the donation center. Before you commit, inspect the piece carefully. Solid wood and quality veneer are usually worth saving. Dovetail drawers, stable legs, thick shelves, and real wood trim are excellent signs. Wobbly particleboard, swollen panels, strong odors, pest damage, and badly warped doors are red flags.
If the piece is very old, rare, or potentially valuable, pause before painting. Some antiques are worth more when restored rather than reinvented. But for everyday vintage hutches from estate sales, thrift stores, family basements, or online marketplaces, upcycling can be the perfect way to preserve the craftsmanship while making the piece fit real life.
Planning the Transformation
Before you pick up a screwdriver, decide what both pieces will become. This step keeps the project from turning into the DIY version of opening twenty browser tabs and forgetting why.
For the base, popular ideas include a dining room buffet, living room media console, entryway cabinet, coffee station, home office printer cabinet, nursery storage, or bedroom dresser alternative. For the top, think wall-mounted display cabinet, bathroom linen storage, laundry-room cabinet, bookshelf, kitchen plate rack, craft storage, or mudroom organizer with hooks.
Measure First, Celebrate Later
Measure the full hutch, the base, the top, and the spaces where both pieces might live. Pay attention to depth. Older hutches can be deeper than modern cabinets, which is lovely for storage but risky in tight hallways. Also measure doorways, stairwells, and elevators before hauling the piece home. Nothing humbles a DIY dream faster than a cabinet wedged sideways in a stairwell like a wooden ship in a bottle.
Tools and Materials You May Need
Your exact supply list depends on the condition of the hutch, but most projects require basic hand tools and finishing supplies. Gather screwdrivers, a drill, pliers, a utility knife, painter’s tape, wood filler, sanding blocks or an orbital sander, tack cloth, primer, furniture paint, brushes, a foam roller, protective topcoat, drop cloths, and new hardware.
If you are adding legs, you may also need mounting plates, bun feet, tapered legs, wood blocks, or a support frame. If you are creating a new top for the base, consider plywood, butcher block, pine boards, reclaimed wood, or a finished hardwood panel. For wall-mounting the hutch top, use proper anchors, a French cleat, screws long enough to reach studs, and a second person who can lift without saying, “This is definitely lighter than it looks.” It is not.
Step 1: Clean and Inspect the Hutch
Start with a serious cleaning. Remove dishes, shelves, drawers, old shelf paper, mystery crumbs, and the one dried birthday candle that somehow lives in every vintage cabinet. Vacuum corners and wipe the surfaces with a degreasing cleaner or a mild mix of warm water and dish soap.
Check the back panels, drawer runners, hinges, shelf supports, and seams. Look for screws connecting the hutch top to the base. Many two-piece china cabinets are attached from the inside, through brackets, screws, dowels, or a combination of fasteners. Take photos before disassembly so you remember how everything fits together.
Step 2: Separate the Top From the Base
Remove glass shelves, drawers, loose doors, and anything fragile before lifting. This reduces weight and prevents breakage. Look inside the cabinet and along the back for screws or metal brackets. Remove every visible fastener. If the top still will not budge, it may be held by dowels, glue, caulk, or decades of furniture stubbornness.
Use gentle pressure and avoid aggressive prying at one corner. Work slowly along the seam with plastic shims or a putty knife. The goal is to separate the pieces without splitting trim or damaging veneer. Once the top is free, set both sections on padded surfaces and inspect the newly exposed areas.
Step 3: Turn the Base Into a Standalone Piece
Once separated, the base may look unfinished because the original hutch top covered its upper surface. This is your chance to make it look intentional. Add a new top using stained wood, painted plywood with trim, butcher block, or a stone remnant if the cabinet is strong enough to support the weight.
If the base sits too low or looks squat, add legs or feet. Tapered wood legs can create a midcentury feel. Bun feet add cottage charm. Simple block feet make the piece look grounded and classic. For a buffet or coffee bar, consider adding a backsplash strip, new knobs, cup pulls, or updated hinges.
Design Ideas for the Base
A painted buffet in deep green, navy, warm white, or charcoal can look polished in a dining room. A natural wood top with a painted base gives the piece contrast. For a media console, remove a center door, drill cord holes in the back, and use baskets for remotes and gaming accessories. For an entryway cabinet, add labeled bins inside and a tray on top for keys. The hutch base is not just “the bottom half.” It is a hardworking storage hero in disguise.
Step 4: Reimagine the Hutch Top
The upper section is where creativity gets fun. A hutch top usually has shelves, doors, trim, and decorative details that would be expensive to build from scratch. Mounted on the wall, it can become a custom-looking cabinet in a laundry room, kitchen, bathroom, craft room, or hallway.
If the top has glass doors, keep them for display storage. If the glass feels too formal, replace it with cane webbing, wire mesh, fabric panels, fluted film, or painted hardboard. If the shelves are glass and you want a warmer look, replace them with wood shelves cut to size.
How to Use the Hutch Top Safely
Safety matters, especially if you mount the hutch top on a wall. Locate studs and use a strong hanging method such as a French cleat. Do not rely on drywall anchors alone for a heavy cabinet. If the hutch top is extremely deep or heavy, consider adding a small support base, legs, or wall brackets. For laundry rooms and bathrooms, use moisture-resistant paint and avoid placing unfinished wood where it will be exposed to frequent humidity.
Step 5: Prep for Paint or Stain
Good furniture makeovers are mostly prep work wearing a cute paint color. Remove hardware, label doors and hinges, fill holes, repair chips, and sand glossy surfaces so primer can grip. You do not always need to sand down to raw wood, but you do need to dull the finish and smooth rough areas.
Use wood filler for dents, missing veneer, old hardware holes, and seams. Once dry, sand the repairs smooth. Wipe everything with a tack cloth or damp microfiber cloth before priming. Dust hiding in corners will absolutely jump into wet paint like it paid rent there.
A Safety Note About Old Finishes
If the hutch may have been painted before 1978, avoid dry sanding until you know whether lead-based paint is present. Use a lead test kit or consult a professional when needed. Wear a respirator, work in a ventilated area, and follow safe dust-control practices. DIY should be empowering, not a surprise chemistry lesson.
Step 6: Prime, Paint, and Protect
Primer is the peace treaty between old finish and new paint. It helps block stains, improves adhesion, and reduces the number of paint coats needed. Choose a primer that suits the surface. Slick laminate, stained wood, dark finishes, and tannin-rich woods may need bonding or stain-blocking primer.
For paint, use a durable furniture paint, enamel, mineral paint, chalk-style paint with a protective topcoat, or cabinet-grade paint. Wall paint is usually not tough enough for furniture that will be touched, bumped, opened, and wiped down regularly. Apply thin coats instead of one thick coat. Thick paint may look efficient for five minutes and then betray you with drips, brush marks, and slow curing.
Sand lightly between coats if needed. Let each coat dry according to the product instructions. Finish with a clear protective topcoat, especially on high-touch areas like the buffet top, drawer fronts, shelves, and cabinet doors.
Step 7: Add Personality With Details
This is where your two new pieces stop looking like rescued furniture and start looking custom. Add wallpaper, peel-and-stick paper, beadboard, fabric, or painted patterns to the back panel of the hutch top. Replace dated hardware with brass knobs, matte black pulls, ceramic handles, or vintage-style cup pulls.
For a farmhouse look, use warm white paint, natural wood, and aged bronze hardware. For a modern look, try a single bold color with sleek pulls. For a cottage or grandmillennial style, keep glass doors, add floral wallpaper inside, and display colorful dishes or books. For a moody built-in effect, paint the hutch top the same color as the wall behind it.
Budget Breakdown: What This Project Might Cost
The cost depends on what you already own and how fancy you get with finishes. A thrifted hutch might cost anywhere from very little to a few hundred dollars. Supplies such as primer, paint, sandpaper, brushes, hardware, wood for a new top, and legs can add another modest chunk. Even so, the final result is often far less expensive than buying two new storage pieces of similar size and quality.
To save money, reuse original hinges, shop clearance hardware, check local reuse stores for wood, and choose paint colors from quality mistints if available. Spend where it matters: primer, durable paint, strong mounting hardware, and a good topcoat.
Common Mistakes to Avoid
The biggest mistake is skipping prep. Paint can make furniture beautiful, but it cannot magically bond to grease, dust, wax, or glossy finish. Another mistake is choosing hardware that does not match the scale of the piece. Tiny knobs on a large buffet can look lost, while oversized pulls on delicate doors can look like the cabinet is wearing costume jewelry.
Do not ignore structure. If the base wobbles, fix that before painting. If the top will be mounted, plan the hanging method before decorating it. And do not rush curing time. Paint may feel dry before it is fully hardened. Give surfaces time before loading them with dishes, books, appliances, or your impressive collection of mugs that say things like “But First, Coffee.”
Creative Ways to Style the Two Finished Pieces
Use the base as a dining room buffet with stacked plates, linens, candles, and serving pieces inside. Add a tray, lamp, and art above it to make the piece feel anchored. In a living room, style it as a media console with closed storage for cords and open space for baskets. In a kitchen, turn it into a coffee bar with mugs in the drawers, syrups on a tray, and a small lamp for cozy café energy.
The hutch top can become a bathroom cabinet for towels and jars, a laundry-room cabinet for detergent and cleaning supplies, or a craft-room organizer for paints, fabric, and tools. In an entryway, add hooks underneath and baskets on the shelves. In a child’s room, paint it a playful color and use it for books and toys. The beauty of this project is that the two pieces do not have to live in the same room or even keep the same style.
Real-World Experience: What This Hutch Project Teaches You
Upcycling a vintage hutch into 2 new pieces teaches patience in the most practical way possible. At first, the project looks simple: separate the top, paint the parts, enjoy your brilliance. Then you discover hidden screws, mystery glue, uneven veneer, one drawer that sticks for emotional reasons, and hardware holes that no modern pull wants to match. That is not failure. That is furniture telling you its life story.
The first big lesson is that old furniture is often better built than it looks. A hutch that seems dated in a listing photo may have solid drawers, real wood trim, and shelves strong enough to hold more than decorative teacups. Once the heavy top is removed, the base often becomes surprisingly elegant. It may need a new top board and better feet, but the bones are already there. You are not starting from scratch; you are editing.
The second lesson is that design decisions should serve the new use. A buffet needs a durable surface because serving platters, coffee makers, and backpacks are not gentle creatures. A wall cabinet needs secure mounting more than fancy knobs. A bathroom cabinet needs a finish that can handle humidity. A craft-room cabinet needs shelves that fit actual supplies, not imaginary Pinterest supplies arranged by color and emotional stability.
The third lesson is that small details create the “wow.” A fresh back panel inside the hutch top can make glass doors feel charming instead of dated. New hardware can shift the whole personality of the piece. Adding legs to the base can make it look like a custom console rather than the bottom half of something. Even caulking tiny gaps and painting the underside of shelves can make the finished piece feel professional.
The fourth lesson is that imperfections are part of the charm, but shortcuts are not. A small ding in old wood can look warm and storied. Paint peeling because the surface was not cleaned properly looks like regret with a satin finish. Take time to clean, sand, prime, and cure. The unglamorous steps are the ones that make the glamorous reveal possible.
Finally, this project changes how you see secondhand furniture. After you split one hutch successfully, you start noticing potential everywhere: dresser bases that could become vanities, cabinet tops that could become bookshelves, old doors that could become headboards. This is both inspiring and dangerous, especially if you have limited garage space. But the reward is real. You end up with two useful, personal, conversation-starting pieces from one overlooked cabinet. That is the magic of upcycling: less waste, more character, and the quiet satisfaction of proving that old furniture still has excellent plot twists.
Conclusion
Upcycling a vintage hutch into 2 new pieces is one of the most rewarding furniture makeover ideas because it combines creativity, practicality, and sustainability. Instead of wrestling one oversized china cabinet into a home that no longer needs it, you create two custom storage pieces that work harder and look better.
The key is to choose a sturdy hutch, separate it carefully, repair and prep every surface, use durable furniture paint, and design each section for a real purpose. The base might become a polished buffet or media console. The top might become a wall cabinet, bookshelf, or mudroom shelf. Together, they prove that old furniture does not have to stay stuck in its original job description.
Note: This guide is intended for everyday vintage and secondhand hutches. If your piece may be a valuable antique or may contain lead-based paint, test first and consider professional advice before sanding, stripping, or painting.