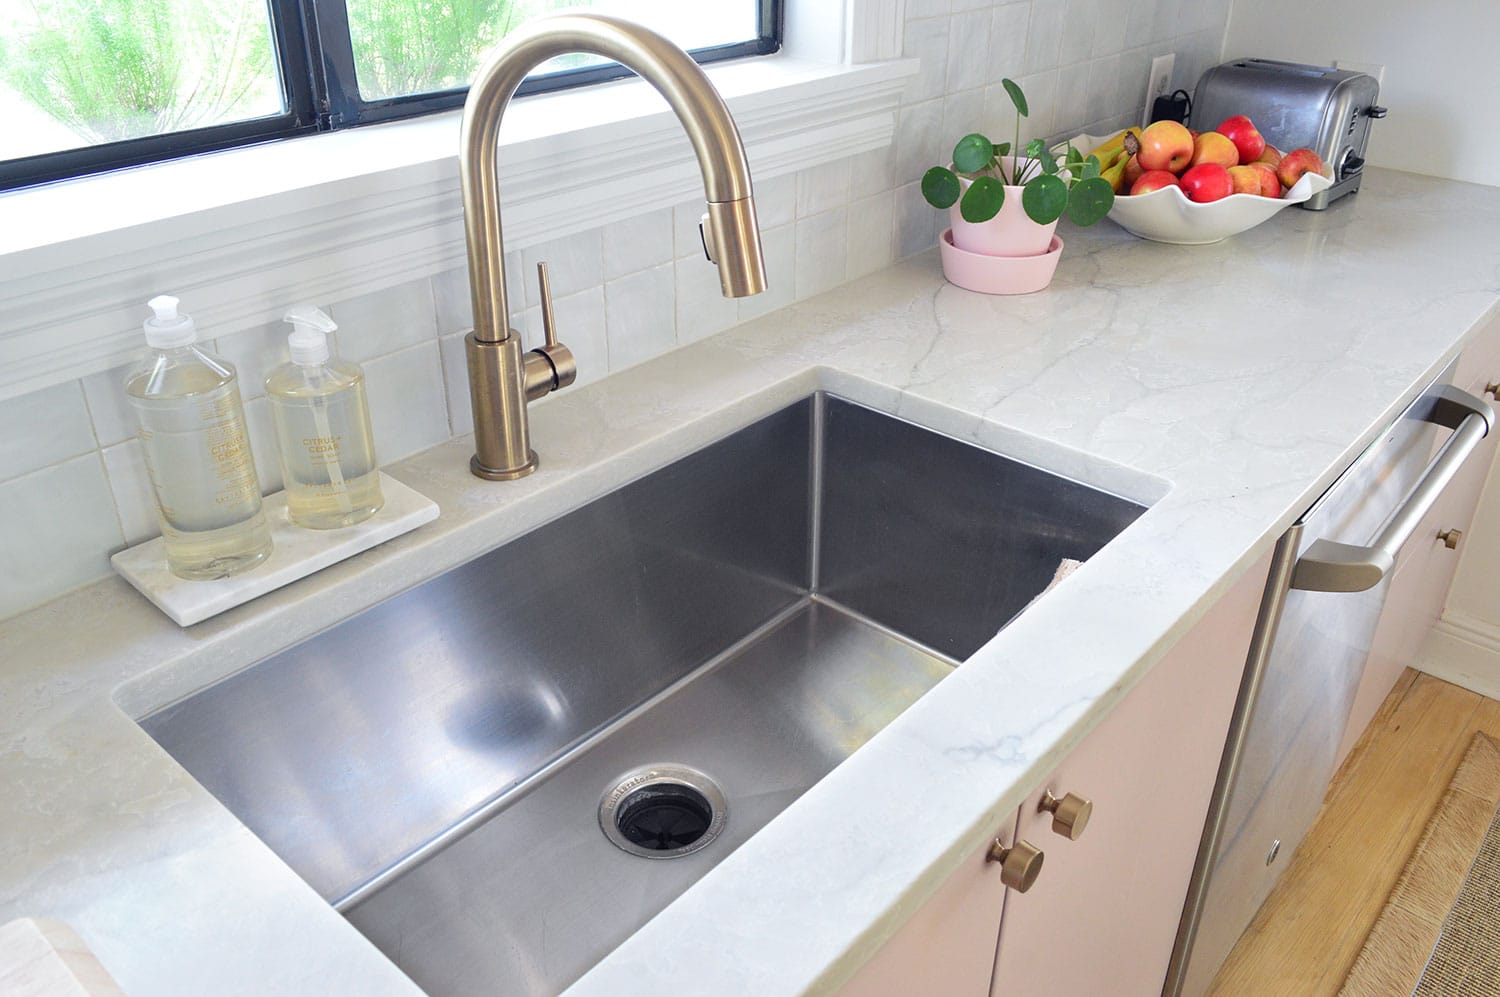
A stainless steel sink is the hardworking stagehand of the kitchen. It catches coffee grounds, pasta water, cereal bowls, vegetable peels, mystery crumbs, and the occasional spoon that somehow vanishes for three days. Because stainless steel looks sleek and tough, it is easy to assume it can handle anything. Technically, it can handle a lot. But if you want it to stay shiny, fresh, and free from dull water spots, it needs the right kind of cleaning.
The good news is that cleaning a stainless steel sink is surprisingly simple. You do not need a cabinet full of dramatic chemicals with names that sound like superhero villains. In most kitchens, the easiest method uses warm water, mild dish soap, baking soda, white vinegar, a soft sponge, and a microfiber cloth. The secret is not scrubbing harder. The secret is cleaning smarter: work with the grain, rinse well, dry completely, and avoid anything that scratches or corrodes the surface.
This guide explains the easy way to clean a stainless steel sink, how often to do it, what to use, what to avoid, and how to handle stains, odors, hard water marks, and everyday grime. By the end, your sink may not win a beauty pageant, but it will definitely stop looking like it survived a tiny kitchen tornado.
Why Stainless Steel Sinks Get Dirty So Fast
Stainless steel has a polished, modern look, but it is not magically self-cleaning. A kitchen sink is exposed to food residue, grease, soap film, minerals from water, coffee and tea stains, cookware marks, and bacteria from food prep. Even clean-looking sinks can hold residue around the drain, faucet base, corners, and strainer basket.
Water spots are another common problem. When water evaporates, minerals can remain on the surface and leave cloudy marks. Hard water makes this worse. If the sink is not dried after cleaning, those spots return quickly, like guests who “just stopped by” and then stayed for dinner.
Small scratches can also make stainless steel look dull. Some scratches are normal because sinks are used daily, but rough pads, steel wool, harsh powders, and scrubbing against the grain can make the finish look worn much faster. That is why a gentle routine is better than an occasional cleaning battle.
The Best Supplies for Cleaning a Stainless Steel Sink
Before you begin, gather a few simple items. You probably already own most of them.
- Mild dish soap
- Baking soda
- White vinegar
- Warm water
- A soft sponge or non-scratch scrub pad
- A soft-bristled brush or old toothbrush for tight areas
- A microfiber cloth for drying and buffing
- Optional: lemon peel, stainless steel cleaner, or a tiny amount of mineral oil for polishing
Baking soda is useful because it acts as a gentle abrasive. It helps loosen stuck-on grime without being as aggressive as harsh scouring powders. Dish soap cuts grease. Vinegar helps with mineral deposits and water spots, as long as it is rinsed away and not left sitting on the metal for too long. A microfiber cloth is the finishing move because it dries the sink without leaving lint or streaks.
The Easy Step-by-Step Method
Step 1: Empty and Rinse the Sink
Remove dishes, utensils, food scraps, sink mats, strainers, and anything else hanging around. Rinse the entire sink with warm water to wash away loose crumbs and grit. This first rinse matters because tiny particles can scratch the surface when you start scrubbing.
If your sink has a removable strainer basket, take it out and rinse it separately. Food debris often hides there, quietly plotting bad smells.
Step 2: Wash with Dish Soap
Add a few drops of mild dish soap to a damp sponge and wipe the entire sink. Focus on the basin, sides, corners, faucet base, drain rim, and divider if you have a double sink. Dish soap removes grease and everyday residue, which makes the deeper cleaning step more effective.
Always scrub gently in the direction of the stainless steel grain. Look closely and you will usually see faint lines in the metal. Follow those lines instead of scrubbing in circles. This helps protect the finish and reduces the chance of visible scratches.
Step 3: Sprinkle Baking Soda Over the Damp Sink
After the soapy wipe-down, rinse lightly, leaving the sink damp. Sprinkle baking soda across the basin and along stained or dull areas. The baking soda will cling to the wet surface and form a light paste as you scrub.
Use a soft sponge or non-scratch pad to work the baking soda over the surface. Pay attention to the drain ring, corners, and areas where water spots collect. If you see brownish marks or light discoloration, give those areas a little extra time. Do not attack the sink like you are sanding a table. Gentle pressure is enough.
Step 4: Use Vinegar for Mineral Spots
Spray or wipe a small amount of white vinegar over the baking soda. It will fizz, which is always satisfying because it makes cleaning feel like a science experiment with better results. The fizzing action can help loosen residue, while vinegar helps dissolve mineral buildup.
Let it work briefly, then rinse thoroughly with warm water. Do not leave vinegar sitting on stainless steel for an extended period. Used correctly, vinegar is helpful. Forgotten on the surface, it can contribute to dullness or potential damage over time.
Step 5: Detail the Drain and Faucet Area
The drain area is where grime loves to settle. Use an old toothbrush or small soft brush with a bit of baking soda paste to clean around the drain rim, strainer basket, and faucet base. These tight spots often make the whole sink look dirty even after the basin is clean.
If your faucet has water spots, wipe it with a damp microfiber cloth and a small amount of vinegar, then rinse and dry. For stubborn buildup around the faucet base, let a damp cloth sit on the area for a few minutes before gently scrubbing. Again, do not use anything sharp or scratchy.
Step 6: Rinse Completely
Rinse the sink thoroughly with warm water. Baking soda residue can leave a cloudy film if it is not fully removed. Move your hand around the surface to feel for any gritty spots. If it still feels powdery, keep rinsing.
This is also a good time to rinse the faucet, handles, soap dispenser, and backsplash area if splashes landed there. A clean sink surrounded by splatter is like wearing a tuxedo with muddy shoes.
Step 7: Dry and Buff
Drying is the step many people skip, and it is also the step that makes the sink shine. Use a clean microfiber cloth to dry the entire sink, including the sides, bottom, faucet, drain rim, and edges. Buff in the direction of the grain until the sink looks bright and smooth.
If you want a little extra shine, apply a tiny amount of mineral oil or a stainless steel polish to a cloth and buff lightly. Use very little. Too much oil can attract dust and fingerprints, which is not exactly the glamorous finish we are aiming for.
How Often Should You Clean a Stainless Steel Sink?
For everyday maintenance, rinse and wipe the sink after use, especially after washing greasy pans, draining pasta, or rinsing produce. A quick daily wipe with dish soap and water keeps buildup from becoming stubborn.
A deeper clean once a week is a smart routine for most homes. That weekly cleaning can include baking soda, vinegar for mineral marks, drain detailing, and a full dry-and-buff finish. If you cook frequently, have hard water, or use the sink for messy food prep, clean it more often.
Sanitizing is different from cleaning. Cleaning removes grime, food residue, and grease. Sanitizing reduces germs on a cleaned surface. After handling raw meat, poultry, seafood, or anything that could cross-contaminate surfaces, wash the sink with hot, soapy water first, then use a food-safe sanitizer according to label directions. If using a diluted bleach solution for food-safety sanitizing, keep it properly diluted, use it carefully, and rinse well if your sink manufacturer recommends doing so to protect the stainless steel finish.
What Not to Use on a Stainless Steel Sink
Stainless steel is durable, but it is not indestructible. Some cleaning products and tools can scratch, stain, or corrode the surface.
- Do not use steel wool or wire brushes.
- Do not use abrasive scrub pads that can scratch the finish.
- Do not leave bleach, chloride cleaners, or harsh chemicals sitting on the sink.
- Do not let salty foods, acidic foods, or cleaning products dry on the surface.
- Do not use oven cleaner, toilet bowl cleaner, or heavy-duty drain chemicals on the sink basin.
- Do not leave wet sponges, rubber mats, or metal cans sitting in the sink for long periods.
Steel wool is especially risky because tiny metal particles can stick to the sink and later rust, making it look as though the stainless steel itself is rusting. Chloride-based cleaners can also damage the protective layer of stainless steel if they are left too long. When in doubt, choose mild soap, baking soda, and a soft cloth.
How to Remove Common Stainless Steel Sink Problems
Water Spots
For water spots, wipe the area with a microfiber cloth dampened with a little vinegar, then rinse thoroughly and dry. The real prevention trick is drying the sink after use. It takes less than a minute and saves you from chasing spots later.
Rust-Colored Marks
Rust-colored marks often come from metal particles, cast iron pans, steel wool residue, or cans left in the sink. Make a paste with baking soda and water, apply it to the mark, and gently rub with the grain. Rinse and dry. For tougher marks, use a stainless steel-safe cleaner according to the product directions.
Grease Film
Grease film usually responds well to hot water and dish soap. Wash the sink thoroughly, then use baking soda for any remaining dull patches. Rinse with warm water and dry completely.
Drain Odors
For a smelly drain, remove visible debris first. Pour baking soda into the drain, follow with vinegar, let it fizz briefly, then rinse with hot water. If you have a garbage disposal, run cold water and grind a few ice cubes to help knock loose residue. Citrus peel can freshen the scent, but use small pieces and check your disposal manual first.
Scratches
Light scratches are part of normal stainless steel life. Over time, they blend into the finish. To reduce new scratches, clean with the grain, avoid rough tools, and use a sink grid if you often wash heavy cookware. Deep scratches may require a professional refinishing product or service, but for most home kitchens, prevention is easier than repair.
Daily Habits That Keep the Sink Looking New
The easiest stainless steel sink cleaning routine is the one you do before the mess gets dramatic. After washing dishes, rinse away soap and food particles. Wipe the faucet base. Empty the strainer. Dry the basin with a microfiber cloth. That tiny routine can keep the sink looking clean for days.
Do not let wet sponges sit directly in the sink. They can trap moisture and bacteria. Use a sponge holder that allows airflow. Do not leave acidic foods like tomato sauce, citrus slices, pickle juice, or salty brine sitting in the sink. Rinse them away quickly. If you use a rubber mat, lift it often and clean underneath it because trapped water can create stains and dull patches.
Think of stainless steel like a nice pair of sneakers. It can handle daily life, but it looks better when you do not leave it sitting in puddles.
The Fast 5-Minute Cleaning Routine
If your sink is not terrible but needs a quick refresh, use this simple routine:
- Rinse the sink with warm water.
- Wash with dish soap and a soft sponge.
- Sprinkle baking soda on dull areas and scrub gently.
- Rinse thoroughly.
- Dry and buff with a microfiber cloth.
This mini routine is perfect after dinner, before guests arrive, or any time the kitchen looks clean except for the sink, which is somehow telling a different story.
The Weekly Deep-Clean Routine
Once a week, give the sink a more complete reset. Remove everything from the sink. Wash with dish soap. Scrub with baking soda. Use vinegar briefly for mineral spots. Detail the drain, faucet base, and strainer. Rinse thoroughly. Dry completely. Buff the finish.
This routine takes about 10 to 20 minutes, depending on how much buildup you have. The more consistent you are, the faster it gets. A sink that is cleaned weekly rarely needs aggressive scrubbing, and that is good news for both your schedule and your stainless steel finish.
Why Drying Matters More Than You Think
Drying may seem like an optional final step, but it is one of the most important habits for a shiny stainless steel sink. Water spots, mineral rings, and cloudy streaks usually happen after water dries on the surface. When you dry the sink yourself, you remove the water before it leaves deposits behind.
A microfiber cloth works best because it absorbs water quickly and buffs the surface without scratching. Keep one cloth near the sink just for drying. It is a small habit with a big payoff. Your sink will look cleaner, your faucet will shine, and you will feel oddly proud of a household chore. That is adulthood: finding joy in a reflective basin.
Experience Notes: What Actually Works in a Real Kitchen
In real life, the easiest way to clean a stainless steel sink is not about creating a perfect cleaning ritual with candles, music, and a dramatic before-and-after reveal. It is about building a routine that works when dinner is late, the dishwasher is full, and someone has left a spoon coated in peanut butter in the basin like a tiny act of rebellion.
The most useful habit is cleaning the sink right after the messiest job of the day. For many households, that is after dinner. Once the dishes are loaded or hand-washed, the sink is already wet, which makes cleaning faster. A few drops of dish soap on a sponge can remove most grease before it dries. If the sink still looks cloudy, a quick sprinkle of baking soda gives just enough scrubbing power without making the job feel like a weekend project.
Another experience-based tip: do not wait until the drain smells bad to clean the drain area. The drain rim, stopper, and strainer basket collect tiny bits of food that are easy to miss. Cleaning those pieces twice a week can prevent odors before they start. An old toothbrush is perfect for this job. It gets into the small ring around the drain and the seam where the faucet meets the sink deck. That one detail can make the entire sink look cleaner.
Hard water changes the game. In homes with mineral-heavy water, a sink can look spotted even when it is technically clean. The best fix is not stronger cleaner; it is faster drying. Keeping a microfiber cloth nearby makes a huge difference. After the final rinse, wipe the bottom, sides, faucet, and counter edge. It takes less than a minute. The first few times, it feels unnecessary. After a week, the difference is obvious.
It also helps to stop using the sink as temporary storage. Wet cast iron, open cans, metal lids, rubber mats, and damp sponges can leave marks or trap moisture. A sink grid can help protect the bottom from pots and pans, but it still needs to be lifted and cleaned underneath. Otherwise, the grid becomes a little grime apartment complex.
For busy kitchens, the best routine is simple: rinse after use, wash with soap daily, deep clean weekly, sanitize after raw meat or poultry prep, and dry whenever you want shine. This method is realistic, affordable, and gentle enough for long-term sink care. It does not require fancy products or heroic scrubbing. It just requires consistency, the right tools, and a microfiber cloth that earns its keep.
Conclusion
The easy way to clean a stainless steel sink is to keep the process gentle, consistent, and complete. Start with warm water and dish soap, use baking soda for mild scrubbing, apply vinegar briefly for mineral spots, clean the drain and faucet details, rinse thoroughly, and always dry with a microfiber cloth. Avoid steel wool, harsh abrasives, and long contact with bleach or chloride-based cleaners. For food safety, clean and sanitize after raw meat or poultry prep using safe, label-approved methods.
A stainless steel sink does not need to be babied, but it does need the right kind of attention. Treat it well, and it will stay bright, clean, and ready for everything from dinner cleanup to emergency ice cream bowl rinsing. The whole routine is simple enough to do regularly, and that is what makes it work.