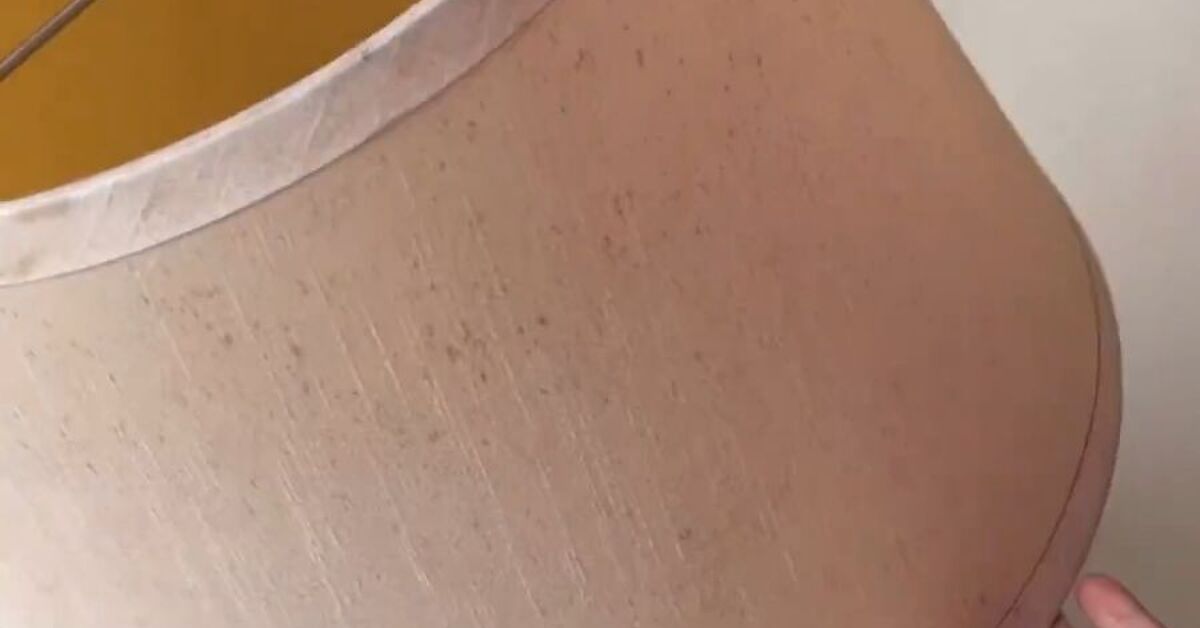
An outdated lamp can be an oddly emotional object. It still works, its shape is not terrible, and throwing it away feels wastefulbut its shiny brown finish looks as though it has been waiting patiently since 1997 for someone to notice it.
Fortunately, a stylish DIY lamp makeover does not require a design degree, an enormous budget, or a garage filled with intimidating power tools. With careful cleaning, the right paint, a better lampshade, and a few thoughtful details, a thrift store lamp can become modern lighting that looks surprisingly expensive.
This guide explains how to upcycle a lamp safely and successfully, from inspecting the electrical components to choosing a finish that works with your room. It also covers common mistakes, material-specific preparation, shade upgrades, and experience-based lessons that can help your finished lamp look chic rather than merely “recently attacked with spray paint.”
Why Upcycling a Lamp Is Worth the Effort
Lamps are excellent candidates for upcycling because their visual impact is much larger than their physical size. A table lamp may occupy only a small corner of a nightstand, console, or desk, yet it influences the color, texture, height, and atmosphere of the entire arrangement.
Older lamps also tend to have interesting silhouettes. Even when the finish feels dated, the underlying base may have elegant curves, sculptural geometry, or substantial proportions that are difficult to find in inexpensive modern lighting.
Upcycling lets you preserve those good bones while changing everything that makes the lamp look tired. Instead of buying another disposable accessory, you can create personalized, upcycled home decor using paint, fabric, trim, texture, or replacement hardware.
The project can also be refreshingly affordable. A secondhand lamp, a sample-size container of paint, and a simple linen shade may produce a result similar to designer lighting that costs considerably more.
Start With the Right Lamp
Not every neglected lamp deserves a makeover. Some are hidden treasures. Others are electrical cautionary tales wearing pleated shades.
Look for a Strong Silhouette
Ignore the existing color for a moment and study the shape. Simple urn bases, rounded ceramic lamps, stacked spheres, tapered columns, architectural wood forms, and geometric metal frames usually adapt well to contemporary interiors.
A lamp with a clean outline can look dramatically different after receiving a matte finish and an updated drum shade. Highly ornate bases can also work, but they often need restrained colors to prevent the final design from becoming visually busy.
Check the Lamp’s Stability
Place the lamp on a level surface and gently test it. The base should not rock, lean, or feel dangerously top-heavy. Check whether the central rod, socket, harp, finial, and decorative components are secure.
Loose hardware can often be tightened, but cracked structural pieces may not be worth repairing. A stylish lamp is less impressive when it tips over every time someone closes a drawer.
Inspect the Electrical Components
Before planning colors or shopping for fabric, inspect the cord, plug, switch, socket, and insulation. Do not use a lamp with a frayed cord, exposed wiring, cracked socket, scorched area, loose plug, buzzing sound, or unreliable switch.
Replacement lamp kits are widely available, and straightforward table lamps can often be rewired with careful adherence to the kit manufacturer’s instructions. However, electrical work must never become an improvisational craft project. When the wiring is unusual, inaccessible, badly damaged, or confusing, have the lamp evaluated by a qualified professional.
Choose a Modern Design Direction
The easiest way to create a cohesive lamp makeover is to choose the final look before buying supplies. Otherwise, you may return from the craft store with rope, gold leaf, floral fabric, black paint, and absolutely no adult supervision.
Matte Black and Natural Linen
A matte black base paired with a white, oatmeal, or natural linen shade is one of the most reliable modern combinations. The dark base visually simplifies elaborate details, while the textured shade keeps the lamp from looking cold.
This formula works especially well with brass, resin, ceramic, or wood lamps that have attractive shapes but outdated colors.
Plaster or Stone-Inspired Texture
A textured neutral finish can make a basic lamp resemble hand-finished pottery. Soft white, mushroom, warm gray, putty, and sand tones look particularly convincing on rounded or sculptural bases.
Texture can be created with a compatible decorative coating or a carefully tested mixture intended for craft surfaces. Keep texture away from electrical components, ventilation openings, moving joints, and the socket assembly.
Color Blocking
For a more playful modern lamp, divide the base into two or three painted sections. Terracotta and cream, navy and white, sage and black, or muted coral and burgundy can look contemporary without becoming cartoonish.
Use painter’s tape to create clean divisions, but remove it according to the paint manufacturer’s directions. Waiting until the coating becomes extremely hard can cause the tape to pull up the edge.
Updated Metallic Accents
Metallic finishes can modernize a lamp when used selectively. Instead of coating every surface in bright gold, consider highlighting the neck, finial, harp, feet, or a narrow band around the base.
Satin brass, aged bronze, brushed nickel, and dark copper usually appear more sophisticated than an extremely reflective finish. Modern design often succeeds because it knows when to stop sparkling.
Patterned or Fabric-Covered Shades
A simple base can support a stronger lampshade. Block prints, narrow stripes, abstract patterns, and textured solids add personality while preserving a clean silhouette.
For a chic result, repeat at least one shade color elsewhere in the room, such as in a pillow, artwork, rug, or decorative object. The repetition makes the lamp feel intentional rather than randomly cheerful.
Supplies for a DIY Lamp Makeover
- Microfiber cloths
- Mild detergent or an appropriate degreaser
- Fine-grit sanding sponge or sandpaper
- Painter’s tape
- Drop cloth or flattened cardboard
- Surface-compatible bonding primer
- Spray paint or brush-on paint suitable for the base material
- Clear protective coating, when compatible and necessary
- Disposable gloves and recommended protective equipment
- A replacement lampshade, harp, finial, socket, or lamp kit as needed
- An LED bulb that fits the socket and remains within the lamp’s marked rating
Always read the instructions for every primer, paint, adhesive, and topcoat. Products from different systems are not automatically compatible, and drying time is not the same as full curing time.
How to Upcycle a Lamp Step by Step
Step 1: Unplug and Disassemble the Lamp
Unplug the lamp and remove the bulb, shade, finial, and harp. Detach any easily removable decorative hardware and place small parts in a labeled container.
If the lamp is being rewired, photograph the original assembly before taking it apart. The photograph is not a substitute for proper instructions, but it can help you remember how non-electrical decorative pieces were positioned.
Step 2: Clean the Base Thoroughly
Paint adheres to the lamp, not to the invisible layer of dust, furniture polish, cooking residue, and mysterious thrift store history sitting on top of it.
Clean the surface with a method appropriate for its material. A mild detergent solution works for many durable bases, while stubborn grease may require a compatible degreaser. Do not soak wooden components or allow liquid to enter the socket, switch, cord opening, or hollow interior.
Let the lamp dry completely before sanding or priming.
Step 3: Prepare the Surface
Lightly scuff glossy surfaces so the primer can establish a stronger bond. Remove loose paint and rust from metal bases, smooth damaged edges, and wipe away sanding dust.
Preparation varies by material:
- Metal: Remove grease, loose paint, and rust. Use a metal-compatible or rust-inhibiting primer when needed.
- Glazed ceramic: Clean carefully, lightly abrade when appropriate, and use a bonding primer designed for slick surfaces.
- Glass: Use coatings specifically labeled for glass and follow their cleaning and curing instructions.
- Wood: Clean, sand with the grain, fill unwanted damage, and prime bare or uneven areas.
- Plastic or resin: Test a hidden area and select products explicitly compatible with plastic or synthetic surfaces.
Step 4: Mask Every Functional Component
Protect the socket, switch, cord, plug, threaded rod, identification labels, and any surface that must move or make an electrical connection. Painter’s tape, foil, and small plastic bags can help cover awkward shapes.
Do not paint the electrical contacts inside a socket or coat the plug blades. These are functional components, not opportunities for a coordinating accent color.
Step 5: Apply Primer
Primer improves adhesion, creates a more uniform surface, and can reduce chipping or peeling. It is particularly useful on glossy ceramic, metal, resin, glass, or any lamp with a dramatic color change.
Apply thin, even coats in a well-ventilated work area that meets the product’s temperature and humidity requirements. Heavy primer coats can drip, remain soft, or obscure attractive details.
Step 6: Paint With Multiple Light Coats
When using spray paint, shake the can as directed and test the spray pattern on scrap cardboard. Begin each pass slightly beyond the lamp, move smoothly across it, and release the nozzle after passing the opposite edge.
Several light coats generally produce a smoother finish than one heroic, dripping coat. Rotate the lamp between passes so you can reach curves and recesses without flooding them.
For brush-on paint, use a high-quality brush suitable for the coating. Follow the shape of the lamp and maintain a wet edge where practical. Avoid repeatedly brushing paint after it begins to set.
Step 7: Add Texture or Decorative Details
Once the base coat has dried according to the manufacturer’s directions, add restrained decorative details. Possibilities include a narrow metallic band, hand-painted line, color-blocked section, stamped motif, faux stone variation, or wrapped natural fiber.
Rope or cord should be secured only to cool exterior portions of the base. Keep all embellishments away from the bulb, socket, switch, ventilation areas, and cord entry point.
Step 8: Allow the Finish to Cure
A painted surface may feel dry long before it has fully cured. Reassembling the lamp too quickly can create fingerprints, dents, scratches, or stuck hardware.
Follow the coating manufacturer’s curing guidance. Place the base in a protected, ventilated location where curious pets, airborne dust, and impatient household members cannot investigate it.
Step 9: Upgrade the Shade and Hardware
A new lampshade often creates as much visual improvement as repainting the base. Drum shades usually feel clean and contemporary, while tapered shades can balance traditional or curved lamp bases.
Measure the original shade and base before shopping. Confirm the shade fitting is compatible with the lamp’s socket, harp, or shade carrier. The shade should conceal the socket from normal viewing angles, remain proportionate to the base, and maintain safe clearance from the bulb.
Replacing a dated finial can provide an inexpensive finishing touch. A small sphere, simple cylinder, dark metal cap, or understated brass finial may be all the lamp needs.
Step 10: Reassemble and Test
Remove all masking materials and inspect the lamp carefully. Confirm that the socket is secure, the cord is undamaged, the switch moves normally, and no paint has entered a functional component.
Install an appropriate LED bulb that fits the socket and stays within the lamp’s labeled maximum wattage. LEDs generally use less energy and produce less heat than traditional incandescent bulbs, but they still require ventilation and proper clearance.
Place the lamp on a stable surface, plug it in, and test it while remaining nearby. Immediately unplug it if you notice flickering, buzzing, smoke, unusual heat, sparks, or a burning odor.
Easy Lampshade Makeover Ideas
Cover a Plain Drum Shade With Fabric
A clean drum shade can be covered with lightweight fabric using an adhesive intended for the materials involved. Choose a pattern with a manageable repeat, smooth it carefully, and finish the vertical seam neatly at the back.
Avoid bulky layers and loose fabric near the top or bottom openings. The shade must retain its structure and remain safely separated from the bulb.
Add Narrow Ribbon or Trim
Attaching a slim ribbon around the upper and lower edges can make an inexpensive shade look custom. Black trim on white linen creates crisp contrast, while tonal trim produces a quieter designer effect.
Paint a Simple Pattern
Acrylic paint can be used on compatible shade materials to create stripes, arches, dots, or hand-drawn botanical forms. Test first because paint can alter light transmission and reveal imperfections when the lamp is switched on.
Keep painted designs relatively thin and avoid heavy, heat-trapping coatings. Do not coat the interior unless the shade and product instructions specifically support that application.
Line the Interior Carefully
A contrasting shade interior can create a warm glow and an elegant surprise. However, lining changes the shade’s heat behavior and should be attempted only with appropriate materials, proper clearance, and a cool-running bulb.
Common Lamp-Upcycling Mistakes
- Skipping the electrical inspection: New paint cannot make deteriorated wiring safe.
- Painting over dirt or polish: Contaminated surfaces cause peeling, fisheyes, and uneven adhesion.
- Using the wrong coating: Paint formulated for wood may perform poorly on glazed ceramic, flexible plastic, or glass.
- Applying coats too heavily: Thick paint creates drips and hides sculptural details.
- Ignoring curing time: A finish that is dry to the touch may still be soft underneath.
- Choosing an undersized shade: A tiny shade can make a substantial base look awkward and top-heavy.
- Covering functional parts: Paint and decorative materials must not interfere with sockets, switches, joints, labels, or cords.
- Using an inappropriate bulb: Follow the lamp’s marked bulb type and maximum wattage.
- Adding every idea at once: Texture, rope, metallic paint, stencils, fringe, and tassels rarely need to attend the same meeting.
How to Make an Upcycled Lamp Look Expensive
The difference between a homemade-looking lamp and a polished DIY lamp makeover usually comes down to restraint and execution.
Start with a limited color palette. Two coordinated colors and one metal finish are generally enough. Match the sheen to the design: matte finishes soften busy details, satin finishes provide subtle depth, and gloss highlights every curveas well as every sanding mistake.
Invest attention in the shade. A beautifully painted base paired with a yellowed, dented shade will still look unfinished. Conversely, an affordable base can appear substantially more refined when topped with a properly proportioned linen shade.
Finally, coordinate the lamp with its surroundings. A warm neutral lamp can echo wood tones in a room, while a black base may connect to picture frames, cabinet hardware, or window trim. Repeating one visual element makes the lamp feel as though it belongs there.
Experience-Based Lessons From Real-World Lamp Makeovers
Across successful thrift store lamp transformations, one lesson appears repeatedly: the original shape matters more than the original finish. A lamp with balanced proportions can survive an alarming faux-bronze glaze, faded floral painting, or glossy cherry-red coating. Once the color is removed or covered, the silhouette becomes visible again.
The opposite is also true. An unstable, poorly proportioned lamp rarely becomes elegant simply because it has been painted beige. Before investing time in a project, it helps to imagine the base as a solid black shadow. When that shadow still looks attractive, the lamp is usually a promising candidate.
Another common experience is that preparation takes longer than painting. Cleaning crevices, removing adhesive residue, sanding imperfections, protecting the socket, and waiting for primer to dry may feel unproductive because the lamp does not yet look different. Those stages, however, determine whether the finish remains smooth or begins peeling after the first enthusiastic dusting.
Spray painting also rewards patience. Many disappointing finishes begin with the thought, “One more heavy pass should cover everything.” That pass often produces a drip on the most visible side of the base. Light coats seem slower, but they reduce runs, preserve details, and create a more even sheen. Turning the lamp between coats instead of trying to reach every angle at once also improves control.
Color selection frequently changes once the lamp enters the room. A cool white that appears crisp outdoors may look bluish beside warm wood furniture. A fashionable greige may disappear against a similarly colored wall. Testing a small painted sample near the lamp’s intended location can prevent an entire repainting session.
The lampshade is another recurring source of surprise. DIYers sometimes spend most of their effort on the base and treat the shade as an afterthought. Yet changing a pleated bell shade to a simple drum shade can create the strongest modernizing effect in the whole project. Proper scale matters just as much. A shade that is slightly wider or taller can make a lamp look grounded, while an undersized shade makes it resemble a person wearing a hat from elementary school.
Texture projects require particular restraint. Faux plaster and stone effects look most convincing when the surface variation is irregular but subtle. Deep ridges and thick clumps tend to collect dust and can make the lamp look more like a school volcano. Building several thin layers produces a softer, more believable finish.
Projects involving sentimental or vintage lamps also benefit from reversible choices. A removable shade, replaceable finial, or carefully selected new cord can refresh the lamp without erasing every trace of its history. Original hardware can be labeled and stored rather than discarded.
Finally, safety is never the glamorous part of a lamp makeover, but it is the most valuable. Replacing a worn cord, tightening a loose socket, using the proper bulb, and keeping decorative materials away from heat are not optional details. The best upcycled lamp is not merely stylish in a photograph. It is stable, functional, appropriately wired, and safe enough to use every day.
Conclusion
Learning how to upcycle a lamp is mostly an exercise in seeing potential. Beneath a dated finish or unfortunate shade may be a beautifully proportioned base waiting for a second chance.
Begin with a sound lamp, inspect its wiring, and choose a clear design direction. Clean and prepare the material carefully, apply compatible products in thin coats, allow the finish to cure, and complete the transformation with a properly sized shade and efficient LED bulb.
Whether you choose minimalist matte black, warm plaster texture, soft color blocking, or subtle metallic details, the most successful result will feel intentional. Keep the palette controlled, respect the lamp’s original shape, and remember that chic design usually knows when to put the glue gun down.