Note: This article synthesizes practical guidance from reputable U.S. paint manufacturers, home-improvement retailers, safety resources, and established DIY publications. Source links are omitted by request.
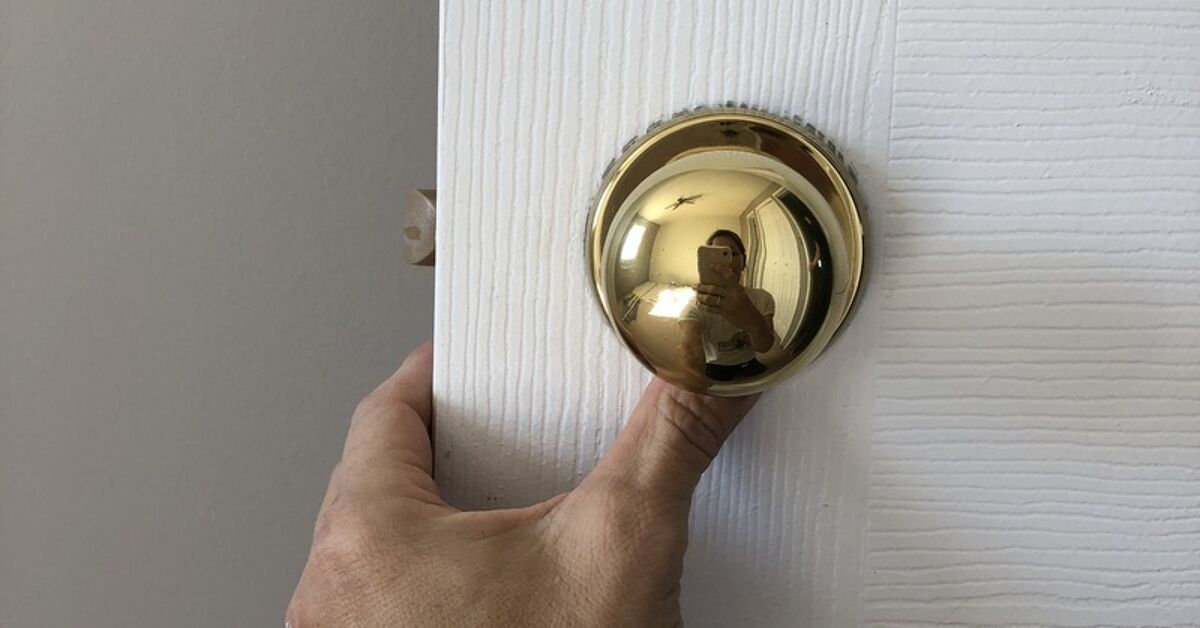
Some home details age gracefully. Crown molding? Charming. Original hardwood floors? A treasure. Brassy gold doorknobs from the 1980s and 1990s? They often walk into the room wearing shoulder pads and asking where the fax machine went.
If your doors are still sporting shiny yellow-gold knobs that clash with your current style, you do not always need to replace every piece of hardware in the house. A smart brassy gold doorknobs DIY makeover can refresh interior doors, stretch a decorating budget, and make hallways feel less “builder-grade time capsule” and more “intentional modern home.”
The key word is smart. Doorknobs are high-touch hardware. They are grabbed, twisted, bumped, cleaned, and occasionally attacked by grocery bags, backpacks, and one determined toddler with sticky fingers. Paint can look beautiful, but only if the surface is cleaned, scuffed, primed, painted in thin coats, and allowed to cure properly. Skip the prep, and your gorgeous matte black knob may chip faster than a cheap manicure.
This in-depth guide explains how to say goodbye to brassy gold doorknobs using DIY-friendly materials, safe spray-painting habits, and realistic expectations. You will learn when painting makes sense, when replacement is smarter, which supplies to use, and how to get a finish that lasts longer than a weekend trend.
Why Brassy Gold Doorknobs Make a Home Feel Dated
Brassy gold hardware was once everywhere: bedroom doors, bathroom doors, closet doors, bifold doors, and sometimes even pantry doors that did not deserve that level of drama. The finish was affordable, easy to mass-produce, and popular in many builder homes. Over time, however, that bright yellow shine began to feel less elegant and more “hotel hallway in 1994.”
Modern interiors lean toward finishes that feel softer, deeper, or more architectural. Matte black, oil-rubbed bronze, satin nickel, aged brass, champagne bronze, and brushed gold are popular because they pair well with updated lighting, cabinet pulls, faucets, and neutral paint colors. Replacing every doorknob can become expensive quickly, especially in a home with 10, 15, or 20 doors. That is where a DIY door hardware makeover earns its applause.
Painting brassy gold doorknobs is not magic, though. It is a surface-coating project. That means the final result depends almost entirely on adhesion. Paint needs a clean, dull surface to grab. Shiny brass or brass-plated metal is smooth and slick, so it must be cleaned and lightly scuffed before primer and paint go on.
Should You Paint or Replace Gold Doorknobs?
Before grabbing a can of spray paint like a makeover superhero, pause for a quick reality check. Painting is best for interior knobs that still work properly, are not badly dented, and do not have failing locks or loose mechanisms. If the knob already sticks, wobbles, scratches your hand, or requires a secret handshake to open, replacing it is usually the better investment.
Painting is a good choice when you want a budget-friendly update, are working on low- to medium-traffic interior doors, and can give the hardware enough drying and curing time. It is also useful when you want all hardware to match but are not ready to spend hundreds of dollars on new knobs.
Replacement is smarter for exterior entry hardware, heavily used bathroom knobs, rental units with strict durability needs, antique solid brass pieces that would be more valuable restored, or any hardware with a lock you rely on for security. Paint can improve appearance, but it cannot turn worn-out hardware into premium hardware. Think of it as a wardrobe upgrade, not orthopedic surgery.
Best Finishes for Updating Brassy Gold Doorknobs
The most popular finish for a gold doorknob makeover is matte black. It looks crisp, modern, and graphic against white, greige, taupe, navy, sage, and natural wood doors. Satin black is slightly more forgiving than dead-flat black because it resists fingerprints better.
Oil-rubbed bronze is another strong option. It offers depth without looking harsh and works well in traditional, farmhouse, craftsman, and transitional interiors. Satin nickel gives a lighter, clean look and pairs nicely with stainless appliances and cool-toned rooms. Champagne bronze or soft brushed gold can also work if your goal is not to eliminate gold entirely but to trade loud brass for something more grown-up.
For durability, choose a spray paint labeled for metal, ideally with rust protection or enamel-style toughness. Many DIYers use a separate metal primer followed by a spray paint topcoat. Paint-and-primer-in-one products can work on some projects, but slick brass hardware usually benefits from a dedicated primer. In the battle between primer and peeling, primer is the adult in the room.
Tools and Materials You Will Need
- Screwdriver or drill with the correct bit
- Painter’s tape
- Permanent marker and small bags for labeling screws
- Dish soap, degreaser, or a mild household cleaner
- Old toothbrush or small cleaning brush
- Microfiber cloths or lint-free rags
- 220- to 320-grit sandpaper or sanding sponge
- Cardboard box, foam board, or scrap wood for holding knobs upright
- Metal primer spray
- Spray paint designed for metal
- Clear protective topcoat, if compatible with your paint
- Disposable gloves
- Eye protection
- Respirator or mask rated for paint fumes and particles
- Drop cloth or plastic sheeting
Always read the product label for application temperature, recoat window, dry time, and cure time. Paint brands vary, and the label is not just decorative literature printed in tiny letters to humble us.
Step-by-Step: How to Say Goodbye to Brassy Gold Doorknobs
Step 1: Remove the Doorknobs
Remove the doorknobs from the door instead of painting them in place. This is one of the biggest differences between a clean DIY finish and a “landlord special.” Painting hardware while it is still attached can clog seams, stain the door, gum up the latch, and leave visible edges where paint cannot reach.
Use a screwdriver to loosen the visible screws on the interior side of the knob. Pull both sides apart, remove the latch if you plan to paint it, and place screws in a labeled bag. Label by room if you are doing multiple doors. “Guest room left closet thingy” may not sound scientific, but future you will appreciate it.
Step 2: Clean Every Surface Thoroughly
Door hardware collects hand oils, dust, cleaning residue, lotion, cooking grease, and the mysterious grime of everyday life. Paint will not bond well to that layer. Wash each knob with warm water and dish soap or use a degreaser suitable for metal. Scrub around seams, screw holes, and decorative grooves with an old toothbrush.
Rinse off cleaner residue and dry the hardware completely. Any moisture left under primer can interfere with adhesion. If the knobs have stubborn buildup, repeat the cleaning process. This step is not glamorous, but neither is chipped paint two weeks later.
Step 3: Scuff Sand the Shiny Brass Finish
Once clean and dry, lightly sand the visible surfaces with 220- to 320-grit sandpaper. You are not trying to grind the knob into a new shape. You simply want to dull the glossy surface so primer has something to grip. When the finish looks evenly scuffed instead of mirror-shiny, you are on the right track.
Be gentle with brass-plated hardware. Many inexpensive doorknobs are not solid brass; they are plated. Aggressive sanding can cut through the thin finish. Use light pressure, smooth passes, and wipe away sanding dust with a clean cloth.
Step 4: Mask the Moving Parts
Use painter’s tape to cover areas that should not be painted, including the spindle, keyhole, latch mechanism, privacy lock button, and any internal moving parts. Paint buildup can stop a latch from retracting smoothly or make a lock feel sticky.
If you are painting knobs with keyholes, do not spray directly into the cylinder. A beautiful finish is not worth a key that suddenly behaves like it joined a labor union and refuses to work.
Step 5: Set Up a Safe Spray Station
Spray outdoors or in a very well-ventilated area away from flames, pilot lights, heaters, sparks, and anything that could ignite fumes. Aerosol paints often contain flammable propellants and solvents. Wear eye protection, gloves, and a respirator or mask appropriate for paint fumes and airborne particles.
A cardboard box makes a simple spray booth. Push screws, dowels, or bamboo skewers through cardboard to hold knobs upright, or place them on scrap wood so you can spray from multiple angles. Elevating the hardware helps prevent paint from pooling at the bottom edge.
Step 6: Apply Metal Primer in Thin Coats
Shake the primer can according to the label instructions. Two minutes can feel surprisingly long, but under-mixed spray paint can spit, streak, or apply unevenly. Hold the can about 6 to 12 inches from the surface, depending on the product directions, and spray in smooth, light passes.
Do not try to cover the entire knob in one heroic coat. Heavy coats drip, wrinkle, and take longer to dry. Use several thin coats, allowing the recommended recoat time between passes. Primer should look even and smooth, not like frosting on a cupcake.
Step 7: Spray Paint the New Finish
After the primer is ready for paint, apply your chosen color using the same light-coat technique. Start spraying slightly before the knob, move across it, and release the nozzle after passing the other edge. This helps avoid heavy spots at the beginning and end of each pass.
Rotate the hardware as needed so all sides are covered. Decorative knobs with curves and grooves may need extra attention from different angles. The goal is even coverage without puddling. If the first coat looks too light, congratulationsyou are doing it correctly. Thin coats build a smoother, stronger finish.
Step 8: Add a Compatible Clear Coat
A clear protective topcoat can improve durability on high-touch hardware, but it must be compatible with your paint. Some clear coats change the sheen or slightly alter metallic finishes. Test on a scrap piece or the underside of the knob if possible.
Use the same thin, even spray pattern. A satin or matte clear coat works well for modern finishes. Gloss clear coat can look polished but may highlight fingerprints and imperfections.
Step 9: Let the Paint Cure Before Reinstalling
Dry-to-touch does not mean fully cured. This is where many DIY doorknob projects go wrong. The paint may feel dry in an hour but still be soft underneath. Reinstall too soon, and screws, plates, and fingertips can dent the finish.
Follow the product label for cure time. As a practical rule, give painted knobs at least 24 to 48 hours before reinstalling, and longer if you can. For heavily used doors, several days of cure time can make a noticeable difference. Paint patience is boring, but chipping is more boring.
How to Avoid Chipping on Painted Doorknobs
The best way to prevent chipping is to respect the preparation steps: clean, sand, prime, paint, topcoat, and cure. Each step builds the foundation for the next. If you skip cleaning, paint sticks to grime. If you skip sanding, paint sits on a glossy surface. If you skip primer, the topcoat has to do all the bonding work. That is a lot to ask from one little can.
Another important trick is to avoid harsh cleaners after the knobs are painted. Use a soft damp cloth and mild soap when needed. Abrasive pads, alcohol-heavy cleaners, and aggressive disinfecting wipes can dull or weaken the finish over time. High-touch areas may eventually need touch-ups, especially on bathroom doors, kids’ rooms, and busy hallway doors.
If your home has a large number of doors, consider painting one test knob first. Use it for a week or two before committing to the whole house. A test run reveals whether you like the color, sheen, feel, and durability. It also prevents the classic DIY tragedy known as “I painted twenty knobs and now I hate the finish.”
Common Mistakes to Avoid
Painting Hardware While It Is Still on the Door
This saves time at first and creates problems later. Overspray, stuck mechanisms, and rough edges are not worth it. Remove the knobs whenever possible.
Skipping the Sanding Step
Brassy gold hardware is usually slick. Paint needs a dull surface. Light scuff sanding is one of the most important steps for long-term adhesion.
Using One Thick Coat
Thick spray paint coats run, bubble, and cure poorly. Multiple light coats are stronger and smoother.
Ignoring Cure Time
Paint may feel dry long before it is ready for daily use. Give it time to harden before reinstalling.
Painting Broken or Cheaply Failing Hardware
If a knob is already failing mechanically, paint will not save it. Replace problem hardware instead.
Budget and Timeline for a DIY Doorknob Makeover
A DIY brassy gold doorknob update is usually affordable. Many homeowners can complete several knobs with one can of primer, one can of spray paint, and one clear coat, depending on the number of coats and hardware size. Add sandpaper, tape, gloves, and cleaning supplies, and the project is still often cheaper than replacing every knob in the home.
The active work may take only a few hours, but the full timeline should include drying and curing. Removing, cleaning, sanding, and spraying can be done in a day. Reinstallation is best saved for the next day or later. For best results, plan this as a weekend project rather than a “guests arrive in four hours” project. Nothing says hospitality like asking visitors not to touch any doors.
Maintenance Tips for Painted Doorknobs
After reinstalling your newly painted hardware, treat it gently for the first week. The finish may continue to harden even after it is dry enough to handle. Avoid rings scraping across the knob, do not hang bags from it, and clean only with mild soap and water.
Keep a small labeled container of leftover paint or note the exact brand, color, and sheen. If a chip appears later, you can lightly sand the area, clean it, and apply a careful touch-up. Painted hardware is not indestructible, but it is maintainable.
Real-World DIY Experience: What This Project Teaches You
The most important experience related to a How to Say Goodbye Brassy Gold Doorknobs DIY project is that the makeover looks simple because the objects are small. That is also the trap. Small hardware makes people assume the project is quick, casual, and impossible to mess up. In reality, a doorknob is one of the most demanding things you can paint because it is curved, handled constantly, and full of tiny moving parts that absolutely do not want to be filled with primer.
Many DIYers start with one hallway knob and immediately discover three lessons. First, removing the hardware is easier than expected. Most interior knobs come apart with a screwdriver and a few minutes of attention. Second, cleaning is more disgusting than expected. Even knobs that look “fine” can leave a gray-brown film on a cleaning cloth. Third, spray paint rewards patience with a professional finish and punishes impatience with drips that look like the knob cried during its makeover.
A practical experience is to create an assembly line. Remove only a manageable group of knobs at a time, especially if you still need doors to close overnight. Label every set of screws and latch parts. Lay the knobs out by room. Take a quick phone photo before removing anything unusual. These tiny habits prevent confusion later, especially when several pieces look almost identical but have slightly different wear patterns or screw lengths.
Another lesson is that lighting matters. A knob may look fully covered from one angle and show a bright gold crescent when rotated. Curved hardware hides missed spots. Spraying from multiple angles solves this, but only if you use light coats. Turn the knob, check the underside, inspect around the rose plate, and look at it in natural light before declaring victory.
The curing stage is where discipline pays off. It is tempting to reinstall everything as soon as the finish looks dry. Do not let excitement boss you around. Fresh paint can dent under screw heads or stick to the door surface if assembled too soon. Letting the pieces rest longer makes the finish feel harder and less vulnerable. A spare bedroom door can wait. Your future chip-free self will thank you.
Finally, the experience teaches realistic expectations. Painted doorknobs can look fantastic and save money, but they are still painted doorknobs. They may need touch-ups over time, especially in busy households. That does not make the project a failure. It simply means you chose a budget-conscious cosmetic upgrade instead of buying new hardware. Done carefully, the transformation can make an entire hallway feel updated for the cost of a few supplies and one afternoon of focused work. That is a pretty satisfying goodbye to brassy gold.
Conclusion
Saying goodbye to brassy gold doorknobs does not require a full renovation, a contractor, or a dramatic speech to your hallway. With the right preparation, metal primer, spray paint, and curing time, you can turn outdated shiny hardware into a cleaner, more modern detail that supports the style of your home.
The secret is not rushing. Remove the knobs, clean them thoroughly, scuff the surface, protect the moving parts, apply thin coats, and wait before reinstalling. Painting doorknobs is not the right answer for every situation, especially damaged or exterior hardware, but for functional interior knobs, it can be a surprisingly powerful DIY upgrade.
Brassy gold had its moment. It served bravely. It opened many doors. But if your home is ready for a fresher look, this DIY project lets you close the door on dated hardwareusing that same door, of course, now with a much better knob.