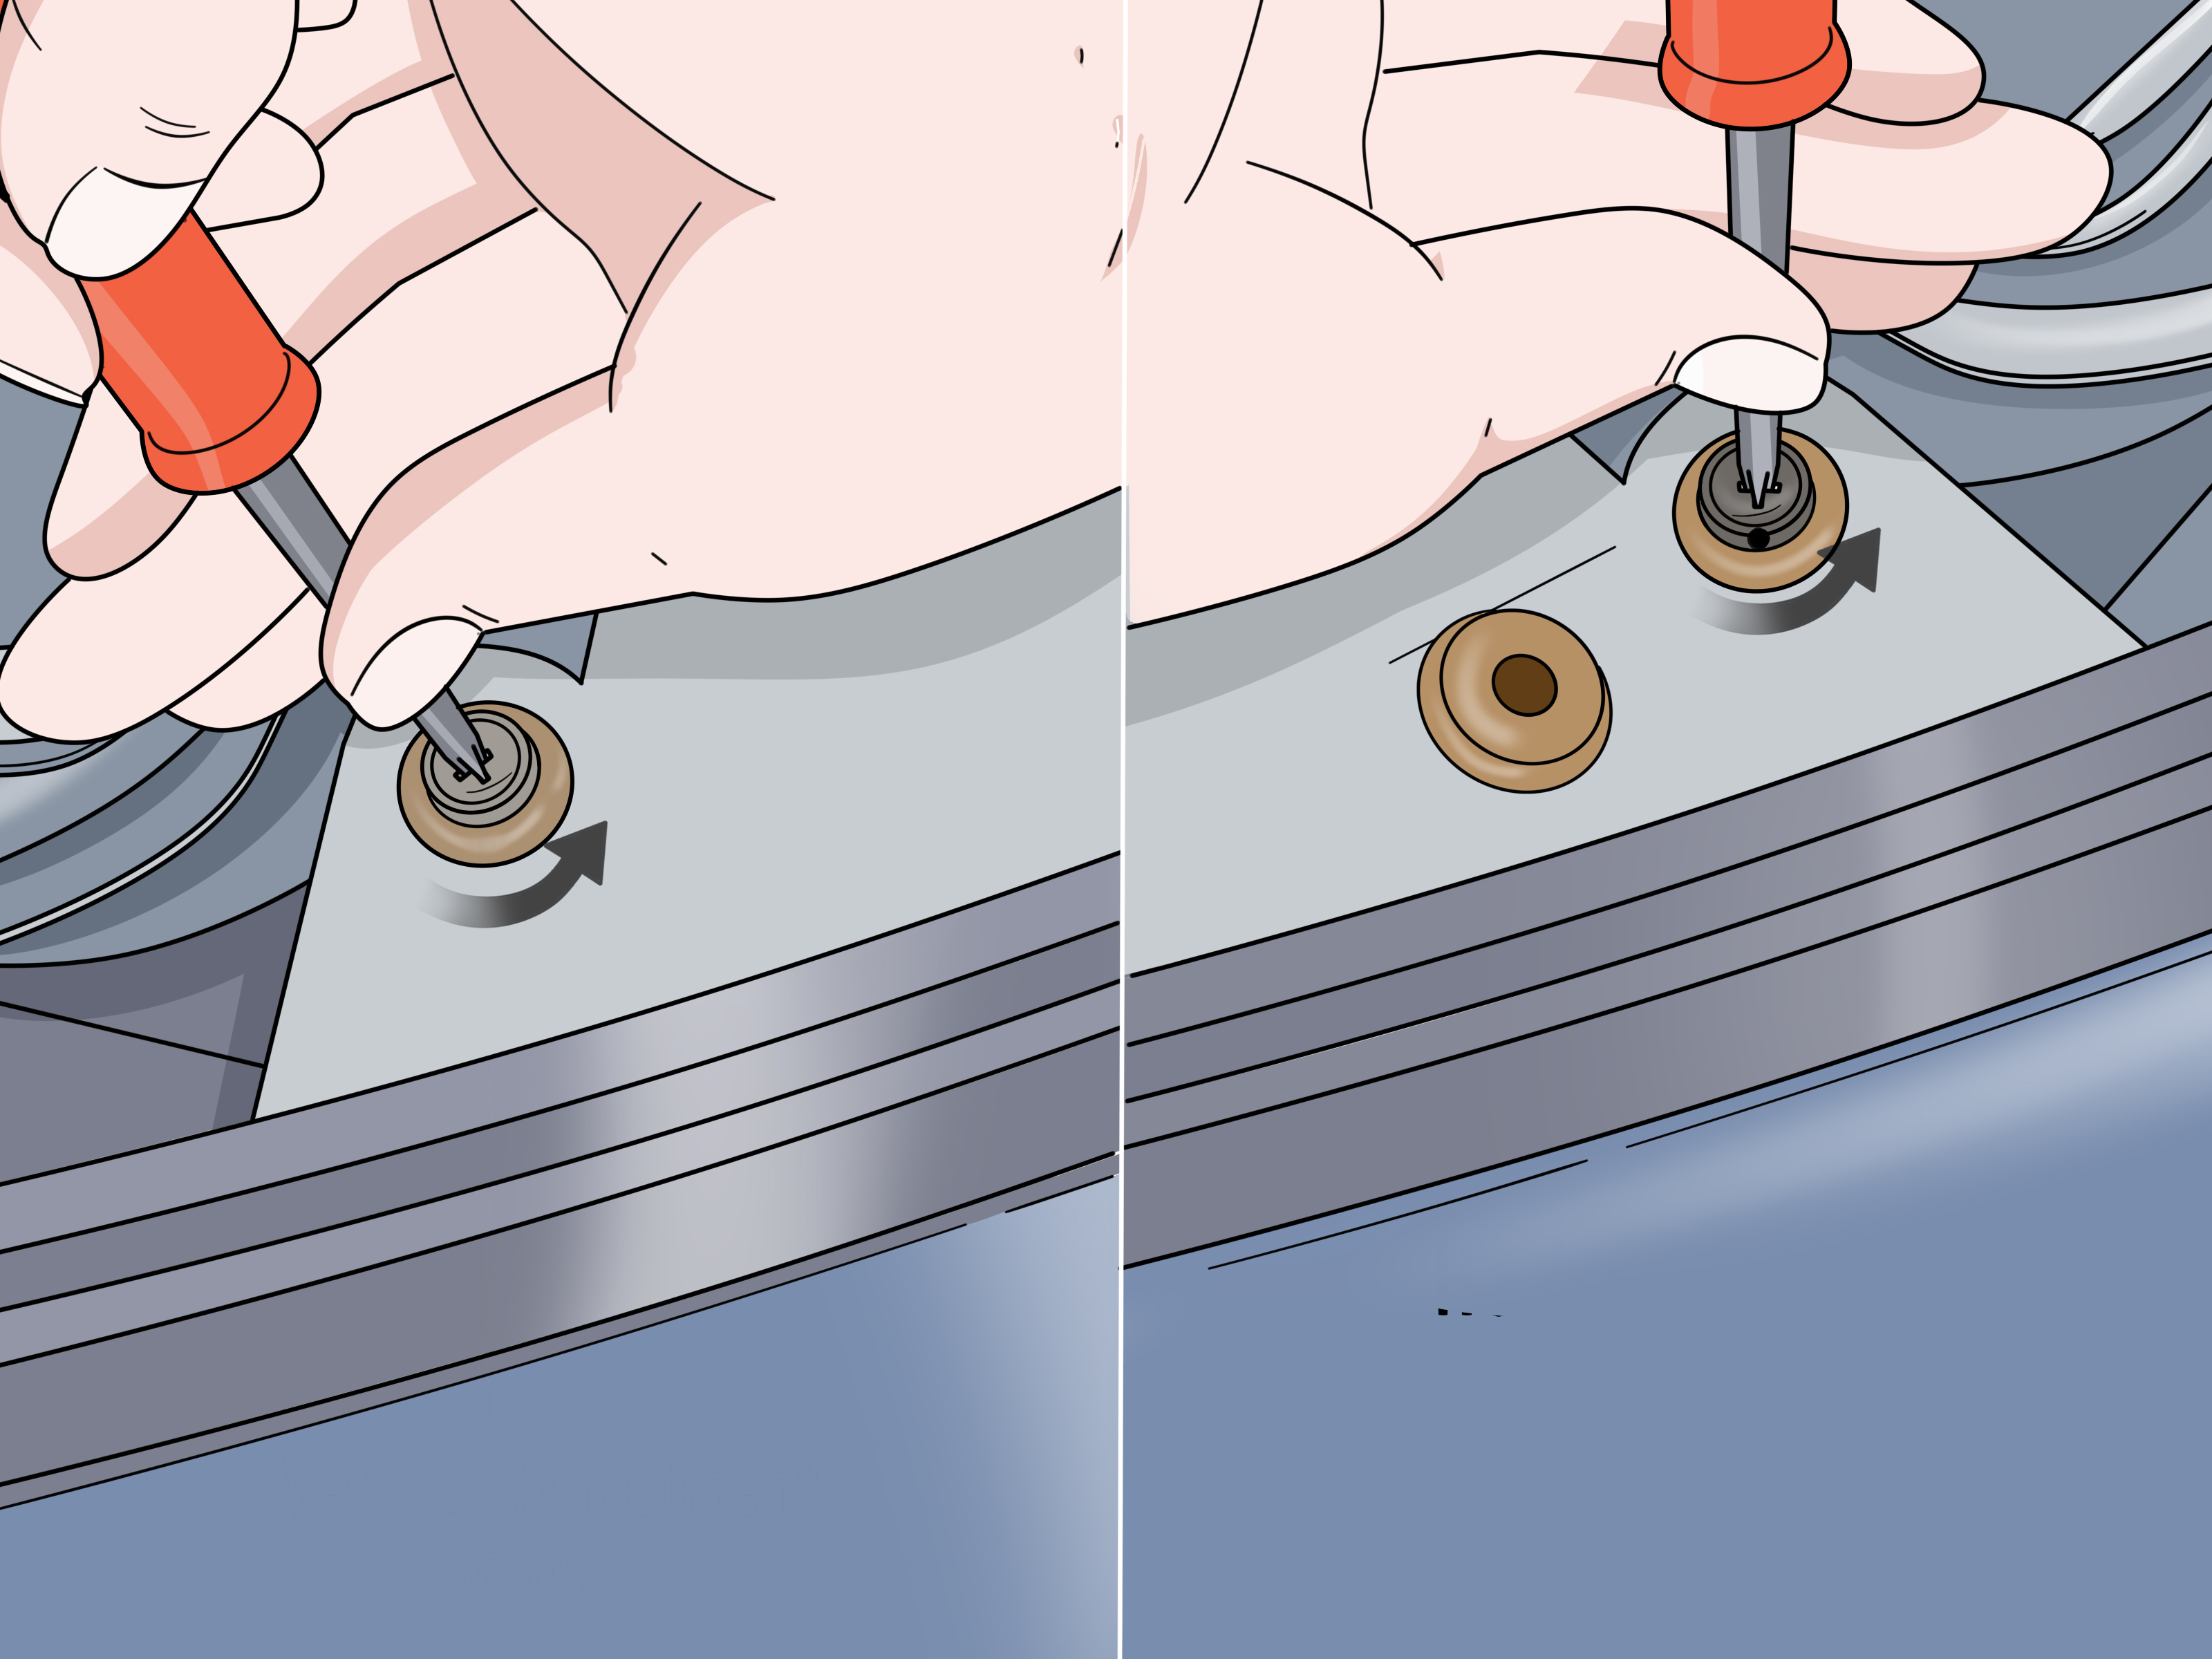
A headlight adjustment screw is a tiny part with a surprisingly important job. When it breaks, strips, seizes, or pops out of its plastic socket, the headlight may point at the pavement, illuminate treetops, or perform an accidental interrogation of every oncoming driver.
Fortunately, many vehicles allow you to replace the damaged headlight adjuster without buying an entire headlamp assembly. The repair usually involves removing the lamp, extracting the old screw or adjuster mechanism, installing a vehicle-specific replacement, and carefully aiming the beam afterward.
The word usually matters. Headlamp designs vary dramatically. Some use a simple threaded screw and plastic nut, while others have captive adjusters that are not intended to be serviced separately. Modern LED, HID, adaptive, and automatic-leveling systems may also require professional calibration.
What Does a Headlight Adjustment Screw Do?
A headlight adjustment screw changes the position of the reflector, projector, or complete lamp housing. Turning the adjuster moves one side of the lighting unit forward or backward, changing the direction in which the beam points.
Depending on the vehicle, the headlight assembly may have:
- One vertical adjustment screw
- Separate vertical and horizontal adjusters
- A geared adjuster operated through an access hole
- A screw connected to a ball-and-socket joint
- A vehicle headlamp aiming device with an indicator or bubble level
- An electronic leveling motor instead of a conventional manual adjuster
Many newer U.S.-spec low-beam headlamps provide only an accessible vertical adjustment. A horizontal adjuster may be fixed, covered, disabled, or unavailable by design. Do not remove a factory cap or alter a sealed horizontal mechanism simply because it looks like something that should turn.
Signs of a Broken Headlight Adjuster
A beam that appears too high or low does not automatically prove that the adjustment screw has failed. Vehicle loading, collision damage, worn suspension components, an incorrectly installed bulb, or a loose mounting bracket can produce similar symptoms.
Common signs of a failed headlight adjustment screw include:
- The adjuster turns, but the beam does not move.
- The screw spins freely without becoming tighter or looser.
- The screw head is rounded, cracked, or missing.
- The headlamp reflector moves or rattles inside the housing.
- The beam suddenly drops after hitting a pothole.
- The lamp cannot hold its adjusted position.
- A plastic gear, retaining clip, or socket is visibly broken.
- The adjuster is heavily corroded and will not rotate.
Before ordering parts, gently hold the headlamp housing and check for movement at its mounting points. Broken mounting tabs can make the beam shake even when the adjustment mechanism is perfectly healthy. Also confirm that the bulb is fully seated. A crooked bulb can create a bizarre beam pattern that no amount of screw turning will cure.
Can You Replace Only the Adjustment Screw?
On many older vehicles and some current models, the answer is yes. Replacement kits may include the threaded rod, plastic nut, gear, clip, socket, or other pieces needed to repair the original mechanism.
Replacing only the failed adjuster can save considerable money compared with purchasing a complete headlight assembly. However, the replacement must match the original design. Thread pitch, rod length, head shape, gear size, socket diameter, and mounting style can all differ.
A random screw from the hardware store is rarely a good substitute. Even if it threads into the housing, it may lack the correct travel, strength, corrosion resistance, or connection to the reflector. Headlamp engineering is not a great place for the “close enough” philosophy.
You may need a complete headlight assembly when:
- The adjuster is permanently molded or sealed into the housing.
- The internal reflector or projector support is broken.
- Multiple mounting tabs are damaged.
- The lens or housing is cracked and leaking.
- The replacement adjuster is not available separately.
- An electronic leveling motor has failed.
- Opening the lamp would destroy its moisture seal.
Tools and Supplies You May Need
The exact tool list depends on the vehicle, but a typical headlight adjuster replacement may require:
- A vehicle-specific replacement adjustment screw or repair kit
- Phillips and flat-blade screwdrivers
- Torx drivers or sockets
- A metric or SAE socket set
- A ratchet with extensions
- Plastic trim-removal tools
- Needle-nose pliers
- A pick or small hook tool
- Masking or painter’s tape
- A tape measure
- A marker
- Safety glasses and gloves
- A work light
- Plastic-safe lubricant, when permitted
- Penetrating oil for exposed metal threads only
Do not soak plastic gears or polycarbonate housings in aggressive solvents. Petroleum-based chemicals can damage certain plastics, seals, coatings, and adhesives. Use only a small amount of a lubricant known to be compatible with the materials in the headlamp.
How to Replace a Headlight Adjustment Screw
1. Identify the Correct Replacement Part
Use the vehicle identification number when possible, especially if the manufacturer offered several headlamp designs during the same model year. Halogen, HID, LED, premium, adaptive, and appearance-package headlights may use entirely different adjusters.
Compare the replacement part with the original before beginning. Check the thread pattern, total length, gear shape, retaining clip, and ball or socket connection. If the parts do not match, stop before dismantling the lamp.
2. Prepare the Vehicle Safely
Park on a flat surface, switch off the lights, remove the key, and allow hot bulbs or modules to cool. Apply the parking brake. If the repair requires disconnecting the headlamp wiring, follow the manufacturer’s battery-disconnection procedure.
HID systems can generate dangerous voltage, and some LED assemblies contain integrated electronic modules. Never probe or disassemble an energized lighting system. When the manual specifies dealer or qualified-technician service, take that warning seriously.
3. Record the Existing Beam Position
If the damaged adjuster still holds the lamp reasonably close to its original position, park the vehicle facing a wall and mark the beam pattern with tape. This will not replace a proper aiming procedure, but it provides a useful reference during reassembly.
You can also photograph the adjuster and measure the amount of exposed thread. If the old screw still rotates, count the turns required to remove it. Installing the new adjuster to approximately the same depth may place the beam near its previous position.
Do not rely on turn counting as the final alignment method. Wear, damaged threads, replacement-part differences, and movement during disassembly can make the original measurement inaccurate.
4. Gain Access to the Headlamp Assembly
Open the hood and locate the headlamp fasteners. On a simple design, removing the assembly may require only two or three bolts. On a less cooperative vehicle, you may need to remove the grille, radiator cover, wheel-well liner, or part of the front bumper cover.
Use a trim tool on plastic clips instead of attacking them with a screwdriver and optimism. Keep bolts and clips organized by location. Some fasteners look identical but have different lengths, and installing a long bolt in the wrong hole can damage nearby components.
Before pulling the lamp forward, check for hidden locating pins or lower brackets. Do not pry aggressively against the fender or painted bumper.
5. Disconnect and Remove the Headlight
Support the assembly while releasing its electrical connectors. Many connectors have locking tabs that must be pressed or lifted before removal. Pull on the connector body, not the wires.
Place the headlamp on a clean, padded work surface with the lens facing upward or protected by a soft towel. A new adjuster is inexpensive. A deeply scratched lens caused by sliding it across concrete is considerably less charming.
6. Examine the Adjustment Mechanism
Determine how the adjustment screw connects to the moving portion of the lamp. Common designs use a threaded plastic block, snap-in socket, metal retaining clip, gear drive, or ball stud.
Inspect the surrounding components closely. If the screw failed because a reflector support or socket cracked, replacing the threaded rod alone will not solve the problem. The new screw needs a solid structure to push and pull against.
Also look for water, condensation, corrosion, loose wiring, and damaged seals. Moisture inside the assembly may indicate a separate housing problem that should be repaired before reinstallation.
7. Remove the Damaged Adjuster
If the screw still turns, rotate it in the removal direction until it unthreads from the plastic nut or bracket. The required direction varies by design, so observe the mechanism rather than assuming every screw follows the same procedure.
If the screw connects through a ball socket, support the reflector or internal bracket while releasing it. Do not pull hard on the reflector. Older plastic becomes brittle, particularly after years of engine heat and ultraviolet exposure.
For a seized metal adjuster, apply a tiny amount of penetrating oil to the exposed metal threads and allow it to work. Avoid contaminating the lens, reflector, bulb, electrical parts, or plastic housing. Work the screw gently in both directions instead of applying one heroic twist that converts a stubborn repair into a broken housing.
A stripped screw head may require locking pliers, a screw extractor, or careful slot cutting. Protect the surrounding plastic and wiring before using rotary tools. Sparks, plastic dust, and headlamp electronics are not ideal roommates.
8. Install the New Adjustment Screw
Transfer any reusable clips, washers, seals, gears, or plastic nuts specified by the repair kit. Start the new adjuster by hand to prevent cross-threading. It should rotate smoothly without excessive force.
Reconnect the ball stud or socket carefully and verify that it fully engages. If the socket will not snap into place with moderate pressure, confirm the part orientation. Forcing an incorrectly positioned joint can break the new component before it completes its first day at work.
Thread the adjuster to roughly the original depth or number of turns. Move it through part of its range while watching the mechanism. The reflector or housing should move steadily without jumping, binding, or disconnecting.
9. Reinstall the Headlamp Assembly
Reconnect the electrical plugs and make sure their locks engage. Position the headlamp on its locating pins and brackets before tightening the mounting bolts.
Tighten fasteners evenly and only to the specified torque. Overtightening can crack plastic mounting ears. Confirm that the lamp sits flush with the grille, bumper, hood, and fender before reinstalling trim panels.
Test the low beams, high beams, turn signals, parking lamps, daytime running lamps, and any adaptive functions that were disturbed.
How to Aim the Headlights After Replacement
A headlight must be aimed after an adjustment screw, internal bracket, or complete housing has been replaced. Improperly aimed low beams can reduce the driver’s useful viewing distance or create glare for other road users.
The vehicle’s service manual is the primary authority because aiming distances and specifications vary. A commonly used visual method involves parking on level ground approximately 20 to 25 feet from a vertical wall, but you should not assume that every vehicle uses the same distance or beam drop.
Prepare the Vehicle for Aiming
- Inflate the tires to the recommended pressures.
- Remove unusual cargo from the trunk or cargo area.
- Keep the fuel level and normal vehicle load within the manual’s instructions.
- Park on a truly level surface perpendicular to the wall.
- Settle the suspension by gently bouncing the vehicle or rolling it forward and backward.
- Clean the headlight lenses.
- Make sure the bulbs are correctly installed.
Mark the Reference Lines
Measure from the ground to the optical center or specified aiming mark on each headlamp. Transfer those measurements to the wall with horizontal tape. Add vertical tape lines corresponding to the centers of the left and right lamps.
Back the vehicle to the distance required by the manual. Switch on the low beams and cover one lamp at a time with an opaque material that will not trap damaging heat.
Adjust the Vertical Aim
Turn the accessible vertical adjustment screw in small increments. Observe the beam cutoff after each adjustment. Many conventional systems place the top of the brightest low-beam cutoff at or slightly below the headlamp centerline. Some procedures specify approximately two inches of drop at 25 feet, while others use a different measurement.
Because beam patterns differ, use the specified cutoff point rather than centering the brightest blob of light. Projector lamps may have a sharp stepped cutoff, while reflector lamps can produce a softer pattern.
Avoid Unauthorized Horizontal Adjustment
Adjust horizontal aim only when the manufacturer provides an approved procedure and accessible mechanism. On many visually aimed U.S. headlamps, horizontal alignment is fixed by the design. A covered or disabled adjuster should not be uncovered merely to make the beam look more symmetrical on a garage door.
Perform a Final Road Check
After the wall adjustment, drive cautiously on a dark, level road. The low beams should illuminate the lane and right-side shoulder without shining into the windows or mirrors of vehicles ahead.
A road check is only a confirmation, not an excuse to aim headlights while driving. If the beam remains uneven, scattered, or difficult to interpret, have the vehicle checked with professional optical aiming equipment.
Common Mistakes to Avoid
Replacing the Screw Without Diagnosing the Housing
A new adjuster cannot stabilize a headlamp with broken mounting tabs, an internally detached reflector, or collision damage. Inspect the complete assembly before ordering parts.
Using the Wrong Adjustment Point
Headlamp housings may contain mounting bolts, bulb retainers, vent caps, leveling motors, and adjustment screws in the same general area. Turning the wrong fastener can loosen the assembly or damage an internal component.
Forcing a Seized Plastic Mechanism
If the adjuster suddenly becomes difficult to rotate, stop. It may have reached the end of its travel, become cross-threaded, or jammed against a broken socket. More torque is not a diagnostic strategy.
Touching Bulb Glass
When removing a halogen bulb, avoid touching its glass with bare fingers. Skin oils can create hot spots and reduce bulb life. Handle it by the base or wear clean gloves.
Skipping the Final Aim
Installing the new screw at the same visible depth as the old one is only a starting point. The beam must still be checked and adjusted under the proper conditions.
Trying to Open a Sealed LED Headlamp
Some modern assemblies are bonded, vented, and calibrated as complete modules. Opening one without an approved repair procedure can create condensation, seal failure, electronic faults, or permanent optical misalignment.
When to Call a Professional
Professional service is the safer choice when the vehicle has adaptive headlights, automatic leveling, matrix or adaptive driving beams, integrated LED modules, suspension-height sensors, collision damage, or a manufacturer-required calibration process.
You should also seek help when:
- The headlamp must be opened to reach the adjuster.
- The bumper removal procedure is beyond your experience.
- The electrical connectors show heat damage or corrosion.
- The beam cutoff cannot be identified.
- The adjuster reaches its limit before the beam is correct.
- A warning message appears after reassembly.
- The lamp changes aim while the vehicle is moving.
A repair shop can also verify the result with dedicated aiming equipment. That is especially valuable when suspension modifications, towing equipment, accident repairs, or replacement housings have changed the vehicle’s normal stance.
Practical Experience: Lessons Learned from Headlight Adjuster Repairs
The most useful lesson from replacing headlight adjustment screws is that the visible screw is not always the actual problem. On one typical older headlamp design, an adjuster appeared to spin freely and seemed obviously stripped. After the lamp was removed, the threaded rod turned out to be intact. The failure was a cracked plastic socket hidden behind the reflector. Replacing only the rod would have produced exactly the same loose beam, along with the exciting opportunity to remove the bumper twice.
That experience makes a thorough inspection more valuable than immediately ordering the cheapest adjuster listed online. Move the housing gently, watch the reflector through the lens, and identify which component is no longer supporting the lamp. A phone camera and flashlight can reveal connections that are difficult to see directly.
Another recurring lesson is to photograph everything before disassembly. A headlamp assembly can have several similar holes, gears, clips, and fasteners. A clear photo showing the original screw depth, clip direction, connector routing, and mounting locations eliminates much of the guesswork later. Counting removal turns is also helpful, provided you treat the number as a rough setup measurement rather than a final aiming specification.
Plastic deserves patience. Headlight components spend years exposed to engine heat, cold weather, vibration, moisture, and sunlight. A retaining clip that flexed easily at the factory may behave like a potato chip fifteen years later. Supporting the surrounding bracket while releasing a socket can prevent a simple adjuster repair from becoming a complete headlamp replacement.
It is also wise to test the mechanism on the workbench. Install the new screw, turn it several rotations in both directions, and verify that the reflector moves smoothly. Discovering a cross-threaded nut or disconnected ball socket while the lamp is on a padded table is mildly annoying. Discovering it after reinstalling the bumper, grille, undertray, and twelve clips is the automotive version of a practical joke.
The aiming stage should never be rushed. A beam can look acceptable from five feet away yet be several inches too high at normal aiming distance. Small movement at the lamp becomes a substantial change farther down the road. Set tire pressures, remove heavy cargo, settle the suspension, and use accurate measurements rather than judging the pattern by eye alone.
Finally, accept that not every adjuster is designed to be repaired separately. A low-cost repair kit is an excellent solution when it matches a serviceable mechanism. It is a poor solution when installation requires cutting open a sealed housing or improvising a connection to a fragile projector bracket. The best repair is not always the one that saves the most parts; it is the one that restores stable, predictable, and correctly aimed illumination.
Replacing a headlight adjustment screw is therefore less about turning one small fastener and more about careful diagnosis, controlled disassembly, correct part selection, and precise beam alignment. Handle those four stages properly, and the repaired headlight should illuminate the road instead of the clouds, the ditch, or an understandably irritated driver in the next lane.