Spray paint stencils are one of those DIY tricks that look wildly impressive but do not require a secret art degree, a professional studio, or the steady hand of a museum restorer. With a clean design, the right stencil material, a sharp blade, and a little patience, you can turn plain wood, canvas, cardboard, furniture, planters, tote bags, signs, and even old storage bins into custom pieces that look intentional instead of “I got bored on Saturday.”
The beauty of learning how to make spray paint stencils is that the process is flexible. You can hand-cut a simple letter stencil from cardstock, make a reusable stencil from Mylar, or use adhesive stencil film for crisp edges on curved or flat surfaces. The goal is simple: create a cutout design, hold it securely against your project surface, spray light coats of paint, and lift the stencil to reveal your artwork. The magic happens in the detailsespecially surface prep, stencil placement, and not blasting paint like you are trying to pressure-wash a driveway.
This easy tutorial walks you through every step, from choosing a design to fixing paint bleed. Whether you are making wall art, a custom sign, a decorative tray, a painted doormat, or a matching set of storage boxes, this guide will help you get clean results without turning your workspace into a foggy rainbow crime scene.
What Is a Spray Paint Stencil?
A spray paint stencil is a sheet of material with a design cut out of it. When you spray paint over the cut areas, the paint passes through the openings and lands on the surface underneath. The uncut parts block the paint, creating a clean pattern, word, logo, border, shape, or image.
Stencils can be one-time-use or reusable. Paper and cardstock are affordable and great for quick crafts, but they can warp if they get too wet with paint. Mylar, acetate, and other plastic stencil films are more durable, easier to clean, and better for repeated projects. Adhesive stencil vinyl or stencil film is excellent when you need the stencil to stick closely to the surface, especially on glass, curved objects, or detailed designs.
Best Materials for DIY Spray Paint Stencils
The best stencil material depends on your project, budget, and whether you want to reuse the stencil later. Here are the most practical options.
Cardstock or Heavy Paper
Cardstock is cheap, easy to find, and simple to cut with a craft knife. It works well for one-time signs, posters, party decorations, cardboard projects, and practice runs. The downside is that it absorbs moisture and may curl if you use too much paint. To stretch its life, lightly seal both sides with clear acrylic spray before using it.
Mylar Stencil Film
Mylar is one of the most popular materials for reusable stencils because it is flexible, durable, and resistant to tearing. It cuts cleanly with a sharp blade or cutting machine and works on wood, walls, canvas, concrete, and furniture. For most DIY projects, 4 mil to 7 mil Mylar is a comfortable thickness: thin enough to cut, sturdy enough to reuse.
Acetate Sheets
Acetate is clear, which makes tracing designs easy. It is useful for simple shapes and lettering, but it may not hold up as long as Mylar if you use strong solvents or clean it roughly. Treat it gently and it will behave.
Adhesive Stencil Film or Vinyl
Adhesive stencil film sticks directly to the surface, which helps reduce paint bleed. It is especially useful for glass, signs, tumblers, smooth wood, canvas, and curved surfaces. It usually works best as a single-use stencil, but the crisp lines can be worth it.
Freezer Paper
Freezer paper can work for fabric projects because the shiny side can be lightly pressed onto fabric with an iron. However, for spray paint, test first and keep coats very light. It is not as durable as Mylar, but it can be useful for quick textile experiments.
Tools and Supplies You Will Need
Gather your materials before you start. Nothing ruins creative momentum faster than realizing your only cutting surface is a beloved dining table. Please do not sacrifice the table.
- Stencil material: Mylar, cardstock, acetate, or adhesive stencil film
- Printed design, drawing, or digital file
- Craft knife or precision utility knife
- Cutting mat
- Painter’s tape or low-tack masking tape
- Temporary spray adhesive, optional but helpful
- Spray paint suitable for your surface
- Drop cloth, cardboard, or newspaper for overspray protection
- Gloves and eye protection
- Respirator or painting mask, especially for larger projects
- Ruler, pencil, and level for alignment
- Scrap cardboard or test board
- Clear sealer or topcoat, if the project needs protection
Step 1: Choose a Stencil-Friendly Design
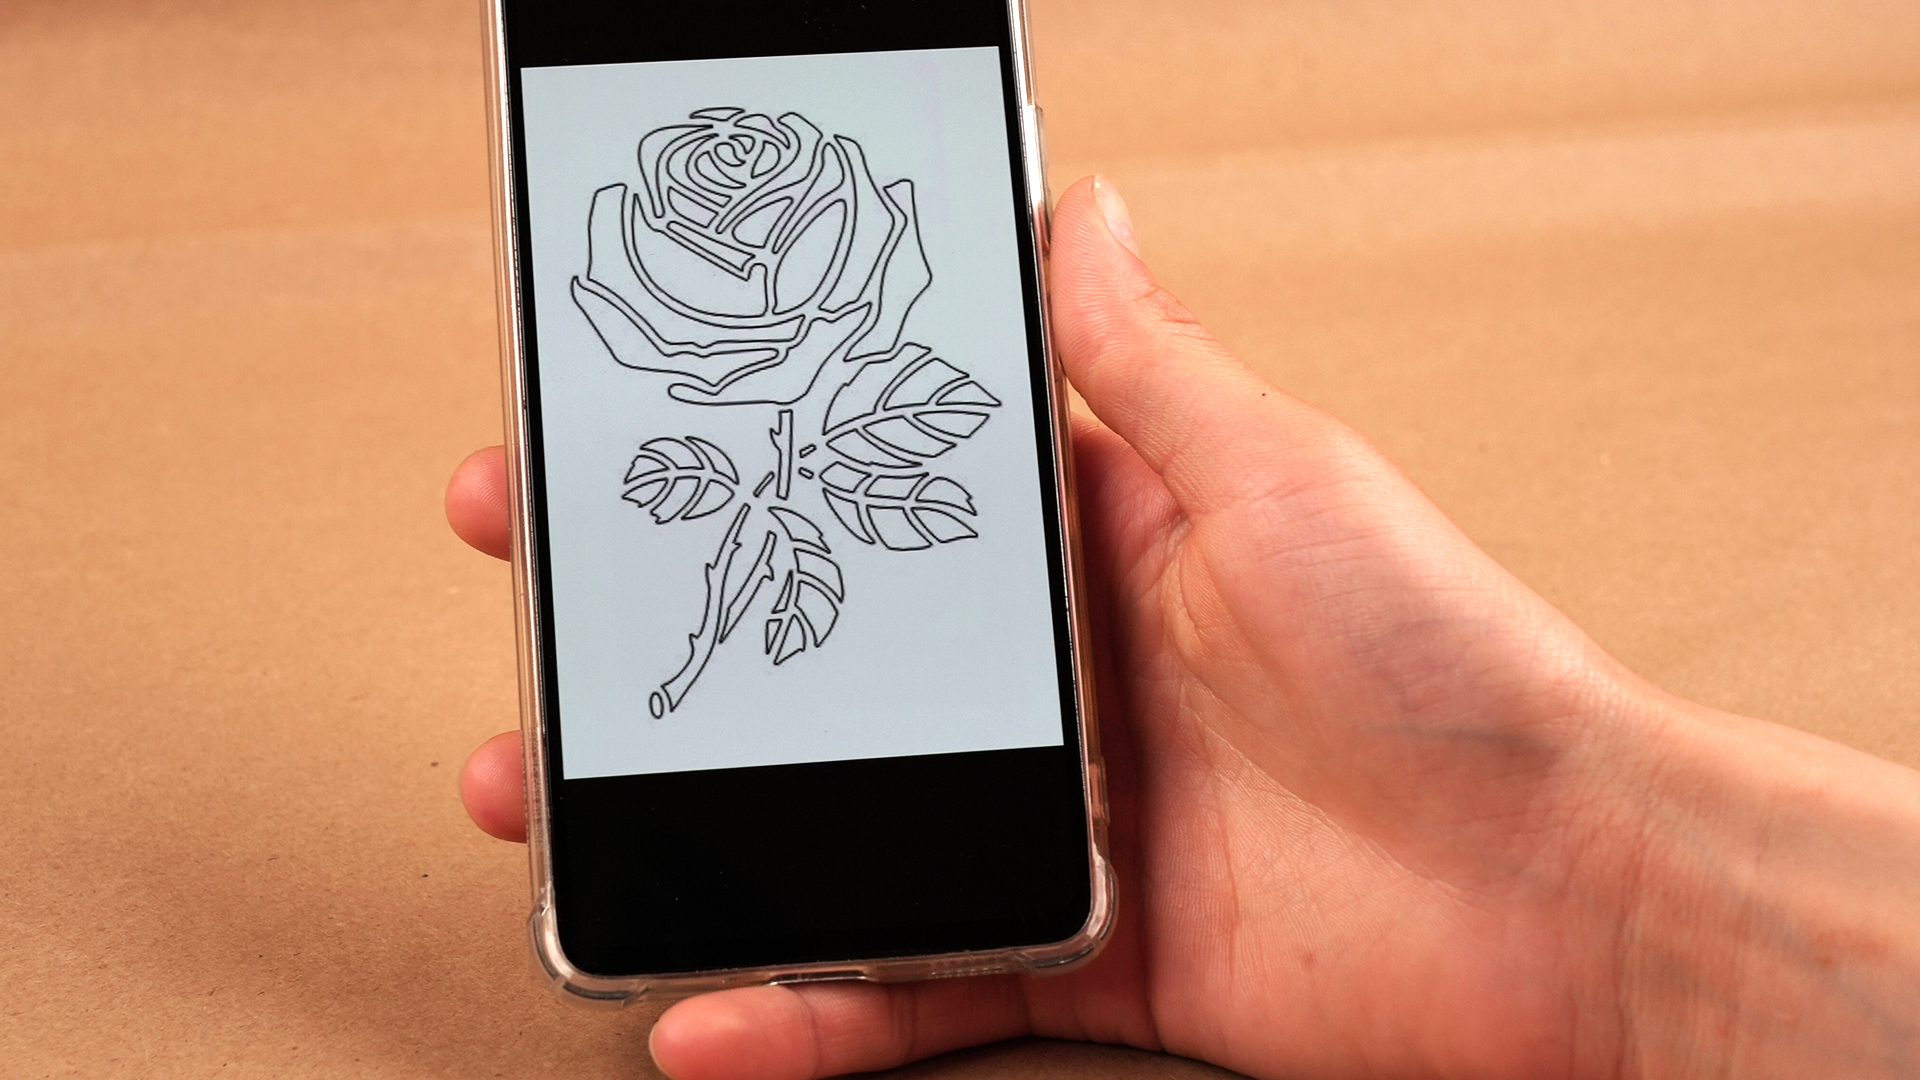
Start with a design that will survive being cut into a stencil. Bold shapes, simple letters, silhouettes, geometric patterns, icons, and thick-line illustrations are much easier than tiny details. A stencil needs “bridges,” which are small connecting pieces that hold the inside parts of letters and shapes in place. Without bridges, the center of letters like O, A, D, P, R, and B will fall out. That is not a tragedy, but it does turn your elegant sign into alphabet soup.
If you are making a word stencil, choose a stencil font or a bold sans-serif font. If you are making a picture stencil, convert the image into a high-contrast black-and-white design. For beginners, avoid hair-thin lines, tiny dots, and complicated portraits. Start with something friendly, such as a leaf, star, house number, name, border, checkerboard, mountain outline, or simple floral motif.
Step 2: Size and Print the Design
Measure the surface you plan to paint. A stencil that looks perfect on a computer screen may be too large for a flowerpot or too tiny for a wall sign. Print the design at the exact size you want. For large designs, use poster-print settings or split the image across several pages and tape them together.
Before cutting your final stencil, place the printed design on your project surface to check proportion and placement. Step back and look at it from a normal viewing distance. This simple test can prevent the classic DIY problem known as “beautiful design, weird location.”
Step 3: Transfer the Design to Your Stencil Material
If you are using clear Mylar or acetate, place the stencil sheet over your printed design and tape both to the cutting mat. Trace the design with a fine-tip marker. If you are using cardstock, tape the printed design directly over the cardstock and cut through both layers, or use transfer paper to trace the design.
For adhesive stencil film, you may use a cutting machine or hand-cut the design. If using a cutting machine, follow the material settings recommended for your machine and test a small shape first. If hand-cutting, keep the film flat and avoid stretching it while you work.
Step 4: Cut the Stencil Carefully
Use a sharp craft knife and a cutting mat. Dull blades drag, snag, and make ragged edges. For clean cuts, rotate the stencil material instead of twisting your wrist into strange positions. Cut slowly around curves and use a ruler for straight lines.
Work from the smallest details outward. If you cut the large sections first, the sheet may lose stability, making smaller cuts harder. Keep bridges intact and do not rush. A good stencil is not made with panic energy.
After cutting, gently lift the loose pieces. If an area does not release easily, do not yank it. Cut the stubborn spot again with the knife. Tugging can tear the stencil or stretch the edges, especially with thinner plastic films.
Step 5: Prepare the Surface
Clean, dry surfaces produce better stencil results. Dust, oil, wax, and grime can prevent paint from sticking evenly. For wood, sand rough spots and wipe away dust. For metal or plastic, use a cleaner appropriate for the material and allow it to dry fully. For glass, remove fingerprints and residue. For fabric, wash and dry it first if possible, but skip fabric softener because it can interfere with paint adhesion.
If your surface is slick, porous, or uneven, primer may help. Bare wood, metal, and some plastics often benefit from a compatible primer. Concrete, tile, and furniture may need extra prep depending on the finish. The smoother and cleaner the base, the sharper your stencil will look.
Step 6: Secure the Stencil
Position the stencil where you want it. Use painter’s tape around the edges, making sure the tape does not cover any cutout areas. For extra control, lightly mist the back of the stencil with temporary spray adhesive, wait until it becomes tacky, and press it into place. Do not soak the stencil with adhesive; you want “friendly handshake,” not “forever commitment.”
On textured surfaces, press the stencil down as much as possible around the cut edges. A stencil brush, scraper, or clean cloth can help burnish adhesive stencil film. If you are working on a repeating pattern, mark light guide points with pencil or tape so the next placement lines up correctly.
Step 7: Protect Against Overspray
Spray paint travels farther than you think. Cover the surrounding area with a drop cloth, cardboard, or paper. If you are painting a small object, place it inside a large cardboard box turned on its side to create a simple spray booth. This helps catch overspray and keeps the project from decorating nearby objects that did not volunteer.
Work outdoors or in a very well-ventilated space, such as an open garage. Avoid windy conditions because wind can blow paint under the stencil or across your workspace. Also avoid dusty conditions, because dust loves wet paint the way glitter loves every surface in the universe.
Step 8: Spray Light Coats
Shake the spray paint can according to the label directions. Hold the can several inches from the surface, usually around 8 to 12 inches depending on the paint and project. Start spraying slightly off the stencil, move across in a smooth motion, and release after passing the design. This prevents heavy paint spots at the beginning and end of each pass.
Use several light coats instead of one heavy coat. Heavy spraying is the main cause of drips, fuzzy edges, and paint bleeding under the stencil. Let each coat flash off for a few minutes before applying the next. Your first coat may look too light. That is fine. A light first coat acts almost like a seal and helps the next coat build color without flooding the edges.
Step 9: Remove the Stencil at the Right Time
For many projects, remove the stencil while the paint is still slightly wet or just tacky, especially if the paint forms a film that could peel later. Lift from one corner slowly and evenly. Pulling straight up usually works better than sliding the stencil sideways.
If you used adhesive stencil film, peel it back at a low angle. If small pieces remain inside letters or shapes, remove them carefully with tweezers or a weeding tool. Let the painted design dry fully before touching, sealing, stacking, or showing it off to everyone within a 50-foot radius.
Step 10: Seal the Finished Design
Not every stencil project needs a sealer, but many do. If the piece will be handled often, used outdoors, cleaned regularly, or exposed to moisture, apply a compatible clear coat after the paint has fully cured. Wood signs, trays, furniture, planters, and floor projects often benefit from a protective topcoat.
Choose the finish based on the look you want: matte for a subtle modern finish, satin for a soft sheen, or gloss for extra shine. Always test your sealer on a scrap piece first, especially over metallic, neon, or specialty spray paints.
Common Spray Paint Stencil Mistakes and How to Fix Them
Paint Bleed
Paint bleed happens when paint creeps under the stencil edges. To prevent it, use less paint, secure the stencil more firmly, try temporary adhesive, and spray from directly above instead of at a sharp angle. If bleeding happens, let the paint dry, then touch up the edges with the base color and a small brush.
Fuzzy Edges
Fuzzy edges usually mean the stencil was not flat against the surface or the spray was too heavy. Use lighter coats and press the stencil down around detailed areas. Adhesive stencil film can help with crisp lines.
Drips
Drips mean too much paint landed too quickly. Let the drip dry completely, sand lightly if the surface allows, and repaint in thin coats. Trying to wipe wet drips often makes the problem bigger, shinier, and more dramatic.
Stencil Shifting
If the stencil moves while painting, your design may look blurry. Tape more securely, use spray adhesive, or hold small areas down with gloved fingers outside the paint path. For repeating patterns, let each section dry before moving the stencil to the next spot.
Creative Spray Paint Stencil Ideas
Once you understand the basic stencil method, you can customize almost anything you are allowed to paint. Here are practical ideas that work well for beginners and intermediate DIYers.
- Custom wooden signs: Paint house numbers, family names, garden labels, or workshop signs.
- Canvas wall art: Use geometric shapes, botanical silhouettes, or layered colors.
- Storage bins: Add labels like “Tools,” “Toys,” “Crafts,” or “Why Do I Own This?”
- Furniture accents: Stencil drawer fronts, tabletops, chair seats, or cabinet panels.
- Planters: Add stripes, leaf patterns, initials, or modern abstract shapes.
- Fabric projects: Use fabric-safe spray paint for tote bags, banners, or pillow covers.
- Floor or patio designs: Use durable exterior paint and seal properly for longer wear.
Safety Tips for Spray Painting Stencils
Spray paint is useful, but it should be handled with care. Work outdoors whenever possible or use a space with strong ventilation. Keep paint away from flames, sparks, heaters, and cigarettes. Wear gloves, protect your eyes, and consider a respirator or painting mask, especially for larger projects.
Read the paint label before use. Temperature and humidity matter because they affect drying, adhesion, and finish quality. Many spray paints perform best in mild temperatures with low to moderate humidity. Avoid spraying in strong wind, dusty areas, or direct harsh sunlight. Store cans safely and never puncture or burn aerosol containers.
Also, use stencils only on surfaces you own or have permission to decorate. DIY art is wonderful. Surprise-painting someone else’s property is not a craft project; it is a fast way to make a very awkward phone call.
Pro Tips for Cleaner, Sharper Stencil Results
Practice on scrap material before painting the final surface. This helps you test the paint, distance, color intensity, and stencil hold. If your design has fine details, spray from straight above rather than from the side. Side spraying can push paint under the stencil.
For multi-color stencils, let each color dry before applying the next layer. Use registration markstiny guide marks outside the design areato line up different stencil layers. For repeating patterns, clean paint buildup from the stencil every few uses so the edges stay sharp.
If using cardstock, keep it as dry as possible. Spray very light coats and avoid soaking the paper. If using Mylar, clean it gently after the paint dries or while the paint is still workable, depending on the paint type. Do not scrape aggressively or you may damage small bridges.
Extra Experience Notes: What Actually Helps When Making Spray Paint Stencils
After making several spray paint stencils for signs, storage labels, small furniture pieces, and decorative wall art, one lesson becomes clear: the stencil itself is only half the project. The other half is control. The best results usually come from slowing down at the boring stagesmeasuring, taping, testing, and waiting. Nobody wants to hear that patience is a tool, but unfortunately, patience keeps showing up to the job site wearing safety glasses.
One helpful experience is to always test the stencil on scrap cardboard before using it on the final item. Even if the stencil looks perfect, the first spray often reveals surprises. A bridge may be too thin, a letter may not read clearly, or the spray paint may be too watery for tiny details. A test spray tells you whether to hold the can farther away, apply a lighter coat, or reinforce a weak area with tape.
Another real-world tip is to avoid designs that are too detailed for the project size. A complex floral pattern may look beautiful on a full wall but turn into a blob on a four-inch coaster. Small stencils need bold shapes. Large stencils can handle more detail. When in doubt, simplify the design. Clean and readable almost always beats complicated and muddy.
Temporary spray adhesive can be a game changer, especially on wood, canvas, and slightly textured surfaces. However, too much adhesive creates a sticky mess. A very light mist on the back of the stencil is usually enough. Let it sit briefly until tacky, then press it down. If adhesive transfers to the project surface, you used too much or sprayed too close.
Paint distance also matters more than beginners expect. Holding the can too close creates puddles and hard blasts of paint that force their way under the stencil. Holding it too far away can make the paint dry in the air and land with a dusty texture. A comfortable middle distance with smooth side-to-side motion gives the best finish. Think gentle mist, not bug spray attack mode.
For reusable stencils, Mylar is worth the upgrade. Cardstock is fine for one quick project, but Mylar stays flatter, cleans better, and handles repeated use. If you plan to stencil several signs, drawers, bins, or gift items, reusable film saves time and frustration. Store finished stencils flat in a folder or between pieces of cardboard so they do not bend.
The biggest beginner mistake is removing the stencil too aggressively. Lift it slowly, starting from one corner, and keep your hands steady. If paint has built up around delicate areas, rushing can smear the design. For adhesive stencil film, peeling at a low angle gives better control and helps prevent the fresh paint from lifting.
Finally, remember that tiny imperfections often disappear once the piece is finished and placed where it belongs. A slightly soft edge on a planter or storage crate is rarely noticeable from normal viewing distance. DIY projects are allowed to look handmade. That is part of their charm. The goal is not machine-perfect sterility; the goal is a clean, attractive design that makes a plain object feel personal, useful, and a little more fun.
Conclusion
Making spray paint stencils is an easy, affordable way to customize your home, craft projects, gifts, and décor. The process is simple: choose a stencil-friendly design, cut it from the right material, prepare your surface, secure the stencil, spray light coats, and lift carefully. The difference between messy and professional-looking results usually comes down to prep, patience, and paint control.
If you are new to stencil making, start small. Try a bold shape on cardboard, a simple label on a storage bin, or a one-color design on scrap wood. Once you understand how the paint behaves, you can move on to layered designs, repeating patterns, furniture accents, and larger wall art. With a little practice, your DIY spray paint stencils can turn ordinary surfaces into custom pieces that look polished, creative, and completely your own.