A DIY dog bandana turns a small piece of fabric into instant personality. It can brighten a walk, catch a little drool, and make your dog look suspiciously more put-together than the rest of the household. Better yet, this is a beginner-friendly project: no advanced pattern drafting, no expensive supplies, and no need for a dog willing to model for longer than seven seconds.
This guide explains how to make a no-sew dog bandana, a lined reversible version, and an over-the-collar design. You will also learn how to size it, choose comfortable fabric, and keep the finished accessory safe for supervised wear.
Why Make a DIY Dog Bandana?
Making your own dog bandana gives you control over the fabric, print, fit, and finish. That is useful when your dog is shaped like a dainty noodle, a compact meatball, or a majestic sofa with legs. You can make a soft everyday bandana from cotton, create seasonal styles, or upcycle a clean shirt that has retired from human duty.
It is also an excellent first sewing project. The cuts are simple, the seams are short, and a bandana does not need to fit a human waistlinean immediate reduction in craft-related drama.
Choose Your Dog Bandana Style
Classic Tie-On Dog Bandana
The traditional triangle ties behind the neck. It is quick to make and easy to adjust for a photo session or calm, supervised wear.
No-Sew Dog Bandana
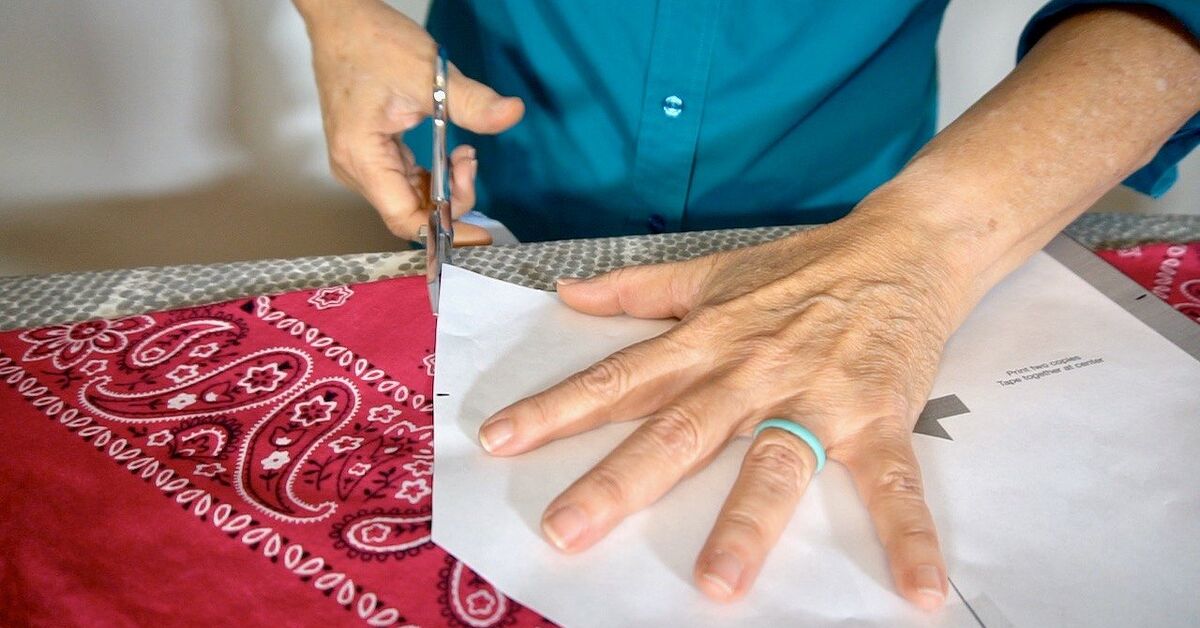
Cut a square, trim it with pinking shears, fold it into a triangle, and tie it loosely. This is ideal for a last-minute outfit, though raw edges may fray after repeated washing.
Reversible Dog Bandana
A lined version has two usable sides, a clean finish, and better durability. Pair a cheerful print with a solid color and flip it whenever your dog’s mood changes from trail guide to snack inspector.
Over-the-Collar Dog Bandana
This style has a fabric channel at the top so an existing collar slides through it. It avoids an extra neck knot and tends to stay in place better on active dogs.
Materials and Tools
- Lightweight cotton, quilting cotton, flannel, or a soft cotton blend
- Fabric scissors or pinking shears
- Measuring tape, or string and a ruler
- Iron, pins or clips, and thread
- A sewing machine or hand-sewing needle for sewn styles
Breathable, washable cotton is usually the easiest fabric to cut, sew, and clean. Skip stiff upholstery fabric, loose fringe, dangling charms, glitter that sheds, or anything a determined chewer might consider an appetizer. Flat, simple details are best.
How to Measure Your Dog for a Bandana
Measure around the widest part of your dog’s neck with a soft tape. You should be able to slide two fingers between the finished bandana and the neck. For a tie-on design, the long edge of the triangle must be longer than the neck measurement so there is room for a loose knot.
As a starting point, add about 10 inches of tie room for small dogs, 12 to 14 inches for medium dogs, and at least 16 inches for large dogs. When in doubt, test with paper or scrap fabric first. Five minutes of testing can prevent a bandana that fits only a very patient houseplant.
| Dog Size | Starting Fabric Square |
|---|---|
| Extra small | 14 x 14 inches |
| Small | 18 x 18 inches |
| Medium | 22 x 22 inches |
| Large | 26 x 26 inches |
| Extra large | 30 x 30 inches |
These are starting points, not sacred textile law. Neck size, coat thickness, and desired tie length all affect the final fit.
How to Make a No-Sew Dog Bandana
- Cut a fabric square. Use the size chart or a custom measurement.
- Trim the edges. Use pinking shears around all four sides to help reduce fraying.
- Fold diagonally. The square becomes a triangle, with the longest edge resting along the neck.
- Tie and check. Place the long edge at the front, cross the ends behind the neck, and tie one loose, flat knot. Do not use a tight double knot that requires an escape room to remove.
- Adjust the drop. Roll the top edge down once or twice if the point hangs too low on the chest.
That is the whole no-sew dog bandana. It is perfect for a birthday photo, a holiday event, or an excellent fabric remnant that deserves better than life in a drawer.
How to Sew a Reversible Dog Bandana
A reversible dog bandana looks polished and is more durable for regular use. Choose two coordinating cotton fabrics, such as plaid and a solid, or florals and stripes.
- Cut two matching squares. Use your chosen size and cut each square diagonally to create two identical triangles.
- Place right sides together. Align the edges, then pin or clip around the perimeter.
- Sew the perimeter. Use a 1/4-inch seam allowance and leave a 3-inch opening along a short edge.
- Turn it right side out. Clip the sharp point carefully, turn through the opening, and use a blunt tool to shape the point.
- Press and topstitch. Tuck the opening inward, press the triangle flat, and stitch close to the edge all the way around.
Inspect your finished bandana and remove loose threads before your dog wears it. The goal is soft and tidy, not a mobile treasure hunt for a curious mouth.
How to Make an Over-the-Collar Dog Bandana
For this design, make the reversible triangle, then create a fabric tunnel across the top. The collar slides through the tunnel, while the bandana remains a removable outfit upgrade.
- Make the reversible triangle, leaving the long top edge about 2 1/2 inches longer than a tie-on version.
- Fold the long top edge down 1/2 inch and press. Fold it down again to form a collar channel.
- For a 1-inch collar, aim for a finished channel about 1 1/2 inches wide. Stitch across the folded edge, leaving both side openings clear.
- Slide the collar through the channel, fasten it normally, and make sure the fabric lies flat around the buckle and ID tag.
The channel should be slightly wider than the collar. Too tight causes bunching; wildly oversized lets the bandana wander around as though it is searching for better Wi-Fi.
Dog Bandana Safety Comes First
A bandana is an accessory, not a collar, harness, leash attachment, or superhero cape. Never clip a leash to it. Remove it for unsupervised time, crating, rough play, swimming, and sleep. Even a well-made bandana can catch on furniture, snag a toenail during scratching, or become a chewing project.
After putting it on, watch for scratching, pawing, stiffness, rubbing, overheating, or attempts to pull it off. Remove it if your dog seems uncomfortable. Wash it whenever it is dirty or damp, and avoid perfumes, essential oils, or heavily scented treatments on the fabric. Simple and clean is excellent when something sits close to a dog’s skin and nose.
Use extra caution with puppies, very small dogs, dogs with sensitive skin or breathing concerns, and dogs that chew fabric. A short photo session may be a better choice than all-day wear. Fashion is optional; comfort is not.
Easy Personalization Ideas
- Use holiday, floral, beach, or team-color prints.
- Make one side playful and the other neutral for everyday wear.
- Add a small, securely stitched initial away from the neck area.
- Use matching fabric for a poop-bag pouch, bow tie, or human scrunchie.
- Upcycle clean cotton shirts, pillowcases, or fabric napkins.
Avoid bells, buttons, beads, and dangling patches. They may look charming on a craft table, but your dog does not need wearable snack hazards.
Quick Fixes for Common Problems
The Bandana Is Too Long
Roll the top edge down before tying it, or trim and resew the triangle. The point should not interfere with walking, eating, or drinking.
The Knot Slips
Choose textured cotton instead of slick satin, use a flat knot, and check it often. For frequent wear, make an over-the-collar dog bandana.
Your Dog Dislikes It
Do not force the issue. Try short, cheerful sessions with praise and a treat, then remove it. Some dogs adore accessories; others consider them a personal insult. Your dog gets a vote.
Experience and Lessons From Making Dog Bandanas
The first lesson most people learn while making dog bandanas is that measuring is less glamorous than choosing fabric, but it is the difference between “adorable” and “why is this dog wearing a picnic tablecloth?” A bright print can distract from a slightly crooked seam; it cannot rescue a bandana that is too tight, too long, or constantly spinning around the neck. Taking a calm measurement before cutting fabric makes every later step easier. It also helps to measure the dog on a normal day, not immediately after a dramatic zoomie session when everyone involved is breathing hard and making questionable choices.
The next lesson is that fabric behavior matters. Quilting cotton is popular because it presses neatly and holds a crisp triangular shape, while flannel feels softer but can look bulkier around a small neck. Lightweight cotton shirts make excellent upcycling material, though they may stretch a little on the bias. A practical approach is to make one test bandana from scrap fabric first. Put it on the dog for a supervised minute, observe where it lands on the chest, and adjust the pattern before cutting your favorite print. This tiny rehearsal prevents the heartbreak of turning your limited-edition taco fabric into a bandana for a dog approximately three times larger than your own.
Many makers also discover that the dog’s personality influences the best design. A relaxed dog may tolerate a classic tie-on triangle beautifully for photos or short walks. A wiggly dog who races through bushes, rolls in grass, and treats every shrub as a suspicious neighbor usually does better with an over-the-collar bandana. The collar channel keeps the fabric from untwisting as easily, but it still needs supervision and regular checks. No design is immune to mud, fur, drool, or the mysterious power of a dog to find the one wet patch in an otherwise dry park.
There is a rewarding rhythm to making several bandanas at once. Once the pattern is chosen, cutting three or four coordinated pieces takes only a little longer than cutting one. Batch sewing makes it easy to create a rotation for laundry day, seasonal events, and those moments when your dog somehow needs a fresh outfit because guests are coming over. It also lets you improve with each piece: the first may have a slightly lopsided point, the second may have better topstitching, and by the third you may begin speaking confidently about seam allowances as though you host a very small but prestigious fashion show.
The most useful experience, though, is learning to keep the project centered on the dog rather than the photograph. A bandana should be a lightweight, optional accessory. The best result is one your dog can wear comfortably for a short, supervised period without rubbing, chewing, overheating, or trying to escape it. When the fit is right and the fabric feels soft, a handmade dog bandana becomes more than a cute craft. It is a modest, practical item made with attentionand your dog gets to look delightfully overqualified for a walk around the block.
Final Thoughts
Learning how to make a dog bandana is a quick, useful project that combines beginner-friendly sewing with maximum canine charm. Start with breathable fabric, measure carefully, choose a style that matches your dog’s activity level, and keep safety ahead of style. Whether you make a five-minute no-sew triangle or a polished reversible over-the-collar design, the goal is the same: a comfortable accessory that lets your dog look excellent without having to do any actual work. Frankly, they have already mastered that part.