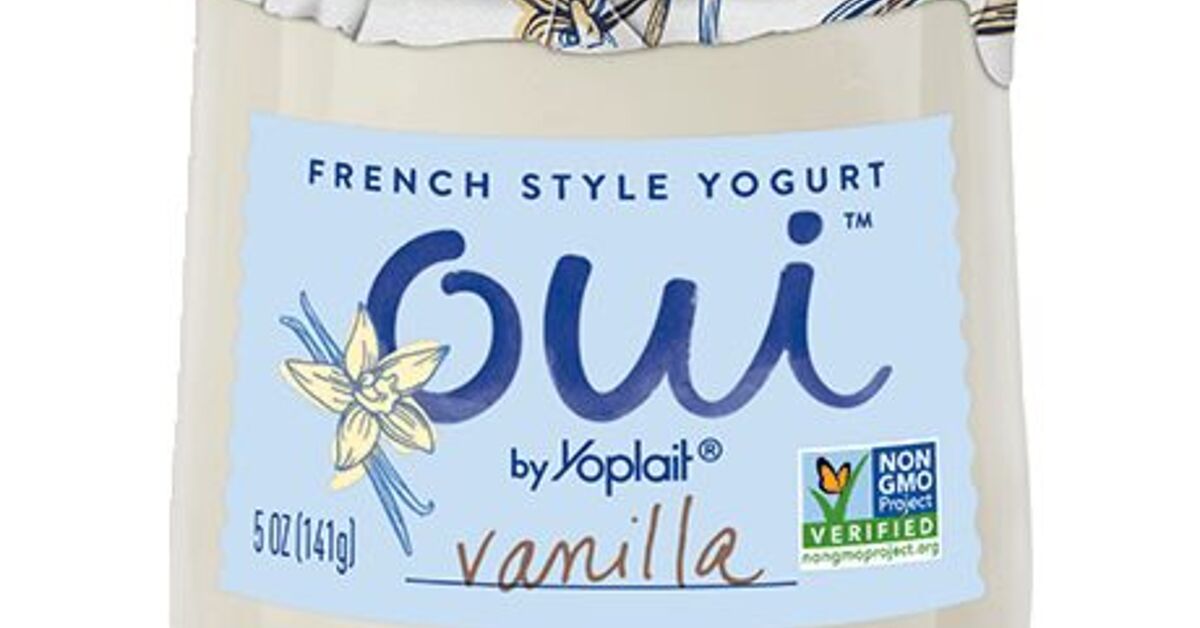
If you have ever finished a little glass pot of Oui yogurt and thought, “This jar is way too cute to throw away,” congratulations: you have officially entered the glamorous world of DIY Oui yogurt jar projects. It starts innocently. You save one jar. Then two. Then suddenly you have a tiny glass army on your counter waiting for a second life like they just got cast in a home décor makeover show.
The good news is that these jars are actually perfect for upcycling. They are compact, sturdy, charmingly minimal, and easy to turn into something useful. A Oui yogurt jar craft can become a mini planter, a frosted candle holder, a bathroom organizer, a party favor, a gift jar, or a decorative catch-all for all the mysterious little objects that appear in every home like bobby pins and rogue paper clips.
In this guide, you will learn exactly how to make a DIY Oui yogurt jar project from start to finish, including how to clean the jar properly, decorate it without making it look like a kindergarten glue emergency, and turn it into a stylish piece you will actually want to keep on display. Even better, this project is budget-friendly, beginner-friendly, and satisfying in the very specific way that only turning “trash” into “Wait, you made that?” can be.
Why Oui Yogurt Jars Are So Good for DIY
Not all food containers deserve a glamorous second act. Some are destined for the recycling bin and should go there with dignity. But Oui yogurt jars are different. They have the kind of clean, simple shape that works in almost any style of home, whether your vibe is modern, farmhouse, cottagecore, boho, or “I just want my bathroom counter to look less chaotic.”
Here is why they work so well for an upcycled glass jar project:
- The glass is sturdy and attractive. It already looks more like a tiny vase than a throwaway food container.
- The size is versatile. Small enough for shelves and windowsills, but large enough to be useful.
- The shape is easy to decorate. Paint, twine, labels, decoupage, and frosted finishes all sit nicely on it.
- It suits multiple uses. One decorated jar can become a planter, luminary, vanity organizer, favor jar, or gift container.
- It supports low-waste crafting. Reusing what you already have is always more satisfying than buying a “rustic glass jar” online for five times the price of yogurt.
That last point matters. One of the nicest things about a DIY glass jar project is that it feels creative without being wasteful. You are not starting with a blank shopping list. You are starting with something already in your kitchen.
Choose the Style of Project Before You Start
The smartest way to approach this project is to decide what you want the finished jar to become before you decorate it. That affects everything from the paint finish to the filler you use to the kind of embellishments that make sense.
1. Mini Succulent Planter
This is one of the most popular Oui yogurt jar ideas because the scale works beautifully for small succulents, cactus starts, or tiny herbs. It looks sweet on a desk, kitchen shelf, or windowsill.
2. Candle Holder or Luminary
A frosted or sea-glass finish turns the jar into a chic little light accent. If you want the easiest and safest version, use a battery tea light. If you plan to make an actual candle, use proper candle-making materials and treat the project with real safety rules, not “it will probably be fine” energy.
3. Vanity or Desk Organizer
These jars are excellent for cotton swabs, hair ties, clips, pens, binder clips, makeup brushes, and other small items that love to scatter themselves around your house like confetti with bad intentions.
What You Need for a Basic DIY Oui Yogurt Jar Project
You do not need every item below. Think of this as a flexible menu rather than a commandment chiseled into a craft store aisle.
- Empty Oui yogurt jar
- Warm water and dish soap
- Small scrub brush or sponge
- Adhesive remover, vinegar, or a plastic scraper for sticker residue
- Paper towels or a lint-free cloth
- Rubbing alcohol for final surface prep
- Frosted glass spray paint, sea-glass spray paint, or glass-safe craft paint
- Mod Podge or similar decoupage medium, if using paper or fabric
- Paintbrush or foam brush
- Twine, ribbon, labels, faux greenery, or small decorative knobs for embellishment
- Pebbles and potting mix, if making a planter
- Battery tea light, sand, or candle-making supplies, if making a lighted project
Step-by-Step: How to Make a DIY Oui Yogurt Jar Project
Step 1: Clean the Jar Like You Mean It
The number one mistake people make with any recycled jar craft is trying to decorate a container that is not truly clean. If the label adhesive is still clinging to the glass like it pays rent there, your paint, paper, or sealant is not going to cooperate.
Start by soaking the jar in warm, soapy water. Let it sit long enough for the label to loosen. Peel it away gently. If sticky residue remains, use an adhesive remover, vinegar, or a plastic scraper to lift it without scratching the glass. Then wash the jar again, dry it thoroughly, and wipe the exterior with rubbing alcohol so the surface is free of oils and residue.
This step is not flashy, but it is what separates “Pinterest-worthy” from “Why does this paint look lumpy and offended?”
Step 2: Pick a Finish That Matches the Final Use
Now for the fun part. You have several easy directions you can take.
Frosted or Sea-Glass Look
This is one of the easiest and prettiest ways to decorate a Oui jar. Spray the outside of the jar with frosted or sea-glass spray paint according to the manufacturer’s directions. Build light coats instead of one heavy one. That helps avoid drips and keeps the finish soft and even.
This finish works especially well for candleholders, vanity storage, and shelf décor because it gives the jar a polished look without a lot of effort. It is the crafting equivalent of putting on sunglasses and instantly looking more put together.
Decoupage Floral or Vintage Look
If you want something more decorative, use paper napkins, tissue paper, or printed designs on the outside of the jar. Apply a thin layer of decoupage medium, smooth the material carefully, then seal over the top once dry. Go lightly with the brush so the paper does not tear.
This style is ideal for spring décor, party favors, gift jars, or a cottage-style display.
Simple Minimalist Jar
You can also leave the glass mostly clear and just add twine, a custom label, a painted lid, or a small decorative accent. This is perfect if you want your Oui yogurt jar craft to look clean and modern rather than heavily embellished.
Step 3: Let Everything Dry Completely
This is the point where patience becomes a personality test. Do not rush it. Let paint cure. Let decoupage dry. Let the jar sit long enough that the finish is stable before you fill it. A project that feels dry after ten minutes can still smudge, peel, or cloud if you handle it too soon.
If you are adding multiple coats, allow full drying time between each one. Thin, patient layers always look more professional than one dramatic coat applied with the confidence of a reality-show contestant and the results of a raccoon in a craft apron.
Step 4: Turn the Jar Into Its Final Form
Once the jar is decorated and dry, decide how to finish it.
For a Mini Planter
Add a small layer of pebbles at the bottom, especially if the plant needs help with drainage. Then add a modest amount of potting mix and tuck in a small succulent or herb start. Because the jar does not have a drainage hole, water lightly and avoid turning it into a swamp with ambition.
For a Luminary
Add sand, tiny pebbles, or decorative filler to the base and place a battery tea light inside. The light will glow beautifully through a frosted finish. This option is quick, giftable, and far more forgiving than working with an open flame.
For a Storage Jar
Simply fill it with cotton rounds, swabs, pens, clips, matches for a separate safe container, or other small items. If you want a more polished look, group three jars together on a tray.
Three Easy Variations to Try
Painted Bathroom Organizer
Use a frosted finish, tie a small piece of neutral ribbon around the neck, and fill with cotton swabs or hair pins. Put several jars together and your bathroom suddenly looks less like a place where chaos stores itself.
Mini Herb Jar
Use a simple painted or clear finish and add a handwritten label for basil, thyme, or mint. These look charming in sunny kitchen windows and make thoughtful gifts for anyone who says they are “getting into cooking” but mostly owns garlic powder.
Party Favor Jar
Decorate the outside with decoupage paper, add a little tag, and fill the jar with wrapped candy, bath salts, seed packets, or tiny beauty items. This is a great idea for showers, birthdays, brunches, and holiday tables.
Mistakes to Avoid in a DIY Oui Yogurt Jar Project
- Skipping surface prep. Dirty glass ruins good intentions.
- Using too much water on paper elements. Tissue and napkins are delicate and can tear easily.
- Applying thick paint coats. That is how drips, streaks, and regret arrive.
- Overwatering plants in jars with no drainage. Your succulent is not asking for a swimming pool.
- Using open flame carelessly. If you want a decorative glow, battery tea lights are a wonderfully low-stress option.
- Adding food to a decorated jar. If the jar has been painted or coated for crafts, keep it for décor and storage rather than food use.
How to Make Your Finished Jars Look More Expensive
A DIY project does not have to look homemade in the tragic sense of the word. A few smart styling choices can make your jars look intentional and elevated.
- Work in sets of three for shelves and countertops.
- Stick to one color family for a cleaner, more designer look.
- Mix textures like frosted glass, twine, matte labels, and pebbles.
- Place jars on a tray to make them feel like a collection instead of random objects.
- Use neat handwritten tags or simple printed labels.
- Leave a little negative space. Not every inch needs glitter, lace, and a motivational quote.
Why This Project Works So Well for Beginners
One reason DIY Oui yogurt jar projects are so appealing is that they offer a high success rate. The jars are already attractive, which means you are not trying to rescue an ugly base. Even a simple frosted coat and a bit of twine can look lovely. That gives beginners room to experiment without spending a lot of money or risking a total craft disaster.
It is also a forgiving project. If one idea does not work, you have not ruined a pricey blank. You can clean another jar, try a new finish, and improve as you go. It is basically the craft version of low-stakes dating.
The Real Experience of Making a DIY Oui Yogurt Jar Project
There is the tutorial version of this craft, where everything is tidy, the label peels off in one satisfyingly cinematic motion, and the jar dries in a sunbeam while soft music plays in the background. Then there is the real experience, which is much funnier and honestly more helpful to talk about.
For many people, the first surprise is how attached they get to these jars. At first you save one because it seems useful. Then you notice the shape is actually pretty cute. Then you rinse another. A week later, you are telling yourself you are “building inventory,” which is a very professional-sounding way of saying you are now emotionally invested in yogurt packaging.
The second real-life experience is discovering that prep matters more than decoration. A lot more. The jar with the best final result is usually not the one with the fanciest ribbon or the most dramatic paint color. It is the one that was soaked properly, scrubbed well, and dried completely before anything was added. In practice, this is where the project becomes oddly satisfying. Removing the label, wiping away that last bit of adhesive, and seeing the clear glass underneath feels like unlocking the jar’s second identity.
Then comes the decorating phase, which usually teaches one universal lesson: less is often better. It is easy to assume a tiny jar needs lots of embellishment, but the opposite is usually true. One frosted finish looks elegant. One wrap of twine looks intentional. One small label looks charming. By contrast, too many add-ons can make the jar look like it lost a fight with a craft drawer. The happiest surprise for most beginners is how polished a simple design can look.
Another common experience is realizing these jars quietly solve storage problems you did not even mean to solve. One goes in the bathroom for cotton swabs. One lands on a desk for binder clips. One becomes a tiny planter near the kitchen sink. One holds tea lights. Suddenly the jars are not just crafts. They are useful little objects tucked into corners of daily life, which is exactly why people keep making them.
There is also a small but meaningful thrill in gifting one. A decorated Oui jar with a succulent, bath salts, wrapped candy, or a battery light inside feels thoughtful in a way store-bought décor sometimes does not. It says, “I made this,” but in a stylish voice, not a desperate one. That makes the project especially rewarding during holidays, birthdays, showers, and dinner parties.
And perhaps the most relatable experience of all is that your first jar may not be perfect. The paint might go on slightly heavier than planned. The twine may slide. The paper may wrinkle. Your succulent may look mildly suspicious of the arrangement. None of that means the project failed. In fact, part of the appeal of a DIY yogurt jar craft is that the learning curve is small and the charm is built in. By jar number two, your hands know more. By jar number three, you start making design choices on purpose. By jar number four, you are casually advising other people about glass prep like you have your own home show.
That is really the beauty of this project. It is small, practical, inexpensive, creative, and unexpectedly addictive. It gives you the satisfaction of making something useful with your own hands, while also making your home feel a little more personal. Not bad for a jar that originally arrived full of yogurt.
Final thought: if you want a DIY that is easy to start, hard to mess up, and charming enough to repeat in a dozen different ways, a DIY Oui yogurt jar project is a very smart place to begin. Clean it well, decorate it simply, use it intentionally, and let the tiny glass jar live its best second life.