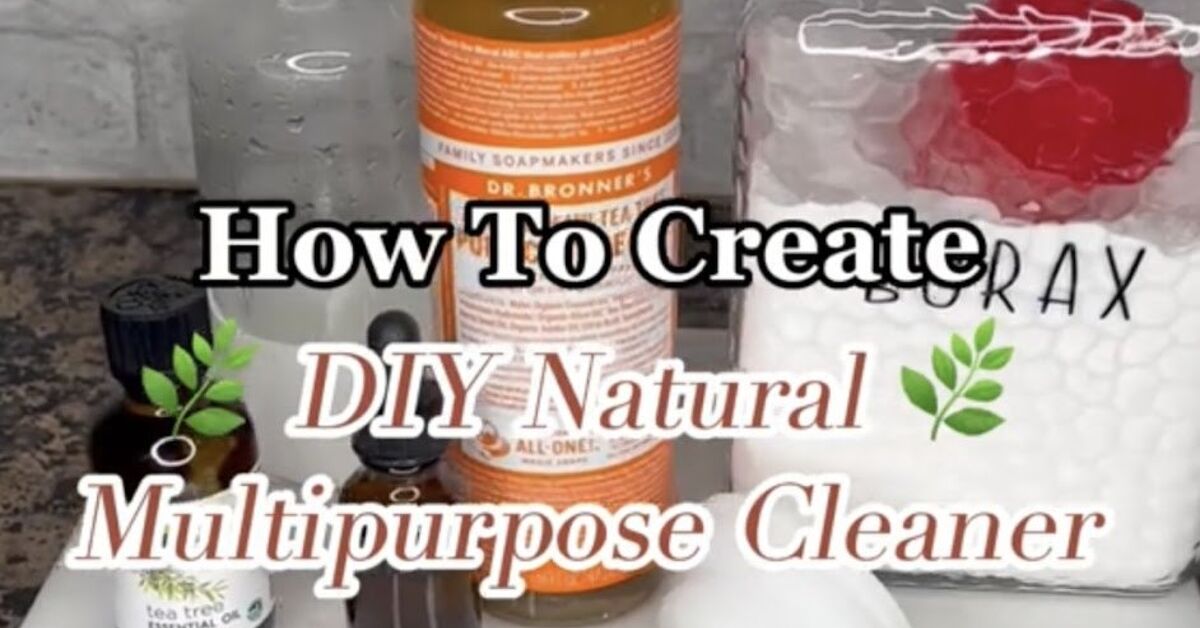
A good all-purpose cleaner should do three things well: cut everyday grime, leave surfaces fresh, and avoid turning your home into a chemistry lab with curtains. The good news? You can make a simple DIY natural all-purpose cleaner with common ingredients, a spray bottle, and about five minutes of effort. The even better news? It costs less than many store-bought cleaners, smells better when made thoughtfully, and gives you more control over what you spray around your kitchen, bathroom, and living spaces.
This guide explains how to make a homemade cleaning spray in five easy steps, what ingredients actually do, where to use it, where not to use it, and how to clean safely without falling for every viral “miracle cleaner” recipe on the internet. Spoiler alert: fizzing is fun, but it is not always cleaning magic.
Why Make a DIY Natural All-Purpose Cleaner?
A DIY natural all-purpose cleaner is a simple household spray made with ingredients such as distilled white vinegar, water, mild dish soap or castile soap, and optional essential oils. It is designed for routine cleaning, meaning it helps remove dust, fingerprints, light grease, soap residue, and everyday messes from washable surfaces.
Many people switch to homemade cleaners because they want fewer harsh odors, fewer mystery ingredients, and less product clutter under the sink. Instead of owning one bottle for counters, one for the sink, one for the mystery sticky spot nobody admits creating, and one that smells like “rainforest thunder,” you can use a basic formula for many everyday jobs.
Natural cleaning also encourages smarter cleaning habits. You learn which ingredients are acidic, which are mild abrasives, which cut grease, and which surfaces need special care. That knowledge is worth more than a cabinet full of bottles with labels that require a magnifying glass and a brave heart.
Cleaning vs. Disinfecting: Know the Difference
This homemade cleaner is excellent for routine cleaning, but it is not a registered disinfectant. Cleaning removes dirt and many germs from a surface. Disinfecting uses an approved product to kill specific germs after the surface has been cleaned. For everyday crumbs, fingerprints, and light grease, a natural cleaner is often enough. For raw meat juices, illness in the home, bathroom accidents, or high-touch areas during flu season, use an EPA-registered disinfectant according to label directions.
The Best DIY Natural All-Purpose Cleaner Recipe
This recipe is designed to be practical, affordable, and gentle enough for many sealed, washable household surfaces. It uses vinegar for mineral deposits and light grime, water for dilution, and a small amount of soap to help loosen oily residue. The result is a homemade all-purpose cleaner that works well for many routine messes without leaving your house smelling like a salad bar forever.
Ingredients
- 1 cup distilled white vinegar
- 1 cup distilled or filtered water
- 1 teaspoon mild dish soap or unscented castile soap
- 10 to 15 drops essential oil, optional
- 1 clean 16-ounce spray bottle
- 1 microfiber cloth or soft cotton cleaning cloth
Best Essential Oil Options
Essential oils are optional. They can make the cleaner smell fresher, but more is not better. Use a light hand, especially if you have asthma, allergies, pets, young children, or fragrance sensitivity in the home. Lemon, lavender, tea tree, orange, and eucalyptus are common choices, but fragrance-free is the safest and simplest option for many households.
Important Safety Rule
Never mix vinegar with bleach. Never mix this cleaner with ammonia, toilet bowl cleaner, hydrogen peroxide, drain cleaner, or any commercial disinfectant. Mixing cleaning products can create irritating or toxic gases. Use one product at a time, rinse surfaces when needed, and label your bottle clearly so nobody mistakes your homemade spray for plant mist, hair spray, or a suspiciously clean lemonade.
How to Make a DIY Natural All-Purpose Cleaner in 5 Steps
Step 1: Choose and Clean Your Spray Bottle
Start with a clean 16-ounce spray bottle. Glass bottles look beautiful and hold up well with acidic ingredients, but a sturdy plastic spray bottle is also fine if it is made for cleaning solutions. Avoid reusing bottles that previously held bleach, ammonia, pesticide, or strong commercial cleaners. Even small chemical residues can create safety problems.
Wash the bottle with warm soapy water, rinse it thoroughly, and let it air-dry. If the sprayer has old product trapped inside, run warm water through it several times. A clean bottle helps your DIY cleaner stay fresh and prevents accidental chemical mixing.
Step 2: Add Water First
Pour 1 cup of distilled or filtered water into the bottle. Adding water first helps dilute the vinegar and reduces the chance of a strong vinegar cloud hitting your nose like a tiny pickle storm. Distilled water is ideal because it contains fewer minerals, which can help reduce streaks on shiny surfaces.
Tap water works in many homes, but if your water is hard, distilled water is a better choice. Hard water can leave mineral spots on glass, stainless steel, and glossy surfaces.
Step 3: Add Distilled White Vinegar
Add 1 cup of distilled white vinegar. White vinegar is popular in natural household cleaning because it is acidic, inexpensive, and useful for cutting light buildup, water spots, and some soap residue. It is especially handy on sinks, faucets, certain appliances, and non-stone bathroom surfaces.
Do not use apple cider vinegar, balsamic vinegar, or anything that sounds like it belongs on a fancy salad. Dark vinegars can stain or leave sticky residue. Distilled white vinegar is the best choice for a homemade all-purpose cleaning spray.
Step 4: Add a Small Amount of Soap
Add 1 teaspoon of mild dish soap or unscented castile soap. This small amount helps loosen grease and everyday grime. Do not overdo it. Too much soap can leave a film that attracts more dust, which is the cleaning equivalent of inviting the mess back for coffee.
If you plan to use the cleaner mainly on mirrors or glass, reduce the soap to just a few drops or leave it out entirely. Soap is useful on counters and sinks, but it can cause streaks on reflective surfaces if used heavily.
Step 5: Add Optional Scent, Shake Gently, and Label
Add 10 to 15 drops of essential oil if desired. Screw on the spray top and shake gently. Do not shake like you are auditioning for a cocktail competition; a few slow turns are enough. Label the bottle with the name, ingredients, and date made.
Store the cleaner in a cool, dark place away from children and pets. For best freshness, make small batches and use the cleaner within about one month. If it changes smell, color, or texture, pour it out, rinse the bottle, and make a new batch.
Where to Use This Homemade All-Purpose Cleaner
This DIY natural all-purpose cleaner works best on sealed, washable surfaces that tolerate mild acidity. Always test in a hidden spot first, especially on newer finishes, painted surfaces, or anything expensive enough to make your eye twitch.
Good Places to Use It
- Laminate counters, if the manufacturer allows vinegar-based cleaners
- Sealed ceramic tile
- Porcelain sinks
- Chrome faucets
- Glass shower doors
- Plastic trash cans
- Refrigerator handles and exterior surfaces
- Microwave interiors after food splatters have softened
- Bathroom sinks and non-stone vanity surfaces
How to Use It Properly
Spray the cleaner lightly on the surface or onto a microfiber cloth. Let it sit for 30 to 60 seconds on sticky spots, then wipe clean. For shiny surfaces, follow with a dry cloth to prevent streaks. For extra grime, repeat the process rather than soaking the area.
A microfiber cloth makes a major difference. It traps dust and grime better than a dry paper towel and reduces the need for extra product. In cleaning, as in life, the tool matters. Try painting a wall with a toothbrush and you will understand immediately.
Where Not to Use Vinegar-Based Natural Cleaner
Vinegar is useful, but it is not universal. Because it is acidic, it can damage certain materials over time. Avoid using this DIY cleaner on surfaces that can be etched, dulled, weakened, or stripped by acid.
Avoid Using It On
- Natural stone such as marble, granite, limestone, travertine, and slate
- Quartz countertops unless the manufacturer says vinegar is safe
- Unsealed grout
- Hardwood floors
- Waxed furniture
- Cast iron cookware
- Aluminum surfaces
- Electronic screens and touchscreens
- Rubber seals and gaskets used frequently
For stone, wood, and delicate surfaces, use a pH-neutral cleaner or mild soap and water. When in doubt, check the manufacturer’s care instructions. The goal is a clean home, not an expensive lesson in countertop regret.
Natural Cleaner Variations for Common Messes
For Greasy Kitchen Messes
Add an extra half teaspoon of dish soap to the basic recipe. Spray lightly, wait one minute, then wipe with a warm damp cloth. This works well on stovetop splatters, cabinet fingerprints, and the mysterious film that appears near cooking areas after one enthusiastic round of bacon.
For Bathroom Soap Scum
Use the basic recipe and let it sit for several minutes before wiping. Vinegar helps loosen mineral deposits and soap residue. For stubborn areas, sprinkle baking soda separately on a damp cloth and scrub gently, then rinse. Avoid mixing a big batch of vinegar and baking soda in the bottle because the reaction quickly reduces their individual cleaning power.
For Odor Control
Baking soda is excellent for absorbing odors, but it works best as a separate tool. Sprinkle it in a trash can, sink, or smelly container, let it sit, then rinse or wipe away. Your vinegar spray can clean the surface afterward. Used separately, these ingredients are more useful than when they are turned into a bubbly science fair volcano.
For Glass and Mirrors
Make a lighter version with 1 cup water, 1 cup vinegar, and no soap. Spray sparingly and wipe with a lint-free microfiber cloth. Too much product causes streaks, so use less than you think you need. Glass cleaning is not a water park.
Common Mistakes to Avoid
Using Too Much Cleaner
More spray does not mean more clean. Overspraying wastes product and can leave residue. A light mist is usually enough. Let the cloth do some of the work.
Using One Cloth Everywhere
Do not wipe the bathroom sink and then march into the kitchen with the same cloth like a germ parade. Use separate cloths for bathroom, kitchen, and general dusting. Wash cloths in hot water after use and let them dry fully.
Assuming Natural Means Risk-Free
Natural ingredients can still irritate skin, eyes, lungs, or pets. Vinegar has a strong smell, essential oils can trigger sensitivities, and even mild soap can bother some people. Ventilate the area, wear gloves if your skin is sensitive, and keep cleaners out of reach of children.
Confusing Fresh Smell With Clean
A clean home does not need to smell like lemons doing gymnastics. Fragrance can be pleasant, but it is not proof that a surface is clean. In fact, fragrance-free cleaning is often a better choice for people with allergies, asthma, migraines, or scent sensitivity.
How to Store Your DIY Natural All-Purpose Cleaner
Store your homemade cleaner in a labeled bottle away from heat and sunlight. Keep it out of reach of children and pets. A cabinet shelf is fine, but avoid placing it next to bleach or ammonia-based products. Keeping incompatible cleaners apart reduces the risk of accidental mixing.
Write the date on the label. Homemade cleaners do not contain the same preservatives as commercial products, so small batches are smarter. If you notice a strange smell, cloudiness, mold, or a damaged spray mechanism, discard the cleaner and start fresh.
Experience Notes: What Actually Happens When You Use This Cleaner at Home
The first thing many people notice after switching to a DIY natural all-purpose cleaner is how simple cleaning becomes. Instead of hunting through a crowded cabinet, you grab one labeled bottle and a microfiber cloth. That alone makes quick cleanups easier. A small splash of coffee on the counter no longer feels like a “deep cleaning event.” You spray, wipe, and move on with your life. Very glamorous. Very adult.
In a kitchen, this cleaner works especially well for everyday maintenance. It handles fingerprints on appliance handles, light grease near the stove, crumbs stuck to the counter, and water spots around the sink. The trick is to clean small messes before they become hardened monuments to procrastination. When sauce splatters sit overnight, even the best natural cleaner has to work harder. Spray the area, give it a minute, wipe with a warm damp cloth, and then dry the surface. That final dry wipe is what makes everything look polished instead of merely damp and hopeful.
In the bathroom, the cleaner is useful for sinks, faucets, and glass shower doors. Vinegar helps loosen mineral spots, especially in areas with hard water. For soap scum, patience matters. Spray the surface, let it sit for several minutes, then wipe. If the buildup is heavy, use baking soda separately as a gentle scrub on a damp cloth. This two-step method works better than mixing baking soda and vinegar in the bottle. The fizz may look dramatic, but the cleaning power fades quickly after the reaction ends.
The smell is another real-life detail worth mentioning. Vinegar has a bold personality. At first, your kitchen may smell like you are preparing pickles for a very large family reunion. The odor usually fades as the surface dries, especially with good ventilation. If the smell bothers you, add a small amount of lemon or lavender essential oil, or use the cleaner near an open window. If anyone in your home is sensitive to fragrance, skip essential oils completely. Clean air matters more than a “spa day” scent.
Over time, using a homemade cleaner can also change how you shop. You may start buying fewer single-purpose products and paying more attention to labels. You may notice that some messes only need warm water and a cloth, while others need soap, scrubbing, or a true disinfectant. That is the real win: not just making a cleaner, but becoming a smarter cleaner. Your home gets cleaner, your cabinet gets less chaotic, and your wallet gets to breathe a little.
Conclusion
Learning how to make a DIY natural all-purpose cleaner in 5 steps is one of the easiest ways to simplify your cleaning routine. With distilled white vinegar, water, a small amount of mild soap, and an optional light scent, you can create a homemade cleaning spray that handles many everyday messes around the home.
The key is using it wisely. This cleaner is great for routine cleaning, but it is not a disinfectant. It works on many washable surfaces, but not on natural stone, hardwood, electronics, or delicate finishes. It is simple, affordable, and effective when matched with the right surface and a good microfiber cloth.
A natural cleaner does not need to be complicated to work well. Sometimes the best cleaning solution is not the loudest bottle under the sink. Sometimes it is the one you made yourself, labeled clearly, used safely, and trusted to tackle daily grime without making your home smell like a chemical thunderstorm.