Note: This guide explains how to make a non-firing pencil crossbow model for display, storytelling, classroom discussion, or a safe STEM craft. It does not include instructions for building a working projectile launcher. Think of it as “engineering cosplay” for pencils: all the medieval charm, none of the eye-patch paperwork.
Introduction: A Tiny Crossbow, a Big Lesson in Design
Learning how to make a crossbow using pencils sounds like the kind of project someone invents five minutes before a school presentation, usually while surrounded by rubber bands, tape, and heroic optimism. But with the right approach, this pencil craft can become a smart, safe, and surprisingly satisfying lesson in structure, symmetry, balance, and creative problem-solving.
The key word here is safe. A real crossbow stores energy and releases a projectile, which can cause injury. A pencil version that launches objects is not suitable for casual crafting, classrooms, or kids’ projects. Instead, this article walks you through an 8-step method for building a decorative pencil crossbow model that looks the part without functioning as a weapon.
You will use common school supplies such as pencils, rubber bands, tape, cardboard, and string to create the shape of a crossbow. Along the way, you will learn why engineers build prototypes, why alignment matters, how tension changes a structure, and why the most important part of any project is knowing when not to make something dangerous.
What Is a Pencil Crossbow Model?
A pencil crossbow model is a small craft inspired by the appearance of a traditional crossbow. It usually has a central body, a crosspiece, a decorative “bow” section, and a handle or grip. In this safe version, the rubber bands and string are used only for shape and tensioned decoration, not for launching anything.
This makes the project useful for students, parents, hobby crafters, and content creators who want a hands-on activity without turning a desk into a miniature siege workshop. It is also a fun way to explore basic design ideas: How do you make a lightweight frame stronger? How do you keep two sides even? How can a simple material like a pencil become part of a stable structure?
Materials You’ll Need
Basic Supplies
- 6 to 8 unsharpened pencils
- 6 to 10 rubber bands
- Masking tape or painter’s tape
- A small piece of cardboard
- Child-safe scissors
- String or yarn
- Optional: markers, stickers, washi tape, or colored paper
Safety Setup
Work on a clear table with good lighting. Use unsharpened pencils because sharp points do not improve the craft and do improve your chances of poking yourself. If younger children are involved, an adult should handle scissors and supervise rubber bands. Rubber bands can snap, so keep them away from faces and never stretch them toward people, pets, windows, or the family’s suspiciously fragile lamp.
How to Make a Crossbow Using Pencils: 8 Safe Steps
Step 1: Plan the Shape Before You Build
Before touching the supplies, sketch a simple crossbow outline on paper. Draw a long center body, a horizontal crosspiece near the front, and a short handle underneath. This gives your project a blueprint, which is a fancy word for “a plan that saves you from taping everything together sideways.”
Keep the design simple. The goal is not to create a working launcher. The goal is to make a recognizable model that demonstrates structure. A good size is about three pencils long for the center body and two pencils wide for the crosspiece.
Step 2: Build the Central Body
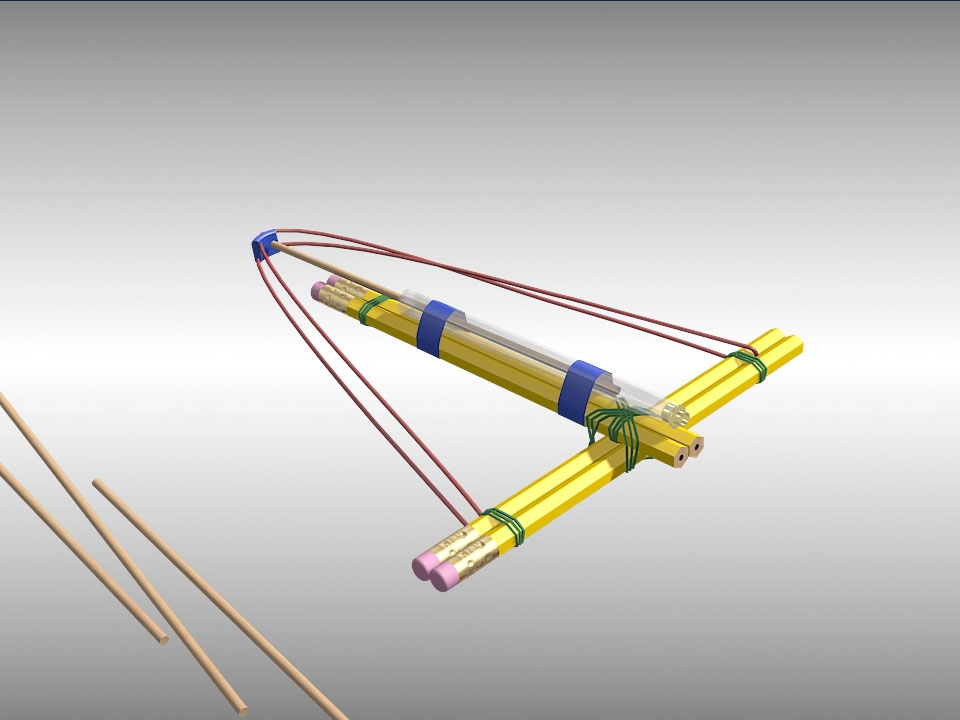
Place three pencils side by side so their ends line up evenly. Wrap rubber bands around both ends to hold them together, then add a strip of masking tape around the middle for extra stability. This pencil bundle becomes the main body of your crossbow model.
The central body should feel firm but not overly tight. If the pencils slide around, add another piece of tape. If the rubber bands bend the pencils inward, loosen them or use tape instead. In model making, neatness is not just about looks; a straighter frame is easier to decorate and display.
Step 3: Create the Crosspiece
Take two pencils and place them end to end, overlapping slightly in the middle. Tape the overlap firmly so they form one long horizontal piece. This will become the “bow” shape across the front of the model.
For a stronger crosspiece, tape a small strip of cardboard behind the overlap. This prevents wobbling and helps the piece stay straight. You can also decorate the crosspiece with colored tape before attaching it. If your pencils have logos or bite marks from an anxious math test, decorative tape is your new best friend.
Step 4: Attach the Crosspiece to the Main Body
Place the horizontal crosspiece across the top front of the central body, forming a lowercase “t” shape. Use masking tape to secure the joint. Wrap the tape around the connection several times, but keep the wrapping flat and smooth.
Check the alignment by looking at the model from above. The left and right sides should extend evenly. If one side is much longer than the other, the model may look lopsided. A tiny bit of imbalance is charming; a lot of imbalance looks like the crossbow had a rough morning.
Step 5: Add a Decorative String
Cut a piece of string or yarn long enough to stretch loosely from one end of the crosspiece to the other. Tie or tape one end of the string to the left side, then attach the other end to the right side. The string should look like a bowstring, but it should not be tight enough to store energy or launch anything.
This is the most important safety choice in the project. Keep the string slack or only gently snug. Do not create a trigger, do not add a launch channel, and do not use the model to shoot pencils, skewers, toothpicks, paper clips, or any other object. The finished craft should be a model, not a mini weapon with better stationery branding.
Step 6: Make a Handle
Cut a small rectangle of cardboard and fold it into a simple handle shape. Tape it underneath the central body near the back. You can also use one short pencil or half a craft stick as a handle, but cardboard is lighter and easier to shape.
The handle helps the model look complete and gives you a place to hold it while decorating. Keep it short and sturdy. If the handle wiggles, add tape on both sides where it meets the pencil body. A strong joint makes the model feel more polished.
Step 7: Decorate the Model
Now comes the part where engineering meets personality. Wrap the pencil body with washi tape, add cardboard panels, draw faux wood grain, or create a tiny nameplate. You might label it “Pencilbow 3000,” “The Homework Defender,” or “Sir Graphite the Mildly Dramatic.”
For a classroom project, decoration can also support learning. Use one color to mark the main body, another for the crosspiece, and another for the joints. This makes it easier to explain the parts of the model and how each section contributes to the structure.
Step 8: Inspect, Display, and Reflect
Once the model is complete, inspect it carefully. Make sure no rubber bands are stretched toward the face, no pencil points are exposed, and no part of the model is designed to launch anything. If the structure is loose, reinforce it with tape or cardboard.
Then place it on a desk, shelf, bulletin board, or project display. The best final step is reflection: What worked well? What would you improve next time? Did the frame stay straight? Did the joints hold? These questions turn a simple pencil craft into a real design-thinking exercise.
Why This Safe Version Is Better Than a Working Pencil Crossbow
A working pencil crossbow may seem exciting, but excitement is not the same thing as a good project. Small launchers can still cause eye injuries, skin injuries, broken objects, and trouble at school. Even lightweight materials can become risky when pulled back under tension and released suddenly.
A non-firing model keeps the best parts of the idea: creativity, problem-solving, and hands-on building. It also removes the worst parts: projectiles, aiming, snapping rubber bands, and the awkward moment when someone has to explain to a parent why there is a pencil stuck in the curtains.
This safe approach also teaches an important engineering lesson. Good design is not only about making something work. It is about making something appropriate for its purpose. If the purpose is learning, display, or fun, a decorative model does the job beautifully.
STEM Lessons Hidden Inside the Craft
Structure and Stability
When you bundle pencils together, you increase the strength of the central body. One pencil bends easily, but several pencils taped together resist movement better. This is a simple example of how combining materials can improve stability.
Symmetry and Balance
The crosspiece needs to be centered to look right. If one side is longer, the model may twist or tilt. Symmetry is important in bridges, vehicles, furniture, and, yes, tiny pencil crossbow models that have no business looking this official.
Elastic Potential Energy
Rubber bands can store energy when stretched, which is why they must be handled carefully. In this safe craft, rubber bands are used only as connectors or light decorative elements. The goal is to understand the idea of stored energy without building a device that releases it as a projectile.
Iteration and Improvement
Your first version may not be perfect. That is normal. Engineers often build prototypes, test them, notice problems, and improve the design. If your model leans, wobbles, or looks like it was assembled during a sneeze, congratulations: you have discovered version one.
Common Mistakes to Avoid
Using Sharpened Pencils
Sharpened pencils are unnecessary and unsafe for this project. Use unsharpened pencils or cover the ends with tape.
Stretching Rubber Bands Too Tightly
Rubber bands should hold parts together, not create a launch mechanism. If a band looks ready to snap, loosen it.
Adding a Trigger
Do not add a trigger, notch, firing groove, or projectile holder. Those features change the project from a model into a launcher.
Skipping the Planning Step
A quick sketch helps avoid crooked parts and wasted tape. Five minutes of planning can save fifteen minutes of “Why does this look like a confused airplane?”
Creative Variations for a Safer Pencil Crossbow Craft
Once you understand the basic structure, you can customize the model in many safe ways. Try making a fantasy-style version with metallic paper and gem stickers, a medieval history version with brown tape and cardboard shields, or a classroom STEM version with labeled parts and a short explanation card.
You can also turn the craft into a design challenge. Ask each person to build the most stable non-firing model using only pencils, tape, and cardboard. Judge the results by straightness, strength, creativity, and presentation. Nobody needs to launch anything for the activity to be competitive. In fact, the no-launch rule makes it easier to focus on design quality instead of chaos quality.
500-Word Experience Section: What This Project Teaches in Real Life
The first time you try making a crossbow model using pencils, you will probably learn one thing very quickly: pencils are excellent at writing essays and surprisingly opinionated when asked to become architecture. They roll, shift, twist, and generally behave like tiny wooden troublemakers until you secure them properly. That is part of the fun.
One useful experience is learning patience with alignment. When the central body is even, the rest of the craft becomes easier. When the body is crooked, every later step feels like trying to hang a picture frame during an earthquake. Taking time to line up the pencils teaches a real design habit: small errors at the beginning can become bigger problems later.
Another lesson is that tape placement matters. Many beginners wrap tape randomly around the model until it resembles a medical emergency. A better method is to tape joints neatly and only where support is needed. This keeps the model lighter, cleaner, and easier to adjust. In other words, the tape should be a helper, not the main character.
The decorative string is also a great teaching moment. It may look like a simple visual detail, but it opens a conversation about tension and safety. When string or rubber bands are pulled tight, they can store energy. When released, that energy has to go somewhere. In a safe model, the string is loose or lightly attached so it creates the appearance of a bow without creating the risk of a launcher.
If you are doing this project with kids, the best experience comes from turning mistakes into questions. Why did the crosspiece tilt? Why did one rubber band slide off? Why did the cardboard handle bend? These questions help young makers think like engineers. Instead of saying, “It failed,” they can say, “The first version gave us data.” That sounds much smarter and also makes the mess feel more professional.
This project can also become a storytelling activity. Once the model is finished, students or crafters can invent a fictional character who owns it. Maybe it belongs to a tiny desk knight defending the kingdom from overdue assignments. Maybe it is a museum artifact from the ancient civilization of Backpackia. Adding a story makes the craft more memorable and encourages creative writing alongside hands-on building.
The biggest takeaway is that safe making is still real making. You do not need a working projectile to enjoy the design process. You can build, revise, decorate, explain, and display a pencil crossbow model while keeping everyone’s eyes, pets, and windows intact. That is not a compromise; that is good design.
Conclusion
Making a crossbow using pencils can be a fun craft when the project is treated as a safe, non-firing model. With pencils, tape, cardboard, rubber bands, and a little imagination, you can build a display piece that teaches structure, balance, symmetry, and design thinking. The 8 steps above help you create something recognizable and creative without turning ordinary school supplies into a hazard.
The best projects are not just impressive; they are responsible. This pencil crossbow model gives you the look of a classic design, the satisfaction of hands-on building, and the peace of mind that nobody has to duck.