Getting good at drawing is not a mysterious gift delivered at birth by a ti to draw realistic portraits, expressive characters, comic panels, landscapes, or suspiciously detailed dragons, the path follows the same basic pattern: learn to see clearly, practice one skill at a time, review your mistakes, and keep going long enough for your hands to catch up with your eyes.
Understand What “Good at Drawing” Really Means
A skilled artist does more than move a pencil accurately. Drawing combines several abilities, including observation, proportion, shape design, perspective, value, composition, visual memory, and confident mark-making. Nobody masters all of them at once.
This is important because beginners often compare a rough sketch to a professional illustration and conclude that they lack talent. In reality, they are comparing their first attempt with the visible result of thousands of hidden studies, abandoned pages, revisions, and drawings that probably never escaped the artist’s desk drawer.
Choose a Direction Without Limiting Yourself
Ask what kind of drawing you would most enjoy making. Your answer might be portraits, animals, architecture, fashion, cartoons, concept art, or botanical illustration. A direction gives your practice a purpose, but it does not lock you into one style forever.
The fundamentals overlap. A cartoonist benefits from anatomy. A portrait artist benefits from shape design. An architectural illustrator needs perspective, but also composition and value. Start with what excites you, then use the fundamentals to support it.
Train Your Eyes Before Blaming Your Hands
Many drawing mistakes begin with seeing rather than hand control. People tend to draw symbols stored in memory: an almond shape for an eye, five little sticks for fingers, or a circle with rays for the sun. Observational drawing requires you to temporarily ignore those symbols and examine what is actually in front of you.
Practice Slow Looking
Before drawing an object, spend a minute studying it. Notice its widest point, narrowest point, major angles, empty spaces, lightest areas, and darkest shadows. Compare relationships instead of naming parts.
For example, do not think, “I am drawing a coffee mug.” Ask, “How wide is the mug compared with its height? Where does the handle begin? Is the opening a narrow ellipse or a wide one? Which edge disappears into shadow?” These questions convert looking into useful information.
Use Blind Contour Drawing
In a blind contour exercise, look at the subject rather than the paper and slowly trace its visible edges with your eyes while your pencil follows. The result may resemble a chair designed during an earthquake, but visual beauty is not the goal.
This exercise strengthens coordination between observation and movement. Try it with your hand, a plant, a shoe, or a face. Work slowly for three to five minutes, then repeat while occasionally checking the page.
Draw Negative Spaces
Negative space is the empty area around and between objects. If you are drawing a chair, focus on the shapes between its legs and beneath its seat. These spaces are often easier to judge objectively because your brain has no convenient symbol for “the weird triangle under a chair.”
Build Drawings from Simple Shapes and Forms
Complex subjects become manageable when they are reduced to circles, boxes, cylinders, spheres, wedges, and irregular flat shapes. This approach is sometimes called construction drawing.
A head can begin as a sphere with a jaw attached. A torso may be simplified into a box or rounded rib-cage form. A car can be blocked in as several boxes. A cat may start as two ovals, four cylinders, and an offended expression.
Move from 2D Shapes to 3D Forms
Begin by filling pages with circles, ellipses, squares, triangles, and curved shapes. Then turn them into three-dimensional forms by adding contour lines, depth, and perspective.
Draw boxes from different angles. Wrap curved lines around cylinders and spheres to show their direction. Cut forms into sections, stack them, rotate them, and connect them. These exercises may look basic, but they teach spatial thinkingthe ability to imagine an object as something solid rather than a flat outline.
Draw Through the Form
Imagine the hidden side of an object and lightly sketch it when useful. When drawing a cylinder, for example, visualize both complete ellipses even if one is partially covered. Drawing through forms helps maintain volume and prevents objects from becoming flat or structurally confusing.
Improve Proportion with Measuring Techniques
Proportion describes the size relationship between different parts of a subject. A portrait can have beautifully shaded eyes and still look wrong if those eyes are too high, too large, or vacationing on opposite sides of the skull.
Compare, Do Not Guess
Choose one measurement as a unit. When drawing a standing figure, you might compare the total height with the length of the head. For a still life, compare the width of one object with another. Ask whether one distance is equal to, half of, or twice another distance.
You can hold a pencil at arm’s length to estimate angles and relative lengths. Keep your elbow straight, close one eye, align the pencil with the subject, and use your thumb to mark the measurement. The pencil is not performing magic; it simply gives your comparisons a consistent reference.
Check Major Landmarks Early
Place the largest shapes and important landmarks before adding details. On a face, establish the top, bottom, center line, eye level, nose placement, and mouth placement first. On a building, establish the overall envelope and major perspective directions before drawing windows.
Details cannot rescue incorrect structure. They merely decorate the problem.
Learn Value, Light, and Shading
Value refers to how light or dark something appears. Strong value relationships create the illusion of volume, atmosphere, depth, and focus. They can make a simple drawing feel convincing even when it contains very little detail.
Create a Value Scale
Draw a row of five to nine boxes ranging from white to the darkest value your pencil can produce. Keep each step visibly different. Practice making smooth transitions as well as clearly separated tones.
Then shade basic forms under a single imagined light source. Study how light affects a sphere, cube, cylinder, and cone. Look for the light side, halftone, core shadow, reflected light, cast shadow, and highlight. You do not need to label every patch forever, but understanding the pattern will help you shade complex objects more logically.
Group Values Before Rendering Details
Squint at your reference until small details disappear. Identify the major light and dark masses, then block them in broadly. This creates a stable foundation before you become emotionally attached to one perfectly shaded nostril.
Use Several Shading Methods
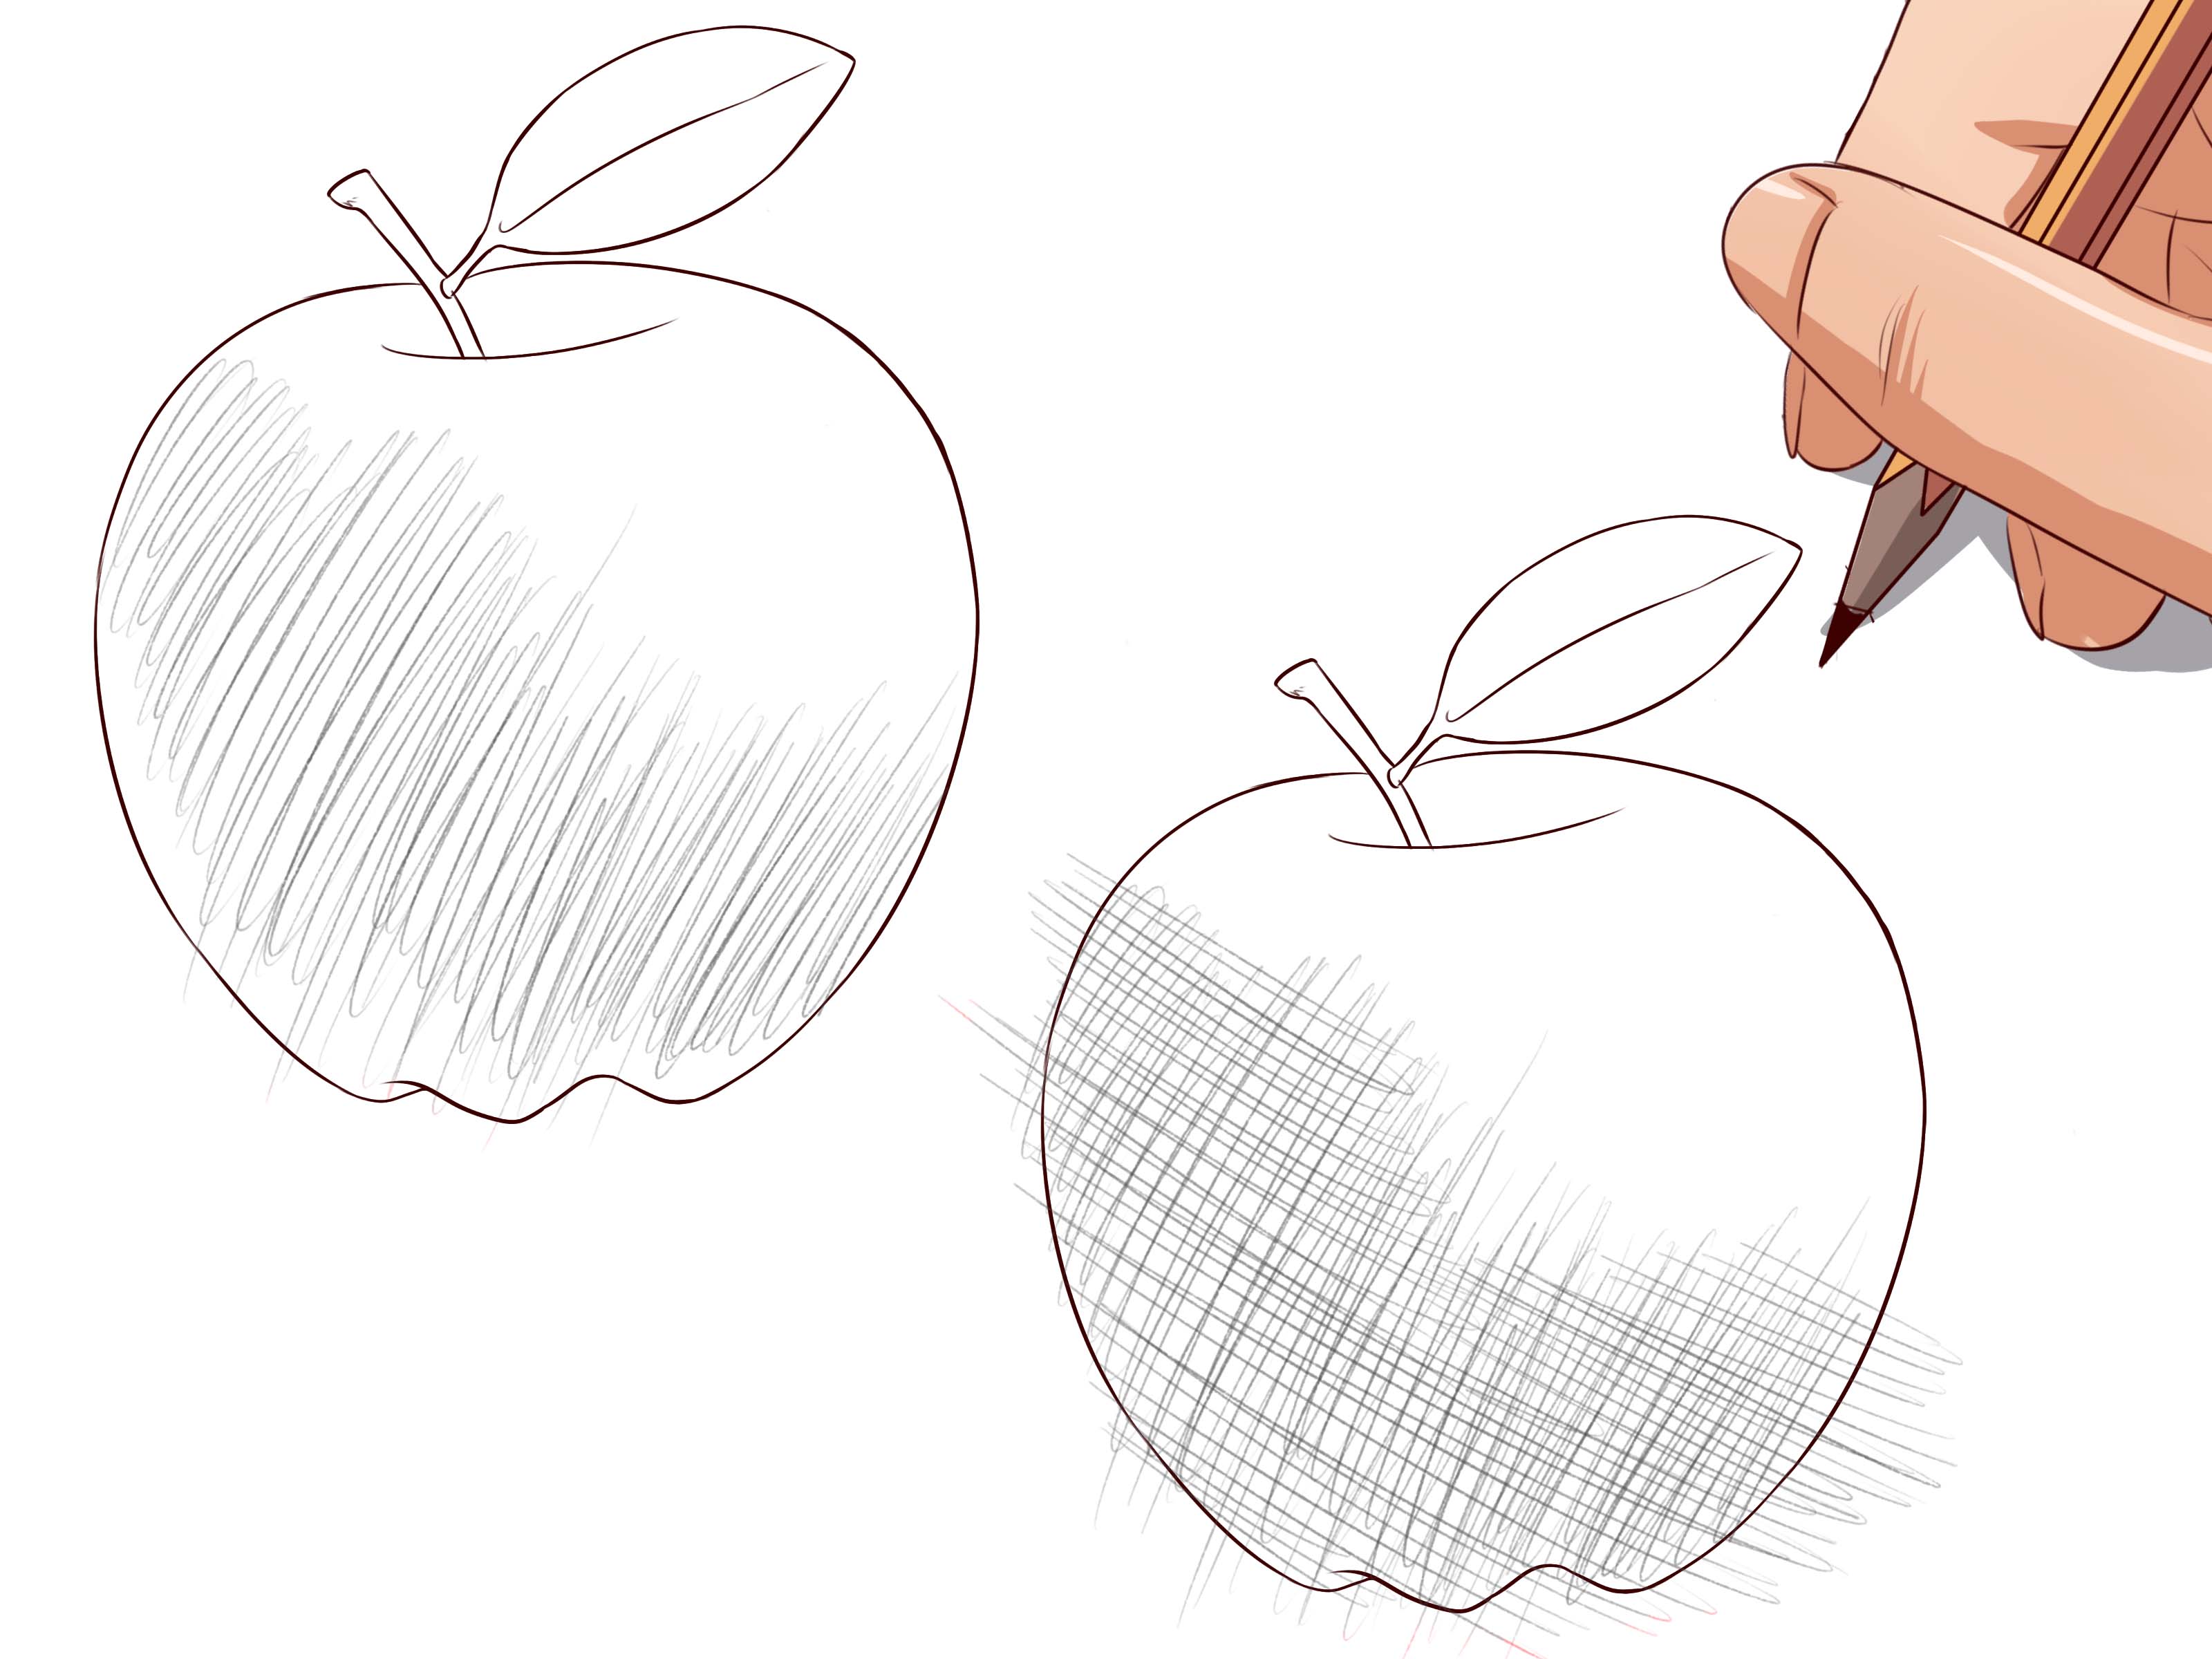
Experiment with hatching, crosshatching, stippling, scribbling, blending, and broad side-of-pencil strokes. The technique should support the subject and style. Hatching may suit an ink illustration, while soft blending can work well for a graphite portrait.
Study Perspective Without Turning It into Homework Torture
Perspective explains how objects appear to change as they move through space. Even artists who focus on characters need it. A figure standing in a room, reaching toward the viewer, or sitting on a chair involves perspective.
Start with One-Point Perspective
Draw a horizon line and place one vanishing point on it. Sketch boxes whose receding edges converge toward that point. Use the setup to draw a hallway, road, simple room, or row of buildings.
Advance to Two-Point Perspective
Place two vanishing points far apart on the horizon. Use them to construct boxes viewed from a corner. Practice boxes above, below, and across the horizon line. Once comfortable, turn those boxes into furniture, houses, vehicles, or imaginary vending machines that dispense better artistic judgment.
Apply Perspective to Organic Subjects
Perspective is not limited to rigid buildings. A forearm pointing toward the viewer becomes shorter because of foreshortening. The far side of a face appears narrower when the head turns. Practice placing cylinders and rounded forms inside perspective boxes to connect geometric study with living subjects.
Use Gesture Drawing to Capture Movement
Gesture drawing focuses on action, rhythm, weight, balance, and the overall flow of a subject. It is especially valuable for figure drawing, animals, animation, and character design.
Set a timer for 30 seconds, one minute, or two minutes and draw the essential movement of a pose. Look for the main action line, the tilt of the shoulders and hips, and the direction of the limbs. Avoid eyelashes, fingernails, shoelaces, and other details that become extremely attractive whenever you are avoiding the difficult part.
Combine Gesture with Structure
Gesture alone may produce energetic but flimsy figures. Structure alone may produce figures with all the excitement of office furniture. Combine them by beginning with fluid action lines and then building simple three-dimensional forms over those lines.
Draw from References the Right Way
Using references is not cheating. Artists use photographs, live models, mirrors, objects, diagrams, and other artworks to understand subjects more accurately. The real question is how you use the reference.
Study Instead of Merely Copying
Before copying an image, decide what you are studying. It might be the lighting, pose, anatomy, clothing folds, perspective, color relationships, or composition. A focused objective turns copying into deliberate practice.
Try the Reference–Memory–Imagination Method
- Draw the subject while looking at a reference.
- Hide the reference and draw it again from memory.
- Compare the drawings and identify what you forgot or misunderstood.
- Draw a new version from a different angle or in a different pose.
This method helps convert observed information into usable visual knowledge. It is far more effective than copying the same image perfectly and discovering that you still cannot draw the subject without it.
Create a Drawing Practice Routine That Produces Progress
Consistency matters, but mindless repetition can reinforce the same mistakes. A useful routine balances technical exercises, observation, creative projects, and review.
A Practical 45-Minute Drawing Session
- 5 minutes: Warm up with straight lines, curves, ellipses, and boxes.
- 10 minutes: Practice one focused skill, such as gesture, value, or perspective.
- 20 minutes: Apply that skill to a complete study from observation or reference.
- 10 minutes: Draw something enjoyable from imagination or continue a personal project.
Three focused sessions per week can be more useful than one exhausted five-hour session followed by a month of recovery.
Use Small, Specific Goals
“Get better at drawing” is too broad to guide a practice session. Better goals include drawing 20 varied hand poses, constructing 10 boxes in two-point perspective, simplifying five portraits into value masses, or completing seven one-minute gestures.
Keep a Dated Sketchbook
Date your pages and avoid tearing out unsuccessful drawings. A sketchbook is a record of decisions, discoveries, and mistakes. Looking back after several months often reveals progress that was invisible from day to day.
Learn to Critique Your Own Drawings
Self-critique should identify the next useful action, not produce a dramatic courtroom speech about your lack of talent. Replace “This is terrible” with questions that can be answered.
- Are the largest shapes correctly sized and placed?
- Does the drawing have a clear light source?
- Are the darkest values in the right locations?
- Do forms feel solid or flat?
- Is the perspective consistent?
- Where does the viewer look first?
- What single change would improve the drawing most?
Flip, Mirror, or Photograph the Drawing
Seeing an image in reverse can expose proportion problems because it interrupts familiarity. You can also photograph the page, view it from a distance, or reduce it to thumbnail size. Each method helps you notice the overall design rather than getting trapped in details.
Seek Useful Feedback
Ask instructors, experienced artists, or supportive peers specific questions. “What do you think?” may produce vague encouragement. “Does the head feel correctly attached to the torso?” or “Which value relationship looks weakest?” invites actionable feedback.
Avoid the Most Common Drawing Mistakes
Do Not Buy Supplies Instead of Practicing
A basic pencil, eraser, inexpensive paper, and sketchbook are enough to learn. Premium tools can be enjoyable, but a luxury pencil cannot negotiate with incorrect proportions on your behalf.
Do Not Practice Only What You Already Do Well
Drawing the same front-facing eye repeatedly may make you excellent at drawing one floating eye. Rotate subjects, viewpoints, lighting conditions, expressions, and materials.
Do Not Wait for Motivation
Motivation is unreliable. Create a small minimum commitment, such as drawing for ten minutes or filling half a page. Starting often produces the motivation that waiting failed to deliver.
Do Not Chase Style Too Early
Style develops through repeated choices, preferences, influences, limitations, and experimentation. Learn enough structure to make intentional decisions. Otherwise, a “style choice” may simply be the permanent avoidance of hands.
What Learning to Draw Actually Feels Like: A Realistic Experience
The early stage of learning to draw can feel strangely personal. You see a simple object, confidently place your pencil on the paper, and somehow produce something that looks like the object’s distant cousin who has recently experienced a difficult week.
A typical learner begins by drawing details too soon. The eye receives careful eyelashes before the skull has been constructed. The jacket gets twenty folds while the figure leans at an impossible angle. Finishing these drawings feels frustrating because every new detail seems to make the underlying problem more obvious.
The first major breakthrough often arrives when the learner slows down and starts comparing relationships. Instead of trying to draw a perfect nose, the artist checks where the nose sits between the brow and chin. Instead of outlining a bottle, the artist compares its width, height, center line, and curved opening. The drawing may still be imperfect, but it begins to feel organized.
Another change occurs after practicing simple forms. Boxes stop being boring exercises and become useful tools. A room can be understood as a large box containing smaller boxes. A head becomes a rounded form with clear directional planes. Arms and legs become cylinders that turn through space. Subjects that once looked overwhelmingly complicated become combinations of manageable decisions.
Progress rarely moves in a smooth upward line. Some days, a sketch seems surprisingly strong. The next day, every face looks like it was assembled from spare parts. This does not necessarily mean the artist has become worse. Often, the eye has improved faster than the hand. The learner can now detect problems that previously went unnoticed, creating the uncomfortable sensation of regression.
Keeping old drawings changes that perspective. A sketch from three months earlier may reveal stiff poses, uncertain lines, weak values, and flattened forms that once seemed acceptable. The current work may not match the artist’s ideal, but the comparison provides concrete evidence that practice is working.
Feedback can be uncomfortable at first. A learner may spend two hours rendering a character’s face only to hear that the neck is too long. The comment feels unfair because the eyelashes were magnificent. Eventually, the artist learns that useful criticism is not an attack on the drawing’s effort. It is a shortcut to the next lesson.
As practice continues, drawing becomes less about proving talent and more about solving visual problems. The artist learns to restart a weak pose, simplify a confusing shadow, reduce an object to basic forms, and leave unnecessary details out. Mistakes still happen, but they become information rather than evidence of failure.
The most satisfying moment is not suddenly becoming a master. It is noticing that an old challenge has become routine. A hand that once required endless erasing can now be blocked in confidently. A room can be sketched with believable depth. A face can turn without losing its structure. These quiet victories accumulate until “trying to learn drawing” gradually becomes “being an artist who is still learning.”
Conclusion: Draw with Purpose, Not Perfection
To get good at drawing, practice seeing, simplify complex subjects, measure proportions, study light, construct forms in perspective, and review your work honestly. Spend time on fundamentals, but continue making drawings that are personally exciting. Technical exercises teach control; creative projects give that control a reason to exist.
You do not need perfect confidence before beginning. Confidence usually appears after repeated evidence that you can face a difficult drawing, make mistakes, correct some of them, and finish with more knowledge than you had before.
Pick up a pencil and draw one object today. Then draw it again tomorrow with one clear improvement in mind. That modest habit is not glamorous, but it is how good artists are madeone observant, slightly stubborn page at a time.