There are two kinds of people in this world: people who see a sheet of paper and think, “document,” and people who see a sheet of paper and think, “emergency snack bowl, tiny hat, dramatic note, or possibly a cup.” Today, we are proudly joining the second group. Learning how to fold a cup from a sheet of paper is one of those wonderfully simple skills that feels almost like a magic trick. You begin with a flat square, make a handful of smart creases, and suddenly you have a small paper pocket that can hold candies, paper clips, seeds, beads, or, in a pinch, a quick sip of water.
This easy origami paper cup is a classic beginner paper-folding project because it teaches several useful basics: diagonal folding, corner alignment, crease control, symmetry, and opening a finished model without crushing it like a nervous accordion. Better yet, it requires no glue, no tape, no scissors if you already have a square, and no advanced origami vocabulary. The whole project is friendly enough for kids, fast enough for a classroom activity, and practical enough for adults who enjoy small, clever life hacks.
Before we begin, one tiny reality check: a folded paper cup is not a replacement for a real drinking cup. Plain paper can soften quickly when wet. Wax paper, parchment paper, or clean food-safe paper can work better for short-term use, but this project is best treated as a craft, demonstration, party container, or temporary holder. In other words, it is charming, useful, and slightly dramaticbut it is not your new dishwasher-safe travel mug.
Why This Paper Cup Works
The paper cup works because of structure. A flat sheet becomes stronger when folded into layers, angles, and pockets. The triangle base gives the model a wide upper opening, while the crossed side flaps lock the cup into shape. The top flaps fold down to secure the sides and create a rim. It is the same general reason cardboard boxes, paper bags, and folded envelopes are stronger than loose sheets: geometry is doing the heavy lifting while pretending to be arts and crafts.
The traditional origami cup is usually made from a square sheet of paper. You can cut standard letter paper into a square by folding one corner diagonally until the short edge lines up with the long edge, then trimming or folding away the extra strip. If you do not want to cut, use origami paper, square scrapbook paper, or any clean square sheet that is not too flimsy. Regular printer paper is perfectly fine for practice, although slightly heavier craft paper often makes a sturdier cup.
What You Need
- One square sheet of paper
- A flat surface, such as a desk or table
- Clean hands, especially if the cup may hold snacks
- Optional: a ruler or bone folder for sharper creases
- Optional: wax paper or parchment paper for a more moisture-resistant practice cup
For beginners, a square between 6 inches and 8 inches wide is comfortable to handle. Smaller paper makes a cute mini cup, but it can be fiddly. Larger paper is easier for children and classroom demonstrations. If you are folding with young kids, start big. Tiny origami may look adorable, but it can turn a calm craft table into a courtroom drama.
How to Fold a Cup from a Sheet of Paper in 5 Steps
Step 1: Start with a Square and Fold It into a Triangle
Place your square sheet of paper on the table like a diamond, with one corner pointing toward you. If the paper has a colored or patterned side, place that side face down if you want the outside of the cup to show the pattern more prominently. Bring the bottom corner up to meet the top corner. Align the points carefully, then press the fold firmly from the center outward to create a neat triangle.
This first crease matters because it becomes the main bottom edge of the cup. A crooked triangle will not ruin the project, but it may create a lopsided cup that looks like it has already had a long day. Take a second to match the corners and smooth the fold. Good origami is not about rushing; it is about calmly convincing paper to behave.
Step 2: Fold One Bottom Corner Across the Triangle
Now look at your triangle. You should have a long folded edge at the bottom and a point at the top. Take the right bottom corner and fold it diagonally across the front of the triangle toward the left side. The goal is to make the top edge of this folded flap roughly parallel with the bottom edge of the triangle. Press the crease firmly.
This fold creates the first side wall of your cup. Do not worry if it feels a little strange the first time. You are not folding the corner straight up; you are crossing it over the body of the triangle. Imagine wrapping a scarf across the front of the paper. That is the general motion, but with fewer winter accessories.
Step 3: Fold the Other Bottom Corner Across
Take the left bottom corner and fold it diagonally across to the right side, overlapping the first flap. Try to mirror the previous fold so both sides look balanced. The top edge of this second flap should also sit roughly parallel to the bottom edge. Once it is positioned well, crease it firmly.
At this point, the model should begin to look like a cup or pouch. The crossed flaps are important because they lock the paper into a stable shape. If one flap is much higher than the other, unfold and adjust. Origami is forgiving when you correct early. It becomes less forgiving after you have pressed every fold with the confidence of a professional envelope machine.
Step 4: Fold the Top Front Flap Down
You will notice two loose triangular flaps at the top of the model: one in front and one in back. Take only the front top flap and fold it downward over the crossed side flaps. Crease it along the top edge of the side folds. This creates the front rim and helps hold the two side flaps in place.
Press the crease well, especially near the edges. A strong rim gives the cup better shape and makes it easier to open. If you are using thicker paper, you may need to run your fingernail, ruler edge, or bone folder along the crease. Sharp creases are the secret sauce of paper folding. They are also a satisfying way to feel productive while making something that weighs less than a sandwich wrapper.
Step 5: Fold the Back Flap Down and Open the Cup
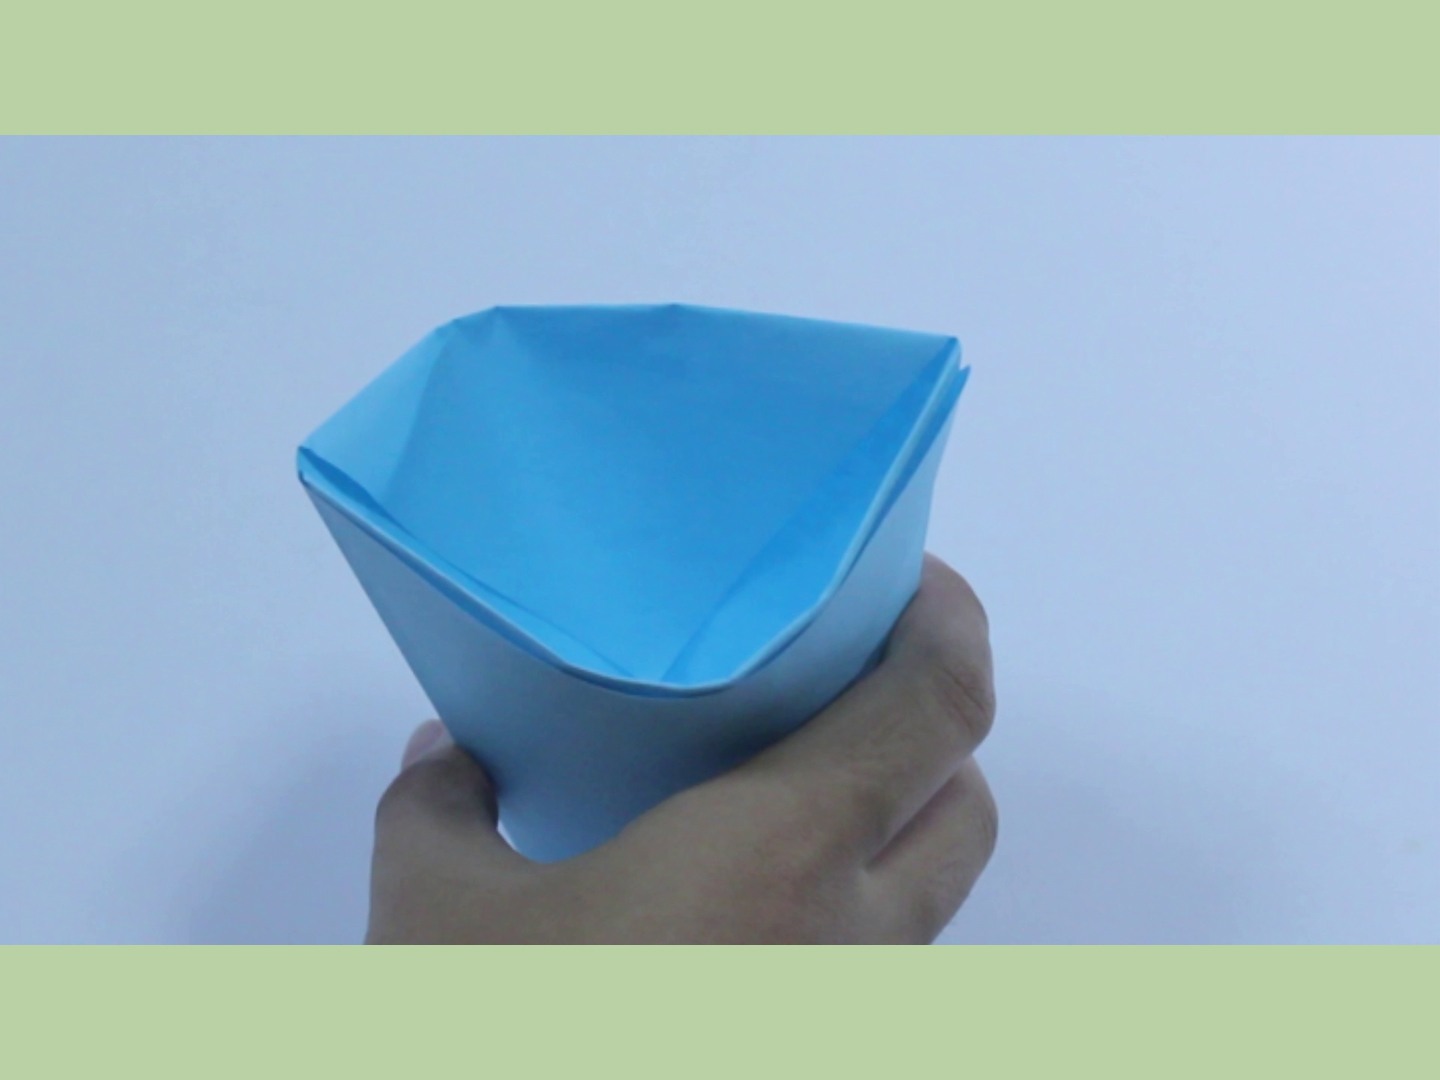
Turn the model over. Fold the remaining top flap downward on the back side in the same way. Crease it firmly. Now gently place your fingers inside the top opening and ease the cup open. Do not yank it apart. Instead, widen the pocket slowly and shape the bottom with your fingertips so the cup can stand or sit more naturally.
Congratulationsyou have folded a cup from a sheet of paper. The finished cup should have a pointed bottom, crossed side panels, and a double-folded rim. It can hold lightweight dry items immediately. If you plan to test it with water, use clean, suitable paper and understand that it may only hold liquid briefly. For crafts, party favors, sorting activities, and desk organization, it can last much longer.
Best Paper Choices for a Stronger Cup
The type of paper you choose affects how well the cup holds its shape. Thin notebook paper folds easily but can collapse faster. Standard printer paper is a good beginner option because it is common, inexpensive, and easy to crease. Origami paper looks beautiful and folds cleanly, but it is often thin, so it is better for decorative cups than practical holders. Scrapbook paper can create a sturdier cup, especially for candy, stickers, or small party favors.
If moisture resistance matters, wax paper or parchment paper may perform better than plain paper for a very short-term demonstration. However, always be sensible about food safety. Do not use paper with unknown inks, old newspaper, glossy magazine pages, or printed paper for anything that touches food or drink. Those materials may look cool, but “mystery ink tea” is not a beverage category anyone needs to explore.
Common Mistakes and How to Fix Them
The Cup Looks Uneven
This usually happens when the two side folds are not mirrored. Unfold the side flaps and try again, using the bottom edge as a visual guide. The top edges of the folded flaps should be close to parallel with the bottom edge.
The Cup Will Not Stay Closed
Make sharper creases. The top flaps need to fold down securely over the side flaps. If your paper is springy or thick, press each crease longer. You can also place the finished cup under a book for a minute to train the folds.
The Cup Tears While Opening
You may be pulling too hard or using brittle paper. Open the cup gently from the top and shape it gradually. Old, dry, or low-quality paper can split at the creases, especially if folded and unfolded several times.
The Cup Cannot Hold Water
That is normal for many types of paper. A traditional folded paper cup can hold water only briefly, and some paper will leak almost immediately. For a craft article, classroom activity, or party project, focus on dry uses unless you are using appropriate moisture-resistant paper for a quick test.
Creative Uses for a Folded Paper Cup
A paper cup is more than a “look what I made” project. It can become a handy little container for many low-stakes uses. Try using several cups to sort beads, buttons, paper clips, seeds, puzzle pieces, or game tokens. Teachers can use them for math counters, vocabulary slips, reward tickets, or science sorting activities. Parents can use them as quick snack holders for dry cereal, crackers, or wrapped candies. Crafters can use them to organize tiny supplies that otherwise roll off the table and vanish into the same dimension as missing socks.
For parties, folded paper cups can hold small favors. Use patterned paper that matches the theme, then arrange the cups on a tray. For a garden activity, make paper cups from plain uncoated paper and use them briefly to sort seeds before planting. For an office desk, fold a few from sturdy scrap paper to hold binder clips, sticky tabs, or push pins. The design is simple, but the usefulness multiplies quickly once you start thinking of it as a pocket instead of only a cup.
Why This Project Is Great for Kids and Beginners
Paper folding teaches patience, sequencing, and spatial reasoning in a hands-on way. Children learn that each step affects the next step, which is a gentle introduction to process thinking. They also practice fine motor control by aligning corners, pressing creases, and opening the model carefully. For adults, the project is relaxing because it gives the hands something focused to do without requiring expensive tools or a heroic amount of concentration.
The five-step paper cup is also a confidence builder. Many origami models look intimidating at first glance, especially the ones with 47 folds and a final result shaped like a dragon contemplating taxes. This cup is different. It is fast, useful, and easy to repeat. Once someone folds it successfully, they understand a key origami lesson: complex-looking objects often come from simple, well-placed folds.
Practical Tips for a Better Paper Cup
- Use a true square. A rectangle will make the folds harder to align.
- Fold on a hard, flat surface for cleaner creases.
- Press from the center outward to avoid wrinkles.
- Keep the side folds symmetrical so the cup opens evenly.
- Use clean, food-safe paper if the cup will touch snacks.
- Use larger paper for teaching children or groups.
- Make one practice cup before using decorative paper.
One of the easiest upgrades is to decorate the paper before folding. Add simple patterns, names, dots, stripes, or seasonal designs. Just remember that whatever you draw may rotate or land in a surprising place once folded. If you want a name or logo on the front, make a plain test cup first, unfold it, and mark where the front panel appears. Then use that as your guide for the final version.
Experience Notes: What Folding Paper Cups Teaches You
The first time you fold a paper cup, the process may feel almost too simple. Triangle, corner, corner, flap, flapdone. But after making a few, you begin noticing small improvements. The second cup is usually cleaner than the first. By the third cup, your side folds become more even. By the fourth, you may find yourself judging the sharpness of creases like a tiny paper engineer. That is the quiet charm of this project: it rewards repetition without becoming boring.
In real-life crafting situations, the paper cup is especially useful because it solves small problems quickly. Imagine a classroom where students are working with beads, seeds, or paper shapes. Instead of handing out plastic containers, you can teach everyone to fold their own cup. The container becomes part of the lesson. Students are not just receiving supplies; they are making the tool that holds the supplies. That changes the energy of the activity. It feels more personal, more creative, and much more memorable.
At home, folded paper cups are surprisingly helpful during quick organizing sessions. If you have ever opened a drawer and discovered a wild civilization of paper clips, rubber bands, coins, and mysterious screws, a few paper cups can bring order in minutes. They are not meant to last forever, but that is part of their appeal. You can fold one when you need it, recycle it when you are done, and make another later. No storage bin shopping trip required.
For kids, the experience is often part craft and part magic show. They see a flat sheet become a three-dimensional object they can actually use. That moment matters. It connects creativity with function. The child is not only making something pretty; they are making something that works. Even if the first cup is crooked, the result still feels like a win. And when a child immediately fills it with crackers, crayons, or tiny toy dinosaurs, you know the project has succeeded.
Adults may appreciate a different lesson: simplicity can be satisfying. In a world full of screens, apps, chargers, updates, passwords, and devices that require another device to reset them, folding a paper cup is refreshingly direct. One sheet. Five steps. A useful object. No subscription plan. No firmware update. No mysterious error message. Just paper, hands, and a few well-placed creases.
If you want to turn the experience into a group activity, challenge everyone to fold the strongest cup, the neatest cup, the smallest cup, or the most decorative cup. You can also test different paper types and compare results. Which one opens best? Which one stands most easily? Which one holds dry rice or beans without sagging? These small experiments turn a basic craft into a mini lesson in design, materials, and problem-solving.
After folding several paper cups, you may also notice that the project encourages careful attention. A tiny misalignment at the start becomes more visible later. That does not mean the craft is difficult; it means the craft teaches cause and effect. Better starts create better finishes. That is a useful lesson whether you are folding paper, writing an essay, building furniture, or assembling anything with instructions that claim “easy setup” in suspiciously cheerful letters.
Conclusion
Learning how to fold a cup from a sheet of paper is a quick, practical, and surprisingly satisfying craft. With one square sheet and five simple steps, you can create a small container for dry snacks, craft supplies, classroom materials, party favors, or desk odds and ends. The key is to begin with a neat square, make sharp creases, keep the side folds balanced, and open the finished cup gently. Once you master the basic version, you can experiment with different paper sizes, patterns, and uses.
This easy origami cup is proof that useful design does not have to be complicated. Sometimes, the best projects are the ones you can learn in minutes, teach to someone else, and use right away. So grab a sheet of paper, fold with confidence, and enjoy the tiny thrill of turning “flat” into “functional.” Paper may be humble, but give it five good folds and suddenly it has responsibilities.