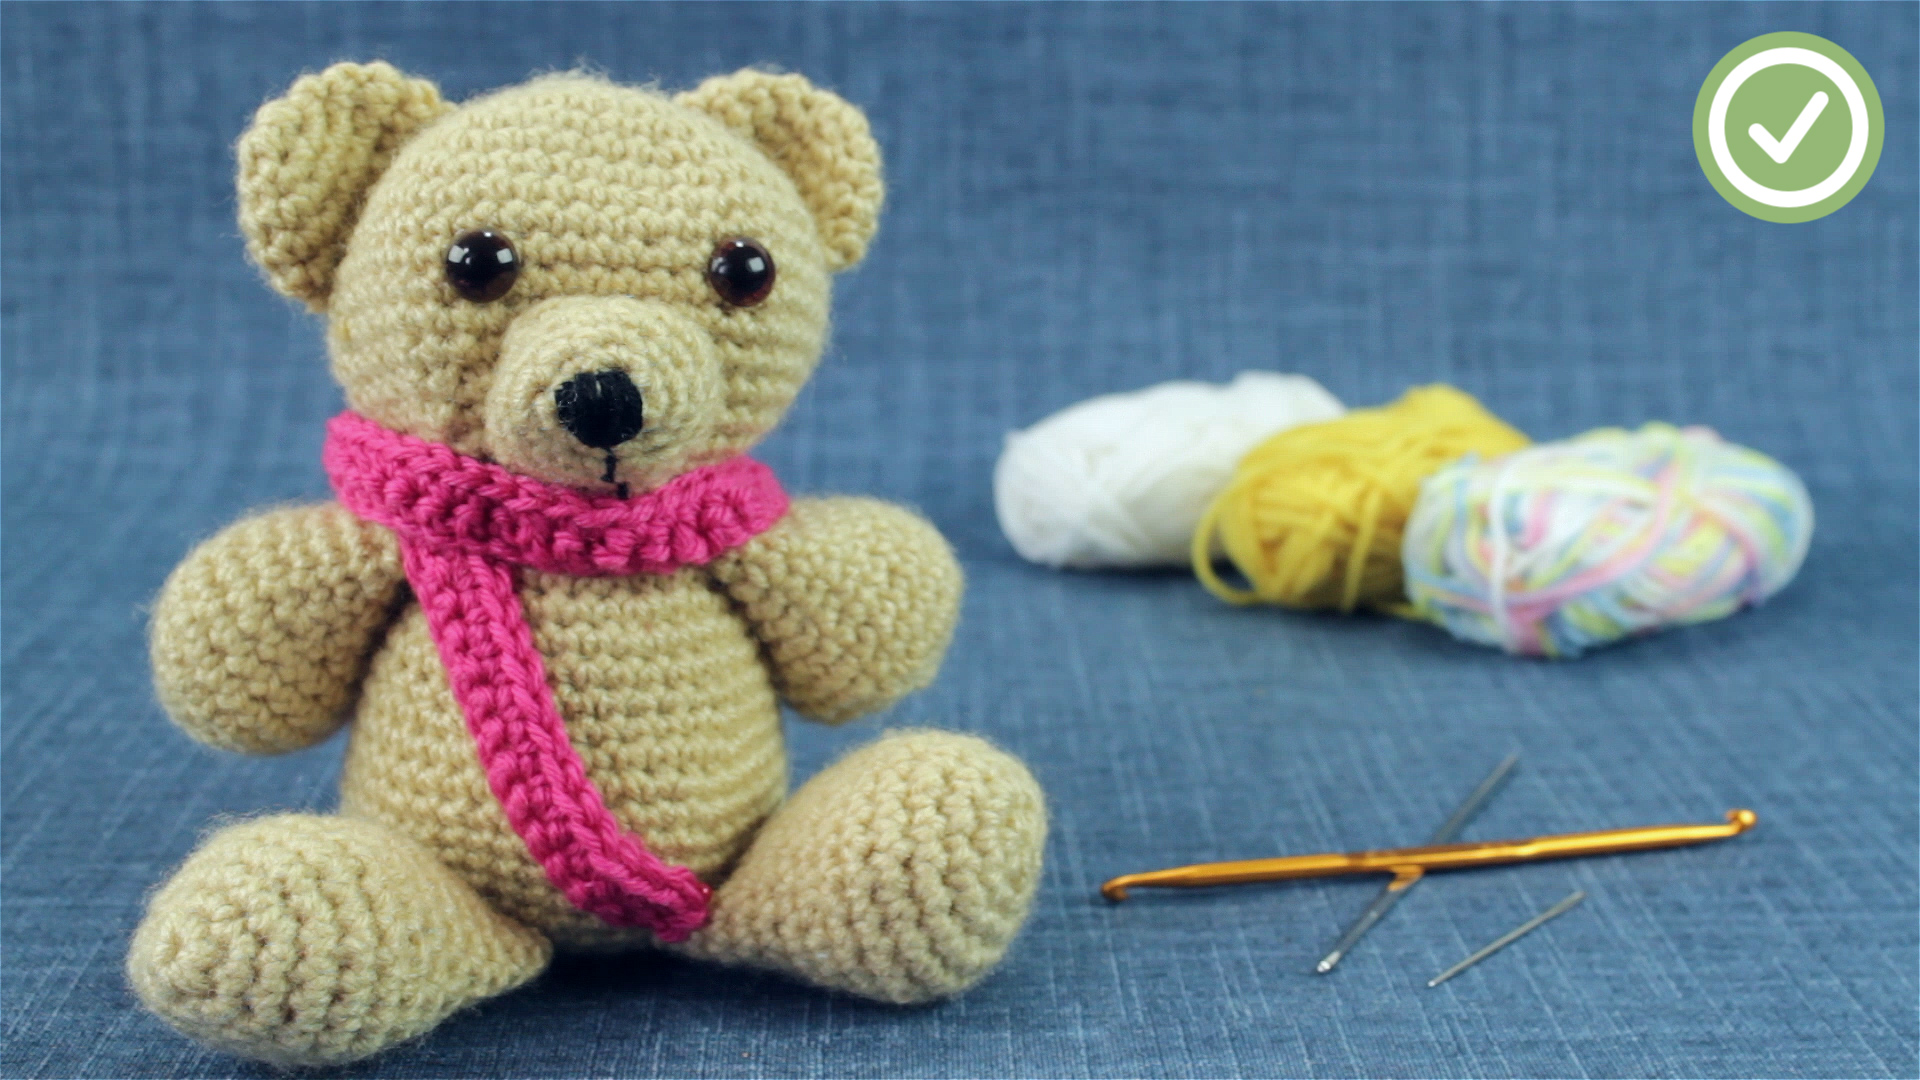
Learning how to crochet a teddy bear is one of those craft adventures that starts with a ball of yarn and somehow ends with you emotionally attached to a small stuffed creature with button-like eyes and a suspiciously charming face. The good news? A crochet teddy bear looks impressive, but the basic method is surprisingly beginner-friendly once you understand the building blocks: tight single crochet stitches, simple shaping, stuffing, sewing, and a little personality magic.
This guide walks you through the process in plain American English, with practical tips for choosing yarn, reading basic crochet instructions, shaping the bear, assembling the pieces, and avoiding the common mistakes that make handmade bears look like they’ve had a very long week. Whether you want to make a baby shower gift, a keepsake, a plush desk buddy, or your first amigurumi project, this tutorial will help you start with confidence.
What Is a Crochet Teddy Bear?
A crochet teddy bear is usually made with amigurumi, the technique of crocheting small stuffed toys in rounds. Most amigurumi teddy bears are built from simple 3D shapes: spheres, tubes, ovals, and flattened circles. The head may be a ball, the body a rounded cylinder, the ears two small circles, and the arms and legs little tubes. Put them together, add a muzzle, stitch a nose, and suddenly your yarn has developed a personality.
The most common stitch used in crochet teddy bear patterns is the single crochet. This stitch creates a dense fabric, especially when worked with a smaller hook. Dense fabric matters because nobody wants stuffing peeking through the bear like it is trying to escape. A teddy bear should look cuddly, not like it is shedding clouds.
Supplies You Need to Crochet a Teddy Bear
Before you begin, gather your materials. You do not need a craft room that looks like a yarn tornado passed through it. A small, organized kit is enough.
Basic Materials
- Worsted-weight yarn, DK yarn, cotton yarn, acrylic yarn, chenille yarn, or plush yarn
- A crochet hook that is smaller than the yarn label suggests
- Polyester fiberfill stuffing
- Yarn needle or tapestry needle
- Stitch markers
- Scissors
- Embroidery floss or yarn for the nose and mouth
- Safety eyes, embroidered eyes, or crocheted eyes
- Pins for positioning parts before sewing
For a first teddy bear, medium-weight acrylic or cotton yarn is easier to control than fluffy chenille. Plush yarn makes a wonderfully squishy bear, but it can hide stitches like a tiny yarn magician. Beginners may prefer a light-colored yarn because dark brown, black, or navy can make stitch counting feel like reading a novel in a power outage.
Choosing the Best Yarn and Hook Size
The best yarn for a crochet teddy bear depends on the look you want. Cotton gives a neat, structured finish. Acrylic is affordable, soft, and easy to wash. Chenille and blanket yarn create a plush, huggable bear, but they require a little more patience because the stitches can be harder to see.
For classic amigurumi, many crocheters size down their hook. For example, if the yarn label recommends a 5 mm hook, you might try a 3.5 mm or 4 mm hook for tighter stitches. The exact size depends on your tension, but the goal is simple: make a firm fabric with no visible gaps. If you can see stuffing through your stitches, go down a hook size or tighten your tension slightly.
A good beginner combination is worsted-weight yarn with a 3.5 mm to 4 mm hook. For plush yarn, a 5 mm or 6 mm hook may work well, depending on the yarn thickness. Always make a small test circle first. If the fabric looks neat and firm, you are ready to meet your bear.
Basic Crochet Terms You Should Know
Most teddy bear crochet patterns use abbreviations. Once you learn them, patterns become much less intimidating. Think of them as crochet text messages, but more useful and with fewer mysterious emojis.
- ch: chain
- sl st: slip stitch
- sc: single crochet
- inc: increase, usually two single crochets in one stitch
- dec: decrease, joining two stitches together
- MR: magic ring or magic circle
- rnd: round
- st: stitch
- FO: fasten off
The magic ring is especially helpful for amigurumi because it lets you start a round with a tightly closed center. You will use it for the head, body, ears, arms, legs, and muzzle. If your magic ring keeps opening, leave a long tail and weave it in securely. That tiny tail is not decorative; it is structural. Treat it with respect.
How to Crochet a Teddy Bear: Step-by-Step Overview
This is a general construction guide rather than a copyrighted pattern. Exact stitch counts vary by design, yarn, hook size, and desired bear size. However, most crochet teddy bears follow the same basic structure.
Step 1: Crochet the Head
Start with a magic ring and work six single crochets into the ring. Then increase evenly for several rounds until the circle becomes wide enough for the bear’s head. A typical shaping sequence might begin with 6 stitches, then 12, 18, 24, 30, and so on. After the widest point, crochet several rounds without increasing to build height. Then decrease gradually to close the shape.
Stuff the head before the opening gets too small. Add stuffing a little at a time. The head should feel firm, but not so packed that the stitches stretch. If your bear’s head feels like a tennis ball with emotional baggage, remove a little stuffing.
Step 2: Crochet the Body
The body is often made the same way as the head, but slightly longer or wider at the bottom. Begin with a magic ring, increase to the desired width, work even rounds, and decrease near the top. Some patterns join the body and head as one continuous piece, while others make them separately and sew them together.
If you are a beginner, a one-piece head-and-body design can reduce sewing. However, separate pieces can make shaping easier. There is no wrong choice, unless you forget to stuff the body before closing it. That is a crochet rite of passage, and yes, it is mildly tragic.
Step 3: Crochet the Arms
Arms are usually small tubes. Start with a magic ring, increase slightly, then work even rounds until the arm reaches the right length. Many makers lightly stuff only the hand end and leave the upper arm flatter. This makes the arms hang naturally and easier to sew onto the body.
Make two arms, unless your teddy bear is intentionally avant-garde. Count your rounds so both arms match. If they are slightly different, do not panic. Handmade bears are allowed to have character. That said, one tiny arm and one giant arm may require a creative backstory.
Step 4: Crochet the Legs
Legs are made similarly to arms but may be wider and shorter. For a sitting bear, the legs are often sewn at the lower front of the body. For a standing bear, they may be joined into the body as you crochet upward. Beginners usually find sewn-on legs easier because you can adjust the placement before committing.
When attaching legs, pin both in place first. Set the bear on a table and check whether it sits evenly. If one leg points east and the other has chosen a different life path, reposition before sewing.
Step 5: Crochet the Ears
Teddy bear ears are small circles or half-circles. They are usually not stuffed. You can make them as simple flat rounds and fold them slightly when sewing to create a curved ear shape. Place them on the upper sides of the head, not too high and not too low. Ear placement can completely change the expression of your bear.
For a baby bear look, position the ears lower and wider. For a classic teddy look, place them higher and symmetrical. Use pins and step back before sewing. A one-inch shift can turn “sweet teddy” into “surprised woodland accountant.”
Step 6: Make the Muzzle
The muzzle is a small oval or circle sewn onto the lower front of the face. Use cream, beige, white, or a lighter shade of your main yarn for contrast. Lightly stuff the muzzle before sewing the final stitches so it has a gentle bump.
After attaching the muzzle, embroider the nose and mouth. A simple triangle or satin-stitched oval works well for the nose. Add a short vertical line down from the nose and a small smile. Keep the expression subtle. A teddy bear should look friendly, not like it knows your browser history.
Adding Eyes Safely
Safety eyes give a polished look, but they are not always appropriate for every recipient. If the teddy bear is for a baby, toddler, or child under three, embroidered eyes are usually the better choice because small detachable parts can be choking hazards. For decorative bears or gifts for older children and adults, safety eyes can be used if installed correctly with secure washers.
Place the eyes before you close the head if you are using plastic safety eyes. Once the washers are on, they are difficult to remove. For embroidered eyes, you can stitch them after the head is finished. This gives you more flexibility and helps you adjust the face until it looks just right.
Stuffing Tips for a Smooth Teddy Bear
Stuffing makes or breaks a crochet teddy bear. Add fiberfill in small pieces rather than shoving in one giant handful. Small pieces help prevent lumps and create a smoother shape. Use the back of your crochet hook, a stuffing stick, or a chopstick to push filling into narrow arms and legs.
Do not overstuff flat areas like ears. Do not understuff the head unless you want a bear who looks like he skipped breakfast and self-confidence. The ideal teddy bear is firm enough to hold its shape but soft enough to cuddle.
Sewing the Teddy Bear Together
Assembly is where your teddy bear becomes a teddy bear instead of a pile of cute yarn potatoes. Use a yarn needle and the long tails left from each piece. Pin everything in place first: ears, muzzle, arms, legs, and head if separate.
Sew slowly and check alignment often. Follow the crochet rows as a guide so pieces sit evenly. If your bear needs to sit, angle the legs slightly outward. If you want floppy arms, sew only the top edge firmly and let the lower part hang. For a sturdier bear, stitch around the full opening of each limb.
Common Mistakes and How to Fix Them
Gaps Between Stitches
If stuffing shows through, use a smaller hook or tighten your tension. Amigurumi fabric should be dense. You can also choose a thicker yarn or avoid overstuffing.
Lumpy Stuffing
Pull the stuffing apart into small clouds before inserting it. Add more gradually. Smooth the outside of the piece with your fingers as you go.
Uneven Arms or Legs
Count rounds carefully and use stitch markers. Make both arms or both legs in the same sitting if possible, so your tension stays consistent.
A Crooked Face
Pin the eyes, muzzle, and ears before sewing. Look at the bear from the front, side, and top. Taking a quick photo can help you notice uneven placement.
The Magic Ring Opens
Leave a long tail, pull it firmly, and weave it through the inside stitches in more than one direction. For slippery or plush yarn, consider reinforcing the starting ring with a matching smooth yarn.
Easy Ways to Customize Your Crochet Teddy Bear
Once you understand the basic teddy bear shape, customization is the fun part. Change the yarn color for a polar bear, panda bear, chocolate bear, honey bear, or rainbow bear. Add a scarf, bow tie, tiny sweater, heart patch, sleeping cap, or embroidered initials.
You can also adjust the proportions. A larger head creates a babyish, kawaii-style bear. Longer arms create a floppy snuggle bear. Big feet make the bear sit more easily. Small ears give a modern plush look, while larger round ears create a classic teddy style.
For gifts, consider the recipient. A minimalist cream bear with a linen bow works beautifully for nursery decor. A bright blue bear with a crooked grin may be perfect for a child who names everything “Captain Waffles.” Handmade toys have room for personality, and that is their superpower.
How Long Does It Take to Crochet a Teddy Bear?
A small beginner teddy bear may take three to six hours, depending on your speed and comfort with sewing. A large plush bear can take a weekend. The crocheting itself is often faster than the assembly, especially for beginners. Sewing pieces neatly, shaping the face, and hiding ends take patience.
If this is your first amigurumi project, do not rush. Crochet one piece at a time. Celebrate small wins: the first round that does not twist, the first arm that looks arm-like, the moment your bear gets ears and suddenly becomes adorable. Crafting is allowed to be slow. In fact, that is half the charm.
Care Tips for a Handmade Crochet Teddy Bear
Check the yarn label for washing instructions before gifting your bear. Many acrylic yarns are machine washable, while some cotton or specialty yarns need gentler care. If the bear has safety eyes, glued accessories, delicate embroidery, or mixed fibers, hand washing may be safest.
Include a small care note with the gift. For example: “Spot clean or hand wash gently in cool water, reshape, and air dry.” This tiny note makes your handmade teddy feel more professional and helps the recipient keep it looking fresh.
Experience Notes: What Crocheting a Teddy Bear Really Teaches You
Making a crochet teddy bear teaches you more than just how to follow rounds. It teaches patience, shaping, problem-solving, and the fine art of not throwing your hook across the room when you lose count at stitch 37. The first bear may not be perfect. In fact, it probably will not be. One ear might lean. The smile might be a little ambitious. The body may look more potato than plush. But that first bear is also the one that teaches your hands what the instructions cannot fully explain.
One of the biggest lessons is tension. When you crochet a flat scarf, uneven tension can hide in the rows. In a teddy bear, uneven tension shows up as gaps, bumps, or shapes that lean. After a few pieces, you begin to feel how tightly the yarn should glide through your fingers. You learn that tight enough does not mean hand-cramping tight. Your stitches should be firm, not forged in battle.
You also learn the importance of pausing before assembly. Many beginners want to sew parts on as soon as they are finished. That is understandable; the bear is almost alive, and you want to meet it. But pinning pieces first saves a lot of heartbreak. A muzzle placed slightly higher can make the bear look cheerful. A muzzle too low can make it look confused. Ears placed evenly create balance, while uneven ears may create charm or chaos, depending on your standards.
Another practical experience is learning how much stuffing to use. At first, you may underfill because you are afraid of stretching the stitches. Then the bear looks tired. Next, you may overfill and create a plush toy that could bounce off the floor. Eventually, you find the sweet spot: firm, smooth, and squeezable. This is the quiet skill that makes handmade amigurumi look polished.
Crocheting a teddy bear also teaches emotional flexibility. You might plan a traditional brown bear and end up with a lavender bear wearing a yellow scarf because that yarn was on sale and your imagination got involved. This is not failure. This is craft evolution. Some of the best handmade toys happen when makers stop chasing factory-perfect results and start letting the project become its own little character.
Finally, a crochet teddy bear reminds you why handmade gifts matter. Every stitch takes time. Every sewn-on ear says, “I made this with care.” Unlike a store-bought plush, a crochet bear carries the maker’s choices: the yarn color, the face, the softness, the tiny details. That is why even a slightly wobbly first teddy bear can become someone’s favorite. Perfection is optional. Cuteness, luckily, is very forgiving.
Conclusion
Learning how to crochet a teddy bear is a rewarding project for beginners and experienced crocheters alike. Once you understand the core techniquesmagic ring, single crochet, increases, decreases, stuffing, and sewingyou can create endless teddy bear styles. Start with simple shapes, choose yarn that helps you see your stitches, use a smaller hook for firm fabric, and take your time with assembly.
The best crochet teddy bears are not always the most perfect ones. They are the ones with personality, careful stitching, and a face that makes someone smile. So grab your hook, pick a cozy yarn, and begin. Your first handmade teddy bear is waiting patiently in that skein, probably wondering why it does not have ears yet.