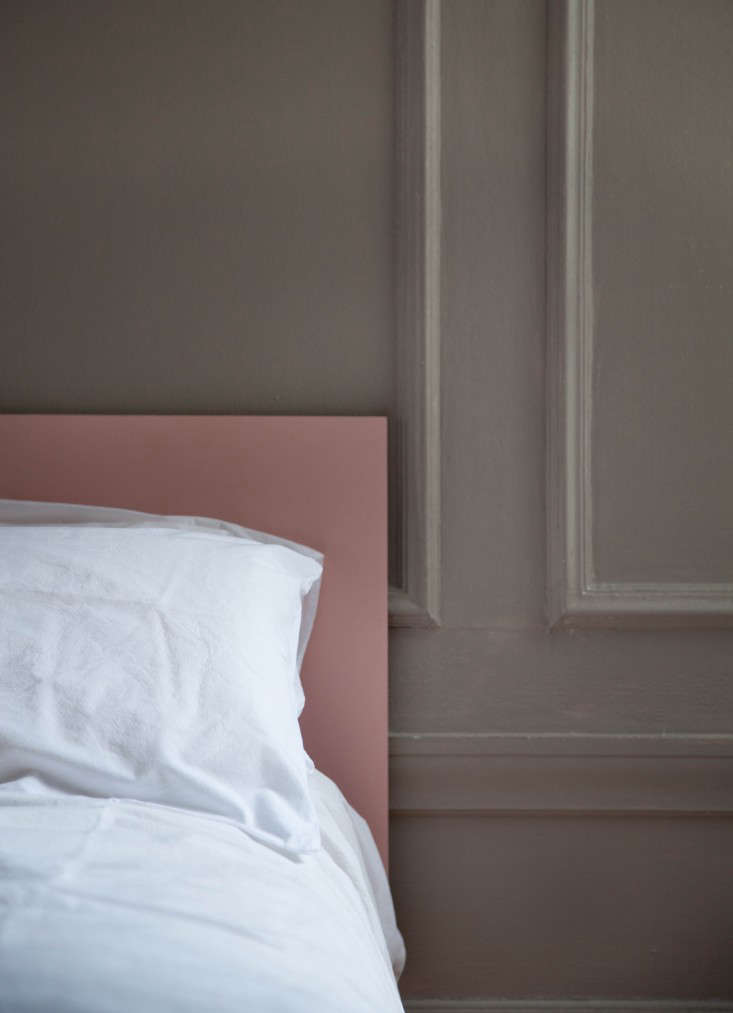
A bedroom without a headboard can feel a little like a sandwich without the filling: technically complete, but missing the part that makes everything come together. Fortunately, you do not need a truck, a power saw, or a heroic amount of money to create a stylish focal point behind your bed. A painted headboard can add color, shape, personality, and a surprisingly custom look with little more than paint, painter’s tape, and a free afternoon.
This DIY painted headboard project is especially useful for renters, small bedrooms, guest rooms, first apartments, and anyone who has ever looked at a beautiful upholstered headboard price tag and quietly closed the browser tab. Instead of buying a bulky piece of furniture, you create the illusion of one directly on the wall. The result can be bold and graphic, soft and architectural, playful and colorful, or calm enough to make your bedroom feel like it belongs in a boutique hotel where the tiny soap smells expensive.
The best part is that this project follows a simple formula: plan the shape, tape the outline, and paint it carefully. That is it. No woodworking degree required. No mysterious extra screws left over at the end. Just a smart use of color and a wall ready for a little attention.
Why a Painted Headboard Works So Well
A painted headboard creates visual structure around the bed, which is usually the largest object in the room. Even if your bed frame is simple, a painted wall treatment gives it a sense of intention. It helps define the sleeping zone, adds height behind the pillows, and can make a basic mattress-and-frame setup feel more finished.
Unlike a traditional headboard, a painted version does not take up floor space. That makes it a strong option for compact bedrooms where every inch matters. It also gives you more freedom to customize the scale. You can paint a narrow rectangular panel for a minimalist look, a tall arch for a soft modern style, or a wide shape that visually connects two twin beds in a shared room.
Paint is also wonderfully noncommittal compared with furniture. A dark green headboard may feel perfect this year, while a warm clay tone may become your next obsession. When your style changes, the wall can change with it. The only thing standing between you and a bedroom refresh is usually a paint sample, a roller, and the determination to avoid getting paint in your hair.
What You Need for a DIY Painted Headboard
Before starting, gather your materials so you are not balancing on a chair with wet paint while searching for the tape you absolutely had five minutes ago.
- Interior wall paint in your chosen color
- Paint primer, if your wall is stained, patched, dark, glossy, or unfinished
- Painter’s tape
- A small angled paintbrush
- A mini roller and roller tray
- A level or laser level
- A measuring tape
- A pencil
- Drop cloths or old sheets
- A damp cloth for cleaning the wall
- Optional: string, cardboard, a large bowl, or a flexible curve ruler for rounded shapes
For most painted headboard designs, a durable interior finish with a slight sheen works nicely because it is easier to wipe clean than a very flat finish. Eggshell and satin are popular choices for bedroom walls, although the right finish depends on the texture of your wall, the lighting in the room, and your tolerance for seeing every tiny fingerprint left behind by a wandering toddler, dog, or adult who insists they were “just checking the paint.”
Choose the Right Painted Headboard Shape
The shape is where this DIY becomes personal. A simple rectangle is timeless, but it is far from your only option. Before reaching for the tape, consider the style of your room, the width of your bed, the height of your ceiling, and whether you want the headboard to whisper or make an entrance.
Classic Rectangle
A rectangular painted headboard is the easiest option and works with nearly every decorating style. It looks crisp behind a platform bed, metal bed frame, or upholstered bed. You can keep the top edge flat for a clean modern look or extend the rectangle beyond the width of the bed for a more dramatic, hotel-inspired effect.
Soft Arch
An arched painted headboard adds warmth and softness to a room filled with straight lines. It works especially well in bedrooms with modern, Mediterranean, Scandinavian, cottage, or vintage-inspired decor. A tall arch can make the ceiling feel higher, while a wide arch creates a cozy frame around the bed.
Half Circle or Rainbow Shape
A half circle is cheerful and approachable, making it a fun choice for a child’s room, teen bedroom, or playful guest space. You can keep it one color or layer several curved bands for a subtle rainbow effect. Just remember that a rainbow does not need to look like a kindergarten mural. Muted shades of terracotta, cream, olive, dusty blue, and warm pink can feel sophisticated.
Color Block Panel
For a graphic look, paint a large block behind the bed and continue it slightly onto the ceiling or side walls. This creates a color-drenched effect that feels deliberate and high impact. It is a good option for rooms with plain white walls that need personality but do not need another shelf full of decorative objects collecting dust.
Striped or Paneled Design
If you like a little more detail, use tape to create vertical stripes, wide horizontal bands, or a simple geometric pattern. These designs work best when the color palette is limited. Two or three shades are usually enough. Once you reach seven colors, you may be decorating a headboard or accidentally opening a small carnival.
The Three-Step Painted Headboard Method
Step 1: Measure, Clean, and Plan the Design
Start by moving the bed away from the wall if possible. If the bed is heavy, cover it carefully with a drop cloth and protect the floor beneath the work area. Remove wall art, plug covers, or sconces that could interfere with the design. Then clean the wall with a lightly damp cloth to remove dust, oils, or mystery smudges. Let it dry completely before applying tape.
Next, decide how large the painted headboard should be. A good starting point is to make the design wider than the mattress so it frames the bed rather than disappearing behind it. For example, a queen bed can look balanced with a painted shape extending beyond each side of the mattress. The exact width depends on your nightstands, wall space, and whether you want the design to feel compact or oversized.
Height matters just as much. A painted headboard should rise high enough above your pillows to be visible, but it does not need to climb all the way to the ceiling. A low rectangle feels modern and understated. A taller arch creates drama. Stand back several feet and imagine the design before making any marks. You can even use removable painter’s tape to outline the idea first and live with it for a few minutes.
Use a level to mark the top line and side edges with a pencil. Do not trust your eyes alone, especially if your home is older. Walls, ceilings, floors, and apparently the laws of geometry can become very creative over time. A level will keep your headboard from looking like it has been gently sliding downhill since breakfast.
For an arch, mark the center point above the bed first. Then determine the height of the arch and the width of the vertical sides. You can create the curve with a large piece of cardboard, a flexible ruler, a pencil attached to string, or a round household object. The goal is not mathematical perfection; the goal is a smooth, intentional shape that looks balanced from across the room.
Step 2: Tape the Outline Carefully
Painter’s tape is the quiet hero of a sharp-looking painted headboard. Apply it slowly along the pencil marks, keeping the tape edge smooth and firmly pressed against the wall. Use your fingers, a plastic card, or a putty knife to seal the edge, especially if your wall has slight texture. This helps reduce paint seepage and gives you cleaner lines.
For straight-edged designs, use long tape sections whenever possible. Fewer seams mean fewer opportunities for paint to sneak underneath. If you need to overlap tape pieces, keep the overlap neat and press both layers firmly against the wall.
Curves require a bit more patience. Use shorter strips of tape and gently bend them around the shape. Do not force the tape into a sharp curve all at once, or it may wrinkle and create uneven edges. Think of it as guiding the tape rather than wrestling it into emotional submission.
Before painting, step back and inspect the outline. Check that the design is centered over the bed area. Measure from the side edges to nearby windows, nightstands, or walls if necessary. Tiny adjustments are easy now. They are much less fun after you have applied two coats of navy blue paint and named the project “The Great Bedroom Regret of 2026.”
If you are painting over a dark wall with a pale color, covering patched areas, or working on unfinished drywall, apply primer first. Allow it to dry according to the product instructions. Primer can make the final color appear more even and reduce the number of paint coats needed.
Step 3: Paint, Remove the Tape, and Style the Room
Use the angled brush to paint along the taped edges first. Keep the brush lightly loaded so paint does not pool against the tape. Then use a mini roller to fill the larger area. Roll from top to bottom with light, even pressure, overlapping each pass slightly to keep the coverage smooth.
Maintain a wet edge while working. In plain English, that means do not paint one little section, disappear for forty minutes to answer emails, and then return to paint right beside it. Work steadily across the shape so the paint blends smoothly rather than drying in visible patches.
Most painted headboards need at least two thin coats for even coverage, especially with rich colors such as navy, forest green, burgundy, charcoal, or saturated terracotta. Let each coat dry as directed on the paint label before applying the next one. Rushing is tempting, but so is eating cake batter with a spoon. Both choices can end badly if you ignore the instructions.
Remove the painter’s tape slowly once the paint is dry to the touch or slightly tacky, depending on the tape and paint directions. Pull it back over itself at an angle rather than yanking it straight away from the wall. This reduces the chance of lifting fresh paint.
After the paint has dried fully, move the bed back into place. Add pillows, bedding, lamps, art, or wall-mounted sconces to complete the look. A painted headboard works especially well when repeated in small details elsewhere in the room, such as a throw pillow, bedside lamp base, curtain trim, or framed print.
Paint Color Ideas for Every Bedroom Style
The color you choose determines whether your painted headboard feels peaceful, dramatic, playful, or quietly expensive-looking.
Warm Neutrals
Try mushroom, taupe, camel, warm gray, sand, or soft clay for a relaxed bedroom. These shades work beautifully with linen bedding, wood furniture, woven textures, and cream-colored curtains.
Moody Colors
Deep blue, blackened green, charcoal, plum, and chocolate brown create a cocooning effect. They look especially striking behind white bedding, brass lamps, or natural wood furniture. Dark colors can make a small bedroom feel intentionally cozy rather than merely small.
Earthy Tones
Terracotta, olive green, dusty rust, muted mustard, and warm blush bring personality without looking overly loud. These colors pair nicely with natural materials such as rattan, oak, cotton, jute, and pottery.
Soft Pastels
Dusty blue, pale lavender, muted peach, sage, and soft pink can make a bedroom feel gentle and airy. They are especially effective in rooms with lots of daylight or in guest bedrooms where you want a welcoming, calm atmosphere.
Common Painted Headboard Mistakes to Avoid
The good news is that paint is forgiving. The better news is that most DIY mistakes are easy to prevent.
- Skipping wall cleaning: Dust and oils can prevent tape from sticking well and may affect paint adhesion.
- Using a dull or damaged roller: A fresh roller cover helps create smoother coverage.
- Overloading the brush: Too much paint increases the chance of drips and tape bleed.
- Ignoring the level: Even a small tilt can become obvious once the bed is centered underneath.
- Choosing a shape that is too small: A tiny painted headboard may look accidental rather than intentional.
- Removing tape too aggressively: Slow, controlled tape removal is much safer for fresh paint edges.
- Forgetting ventilation: Open windows when possible, follow paint-label precautions, and give the room time to air out before sleeping there.
Renter-Friendly Options
If you rent, check your lease and landlord rules before painting. Some rentals allow wall paint as long as you return the room to its original color when you move out. Others are stricter, so it is worth asking before turning your beige bedroom into a dramatic emerald retreat.
A renter-friendly alternative is to create the headboard shape on a removable panel, large piece of lightweight plywood, foam board, canvas, or peel-and-stick wall covering. You can paint the panel, lean it behind the bed, or mount it with removable hardware designed for the wall surface. Another easy option is to use removable vinyl decals or washi tape to outline a headboard shape without painting at all.
Note: Always test painter’s tape and your chosen paint color in a small, inconspicuous area first, especially on older walls or freshly painted surfaces.
DIY Experience Notes: What People Learn After Painting Their First Headboard
The first painted headboard project often begins with optimism, a paint sample, and the phrase, “This should only take an hour.” It may take longer than an hour. That is not failure. That is simply the ancient DIY law that says every project requires at least one unexpected snack break, one tape adjustment, and one moment of standing three feet away from the wall wondering whether the color looks “warm terracotta” or “slightly confused pumpkin.”
One of the biggest lessons is that preparation creates most of the professional-looking result. The actual painting is usually the easy part. Measuring the design, checking the center line, cleaning the wall, and applying tape carefully are the steps that separate a crisp headboard shape from something that looks like a very determined abstract mural.
Many DIYers also discover that paint colors behave differently depending on light. A gray-green that looks elegant in the store can appear bluer in morning sunlight and browner at night under warm lamps. That is why sample swatches are worth the extra effort. Paint a large test patch, look at it during the day and evening, and hold it beside your bedding, curtains, rug, and nightstands. The color does not need to match everything perfectly. It simply needs to feel like it belongs in the room.
Another useful experience is realizing that a painted headboard can be more forgiving than a physical one. If the line is slightly uneven, you can touch it up. If the color is too bold, you can soften the room with neutral bedding and natural textures. If the shape feels too plain, you can add art, sconces, a narrow picture ledge, or a pair of wall-mounted reading lights. Paint gives you a flexible foundation rather than locking you into one expensive furniture decision.
People also learn that less is often more. A simple rectangular panel in a well-chosen color can look more polished than an overly complicated pattern. Bedrooms are places to rest, so a painted headboard does not need to perform a full Broadway production every time you walk in. One strong shape, one thoughtful color, and a few layered textiles can create a room that feels complete without feeling crowded.
Finally, the best experience is the satisfaction of seeing a plain wall become part of the room’s story. A painted headboard can make a bed feel intentional, a guest room feel welcoming, or a rental feel a little more like home. It is proof that a small project can change the mood of an entire space. You do not need a giant renovation budget to create a bedroom you enjoy waking up in. Sometimes you just need paint, tape, patience, and the willingness to trust that your wall can handle a little personality.
Final Thoughts
A DIY painted headboard is one of the simplest ways to give a bedroom a custom look without buying a large piece of furniture. With smart measurements, clean tape lines, and a color you genuinely enjoy, a blank wall can become the anchor of the entire room.
Whether you choose a modern rectangle, a soft arch, a playful rainbow, or a moody color-blocked panel, the three-step process stays the same: plan carefully, tape precisely, and paint patiently. The finished result can look bold, cozy, polished, or artisticbut most importantly, it will look like yours.