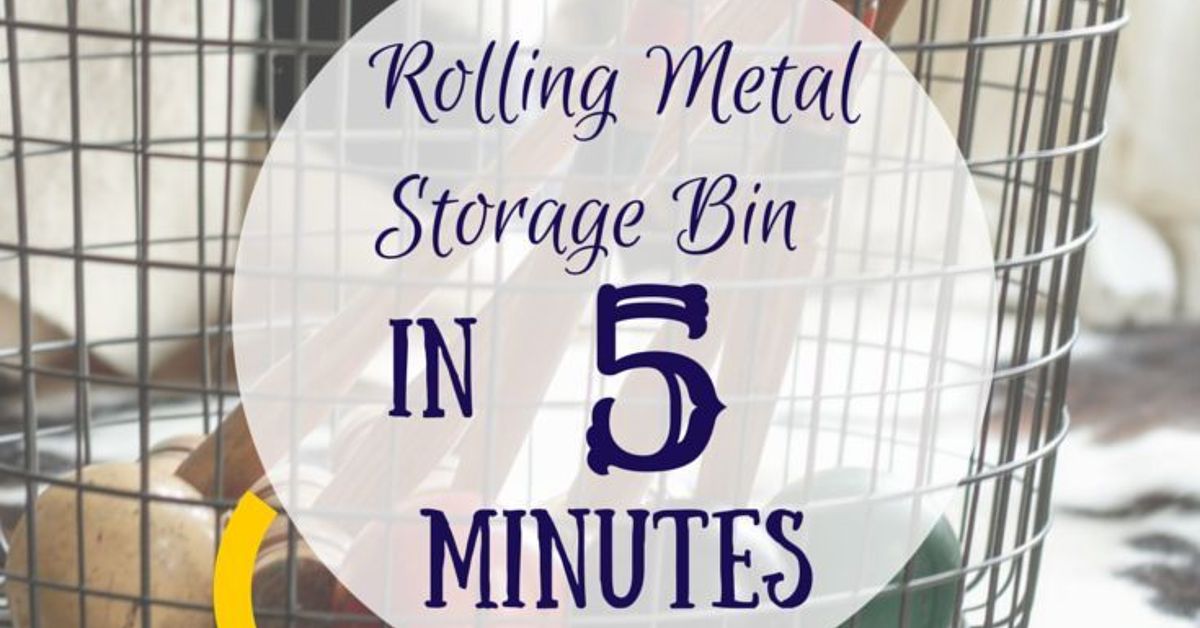
Toys have a remarkable survival instinct. Put them away at bedtime, and by breakfast they have migrated beneath the sofa, occupied the hallway, and formed a tiny plastic settlement beside the refrigerator. When ordinary toy boxes fail to contain the uprising, rolling wire baskets offer a practical alternative.
This DIY toy storage project combines open wire baskets, sturdy wooden bases, and smooth-rolling casters. The baskets keep toys visible, the wheels make cleanup less of a chore, and the compact design can slide beneath a console table, bench, desk, or raised bed. Rolling storage is especially useful in multipurpose rooms because it can be moved into the play area and tucked away when the floor needs to become a living room again. Mobile carts, rolling bins, and low open storage are commonly recommended for flexible, child-accessible organization.
Best of all, this project does not require advanced woodworking skills. Measure carefully, drill patiently, and resist the temptation to test the wheels by riding in the basket. That last instruction is mainly for adults who describe themselves as “young at heart.”
Why Rolling Wire Baskets Work So Well for Toys
Children Can See What Is Inside
A solid container may hide clutter, but it can also hide the exact toy a child suddenly needs with the urgency of a firefighter searching for a hose. The open grid of a wire basket makes dolls, blocks, cars, balls, and stuffed animals easier to identify without emptying the entire container.
Wire baskets are available in several widths and depths, and many include handles that make them easier to lift or reposition. Open storage can also help children participate in cleanup because they can quickly see where items belong. Home-organization sources frequently recommend visible baskets, open shelving, and clearly defined containers for children’s belongings.
The Wheels Bring Storage to the Mess
Traditional toy storage expects every toy to travel back to a permanent cabinet. Rolling baskets reverse that arrangement: the storage comes to the toys. A child can roll a basket beside a block tower, collect the pieces, and move the container back to its parking spot.
This mobility is valuable in family rooms, bedrooms, playrooms, and shared spaces. It also makes vacuuming and mopping easier because the baskets can be moved without lifting a heavy container full of wooden blocks, which somehow become denser after sunset.
The Design Can Grow with the Family
A basket labeled “Baby Toys” today can become a home for art supplies, sports equipment, books, shoes, or hobby materials later. Removable tags allow the system to evolve without rebuilding the entire unit. Storage experts often recommend labeling containers by category and using replaceable labels so organization systems can change as children grow.
Choose the Right Design Before Buying Materials
The simplest version consists of one wire basket mounted above a plywood platform with four casters. Build several matching units if you need separate categories. Three medium-size baskets are often more practical than one enormous basket because toys remain sorted and each container stays light enough to control.
A useful general size is approximately 20 to 24 inches long, 14 to 18 inches wide, and 10 to 14 inches deep. However, the correct dimensions depend on the baskets available and the furniture beneath which they will be stored. Always measure the intended parking space first, including its height.
Individual Rolling Baskets
Give each basket its own wooden base and four wheels. This arrangement is easy to build, easy to rearrange, and ideal for storing different categories. One basket might hold building sets, another plush toys, and another dress-up clothes.
A Multi-Basket Rolling Cart
For larger collections, construct a wooden cart that supports two or three removable wire baskets. This design provides more storage in a smaller footprint but requires additional framing, careful weight distribution, and stronger casters.
Under-Bed Rolling Storage
Use shallow baskets, low-profile casters, and a thin but strong plywood platform. Under-bed rolling bins are widely used because they turn otherwise empty floor space into accessible storage. Keep the finished height at least half an inch below the available clearance so the basket does not scrape the bed frame.
Materials and Tools
The quantities below are for one rolling wire toy basket. Multiply them by the number of baskets you plan to build.
Materials
- One sturdy wire basket with smooth welded joints
- One piece of 3/4-inch plywood sized slightly smaller than the basket
- Four 2-inch or 3-inch plate-mount swivel casters
- At least two locking casters
- Short wood screws suitable for the caster plates
- Four to eight metal conduit straps, pipe straps, or heavy-duty cable clamps
- Bolts, washers, and locking nuts if the basket design permits through-bolting
- Wood primer, paint, stain, or clear protective finish
- Metal primer and spray paint if refinishing the basket
- Felt, canvas, or a washable basket liner
- Label holders, tags, or small chalkboard signs
- Optional rope, leather, or wooden handles
Tools
- Tape measure
- Pencil and straightedge
- Circular saw, jigsaw, or table saw
- Drill and drill bits
- Screwdriver or driver bits
- Sandpaper in medium and fine grits
- Clamps
- Wrench or socket set
- Safety glasses, hearing protection, and work gloves
How to Select Casters
The wheels are small, but they determine whether the finished basket glides smoothly or travels like a grocery cart with one rebellious wheel.
Plate-mount casters are generally the best option for this project. Their rectangular mounting plates attach to the plywood with several screws, spreading the load across a wider area. Stem casters require a properly sized socket or mounting hole and are less convenient for a simple plywood platform. Plate-mounted models are commonly chosen for carts and furniture because their broad mounting area can provide a stable connection.
Choose swivel casters if the baskets must move in every direction. Four swivel wheels make a small basket highly maneuverable, while two swivel and two rigid wheels create more predictable straight-line movement. For toy storage, four swiveling wheels are usually easiest.
Use at least two locking casters so the basket can remain stationary during play and cleanup. Home-improvement guidance also recommends selecting lockable casters that are rated for the anticipated load. Check whether the manufacturer’s listed capacity applies to one caster or the entire set.
Soft rubber or polyurethane wheels are generally kinder to finished floors and quieter than hard plastic. Larger wheels roll more easily across rugs, thresholds, and uneven flooring, but they increase the overall height. Measure twice before purchasing wheels that turn your under-bed basket into an beside-the-bed basket.
Step-by-Step Building Instructions
Step 1: Measure the Wire Basket
Turn the empty basket upside down and measure the flat area around its base. The plywood platform should support the basket without extending far beyond its sides. A platform that is approximately 1/2 inch smaller than the basket on each side usually looks clean and protects the plywood edges from accidental kicks.
Check the basket for protruding wires, rough welds, or sharp corners. Avoid modifying a basket with weak joints. If any cut wire ends are exposed, cover them securely with protective caps or choose a different basket.
Step 2: Cut the Plywood Platform
Mark the plywood using a square and straightedge. Cut slowly with a circular saw or jigsaw, keeping hands clear of the blade path. Clamp the material so it cannot shift.
Round the corners with a jigsaw if the basket has curved ends. Rounded corners are less likely to catch ankles, furniture, or the hem of a superhero cape.
Step 3: Sand and Finish the Wood
Sand the cut edges until they feel smooth. Slightly round the top and bottom edges so they are comfortable to handle. Remove all dust before applying primer or finish.
Paint the platform to match the basket, stain it for a warmer furniture-style appearance, or seal the natural plywood with a water-based clear coat. Allow the finish to cure according to the manufacturer’s instructions before assembling the project.
Step 4: Refinish the Wire Basket if Desired
If the basket already has a durable finish, leave it alone. A factory coating is usually tougher than a quick decorative paint job. For an unfinished or worn metal basket, remove dirt, grease, loose paint, and surface rust. Lightly scuff glossy surfaces so the primer can bond.
Use a primer and paint specifically approved for metal. Several thin coats are better than one thick coat, which tends to sag, drip, and collect between the wires. Rust-Oleum’s metal-coating guidance similarly recommends cleaning and sanding the surface and applying multiple light, overlapping coats rather than one heavy application.
Spray outdoors or in a properly ventilated work area away from children, pets, flames, and ignition sources. Let the coating cure fully before the basket returns indoors or touches toys.
Step 5: Position the Casters
Place the plywood upside down on a protected work surface. Position one caster near each corner, leaving enough wood around every screw hole to prevent splitting. Keep the mounting plates parallel to the edges so the finished basket looks intentional rather than assembled during an earthquake.
Mark every screw hole with a pencil. Set the casters aside and drill pilot holes. Pilot holes guide the screws and reduce the chance of splitting the plywood. Do not drill completely through the platform unless you are using bolts.
Step 6: Attach the Casters
Fasten each caster with screws that are shorter than the plywood thickness. A screw tip should never protrude through the top surface where it could contact the basket liner or a child’s hand.
If using bolts, add washers beneath the bolt heads and nuts to distribute pressure. Locking nuts or thread-locking hardware can help resist loosening caused by repeated rolling. Tighten all hardware firmly without crushing the plywood.
Step 7: Secure the Basket to the Base
Turn the platform right side up and center the wire basket. Secure it with metal straps or clamps placed over the lower basket wires and screwed into the plywood. Use at least one attachment point near each corner.
Do not rely on glue alone. Metal wire provides little bonding surface, and the repeated pulling motion can weaken an adhesive connection. Mechanical fasteners create a more dependable attachment and allow the basket to be removed later if repairs are needed.
Choose clamps that fit closely around the wire. Oversized straps allow the basket to rattle, while undersized straps may bend or damage the wire. After tightening, pull upward on every side of the basket to confirm that it cannot separate from the platform.
Step 8: Add a Liner
A liner prevents small pieces from falling through the wire grid and keeps toys from rubbing against the metal. Canvas, felt, quilted cotton, or washable upholstery fabric can work well.
For a simple removable liner, cut one rectangular piece for the bottom and four pieces for the sides. Sew them together, fold the top edge over the basket rim, and attach the liner with fabric ties or hook-and-loop tabs. A removable liner is easier to wash after crayons, crackers, or mysterious sticky objects appear inside.
Step 9: Add Handles and Labels
If the basket lacks comfortable handles, attach a short piece of smooth rope to each end. Keep loops short so they do not create an entanglement risk. Handles should be used for guiding the basket, not pulling another child across the room.
Label each basket with a simple category such as “Blocks,” “Animals,” “Cars,” “Dress-Up,” or “Art Supplies.” For children who are not yet reading, combine words with pictures. Visual labels made from toy photographs or packaging images can make sorting easier.
Step 10: Test the Finished Basket
Roll the empty basket in every direction. Engage each brake and push gently to make sure the wheels remain locked. Add toys gradually and test it again.
Listen for rattles, inspect the caster screws, and confirm that the basket remains centered. Push it across every surface where it will be used, including rugs and doorway transitions. If a wheel catches repeatedly, replace it with a larger or more suitable caster rather than encouraging children to push harder.
Kid-Friendly Safety Considerations
Rolling toy storage should remain low, light, and easy to control. Never allow children to sit, stand, climb, or ride inside a basket. Casters are designed to move stored objects, not transport enthusiastic passengers.
Avoid adding a heavy hinged lid. The U.S. Consumer Product Safety Commission has warned about toy and storage chests whose lids can fall, latch shut, or trap children. Open baskets avoid many lid-related hazards and provide ventilation, but adults must still inspect them for sharp edges, loose hardware, and entanglement risks.
Store heavy toys near the bottom and do not stack unstable baskets where children may climb to reach them. The CPSC recommends keeping appealing objects within safe reach and placing heavier items lower to reduce climbing and tip-over hazards.
Keep baskets containing choking-size parts away from children younger than the age indicated on the toy packaging. Age labels are especially important for products that include small pieces.
Recheck screws, clamps, wheels, handles, and liners every few months. Replace cracked casters or damaged baskets immediately. A five-minute inspection is considerably easier than explaining why the toy basket suddenly has only three wheels.
Smart Ways to Organize the Baskets
Sort by Play Activity
Organizing toys by activity is often more practical than sorting them by size. Keep train tracks together, place pretend-food items in one basket, and give art materials their own container. Children can roll an entire activity into the room and return it when finished.
Avoid Categories That Are Too Specific
A separate basket for red race cars may look beautifully organized for approximately twelve minutes. Broad categories such as “Vehicles” or “Building Toys” are easier to maintain. Every storage container should have a clear purpose, but that purpose should be flexible enough for real family life.
Use Toy Rotation
Keep a limited number of baskets in the main play area and store the others elsewhere. Rotate them every few weeks. Toy rotation can reduce visual clutter and make familiar toys feel interesting again. Clear category labels help adults rotate complete groups without sorting the collection from scratch.
Create a Parking Zone
Designate a specific location for each rolling basket. A low shelf, wall outline, numbered space, or strip of removable floor tape can show children where the basket belongs. The goal is to make cleanup obvious enough that it requires less adult narration.
Common DIY Mistakes to Avoid
Attaching Wheels Directly to Thin Wire
Most decorative wire baskets are not designed to support concentrated loads at four small attachment points. Mount the wheels to a solid wooden base and secure the basket above it.
Using Casters That Are Too Small
Tiny wheels may work on smooth tile but struggle on carpet, thick rugs, and thresholds. Select the wheel diameter according to the floor surfaces in your home.
Skipping Locking Wheels
A basket that rolls away whenever a child reaches inside is entertaining once and irritating forever. Use locking casters and teach children how the brakes work.
Overloading the Basket
Books, wooden blocks, and large building sets can become surprisingly heavy. Respect the weight ratings of the casters and basket. When in doubt, divide the contents between two containers.
Applying Paint Too Thickly
Heavy spray coats collect around wire intersections and create drips. Clean the metal carefully and build the color with light coats.
Forgetting the Final Height
The basket, plywood, caster plate, and wheel all contribute to the finished height. Measure the entire assembly before building an under-bed version.
Creative Design Variations
Paint each plywood platform a different color and match the labels to the categories. Use neutral black baskets with natural wood bases for a modern farmhouse look, or choose white baskets and pale wood for a bright Scandinavian-inspired playroom.
Add a removable wooden divider to separate dolls from accessories or cars from track pieces. Avoid permanent compartments until you know how the basket will actually be used.
For a shared playroom, assign each child a color. Another approach is to label baskets by cleanup zone: “Living Room Toys,” “Bedroom Toys,” and “Outdoor Toys.” The best system is not necessarily the most photogenic one. It is the one family members can maintain on a busy Tuesday.
A Realistic Build Experience: What Usually Surprises First-Time Makers
A typical rolling wire basket project begins with great confidence. The basket looks rectangular, the plywood looks rectangular, and the builder assumes the two objects will naturally cooperate. The first surprise arrives during measurement: many wire baskets taper toward the bottom. The top may be 22 inches wide while the lower frame is only 19 inches wide. Measuring the rim instead of the actual mounting area produces a wooden platform that sticks out like an oversized serving tray.
The second surprise is caster placement. It is tempting to push the wheels as close to the corners as possible, but plywood can split when screws are installed too near an edge. Moving each mounting plate inward creates a stronger connection. The basket remains stable as long as the casters are spread evenly and positioned near the corners rather than clustered toward the center.
Another common lesson concerns wheel size. On a hard workshop floor, a 1-1/2-inch caster may appear perfectly adequate. Once the basket reaches a playroom rug, however, those tiny wheels begin behaving like they have encountered quicksand. Builders frequently discover that 2-inch or 3-inch wheels provide a more satisfying result, particularly when the basket must cross flooring transitions.
The painting stage can also test a person’s optimism. Wire baskets contain dozens of angles, intersections, and hidden surfaces. Spraying one side heavily does not magically cover the opposite side. The most successful approach is to apply light coats from several directions, rotate the basket, and allow proper drying time. Rushing creates drips that gather along the lowest wires and harden into decorative metal raindrops.
During assembly, slightly loose basket clamps may not seem important. After the basket is loaded and rolled across the room, the metal begins tapping against the plywood. The sound is not dangerous, but it becomes impossible to ignore. Tight-fitting clamps, small rubber washers, or thin felt pads between the basket and base can eliminate this rattle.
The most useful lesson usually appears after children begin using the finished storage. Adults may create detailed categories, but children prefer quick decisions. A label reading “Small Plastic Animals and Related Habitat Pieces” is organizational poetry to an adult and complete nonsense to a preschooler. “Animals,” accompanied by a picture of a lion, works much better.
Families also discover that basket capacity should be limited deliberately. When a container is filled to the top, children cannot see its contents and must dig through everything. Leaving some empty space makes toys easier to find and return. It also prevents the basket from becoming too heavy for small hands.
Finally, mobility changes cleanup more than expected. Instead of carrying handfuls of toys across the room, children can move the entire basket beside the play area. Cleanup becomes a short sorting activity rather than a long-distance transportation project. The finished baskets may not prevent every toy from escaping, but they give the household a practical way to round up the fugitives.
Conclusion
DIY rolling wire baskets for toy storage combine visibility, mobility, and straightforward construction. A strong plywood base supports the basket, plate-mount casters provide smooth movement, and simple labels make the system easier for children to understand. With carefully finished edges, locking wheels, secure hardware, and regular inspections, the project can become a useful addition to a playroom, bedroom, or family living space.
The real advantage is not merely having another container. It is creating storage that can travel to the activity, encourage children to participate, and adapt as toys and interests change. Build one basket as a test, observe how the family uses it, and then create additional units based on actual needs. That method costs less, prevents overbuilding, and leaves more time for the important question: who left a building block in the hallway?
Note: Adult assembly and supervision are required. Inspect all materials for sharp edges, choose hardware appropriate for the expected load, follow product instructions, and never permit children to ride, stand, or climb on rolling baskets.