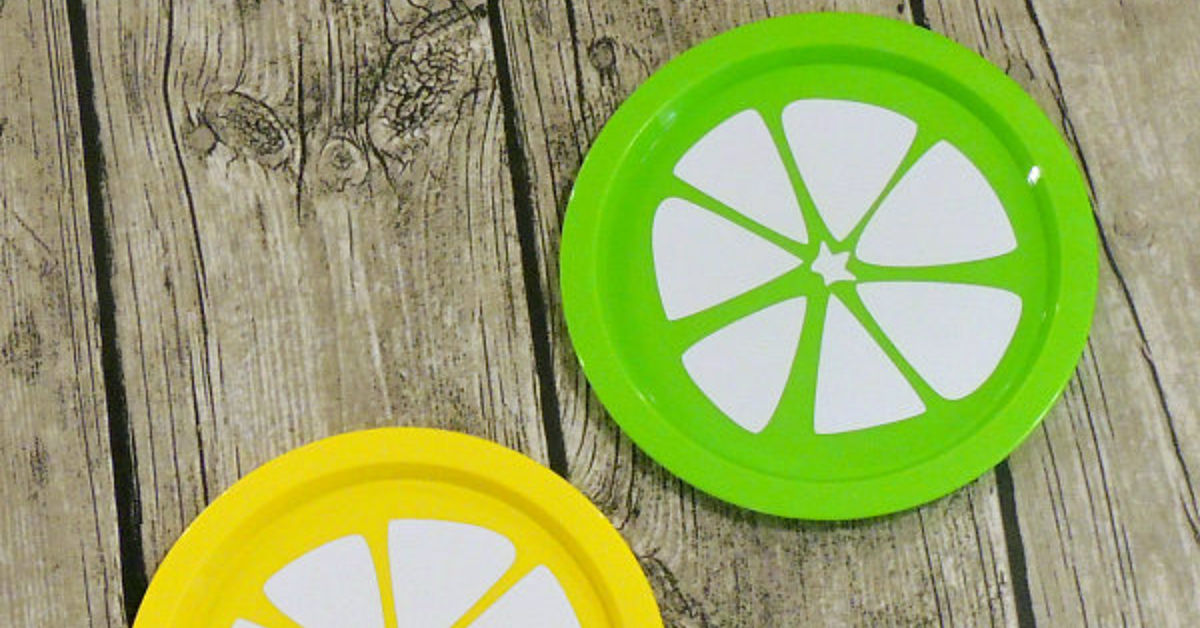
There is something wonderfully optimistic about citrus décor. Lemons look like bottled sunshine, oranges bring instant vacation energy, and grapefruits somehow make brunch feel as though everyone has their life together. Fortunately, you do not need boutique tableware prices to bring that cheerful look to your table.
With inexpensive clear plates from a dollar store, citrus-patterned napkins, and a suitable decoupage medium, you can create a coordinated set of DIY citrus plates that looks surprisingly polished. The secret is decorating the underside of each clear plate. The pattern remains visible through the glass while food sits on the untouched upper surface. It is an easy dollar store craft, requires no advanced painting skills, and is forgiving enough for beginners who occasionally confuse “a thin coat” with “a decorative swamp.”
This tutorial explains the complete process, including material selection, pattern placement, curing, cleaning, troubleshooting, and alternative decorating methods. It also covers an important subject that short craft videos sometimes sprint past: how to keep decorative materials away from surfaces that touch food.
Why Dollar Store Citrus Plates Are Worth Making
Seasonal dishes are charming until you calculate what an entire set costs. One lemon-patterned dinner plate may seem reasonable, but then it needs matching salad plates, bowls, napkins, glasses, and perhaps a tiny ceramic lemon that contributes nothing except emotional support.
DIY dollar store plates solve that problem. You can start with two plates for a small patio lunch or make twelve for a summer party without turning your decorating project into a financial event. Because the design comes from patterned paper or napkins, you can also coordinate the plates with table linens, gift bags, candles, or printable place cards.
The project offers several other advantages:
- You can customize the colors and fruit varieties.
- The reverse-decoupage method keeps the top of the plate smooth.
- No kiln or specialty ceramic equipment is required.
- Minor imperfections disappear into the lively fruit pattern.
- The finished dishes can double as table décor, party props, or handmade gifts.
Dollar store and decoupage craft tutorials commonly use clear glass dishes because the design can be attached to the back while remaining visible from above. This approach has been used successfully with fabric, tissue, and decorative napkins on inexpensive plates.
Supplies for DIY Citrus Plates
Essential materials
- Clear glass dinner plates, salad plates, or small dessert plates
- Citrus-patterned paper napkins or thin decorative tissue
- Dishwasher Safe Mod Podge or another sealer labeled for glass
- A soft, flat paintbrush or foam brush
- Sharp scissors
- Rubbing alcohol
- Lint-free cloth or paper towels
- Wax paper, parchment paper, or a protected craft mat
Optional supplies
- Small detail scissors for cutting individual fruit shapes
- A silicone craft tool for gently smoothing paper
- White multi-surface craft paint for a brighter background
- Painter’s tape
- Disposable gloves
- Small cups for elevating plates while they dry
- Fine sandpaper for carefully cleaning rough paper edges
Choose plates with smooth undersides and no chips, cracks, or raised manufacturing marks in the central area. Clear glass is preferable because it allows the decorative layer to remain physically separated from food. Avoid unknown vintage ceramics or ornamental dishes that were not manufactured for serving food. The FDA monitors lead and cadmium in foodware because improperly made ceramic products can release contaminants, particularly when they come into contact with acidic foods.
Choosing a Citrus Design
Citrus napkins appear in an impressive range of styles. Some feature realistic lemons with leaves and blossoms, while others use watercolor oranges, retro grapefruit wedges, or cheerful lime slices. Your choice determines whether the finished plates look rustic, modern, tropical, Mediterranean, or delightfully obsessed with lemonade.
Popular color combinations
- Lemon and navy: Crisp, classic, and ideal for a summer dinner table.
- Orange and turquoise: Bright and playful with a poolside personality.
- Grapefruit and blush pink: Softer, modern, and perfect for brunch.
- Lime and leafy green: Fresh, botanical, and slightly more sophisticated.
- Mixed citrus on white: Colorful enough to coordinate with almost anything.
Before applying adhesive, place the napkin beneath the plate and look through the glass. Rotate it until the largest fruit shapes appear in attractive positions. Avoid placing every lemon directly in the center. Slightly off-center designs usually look more natural and professionally printed.
How to Make DIY Citrus Plates From the Dollar Store
Step 1: Wash and inspect the plates
Wash each plate with mild dish soap and warm water. Rinse thoroughly and dry it with a lint-free towel. Inspect the edges and base for cracks or chips. A bargain is no longer a bargain if the plate is preparing to become several smaller plates.
Once the plate is dry, wipe the underside with rubbing alcohol. This removes fingerprints, grease, and residue that could interfere with adhesion. Manufacturer instructions for glass and ceramic craft products frequently recommend cleaning the surface with alcohol before applying paint or decoupage medium.
Step 2: Separate the napkin layers
Most decorative napkins contain two or three layers. You need only the thin printed layer. Carefully peel away the plain white backing sheets, starting at one corner. If the layers refuse to separate, lightly dampen your fingertips or place a small piece of tape on the back layer and pull gently.
Do not skip this step. A thick napkin absorbs too much adhesive, wrinkles more easily, and may dry with cloudy patches. The single printed ply becomes nearly translucent when sealed, helping the citrus design appear as though it was printed directly onto the glass.
Step 3: Decide between a full-sheet or cutout design
For the fastest method, use one complete napkin panel. Cut it into a circle approximately one inch larger than the plate. The extra paper gives you room to position the design and trim the edge after it dries.
For a more customized look, cut out individual lemons, orange slices, leaves, and flowers. Arrange the pieces into your own composition. This takes longer but allows you to create a border, a fruit cluster on one side, or a minimalist plate with a single lemon near the rim.
Step 4: Apply the first adhesive coat
Turn the plate upside down on wax paper or support it on a small cup. Brush a thin, even layer of dishwasher-resistant decoupage medium across the underside. Work from the center toward the rim and check for dry gaps.
The word thin deserves respect here. Too little medium can cause lifting, but too much creates puddles and wrinkles. Aim for complete coverage without visible pools. A soft brush usually leaves fewer ridges than a stiff bargain brush that sheds bristles as though protesting working conditions.
Step 5: Place the citrus napkin
Lay the printed napkin face down onto the wet underside of the plate. When you turn the plate over later, the printed side will face upward through the glass.
Lower the napkin from the center outward rather than dropping the entire sheet at once. Gently press it into place with dry fingertips. Smooth large bubbles toward the edge, but do not rub aggressively. Wet napkins are fragile and can tear with remarkably little encouragement.
A few small wrinkles are normal, especially on plates with curved edges. Citrus patterns disguise them well. Trying to remove every microscopic crease often causes more damage than leaving it alone.
Step 6: Let the first layer dry
Allow the plate to dry until the paper no longer looks wet or movable. Drying time depends on humidity, product thickness, and room temperature. Place the plate somewhere protected from dust, pet hair, and curious fingers.
Do not use a powerful hair dryer at close range. Strong heat can move the paper, create bubbles, or dry the surface before the layer underneath has stabilized.
Step 7: Seal the back
Brush two or three thin coats of decoupage medium over the back of the napkin. Extend each coat slightly beyond the paper edge so the design is fully enclosed. Allow each layer to dry before adding the next one.
Brush the first sealing coat carefully because the napkin may still be delicate. Once that layer dries, later coats become easier to apply. Alternate your brush direction between coats to reduce visible streaks.
Plaid recommends preparing the surface with alcohol, applying multiple thin coats, and allowing Dishwasher Safe Mod Podge to cure for 28 days before dishwasher use. After the cure period, the company recommends gentle washing on the top rack.
Step 8: Trim and finish the rim
After the sealed paper has dried, trim excess material close to the plate edge with sharp scissors or a craft knife. Work slowly to avoid chipping the sealer.
If tiny paper fibers remain, smooth them carefully with very fine sandpaper. Wipe away the dust and add one final narrow coat of sealer around the underside of the rim. Never extend the product onto the top eating surface.
Step 9: Allow the plates to cure
Dry and cured do not mean the same thing. A plate may feel dry after several hours while the finish underneath remains soft. Follow the curing instructions printed on your specific product. For Dishwasher Safe Mod Podge, the full cure period is 28 days.
During that period, store the plates separately or place soft paper between them. Do not soak them, stack heavy dishes on top, or test the finish every afternoon with your thumbnail. Craft supplies can sense impatience.
Optional Painted Citrus Plate Method
If clear glass plates and patterned napkins are unavailable, you can paint citrus designs on ovenproof white plates. Use ceramic paint specifically labeled for the intended surface and follow its curing directions exactly.
Sketch simple circles for oranges, lemons, limes, or grapefruit wedges. Add triangular segments, a colored rind, a white pith line, and small seed shapes. Slight irregularities make the fruit look hand-painted rather than factory-produced.
Keep the design around the outer rim unless the paint manufacturer explicitly states that the cured product is suitable for direct food contact. HGTV’s plate-painting guidance similarly calls for ovenproof dishes and ceramic paint identified as food- and dishwasher-safe.
Some enamel paints can be air-cured, while others may be baked. For example, Plaid’s guidance for certain glass and enamel products describes placing the item in a cool oven, heating it to 350°F, baking it for 30 minutes, and allowing it to cool inside the oven. Do not apply those numbers automatically to a different brand. Follow the exact label on your plate and paint, and never bake a dollar store dish unless it is identified as oven-safe.
Ordinary permanent markers are not an equivalent substitute for food-safe ceramic paint. Sharpie states that its standard markers on ceramic or glassware are recommended for decorative or display purposes.
Common Problems and Easy Fixes
The napkin has wrinkles
Small wrinkles are part of reverse decoupage and usually become less noticeable after drying. To reduce larger creases, lower the paper gradually and smooth outward with light pressure. If a wrinkle has already dried, leave it unless it creates a loose edge. Aggressive repairs frequently turn one wrinkle into a small archaeological excavation.
The finish looks cloudy
A milky appearance often means the adhesive is still drying or was applied too heavily. Give it additional time in a dry, ventilated room. Thin coats cure more evenly than one thick coat.
The pattern has bubbles
Gently press bubbles toward the nearest edge while the first coat is still wet. Once everything has dried, tiny bubbles are usually best ignored. Large bubbles can sometimes be punctured from the back with a fine pin, pressed flat, and resealed.
The paper is lifting around the rim
This typically happens when the edge did not receive enough adhesive. Lift the loose section carefully, brush a small amount of medium underneath, press it down, and seal over it after drying.
The citrus colors look dull
Thin napkins become transparent against dark tables. After the sealed napkin layer dries, apply white multi-surface paint to the back before adding the final protective coats. The white background makes yellow lemons and orange slices appear brighter from the front.
How to Wash and Store Finished Plates
Even after the full curing period, gentle care extends the life of handmade tableware. Hand washing is the safest option. Use mild soap, lukewarm water, and a soft cloth. Avoid abrasive pads, soaking, sudden temperature changes, and scraping the decorated underside against a metal sink.
If your exact sealer permits dishwasher cleaning, use the top rack and a gentle cycle. Do not assume that “dishwasher safe” also means microwave safe. Dishwasher Safe Mod Podge should not be heated in a microwave.
Place felt circles, paper towels, or coffee filters between stacked plates. This prevents the raised base of one dish from scratching the decoration below it.
Creative Ways to Use Citrus Plates
Your completed dishes can support far more than a stack of toast. Use them for summer brunches, backyard lunches, lemonade parties, Mother’s Day tables, housewarming gifts, bridal showers, or Mediterranean-inspired dinners.
Create coordinated place settings by giving each guest a different fruit. One plate can feature lemons, another oranges, and another grapefruit. Tie the set together with green napkins, clear glassware, and a centerpiece made from real citrus.
Smaller plates work beautifully beneath coffee cups, candles, soap dispensers, or small flowerpots. Plates intended only for decoration can also become wall art when displayed with suitable plate hangers.
What Makers Learn After Completing a Full Citrus Plate Set
The first lesson from a project like this is that preparation matters more than artistic talent. A citrus napkin already contains the artwork. The maker’s real job is to clean the glass, separate the paper layers, control the adhesive, and resist touching everything while it dries. That final task is somehow the most difficult.
In a typical first attempt, the most common mistake is using too much decoupage medium. The logic seems reasonable: more adhesive should create a stronger plate. Instead, the excess liquid saturates the napkin, makes it difficult to position, and produces cloudy areas beneath the design. By the second plate, most makers use roughly half as much product and obtain a noticeably smoother result.
Pattern placement also improves with practice. On the first plate, it is tempting to center the largest lemon like a school portrait. The result can look stiff. Later plates tend to have fruit entering from the edges, overlapping leaves, and more open space. Those slightly asymmetrical compositions create the relaxed look associated with professionally designed summer tableware.
Another useful discovery is that the plates do not need to be perfectly identical. In fact, a set looks more interesting when each piece uses a different portion of the same napkin. One plate might emphasize yellow lemons, another might feature blossoms, and a third might show mostly green leaves. Because the palette and illustration style remain consistent, the dishes still read as a coordinated collection.
Drying conditions make a visible difference. A cool, humid room slows the process, while a clean space with steady airflow helps each coat become clear and firm. Elevating the plates on small cups makes it easier to coat the backs without smearing the edges. It also prevents the wet finish from bonding permanently to yesterday’s newspaper, which is not the vintage collage effect most people are seeking.
The curing period requires the greatest patience. After a few days, the dishes may appear ready for use, but the finish can still be vulnerable to moisture and pressure. Marking the completion date on a piece of painter’s tape helps. Put the tape on the storage shelf rather than the finished plate, then treat the set as temporarily unavailable. Waiting the recommended cure time is less exciting than revealing the plates at brunch, but it is much more exciting than watching the decoration peel away in the sink.
Once cured, the plates are most satisfying when used as part of a simple table rather than buried under elaborate decorations. White napkins, inexpensive drinking glasses, a small vase of greenery, and a bowl of real lemons are enough. The handmade dishes become the focus without making the table resemble a citrus-themed gift shop.
The project also demonstrates why dollar store crafts can be genuinely useful rather than merely inexpensive. The value comes from choosing the right blank item and applying a technique that disguises its humble origin. Clear plates provide a smooth, consistent base; a printed napkin supplies detailed artwork; and reverse decoupage creates depth because the image is viewed through glass. Together, those ordinary materials produce tableware that feels personal, seasonal, and far more expensive than it was.
Conclusion
DIY citrus plates from the dollar store are bright, affordable, and beginner-friendly. Reverse decoupage allows you to transform plain clear dishes with lemon, orange, lime, or grapefruit patterns while keeping the decorative materials beneath the food-contact surface.
The most important ingredients are not expensive supplies. They are careful cleaning, thin coats, gentle handling, and enough patience for a complete cure. Follow those principles, and your finished plates can bring homemade sunshine to brunches, garden parties, gifts, and everyday mealswithout requiring a boutique budget or a degree in fruit-based interior design.