If your holiday decorating style lives somewhere between “festive” and “I do not have the emotional bandwidth to glue 700 sequins onto anything,” this project is for you. A candy cane door hanger is one of the easiest ways to make your entry look cheerful, polished, and intentionally festive without spending an entire afternoon covered in glitter and regret. It is bright, classic, playful, and instantly recognizable from the sidewalk. In other words, it is the overachiever of quick Christmas crafts.
The best part is that this DIY really can come together in less than 10 minutes when you keep the design simple. Start with a lightweight base, add bold red-and-white stripes, finish with a bow, and hang it on your front door. Done. You get the charm of handmade holiday decor without needing a full craft room, a woodworking degree, or a suspiciously calm amount of free time in December.
In this guide, you will learn how to make a fast candy cane door hanger, which supplies save the most time, how to customize the look for your home, and how to avoid the little mistakes that turn a “cute holiday craft” into a “why is hot glue on my sleeve?” situation.
Why a Candy Cane Door Hanger Works So Well
Some holiday decor looks amazing in magazines but feels wildly impractical in real life. A candy cane door hanger is not one of those projects. It works because it checks all the right boxes: it is affordable, lightweight, easy to personalize, and visually strong enough to stand out from the curb. Even a very plain front door suddenly looks merry when you add a bold red-and-white accent and a simple bow.
It also fits just about every decorating style. If your home leans traditional, pair the candy cane shape with velvet ribbon and faux greenery. If you prefer farmhouse decor, go with burlap, muted reds, and a few pine sprigs. If your taste is more playful and colorful, add mini bells, peppermint ornaments, or oversized loops of striped ribbon. The basic shape stays the same, but the personality can shift however you want.
And unlike more fragile Christmas crafts, this one is beginner-friendly. You are not building a full wreath, arranging florals like a professional stylist, or trying to make twelve bows that somehow all look like they were tied during an earthquake. You are making one bold statement piece. That is the beauty of it.
What You Need
For the fastest version of this project, gather these supplies before you start:
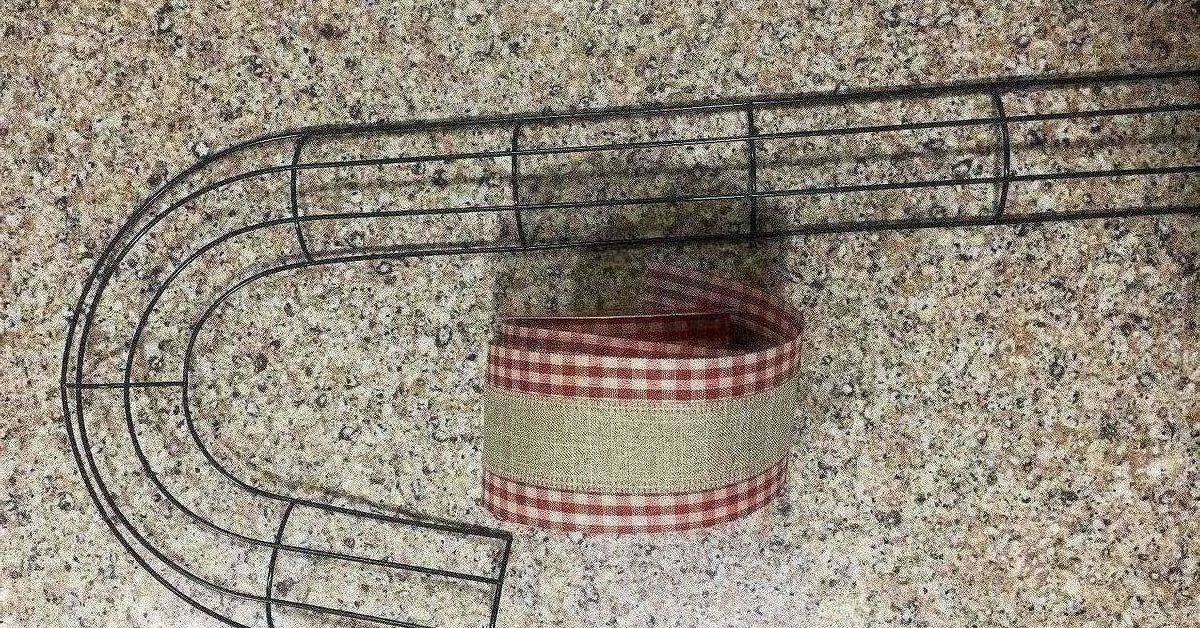
- 1 lightweight candy cane form, wire form, or bent wire hanger
- White ribbon, white tinsel garland, white yarn, or white chenille trim
- Narrow red ribbon, red wired ribbon, or red chenille stems for the stripe
- Hot glue gun and glue sticks
- Scissors
- Floral wire or twist ties
- One premade or handmade bow
- Optional: faux greenery, berries, bells, pinecones, or peppermint picks
- Door hanger or adhesive hook rated for the item’s weight
If you want the quickest possible setup, use a ready-made wire or foam base from a craft store. That shortcut matters. A lot. Starting with a base means you skip the part where you stand in your kitchen staring at a coat hanger like it personally owes you a favor.
The Fastest Method: How to Make a Candy Cane Door Hanger in Less Than 10 Minutes
Step 1: Create or Grab Your Base
If you already have a candy cane-shaped form, congratulations, you are winning. If not, gently bend a wire hanger into a candy cane curve. Do not obsess over perfect symmetry. Once it is wrapped, minor imperfections disappear. Holiday magic is real, but so is strategic ribbon placement.
Step 2: Wrap the Base in White
Take your white ribbon, white yarn, or white tinsel garland and wrap the entire form from bottom to top. Use small dabs of hot glue every few inches to keep the material from sliding. If you are using yarn, keep the wraps snug and close together so the base does not peek through. If you are using garland, fluff it slightly as you go so the hanger looks fuller.
This step builds the clean, candy-like background that makes the red stripes pop. A neat white base is what gives the finished piece that crisp peppermint look instead of a “leftover gift-wrap accident” look.
Step 3: Add the Red Stripe
Now spiral your red ribbon or chenille stems around the white-covered form. Space the stripes evenly for that classic candy cane pattern. You do not need a measuring tape unless you truly enjoy inviting chaos into simple crafts. Just eyeball it and keep the spacing consistent.
If you want a polished look, use wired ribbon cut into narrow strips or a thinner ribbon wrapped at a diagonal. If you want a kid-friendly version, chenille stems are surprisingly forgiving and fast.
Step 4: Attach the Bow
Add your bow near the curve of the candy cane or where the straight section begins. That placement looks balanced and creates a natural focal point. You can hot-glue the bow directly onto the hanger, but wiring it on makes it easier to remove later if you want to reuse the base with a different look next year.
A classic red bow is the obvious choice, but plaid, velvet, striped ribbon, or even a white bow with a touch of sparkle can work beautifully. Long tails give the piece movement and make the whole project look more finished.
Step 5: Add Optional Greenery
If you have an extra minute, tuck a small sprig of faux cedar, pine, or eucalyptus behind the bow. Add berries or one tiny bell if you want a fuller holiday look. Keep it minimal. This is a less-than-10-minute project, not an audition for a department store window display.
Step 6: Hang It Securely
Use an over-the-door wreath hanger, magnetic hanger, or an adhesive hook designed for the surface and weight. If your hanger will be outside, make sure the hardware is weather-appropriate. A lightweight project deserves a secure finish, not a dramatic nosedive onto your porch two hours after you hang it.
Design Ideas to Match Your Style
Classic Christmas
Use bright red ribbon, glossy greenery, faux berries, and a traditional bow. This version feels timeless and works especially well on black, white, navy, or natural wood doors.
Farmhouse Candy Cane
Swap bright red for deeper cranberry tones, use burlap or linen-style ribbon, and add soft greenery with small pinecones. It still feels festive, but a little more relaxed and rustic.
Glam Holiday
Add metallic accents like gold bells or champagne ribbon. Keep the red-and-white stripe, but let the bow do the heavy lifting with satin, shimmer, or oversized loops.
Kid-Friendly Fun
Glue on pom-poms, tiny felt peppermints, or jingle bells. This version is playful and works especially well on an interior mudroom door, playroom door, or family entryway.
Natural Look
Use muted ribbon, faux cedar, dried orange slices, or wooden ornaments. It is less “North Pole candy shop” and more “cozy cabin that smells like cookies and pine.”
Tips That Make the Project Look Better Instantly
Keep the stripes even. This matters more than adding lots of extras. Even spacing makes the design look intentional and clean.
Use wired ribbon if possible. It holds shape better, especially for bows and long tails.
Do not overload the hanger. Too many ornaments or embellishments can make the project look cluttered and harder to hang.
Match your door color. If you have a bold front door, choose a ribbon tone that complements it rather than fighting with it.
Think beyond the hanger itself. A festive doormat, two lanterns, or a simple garland can make the whole entry feel finished without much extra effort.
Common Mistakes to Avoid
Using a Base That Is Too Heavy
If the base is heavy, your project becomes harder to hang and more likely to damage the door or slip off the hook. Lightweight forms are your friend.
Choosing Indoor-Only Materials for Outdoor Use
If your candy cane door hanger will live outside, avoid delicate paper embellishments and flimsy ribbon that wilts in damp weather. Outdoor-friendly ribbon and faux greenery last longer and look better.
Making the Bow Too Small
A tiny bow gets lost. This project needs one confident finishing detail. Make the bow generously sized, even if the hanger itself is simple.
Overdecorating
A candy cane door hanger already has a strong shape and a bold pattern. You do not need to add every bell, berry, pinecone, and ornament in your supply drawer. Restraint is festive too.
How to Make It Last All Season
If you are using faux materials, storage is easy. At the end of the season, wrap the hanger loosely in tissue paper or place it in a shallow storage bin. If the bow has wired edges, fluff it before storing so it does not flatten into a sad little ribbon pancake.
If you are using fresh greenery, check it every few days. Replace any pieces that dry out or shed heavily. A fresh accent can smell wonderful and look beautiful, but it does need a little maintenance. If you want a lower-effort option, faux greenery gives you the same holiday feel with almost none of the upkeep.
Also, save your base. That is the secret to making next year’s version even faster. Once the form is made, all you really need to do later is refresh the wrap, add a new bow, and pretend you always were the kind of person who planned ahead.
Where to Use a Candy Cane Door Hanger Besides the Front Door
Although the front door is the obvious choice, this project works in plenty of other places too. Hang one on a pantry door for a playful kitchen accent. Use a smaller version on a bedroom door, a classroom door, or a covered porch wall. You can also hang it indoors above a console table, on a mudroom hook, or as part of a gallery wall of holiday decor.
If you are decorating a small apartment, condo, or townhouse, a candy cane door hanger is especially useful because it adds visible holiday style without taking up floor space. No giant tree required. No elaborate porch setup required. Just one cheerful project doing the most with the least.
Real-Life Experiences With a 10-Minute Candy Cane Door Hanger
One reason this project keeps showing up in holiday decorating conversations is simple: it fits real life. Many people love the look of handmade Christmas decor but do not love the time, mess, or pressure that often comes with it. A candy cane door hanger solves that problem beautifully. It feels handmade, but it does not demand a whole Saturday or a trip to six different stores.
For busy parents, this type of project often becomes the sweet spot between festive and manageable. You can pull out the supplies after dinner, make the hanger while the kids are finishing homework or watching a holiday movie, and still have time left to clean up before bed. That matters. December has a habit of becoming a scheduling circus, and quick wins feel especially satisfying during that season.
Apartment dwellers also tend to love this craft because it creates a big visual impact in a very small space. When you do not have a yard for inflatables or a porch for layered decor, your front door becomes the star of the show. A candy cane hanger instantly adds personality to an apartment door, hallway entry, or condo exterior without overwhelming the space. It says, “Yes, I decorate for Christmas,” without saying, “I have converted my home into a theme park.”
Another common experience is that this project becomes unexpectedly sentimental. People often make one, then make another for a neighbor, a grandparent, a teacher, or a friend who loves simple holiday decor. Because the supplies are affordable and the process is easy to repeat, it naturally turns into a thoughtful handmade gift. And unlike some handmade gifts that live in a drawer forever, this one usually gets displayed right away.
There is also something satisfying about how forgiving the project is. Even when the curve is not perfectly shaped or the stripes are not mathematically exact, the finished hanger still looks charming. In fact, that slight imperfection often adds to the handmade feel. People who do not consider themselves “crafty” tend to find this project encouraging because it gives them a polished result without demanding perfection.
Season after season, the biggest lesson crafters seem to learn is that simple usually wins. The best-looking versions are often the ones with a clean white base, evenly spaced red stripes, one strong bow, and maybe a small touch of greenery. Not overloaded. Not fussy. Just clear, cheerful design. That is part of why this project feels so repeatable. It does not depend on chasing trends or buying specialty tools. It depends on a classic shape, a familiar color palette, and a little bit of holiday spirit.
And maybe that is the real appeal. A candy cane door hanger is not trying to be complicated. It is trying to be joyful. It lets you create a warm welcome in just a few minutes, using simple materials and a very recognizable holiday symbol. In a season that can get busy, expensive, and occasionally ridiculous, that kind of easy charm is honestly refreshing.
Conclusion
If you want a holiday craft that is quick, affordable, and genuinely cute, a candy cane door hanger is hard to beat. It gives your entry instant Christmas charm, works with almost any decor style, and can be made with beginner-level supplies in less than 10 minutes when you keep the process simple. Wrap the base, add the stripe, tie on a bow, and call it a win. Sometimes the best Christmas decorating ideas are the ones that look cheerful, feel personal, and do not leave your house looking like a ribbon tornado passed through.