Applying eyeliner to hooded eyelids can feel like drawing a tiny masterpiece on a curtain that keeps folding over itself. You create a sharp wing, admire it for half a second, open your eyeand poof. The wing has disappeared into the crease or stamped itself near your eyebrow like an enthusiastic rubber seal.
The good news is that hooded eyes are not difficult to line; they simply require a technique designed for their natural shape. Instead of copying a conventional cat-eye tutorial made for a wide, visible eyelid, you need to place the eyeliner where it can be seen while your eyes are open and relaxed.
This guide explains how to do eyeliner on hooded eyelids step by step, including how to create a small everyday flick, a dramatic bat-wing shape, a soft smoky line, and an eye-opening look that resists smudging. No eyelid wrestling is required.
What Are Hooded Eyelids?
Hooded eyelids have a fold of skin that partially or fully covers the natural crease when the eyes are open. As a result, less of the moving eyelid is visible. Some people are born with this eye shape, while others develop more hooding as the skin around the eyes changes with age.
To check your eye shape, look straight into a mirror without lifting your eyebrows. If the skin below your brow bone overlaps the crease and covers part of the mobile lid, you probably have hooded eyes. One eye may also be more hooded than the other, which is completely normal. Human faces are relatives, not photocopies.
Hooded eyes should not be confused with monolids or deep-set eyes. A monolid has little or no visible crease, while a deep-set eye sits farther back beneath the brow bone. These features can overlap, so the best eyeliner technique is always the one that works with what you see in the mirrornot a label on a diagram.
Why Eyeliner Behaves Differently on Hooded Eyes
Traditional winged eyeliner is often drawn while the eye is closed. That method can cause trouble on a hooded lid because the skin changes position when the eye opens. A smooth triangle drawn on a closed eyelid may bend, break, or vanish inside the fold once the eye returns to its natural position.
There is also more skin-to-skin contact around the crease, which makes eyeliner transfer more likely. Natural oils, watery eyes, humidity, slow-drying formulas, and thick layers can turn a clean line into an abstract painting before lunch.
The solution is to design the eyeliner while your eyes are open, preserve as much visible lid space as possible, and use a formula that sets securely.
What You Need for Hooded-Eye Eyeliner
You do not need a suitcase full of products. A small, practical kit usually works better than a crowded counter covered with mystery caps.
- A lightweight eye primer suited to your skin type
- A fine-tipped liquid pen, waterproof gel pencil, or gel liner
- A small angled brush for sketching and correcting
- A matte brown, charcoal, or black eyeshadow
- Pointed cotton swabs and gentle eye makeup remover
- Translucent powder or matching eyeshadow for setting
- A freestanding mirror positioned at eye level
Choose the Right Eyeliner Formula
A fine felt-tip or brush-tip pen is useful for crisp wings because it can create thin strokes without covering the entire lid. A waterproof gel pencil is more forgiving and works well for smoky liner, tightlining, or mapping a shape before using liquid eyeliner.
Beginners may find black eyeshadow and a damp angled brush easier to control. Powder creates a softer line, and mistakes can be blended instead of triggering a full bathroom crisis. Once the shape looks right, it can be traced with liquid or gel liner for more intensity.
Look for terms such as quick-drying, water-resistant, waterproof, transfer-resistant, and smudge-resistant. A long-lasting formula matters because the hood may touch the liner throughout the day.
How to Do Eyeliner on Hooded Eyelids Step by Step
Step 1: Start With Clean, Dry Eyelids
Remove leftover makeup, skin care, and excess oil from the eyelids. Rich eye cream can make liner slide, so keep heavy products away from the lash line immediately before application. Allow any lightweight moisturizer or sunscreen to absorb fully.
Pat a thin layer of eye primer over the mobile lid, crease, and outer corner. Do not pile it on; too much primer can become another creamy layer that moves. If your lids are particularly oily, press a small amount of translucent powder or neutral matte shadow over the primer.
Step 2: Position the Mirror Correctly
Sit or stand in front of a mirror with your face relaxed. Keep both eyes open and look straight ahead. Avoid raising your eyebrows, stretching the eyelid, or tilting your head dramatically. Those movements temporarily alter the folds you are trying to work around.
Rest your elbow on a table if your hand feels shaky. Stabilizing your arm is more helpful than attempting to summon the spirit of a Renaissance painter.
Step 3: Mark the End of the Wing
Before lining the lashes, place a small dot where you want the wing to end. Follow the general direction of the lower lash line toward the outer end of the eyebrow, but adjust the angle to suit your eye shape.
For heavily hooded or downturned eyes, a straighter, more outward extension may stay visible better than a sharply upward wing. Keep the first mark short. A two- or three-millimeter flick can create plenty of lift without competing with the crease.
Check the dot with your eye open. If it disappears beneath the fold, move it slightly outward or alter the angle before proceeding.
Step 4: Draw the Outer Wing First
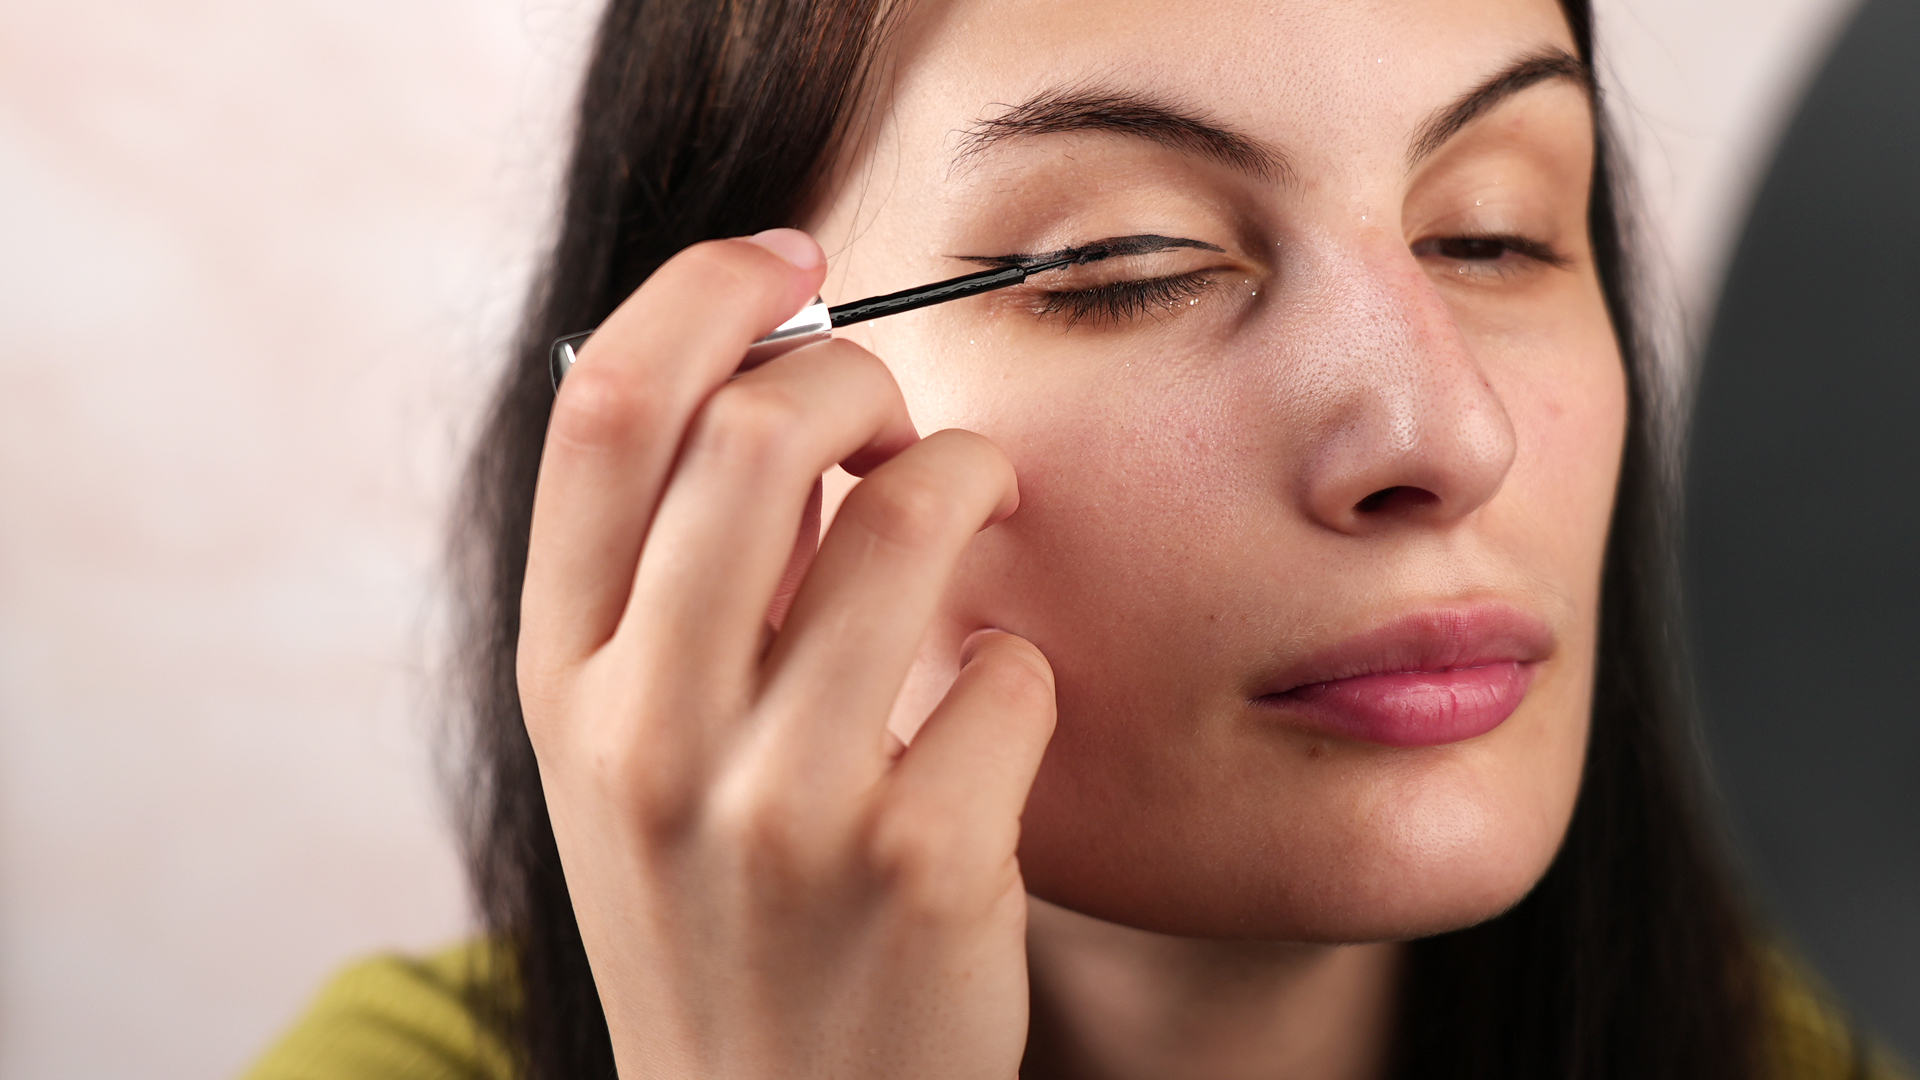
Starting at the dot, draw a short line toward the outer corner of the eye. Use tiny strokes rather than one heroic sweep. The line should remain visible while you continue looking forward.
Next, connect the tip of the wing to the upper lash line. Depending on your folds, this connection may cross over the hood. That is not a mistake. The goal is to create a wing that looks smooth when your eyes are open, even if the outline looks unusual when they are closed.
Step 5: Use the Bat-Wing Technique When Necessary
If a normal triangular wing becomes bent by the crease, use bat-wing eyeliner. With the eye open, draw the visible upper edge of the wing across the fold. Then close or lower the eye and connect the separated sections, creating a small step, notch, or lightning-bolt shape.
Fill the open area with liner. When the eye is closed, the wing may resemble a bat’s wing. When the eye is open, the fold compresses the shape into a clean, straight flick. It is practical geometry wearing mascara.
Step 6: Line the Upper Lashes Thinly
Once the wing is established, draw inward along the upper lash line using short stamps or dashes. Keep the line extremely thin near the inner corner and allow it to become slightly thicker toward the outer third.
People with very limited visible lid space may prefer to begin near the center of the eye instead of lining all the way to the tear duct. Leaving the inner portion bare can make the eyes appear more open and prevents the liner from consuming the mobile lid.
Step 7: Check the Shape Before Adding More
Pause, relax your face, and look straight ahead. Confirm that the wing is visible and that the liner does not make the eye feel visually heavy. Add thickness only where it improves the shape.
It is much easier to make a thin line thicker than to convince a thick line to reconsider its life choices.
Step 8: Let the Eyeliner Dry
Keep your eyes gently lowered for several seconds while liquid liner sets. Do not squeeze them shut, because that can cause the damp formula to stamp onto the hood. A quick-drying product reduces the waiting period and the chance of transfer.
Step 9: Set and Clean the Edges
For extra staying power, press a matching powder eyeshadow over the dried liner with a small angled brush. Use a pointed cotton swab with a tiny amount of makeup remover to sharpen uneven edges. Allow the area to dry before applying concealer, primer, or more liner.
Easy Eyeliner Styles for Hooded Eyes
The Everyday Micro-Wing
A micro-wing provides definition without occupying much lid space. Draw a thin line along the outer half of the upper lashes and extend it just beyond the eye. Keep the flick short, delicate, and nearly horizontal.
Brown, deep plum, navy, and charcoal are softer alternatives to intense black. These colors define the lashes while creating a more relaxed daytime effect.
Soft Smoky Eyeliner
Apply a waterproof pencil in small dashes along the outer half of the lash line. Immediately smudge it upward and outward with a pencil brush before it sets. Press a coordinating matte shadow over the pencil to soften the edge and improve wear.
Smoky liner is especially useful when eyelid texture makes a razor-sharp liquid line difficult. The intentionally blurred finish is flattering, quick, and wonderfully forgiving. Your left and right wings do not need to pass a geometry exam.
Outer-Corner Liner
Skip the inner half of the lid and concentrate the liner at the outer third. This preserves open space near the tear duct while elongating the eye. Pair it with curled lashes and mascara focused near the outer corners.
Straight Siren-Style Liner
Instead of directing the wing steeply toward the brow, extend it outward in a straighter line. Begin around the center of the upper lid, keep the liner narrow, and lengthen the outer corner. A tiny inner-corner point can intensify the elongated effect, but it should be added carefully and skipped if your eyes are sensitive or watery.
Colorful Graphic Liner
Hooded eyes can wear graphic eyeliner beautifully. Place floating lines slightly above the natural crease so they remain visible when the eyes are open. White, cobalt, emerald, metallic bronze, and burgundy can look particularly striking.
Map the design while looking forward, then refine it from different angles. Graphic liner is makeup, not a legally binding contract, so experimentation is encouraged.
How to Make Hooded Eyes Look More Open
Eyeliner works best as part of the complete eye look. Curl the lashes before applying liner, and choose mascara that holds the curl without transferring onto the brow bone. Concentrating mascara near the roots and outer lashes can enhance lift.
Place matte transition shadow slightly above the natural crease, where it remains visible with the eyes open. Keep deeper shadow toward the outer third rather than covering the entire lid in a dark color. A satin or finely milled shimmer on the visible mobile lid and inner corner can reflect light without emphasizing every fold.
A nude pencil along the lower waterline may make the eyes appear brighter, but people with dry, sensitive, or frequently watery eyes may prefer to avoid waterline makeup. You can create a similar brightening effect with a subtle inner-corner highlight.
Common Eyeliner Mistakes on Hooded Eyelids
Drawing the Entire Wing With the Eye Closed
The shape may look perfect on a closed lid but become distorted when the eye opens. Establish the visible outline while looking straight ahead, and close the eye only when filling small gaps.
Stretching the Eyelid
Pulling the skin tight creates a smooth drawing surface, but the line can wrinkle or change direction when released. Keep the skin in its natural position and use small strokes.
Making the Inner Line Too Thick
A heavy line from tear duct to outer corner can use all the visible lid space and make the eyes look smaller. Keep the inner portion very thin or leave it bare.
Using a Formula That Stays Wet Too Long
Slow-setting liner has more time to transfer onto the hood. Choose a fast-drying formula, apply thin layers, and wait before blinking normally.
Trying to Make Both Eyes Identical
Natural asymmetry means the same wing placement may not create the same visual result on both eyes. Adjust each side individually. One wing might need to be slightly longer, straighter, or thicker to look balanced when both eyes are open.
Correcting the Liner While It Is Still Wet
Rubbing wet liner usually enlarges the mistake. Let it dry, lift away the unwanted section with a pointed swab, and redraw only the missing edge.
Eyeliner Tips for Mature Hooded Eyes
Mature eyelids may have more folds, movement, or texture, so smooth glide and flexibility become particularly important. Begin with a soft gel pencil, cream liner, or powder shadow rather than a stiff product that skips across the skin.
Use short pressing motions at the base of the lashes instead of dragging the pencil in one continuous line. A softly diffused brown, charcoal, navy, or plum can create definition without looking as severe as solid black.
Keep the outer edge lifted but not excessively long. A compact smoky flick often looks smoother and wears better than an extremely sharp, oversized wing. Most importantly, do not treat texture as something that must be erased. Makeup should decorate skin, not punish it for being skin.
Eye Makeup Safety Matters
Wash your hands before applying eyeliner, keep pencils sharpened and clean, and never share eye cosmetics. Replace products that smell unusual, have changed texture, or were used during an eye infection. Do not apply eyeliner in a moving vehicle, no matter how talented you believe you are at multitasking.
Use only products labeled for the eye area. Avoid using lip liner near the eyes because pigments and safety requirements may differ, and bacteria can transfer between areas. Remove eyeliner gently before bed without aggressive rubbing.
Stop using a product if it causes persistent burning, swelling, redness, pain, or unusual discharge. Contact an eye-care professional when irritation continues or affects vision. People who wear contact lenses or have dry, watery, or sensitive eyes may find it more comfortable to keep makeup outside the waterline.
Experience-Based Lessons From Practicing Eyeliner on Hooded Eyes
The most useful lesson from repeated eyeliner practice is that the finished result should be judged with the eyes open. Many early attempts fail because the artist becomes focused on making the closed eyelid look perfect. Ten careful minutes go into creating a smooth triangle, only for the crease to fold directly through it. Once the application is designed from the front-facing view, the process becomes much faster. The closed-eye shape stops mattering nearly as much.
Another common discovery is that smaller wings often look more dramatic than expected. A long cat-eye can seem necessary when watching a tutorial, but hooded lids naturally frame and compress the outer corner. A tiny flick placed in the right visible area may create more lift than a large wing placed partly inside the crease. Starting small also leaves room for correction. Starting enormous leaves room mainly for regret.
Product texture changes the experience just as much as technique. A creamy pencil feels easy to apply but may transfer if it is not allowed to set. A very dry liquid pen may resist smudging yet skip over textured skin. Many people get better results by combining products: first sketching with brown shadow or a soft pencil, then tracing only the final outer edge with liquid liner. This approach provides control without sacrificing definition.
Mirror position can produce a surprisingly large improvement. A handheld mirror held too low may cause the eyes to close or the eyebrows to lift. A mirror placed directly in front of the face shows how the liner will appear during normal conversation. Resting the elbow on a counter reduces shaking, while holding the pen closer to the tip provides better control for short strokes.
Practice also reveals that each eye needs its own instructions. One eyelid may have a deeper fold or a slightly lower outer corner. Copying the exact same measurements can make the wings look less balanced, not more. It is usually better to complete the more hooded or difficult eye first and then adapt the easier side to match its visible angle. Symmetry is an optical result, not necessarily identical construction.
Wear testing is equally valuable. A wing that looks excellent at 8 a.m. may stamp onto the crease by noon. Testing primer, liner, and setting shadow on an ordinary day helps identify the weak link before a wedding, job interview, or evening event. Sometimes the answer is a more transfer-resistant formula. Sometimes it is less product. Thick liquid layers take longer to dry and can crack, while one thin layer topped with matching shadow often lasts longer.
Finally, progress becomes much easier when perfection is replaced with consistency. The goal does not have to be two wings sharp enough to slice fruit. A softly lifted outer corner, fuller-looking lashes, and a line that remains visible can be a complete success. After several attempts, the eye’s folds begin to feel less like obstacles and more like a map. You learn where the line disappears, where it stays visible, and which angle gives your natural eye shape the expression you want.
Final Thoughts
Learning how to do eyeliner on hooded eyelids is primarily about placement. Prep the lids, keep your eyes open, draw the outer wing first, work in small strokes, and preserve visible space near the inner corner. If the crease interrupts a conventional wing, let the bat-wing technique work around it rather than forcing the skin into a shape it does not naturally hold.
There is no single “correct” eyeliner for hooded eyes. A micro-wing, smoky pencil, colorful floating line, or bare inner lid can all look excellent. Use these techniques as starting points, adjust them for your individual folds, and remember that practice is supposed to involve a few crooked wings. Even professional-looking eyeliner begins as two tiny lines negotiating a peace treaty.