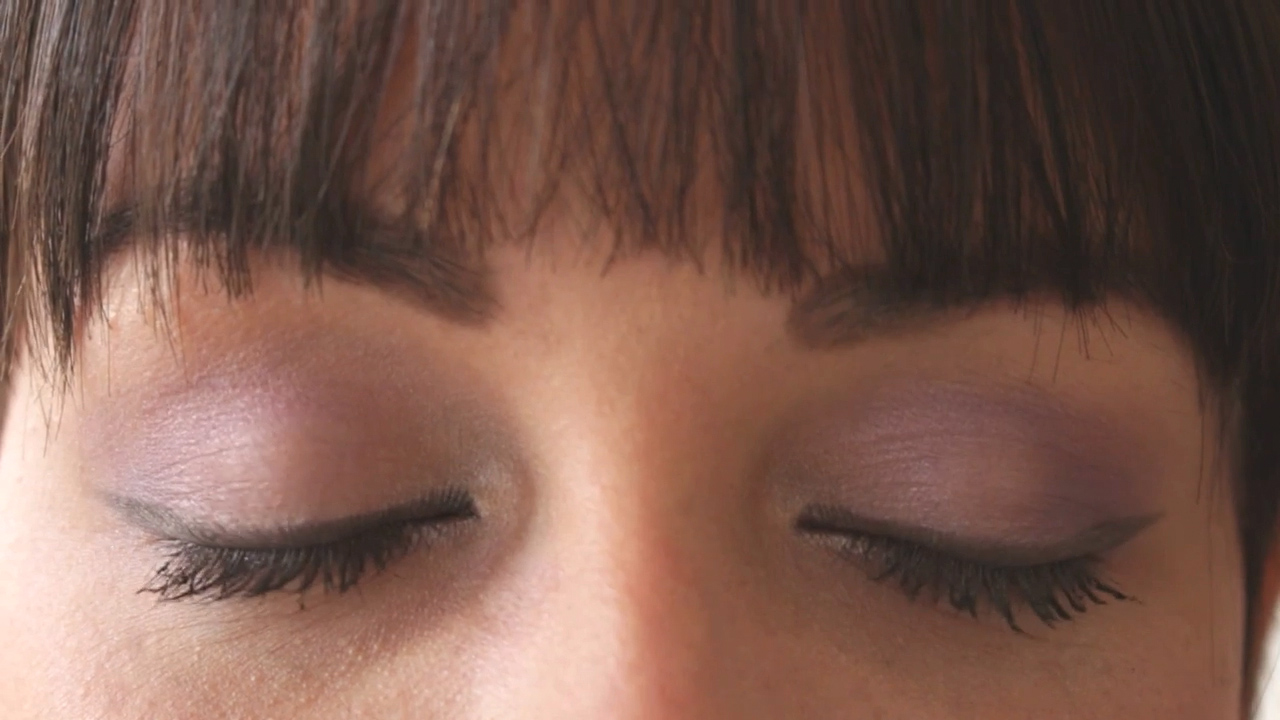
Making eyeshadow at home sounds like the sort of project that begins with artistic ambition and ends with purple dust on the dog. Fortunately, it does not have to become a full-scale cosmetic crime scene. With eye-approved cosmetic ingredients, clean tools, and a little patience, you can create loose mineral shadow, pressed powder, or a creamy custom color in your own kitchen or craft area.
Homemade eyeshadow also gives you control over the finish. You can create a soft matte taupe for work, a copper shimmer for evenings, or a dramatic plum that matches absolutely nothing you own but makes you happy anyway. The key is treating the project as basic cosmetic formulation rather than mixing random pantry ingredients and hoping your eyelids appreciate your creativity.
This guide explains three practical ways to make eyeshadow at home, including beginner-friendly formulas, color-blending advice, storage tips, and important safety precautions.
Before You Begin: Homemade Eyeshadow Safety
The eye area is more sensitive than most of the face, so only use pigments and base powders clearly labeled as cosmetic grade and approved by the supplier for eye-area use. In the United States, a color additive approved for general cosmetic use is not automatically approved for use around the eyes. The Food and Drug Administration maintains separate restrictions for eye-area pigments and advises consumers not to substitute lip, craft, or novelty colors for eye cosmetics.
Do not use craft glitter, acrylic paint, candle pigment, soap dye, chalk, powdered drink mix, or unidentified mica from an art supplier. Even edible ingredients such as cinnamon, turmeric, cocoa powder, activated charcoal, and food coloring are not automatically appropriate for eyelids. “Safe to eat” and “tested for use near the eye” are two very different job descriptions.
Commercial eyeshadows commonly combine pigments with fillers, absorbent powders, adhesion ingredients, and materials that improve slip. Mica, kaolin, talc, silica, zinc compounds, and magnesium-based ingredients may serve different functions within a formula. Homemade versions are simpler, but understanding these roles helps you avoid producing a beautiful color that immediately falls onto your cheeks.
Follow These Basic Rules
- Wash and thoroughly dry your hands, tools, containers, and work surface.
- Use cosmetic-grade ingredients from suppliers that provide full ingredient names and eye-use information.
- Work away from fans, open windows, children, and pets.
- Wear a well-fitting mask while handling fine powders, and mix slowly to minimize airborne dust.
- Make small batches and label each container with the ingredients and preparation date.
- Never share homemade eye makeup or applicators.
- Do not use eye makeup during an eye infection, stye, unexplained swelling, or active eyelid rash.
- Discard the product if its odor, texture, or appearance changes.
Powder ingredients can become airborne, and safety reviews of cosmetic clays and silicates note that incidental inhalation deserves special consideration. That is why gentle mixing matters. There is no prize for whisking eyeshadow as if you are trying to beat eggs before a timer expires.
Essential Ingredients and Tools
Base Powders
A base powder gives eyeshadow structure, improves blending, and dilutes concentrated pigments. Good options include cosmetic-grade sericite mica, synthetic fluorphlogopite, kaolin clay, or a premixed mineral eyeshadow base. Sericite and synthetic mica usually produce a smoother, more luminous finish, while small amounts of kaolin can reduce excess shine and improve oil absorption.
Beginners often get better results from a premixed eyeshadow base because the supplier has already balanced slip, adhesion, and texture. It costs slightly more than plain powder, but it can save you from creating a shadow that behaves like decorative dust.
Colorants
Choose cosmetic-grade iron oxides, ultramarines, and colored micas that are explicitly permitted for eye-area products. Iron oxides are useful for browns, reds, yellows, and blacks. Ultramarines can provide blue, violet, or pink tones. Colored mica blends create pearl, metallic, satin, and duochrome effects.
Always read the product description rather than relying on the color name. A pigment called “Moonlit Mermaid Galaxy Explosion” may sound delightful, but the technical documentation is more useful than the poetry.
Useful Tools
- Measuring spoons reserved for cosmetics
- A small digital scale capable of measuring at least 0.01 gram, when available
- Small glass or stainless-steel bowls
- A miniature spatula
- A small mortar and pestle
- Disposable pipettes
- Loose-powder jars or clean eyeshadow pans
- Paper towels and 70% isopropyl alcohol for sanitizing work surfaces
- Labels and a permanent marker
Method 1: Make Loose Mineral Eyeshadow
Loose mineral eyeshadow is the easiest option for beginners. It requires no pressing medium, heating, or preservative system. You simply blend an eye-safe base with cosmetic pigments until the color and texture are even.
Starter Formula
- 2 teaspoons cosmetic-grade sericite mica or premixed eyeshadow base
- 1/8 to 1/2 teaspoon eye-approved colored mica or pigment
- Up to 1/8 teaspoon cosmetic-grade kaolin clay for a softer, less shiny finish
The amount of pigment depends on its strength. A pale pearl mica may require more product, while black iron oxide can dominate a batch with the enthusiasm of a guest who takes over the music playlist. Begin with less than you think you need. You can always add color, but removing it generally requires adding more base.
Step 1: Build the Base
Place the sericite or premixed base in a clean bowl. Add kaolin only when you want a more matte finish or greater oil absorption. Too much clay can make the shadow dry, chalky, or difficult to blend, so keep the amount modest.
Step 2: Add the Pigment Gradually
Add a small pinch of pigment to the base. Fold the powders together slowly with a spatula. Once the obvious streaks disappear, grind the mixture gently with a mortar and pestle. Grinding breaks up pigment clusters and distributes the color more evenly.
Do not aggressively crush large sparkling particles. Overgrinding a shimmer mica may reduce its reflective effect and transform “radiant champagne” into “beige with trust issues.”
Step 3: Test the Color
Apply a tiny amount to the inside of your forearm using a clean brush. Check the shade in daylight and indoor lighting. A color that looks bronze in the mixing bowl may appear orange on skin, especially when the base is highly reflective.
To lighten the shade, add more base. To deepen it, add brown, black, or a darker version of the main pigment in very small increments. To reduce an overly warm tone, add a trace of a cooler complementary pigment.
Step 4: Package the Shadow
Transfer the finished powder to a clean sifter jar. Label it with the color name, ingredients, and date. Tap a small amount into the lid before use rather than dipping repeatedly into the main container. This keeps the product cleaner and prevents half the jar from escaping when you sneeze.
Method 2: Make Pressed Powder Eyeshadow
Pressed eyeshadow is convenient, portable, and less likely to decorate your bathroom counter. It begins with a loose powder blend, but a small amount of pressing medium is added so the mixture holds together inside a metal pan.
What You Need
- 1 teaspoon finished loose eyeshadow mixture
- A cosmetic pressing medium labeled for eye-shadow formulation
- A clean metal eyeshadow pan
- A small spatula
- A piece of clean, lint-free cloth or paper
- A coin or pressing tile that fits inside the pan
A commercially prepared cosmetic pressing medium is preferable to improvised mixtures because its ingredients and intended use are known. Pressing mediums commonly contain volatile liquid, oils, silicones, or binding ingredients in carefully balanced proportions. Adding too much kitchen oil can create a greasy surface, poor color payoff, and a product that becomes unpleasant surprisingly quickly.
Step 1: Prepare the Powder
Place one teaspoon of your loose shadow in a sanitized bowl. Break apart every visible clump. The powder should look completely uniform before any liquid is added, because pressing will not magically repair uneven pigment distribution.
Step 2: Add the Pressing Medium
Add the pressing medium one drop at a time, mixing after each addition. Most small batches need only enough liquid to create the consistency of damp sand. The mixture should hold together when pressed with the spatula but should not look glossy, oily, or soupy.
Exact quantities vary because different micas and base powders absorb different amounts of liquid. Following the supplier’s directions is more reliable than forcing every formula to accept an identical number of drops.
Step 3: Fill the Pan
Spoon the damp mixture into the pan in two or three layers. Press each layer lightly with the spatula to remove large air pockets. Slightly overfill the pan because compression will reduce the volume.
Step 4: Press the Shadow
Place a clean piece of lint-free material over the powder. Set the coin or pressing tile on top and apply steady, even pressure for approximately 20 to 30 seconds. Lift the press straight up and inspect the surface.
If the shadow develops deep cracks immediately, the mixture may be too dry or unevenly pressed. Return it to the bowl, add one additional drop of medium, remix, and try again. If liquid pools through the cloth, you used too much medium and should blend in more dry powder.
Step 5: Allow It to Dry
Leave the uncovered pan in a clean, protected location until it is fully dry, typically overnight or as directed by the pressing-medium manufacturer. Do not apply damp eyeshadow to your eyelids. Once dry, test the surface with a sanitized brush. It should release color without crumbling into chunks.
Method 3: Make an Instant Cream Eyeshadow
Cream eyeshadow can deliver rich color and a smooth, glossy finish, but it is also the method most likely to develop preservation problems when stored. Introducing water, aloe gel, tea, or other fresh ingredients creates an environment in which microorganisms may grow. Professional cream cosmetics require appropriate preservation, stability testing, and contamination controls.
For a safer home version, make a single-use cream shadow at the time of application rather than storing a jar for weeks. Cosmetic contamination around the eye can contribute to irritation or infection, and health organizations consistently recommend keeping eye products and applicators clean and personal.
Single-Use Formula
- A small pinch of your finished loose eyeshadow
- A rice-grain-sized amount of fragrance-free eye primer or an anhydrous cosmetic base specifically labeled for eye-area use
- A clean mixing palette
- A sanitized spatula or disposable applicator
Step 1: Dispense the Products
Place the eye primer or approved base on a clean palette. Do not mix directly inside the primer container because this can introduce pigment and contamination into the original product.
Step 2: Mix in the Pigment
Add a tiny amount of loose shadow and blend with the spatula until the mixture is smooth. Add more pigment for opacity or more primer for a sheer wash. A ratio of roughly one part powder to two parts primer is a reasonable starting point, but texture matters more than mathematical perfection.
Step 3: Apply Immediately
Apply the cream shadow with a clean brush or fingertip and discard anything left on the palette. Do not return unused mixture to either container. This method lets you experiment with bold colors without creating a preserved cosmetic product in your kitchen.
How to Create Custom Eyeshadow Colors
Everyday Taupe
Combine a champagne or beige mica with a small amount of brown iron oxide. Add a trace of black for depth. For a cooler taupe, introduce the smallest possible amount of violet or blue-toned pigment.
Warm Copper
Start with copper mica, then soften it with gold or champagne mica. Add a trace of red-brown iron oxide for warmth. If the result becomes too orange, dilute it with a neutral base rather than adding large amounts of blue.
Smoky Plum
Blend violet mica with brown iron oxide and a small amount of black. Add pearl mica for shimmer or extra base for a dusty, wearable finish. Test after every addition because black pigment is powerful enough to turn plum into charcoal before you finish saying “just a pinch.”
Soft Matte Rose
Use an eye-approved pink pigment with a generous amount of matte base. Add a touch of yellow or brown oxide to make the shade more natural. Avoid using red pigments unless the supplier specifically confirms that they are approved for eye-area cosmetics in your market.
Patch Testing, Cleaning, and Storage
Before applying a new formula to the eyelids, test a small amount on the inner arm and monitor the area for redness, itching, swelling, or burning. A forearm test cannot guarantee that the eyelids will tolerate a product, but it may identify an obvious reaction before the mixture reaches more delicate skin. Dermatologists also warn that products promoted as natural can still trigger irritant or allergic contact dermatitis.
Wash makeup brushes regularly and allow them to dry completely. The American Academy of Dermatology recommends cleaning brushes every seven to ten days to reduce product buildup and microorganisms. Never share brushes or eye makeup, particularly during or after an eye infection.
Store homemade eyeshadow in a cool, dry place away from direct sunlight and bathroom humidity. Use dry tools, close lids immediately, and make only enough product to use within a reasonable period. Because homemade formulas are not laboratory tested for stability or preservation, discard them conservatively rather than trying to achieve the lifespan of commercial cosmetics.
Stop using the product immediately if you experience persistent burning, swelling, excessive tearing, pain, discharge, light sensitivity, or vision changes. Remove the makeup gently and contact a qualified health professional when symptoms are significant or do not resolve.
Common Homemade Eyeshadow Mistakes
Using Craft Mica Instead of Cosmetic Mica
Craft mica may be suitable for resin, paint, or soap but may not meet purity, particle-size, or color-additive requirements for the eye area. Buy from a cosmetic ingredient supplier and confirm the intended use for each shade.
Adding Water to a Stored Formula
Water can improve texture temporarily, but it also turns a simple dry product into a preservation challenge. Avoid water, floral water, aloe juice, milk, tea, or fresh plant extracts unless you have professional formulation knowledge and an appropriate preservative-testing process.
Adding Too Much Pigment
More pigment does not always mean better eyeshadow. An overloaded formula can become patchy, stain the skin, resist blending, or create excessive fallout. Add pigment gradually and maintain enough base for slip and adhesion.
Making a Huge Batch
Your first formula may be glorious. It may also resemble wet cement under fluorescent lighting. Begin with teaspoons, not cups. Small batches make adjustments cheaper, easier, and considerably less emotionally complicated.
My Experience Making Eyeshadow at Home
My first serious lesson in homemade eyeshadow was that powders behave differently in a mixing bowl than they do on skin. I began with a shimmering bronze mica that looked sophisticated in the container. After adding far too much black oxide, I produced a color best described as “fireplace maintenance.” It was technically smoky, but only in the sense that something may have burned.
Starting over with a much smaller amount of black made the formula easier to control. I mixed the dark pigment into a spoonful of base first, creating a diluted color concentrate. I could then add that concentrate to the bronze mixture in tiny increments. This technique was far more predictable than dropping concentrated black directly into the final batch.
The Lighting Test Changed Everything
I also learned to test every shade under more than one light source. A mauve shadow looked beautifully neutral beside a sunny window but turned aggressively purple beneath cool bathroom lighting. Checking the color in daylight, warm indoor light, and phone-camera lighting helped me understand how the reflective particles changed its appearance.
Photographing each test swatch was useful because the camera sometimes revealed patchiness that was not obvious in person. It also created a visual record of each experiment. When I finally developed a balanced rose-brown shade, I could compare it with earlier attempts instead of relying on memory.
Keeping a Formula Notebook Saved My Favorite Shade
During early experiments, I assumed I would remember every ingredient. This confidence lasted approximately eleven minutes. A beautiful copper-taupe blend disappeared forever because I had measured everything with mysterious pinches and failed to write anything down.
After that, I began recording the ingredient name, supplier, batch number, approximate weight, finish, application performance, and any adjustments. I also gave each test a simple code such as CT-01 or PL-03. This may sound overly organized for a teaspoon of sparkly powder, but it made successful formulas repeatable.
Loose Shadow Was Easier Than Pressed Shadow
Loose mineral eyeshadow was immediately rewarding. Once the pigments were blended evenly, the product was ready to use. Pressed shadow required more patience. My first pan contained too much pressing medium, creating a hard, shiny surface that released almost no color. This problem is often called hard pan, although mine felt more like an eyeshadow-themed paving stone.
The next attempt used less liquid and lighter pressure. Instead of trying to flatten the pan with the strength of a hydraulic machine, I applied steady pressure and allowed the product to dry completely. The result picked up easily with a brush and stayed intact inside the compact.
The Single-Use Cream Method Was the Most Practical
I originally wanted to store homemade cream shadow in tiny jars because the containers looked charming. Once I considered preservation and contamination, the single-use mixing method made much more sense. Combining a pinch of mineral shadow with eye primer took less than a minute and allowed me to change the intensity every time.
For a sheer daytime look, I used more primer and a small amount of pearl pigment. For an evening look, I increased the powder and applied it with a flat synthetic brush. The same loose shadow could therefore produce several finishes without requiring a separate stored cream formula.
Small Batches Made Experimenting More Enjoyable
The most useful habit was making tiny batches. When an experiment failed, I lost only a teaspoon of material. When it succeeded, I could reproduce it using my notes and prepare a slightly larger amount. This removed the pressure to create a perfect color on the first attempt.
It also encouraged more unusual combinations. A tiny amount of blue-violet pigment transformed a basic brown into a sophisticated cool taupe. A trace of gold made a flat peach shade appear warmer and more dimensional. Some tests were unwearable, but even those showed how different pigments interacted.
Homemade eyeshadow is most enjoyable when approached as careful experimentation rather than a shortcut around cosmetic manufacturing. Use documented, eye-approved ingredients, keep everything clean, record your formulas, and respect any sign of irritation. The reward is not merely saving money. It is understanding how texture, color, adhesion, and finish work togetherand occasionally creating a shade so good that you become annoyingly proud of one very small pan.
Conclusion
The three easiest ways to make eyeshadow at home are blending a loose mineral powder, pressing that powder into a compact, and combining a small amount with eye primer for an instant cream formula. Loose shadow is best for beginners, pressed powder is convenient for daily use, and the single-use cream method delivers richer color without requiring you to preserve a homemade wet product.
Successful DIY eyeshadow begins with the right ingredients. Choose cosmetic-grade pigments approved for the eye area, control airborne powder, sanitize your tools, work in small batches, and document each formula. Avoid pantry powders, craft pigments, loose glitter, fragrance, and improvised water-based recipes. Your eyelids deserve better than becoming unpaid volunteers in an uncontrolled kitchen experiment.
Note: This article provides general educational information and beginner-level formulation ideas, not medical advice or a substitute for professional cosmetic safety testing. Safety guidance was synthesized from materials published by the FDA, American Academy of Dermatology, Poison Control, Cleveland Clinic, Mayo Clinic, PubMed, Cosmetic Ingredient Review, American Optometric Association, MedlinePlus, Harvard Health, the National Eye Institute, and EWG. Discontinue use and seek appropriate medical care if an eye product causes significant pain, swelling, discharge, light sensitivity, or vision changes.