An unfinished wooden box is the craft-store version of a blank canvasexcept it has a lid, corners, and just enough personality to make you feel like a tiny furniture designer. Whether you want a jewelry box, a memory box, a desk organizer, a gift box, or a “please stop losing the TV remote” box, plain wood gives you endless decorating options without demanding a professional workshop or a garage full of mysterious tools.
The best part? You do not need to be a master woodworker. You simply need a little prep, the right finish, and a plan that fits your style. In this guide, we will cover 3 easy ways to decorate an unfinished wooden box: painting it, staining it, and decoupaging it. Each method is beginner-friendly, affordable, and flexible enough for farmhouse, modern, vintage, boho, coastal, cottagecore, or “I found these stickers and I’m emotionally attached to them” decor.
Before we start, remember this golden rule of wooden box decorating: the finish is only as good as the prep. A few minutes of sanding and dust removal can be the difference between “handmade boutique treasure” and “school project that fought back.” Let’s make the boutique version.
Why Unfinished Wooden Boxes Are Perfect for DIY Decorating
Unfinished wooden boxes are popular because they are inexpensive, easy to customize, and available in many shapes and sizes. You can find small hinged boxes for jewelry, larger storage boxes for keepsakes, crates for shelves, and simple lidded boxes for handmade gifts. Since the surface is bare wood, it accepts paint, stain, paper, fabric, stencils, stamps, wood-burning designs, and decorative hardware.
They also make great gifts. A decorated wooden box feels personal without requiring you to knit a sweater, build a coffee table, or learn calligraphy overnight. You can paint a child’s name on one, stain a recipe box for a home cook, decoupage a memory box with travel maps, or turn a plain box into elegant storage for a bedroom, office, or entryway.
Basic Supplies You May Need
You do not need every supply for every method, but here are the common tools that make the project smoother:
- Unfinished wooden box
- Fine-grit sandpaper or sanding sponge
- Microfiber cloth or tack cloth
- Acrylic craft paint, wood stain, or decoupage medium
- Foam brushes or small paintbrushes
- Painter’s tape
- Primer or pre-stain wood conditioner, depending on the method
- Clear sealer, polyurethane, wax, or varnish
- Decorative paper, fabric, stencils, stickers, knobs, or ribbon
Prepare the Wooden Box Before Decorating
Even if your box looks smooth, give it a quick sanding. Unfinished wood often has tiny fibers, rough edges, glue residue, or uneven spots that become more noticeable once paint or stain touches the surface. Sand with the grain, not against it. Think of it as brushing the wood’s hair in the right directionless drama, better results.
Use fine-grit sandpaper for light smoothing. If the box has splinters or raised areas, start with a slightly rougher grit, then finish with a finer grit. After sanding, wipe away all dust with a microfiber cloth. Dust left behind can create bumps in paint, dull patches in stain, and general craft-table sadness.
If your box has hinges or a clasp, you can either remove the hardware with a small screwdriver or cover it carefully with painter’s tape. Removing hardware usually gives the cleanest result, but taping works if the screws are tiny or your patience has already clocked out.
Way 1: Paint the Wooden Box for Bold Color and Personality
Painting is the easiest way to transform an unfinished wooden box. It hides uneven wood tones, allows endless color choices, and works beautifully with stencils, hand-painted designs, stripes, dots, florals, metallic accents, or simple solid colors. If you want a bright, modern, playful, or themed box, paint is your best friend.
Best Paints for Wooden Boxes
Acrylic craft paint is a favorite for small wooden boxes because it dries quickly, comes in many colors, and is easy to clean up with water. Chalk-style paint can create a soft matte finish, while spray paint gives smooth coverage if used carefully in thin coats. For a box that will get frequent handling, choose durable paint and finish it with a clear protective sealer.
How to Paint an Unfinished Wooden Box
- Sand the surface. Smooth the top, sides, corners, and edges. Do not forget the inside lip of the lid if it will be visible.
- Wipe away dust. Use a clean cloth so the paint can bond properly.
- Apply primer. Primer helps seal porous wood and creates a more even base, especially if you are using a light paint color.
- Paint thin coats. Two or three thin coats look better than one thick coat. Thick paint can leave brush marks and may dry unevenly.
- Decorate the surface. Add stencils, painter’s tape stripes, dots, hand lettering, or small motifs.
- Seal the finish. Use a clear acrylic sealer, polyurethane, or craft varnish to protect your work.
Painted Box Ideas
For a clean modern look, paint the entire box matte white, black, navy, sage green, or terracotta. Add a small brass knob to the lid for a polished finish. For a nursery or child’s room, paint the box in soft pastels and add the child’s name with letter stickers or a stencil. For a playful desk organizer, try color blocking: tape off diagonal sections and paint each area a different shade.
If you like vintage style, paint the box in a muted color, then lightly sand the edges after it dries. This creates a worn, aged look without requiring the box to survive three generations and a dusty attic. For farmhouse decor, white paint with black lettering works well. For coastal decor, try pale blue, sandy beige, or whitewash with a rope handle.
Way 2: Stain the Wooden Box to Highlight the Natural Grain
Staining is perfect when you want the box to look warm, rustic, classic, or more expensive than it actually was. Unlike paint, stain enhances the natural wood grain instead of covering it. This method is ideal for keepsake boxes, recipe boxes, memory boxes, cigar-style boxes, jewelry storage, or masculine gift boxes.
Choose the Right Stain Color
Wood stain comes in many shades, from light oak and golden pecan to walnut, espresso, gray, and weathered finishes. A light stain gives a fresh Scandinavian feel. A medium brown stain feels timeless and cozy. A dark stain can make a simple craft box look surprisingly elegant, like it belongs on a mahogany desk next to a fountain pen and important-looking papers.
Before staining the whole box, test the color on the bottom or inside. Different woods absorb stain differently. Pine and other soft woods can sometimes look blotchy if stain absorbs unevenly, so a pre-stain wood conditioner is helpful for a smoother, more consistent finish.
How to Stain an Unfinished Wooden Box
- Sand with the grain. Smooth the surface and edges, then remove dust completely.
- Apply wood conditioner. This is especially useful for soft or porous wood. Follow the product directions for timing.
- Brush or wipe on stain. Work in the direction of the grain. A cloth, foam brush, or stain pad can all work well.
- Wipe off excess stain. Letting extra stain sit too long can create sticky or uneven patches.
- Let it dry fully. Drying time depends on the stain type, humidity, and wood surface.
- Add a protective topcoat. Polyurethane, polycrylic, wax, or varnish helps protect the finish from scratches and handling.
Stained Box Design Ideas
A stained wooden box looks beautiful with simple hardware. Try adding small metal corners, a decorative clasp, label holder, leather pull, or vintage-style knob. For a custom look, use a stencil and paint a small monogram on top after the stain dries. White, black, gold, and cream paint usually stand out well over stained wood.
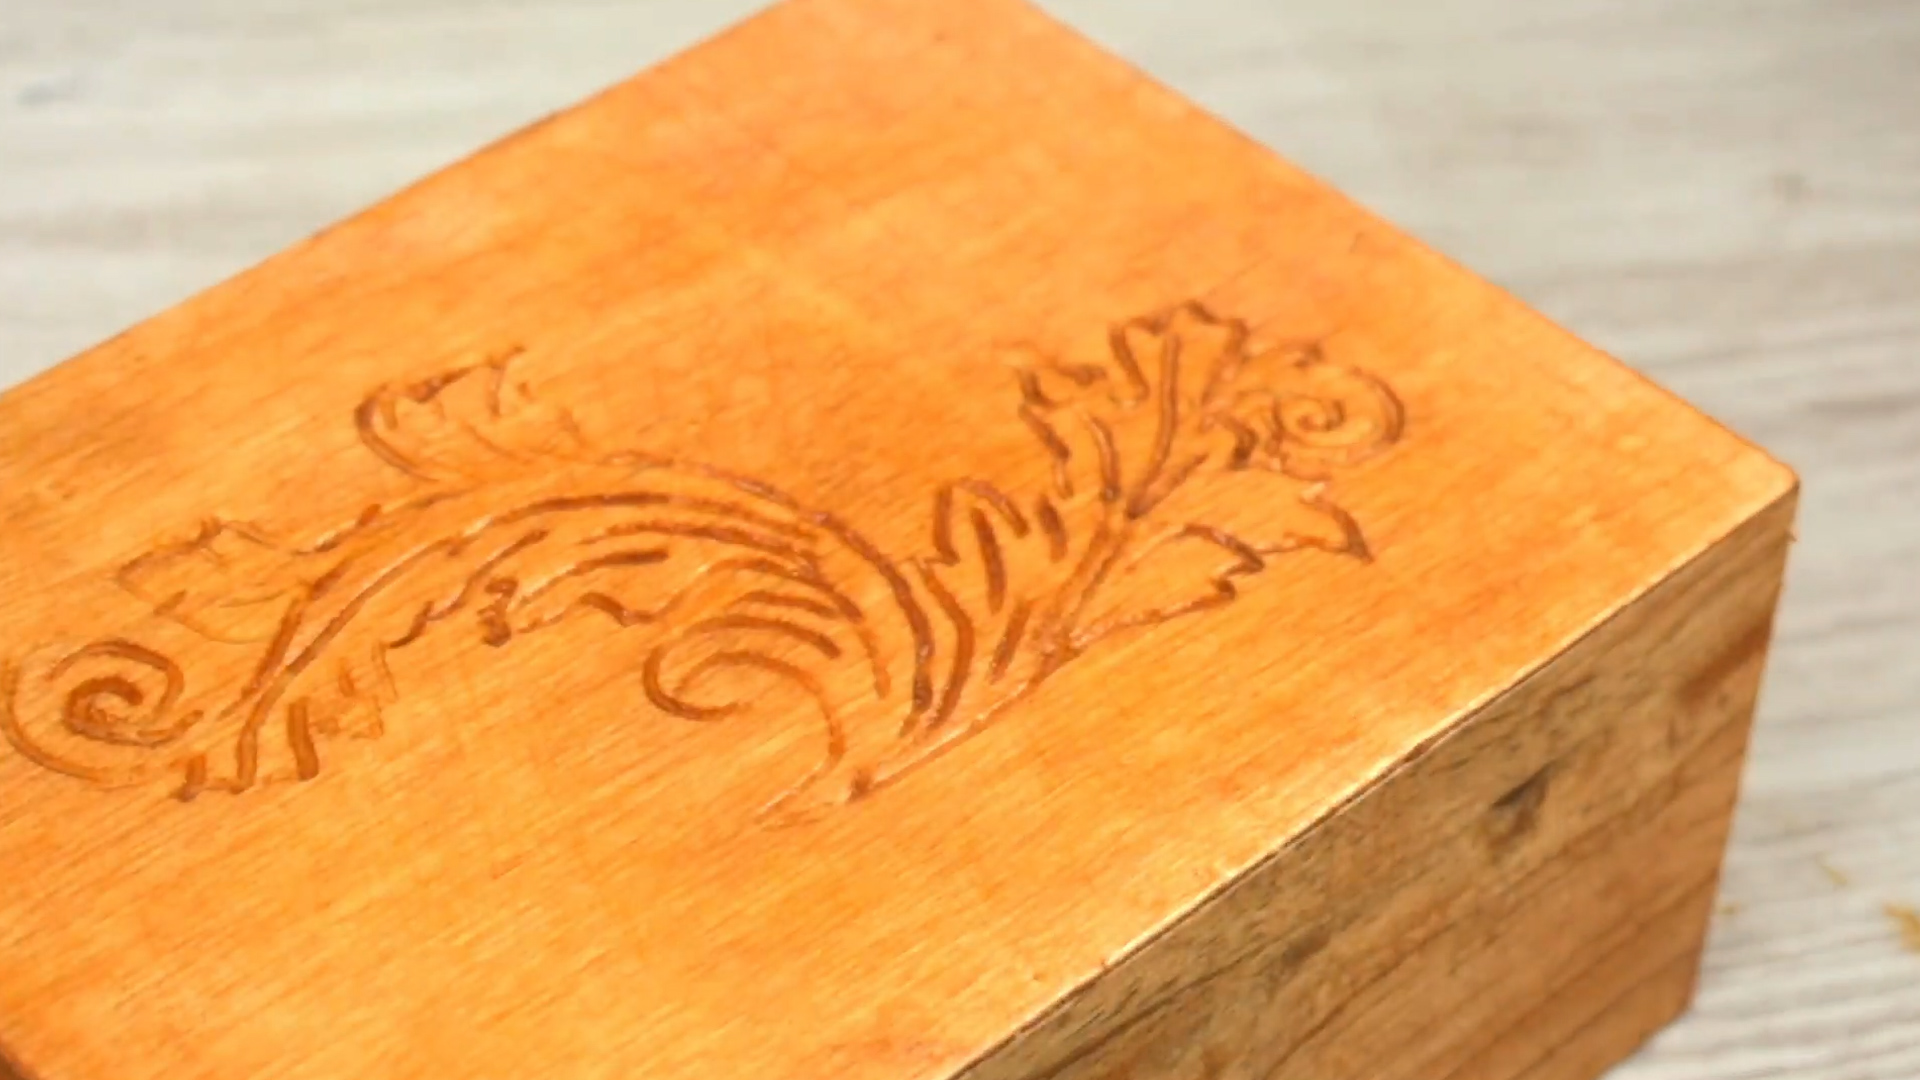
You can also combine stain with wood burning. Lightly sketch a design in pencil, then use a wood-burning tool to add initials, leaves, stars, mountains, or geometric lines. Keep the design simple if you are new to wood burning. A tiny mountain range is charming; a full Renaissance portrait on a four-inch lid may be a cry for help.
For a rustic memory box, stain the outside walnut, line the inside with scrapbook paper, and add a small label frame to the front. For a recipe box, use a warm honey stain and stencil “Family Recipes” on the lid. For a wedding keepsake box, use a pale stain, add the couple’s initials, and finish with satin sealer.
Way 3: Decoupage the Box with Paper, Fabric, or Photos
Decoupage is the art of gluing decorative paper or fabric to a surface and sealing it. It sounds fancy because it has a French name, but the basic process is wonderfully approachable: cut, glue, smooth, seal, admire, repeat. Decoupage is one of the easiest ways to decorate an unfinished wooden box with pattern, color, and personal meaning.
Best Materials for Decoupage
You can use scrapbook paper, wrapping paper, maps, book pages, sheet music, tissue paper, napkins, fabric scraps, printed photos, calendar pages, or handmade paper. Thin materials are easier to smooth around corners, while thicker paper may need extra patience and a stronger adhesive layer.
For a keepsake box, use copies of handwritten notes, old letters, travel maps, ticket stubs, or family photos. Do not use irreplaceable originals unless you are fully committed. Craft glue is powerful, but regret is also pretty strong.
How to Decoupage a Wooden Box
- Sand and clean the box. A smooth surface helps paper adhere neatly.
- Paint a base coat if needed. Light paint under thin paper helps colors look brighter.
- Cut paper or fabric pieces. Measure carefully for panels, or tear pieces for a collage effect.
- Apply decoupage medium. Brush a thin, even layer onto the wood.
- Place the paper. Smooth from the center outward to reduce bubbles and wrinkles.
- Seal the top. Brush another layer of decoupage medium over the paper. Let it dry, then add more coats if needed.
- Protect the final surface. Add a clear sealer if the box will be handled often.
Decoupage Box Ideas
For a romantic look, cover the lid with floral napkins and paint the sides blush pink or ivory. For a travel memory box, use a map on the lid and paint the sides navy, forest green, or warm gray. For a music lover, use sheet music and add a small black ribbon around the edge. For a bookish gift, use photocopied pages from a favorite public-domain text and add a quote on the inside lid.
Fabric decoupage creates a soft, high-end look. Try linen, cotton prints, toile, gingham, or small-scale florals. Keep fabric smooth and avoid overly thick materials on corners. If your edges look uneven, hide them with ribbon, twine, lace, or thin wood trim. This is not cheating. This is “strategic embellishment,” which sounds much more professional.
How to Choose the Best Decorating Method
The best method depends on the look you want, how much time you have, and how the box will be used. Paint is the most flexible option for bold colors and personalized designs. Stain is best for a natural, rustic, or elegant finish. Decoupage is ideal when you want pattern, texture, photos, or sentimental details.
If the box will sit on a shelf and look pretty, almost any finish will work. If it will be opened daily, choose a durable topcoat and avoid delicate raised embellishments near the edges. If it will be a gift, consider the recipient’s home style. A minimalist friend may prefer stained wood with a tiny monogram. A maximalist friend may appreciate florals, gold paint, and a lid that says, “Yes, I brought drama.”
Creative Combinations That Look Expensive
You do not have to choose only one method. Some of the best wooden box designs combine two or three techniques. Try staining the outside and decoupaging the inside. Paint the base and stain the lid. Use decoupage on the top panel and paint the sides a coordinating color. Add a stencil over stained wood, or paint a border around a decoupaged image.
Hardware can also make a big difference. Swap a basic latch for a decorative clasp, add tiny brass feet, glue on a small knob, or attach a label holder to the front. These small details can turn a plain craft box into something that looks custom-made.
Common Mistakes to Avoid
Skipping Sanding
Skipping sanding is tempting because the box looks “fine.” Unfortunately, paint and stain have a way of revealing every rough patch like a tiny spotlight. Sand first, and your finish will look smoother.
Using Too Much Paint or Glue
Thick coats dry slowly and can leave ridges, bubbles, or sticky areas. Use thin layers and let each one dry before adding the next. This applies to paint, stain, decoupage medium, and sealer.
Forgetting the Inside
The inside does not always need a full finish, but it should look intentional. Paint it, stain it, line it with paper, or leave it natural after a light sanding. A beautiful outside with a rough interior is like wearing a tuxedo with gym socks.
Not Sealing the Final Design
A clear topcoat protects your work from scratches, fingerprints, moisture, and everyday wear. Choose matte, satin, semi-gloss, or gloss depending on the style. Satin is a safe choice for most wooden box projects because it adds protection without looking too shiny.
of Real-World Experience: What Decorating Wooden Boxes Teaches You
Decorating an unfinished wooden box sounds simple, and it isbut it also teaches you a lot about patience, design, and the emotional roller coaster of waiting for paint to dry. The first thing you learn is that prep work matters more than you want it to. Everyone wants to jump straight into the fun part, but the box always rewards the person who sands the edges, wipes the dust, and checks whether the lid still closes smoothly before adding three coats of enthusiasm.
One practical experience is that small boxes can be trickier than large ones. A big flat surface gives you room to brush, stencil, and correct mistakes. A tiny hinged box has corners, seams, hardware, and little edges that collect extra paint. The best solution is to use smaller brushes than you think you need. Foam brushes are useful for broad sides, but a small detail brush saves the day around hinges, clasps, and lid seams.
Another lesson is that color changes as it dries. Paint may dry darker or flatter than expected, and stain can look completely different on pine than it does on the sample label. Testing the finish on the bottom of the box is not a fussy extra step; it is a tiny insurance policy. If the color looks strange underneath, nobody has to know. The bottom of the box is where craft secrets go to retire.
Decoupage also teaches humility. Paper bubbles happen. Napkins tear. Fabric corners may fray. The trick is not to panic. Smooth gently from the center outward, use thin layers of medium, and let each coat dry before judging the result. Many decoupage projects look questionable while wet and charming once dry. Give the box time to become its best self. We should all be so lucky.
From experience, the most satisfying boxes usually have one strong idea instead of five competing ideas. A stained box with one engraved initial often looks better than a box covered in every sticker from the craft drawer. A painted box with clean stripes can feel more polished than a design overloaded with dots, flowers, glitter, lace, and a random wooden butterfly. Editing is part of decorating. When in doubt, stop before the box starts looking like it lost a fight with a scrapbook.
Finally, handmade boxes are most meaningful when they have a purpose. A memory box for concert tickets, a recipe box for family cards, a jewelry box for a teenager, a keepsake box for wedding notes, or a desk box for pens and chargers all feel special because they solve a small real-life problem. Decorating an unfinished wooden box is not just about making wood look pretty. It is about turning a plain object into something useful, personal, and worth keeping.
Conclusion
Decorating an unfinished wooden box is one of the easiest DIY projects with one of the biggest creative payoffs. With paint, you can create bold color and personality. With stain, you can highlight natural wood grain and create a warm, timeless finish. With decoupage, you can add pattern, photos, paper, fabric, and personal meaning. No matter which method you choose, the secret is simple: sand well, work in thin layers, let everything dry, and protect the final design with a clear sealer.
Whether you are making a gift, organizing your home, or simply enjoying a relaxing weekend craft, a plain wooden box gives you room to experiment without pressure. Start small, keep the design focused, and do not be afraid of imperfections. A handmade box should look loved, not factory-stamped. And if all else fails, add a ribbon. Ribbon has rescued more craft projects than anyone is willing to admit.