Shin splints have a special talent for showing up exactly when your running shoes finally feel broken in, your playlist is perfect, and you have decidedheroicallythat this is the week you become “a runner.” One minute you are jogging like a motivated movie character. The next, your lower legs are complaining like they have filed a formal workplace grievance.
The good news? Shin splints, also known as medial tibial stress syndrome, are often linked to training errors, weak lower-leg muscles, tight calves, poor footwear, hard surfaces, and sudden jumps in activity. Even better, many cases can be prevented with a smart routine of shin splint exercises, calf stretches, ankle strengthening, foot stability drills, and gradual training progression.
This guide is built as a practical companion to a “Video on Best Exercises to Prevent Shin Splints.” Think of it as your written coach: no whistle, no yelling, and definitely no “just push through it” nonsense. You will learn what shin splints are, why they happen, which exercises are worth demonstrating on video, how to structure a simple routine, and how to avoid the common mistakes that turn mild shin discomfort into a long, annoying break from activity.
What Are Shin Splints?
Shin splints describe pain along the front or inner edge of the shinbone, usually caused by repetitive stress on the muscles, tendons, and bone tissue around the tibia. Runners, dancers, military recruits, soccer players, basketball players, tennis players, and people returning to exercise after a break are frequent members of the shin-splint cluban organization nobody actually wants to join.
The discomfort often starts as a dull ache during or after exercise. At first, it may fade after warming up or resting. But if training continues without adjustment, the pain can become sharper, more persistent, and harder to ignore. That is your body waving a bright orange flag, not asking you to become tougher. Shin pain that worsens, causes limping, stays painful at rest, or feels very localized should be checked by a medical professional to rule out problems such as a stress fracture.
Why Exercise Videos Help Prevent Shin Splints
Written instructions are useful, but a video can make shin splint prevention easier because form matters. A calf raise done with control is a strengthening drill. A calf raise done like a pogo stick with ambition issues is just chaos wearing sneakers.
A good shin splint prevention video should show the exercise from the side and front, explain where the viewer should feel the movement, offer beginner modifications, and warn against pain. The best exercises are simple enough to do at home, require little equipment, and target the main problem areas: calves, shins, ankles, arches, hips, and balance.
The Best Exercises to Prevent Shin Splints
The following exercises are excellent candidates for a video routine because they are visual, beginner-friendly, and easy to progress. They focus on building tissue tolerance, improving lower-leg strength, and helping your feet and ankles manage impact more efficiently.
1. Toe Raises
Toe raises strengthen the tibialis anterior, the muscle along the front of the shin. This muscle helps lift your foot and control how your foot lands when you walk or run.
To do toe raises, stand with your back against a wall and your feet about a foot away from it. Keep your heels on the floor and lift your toes toward your shins. Pause for one second, then lower slowly. Start with two sets of 10 to 15 reps.
In a video, this exercise is easy to demonstrate because viewers can clearly see the toes lifting while the heels stay planted. Remind viewers not to rock the whole body. The movement should come from the ankles, not from dramatic upper-body choreography.
2. Eccentric Calf Raises
Calf strength plays a major role in absorbing impact. Eccentric calf raises focus on the lowering phase of the movement, which helps build control and resilience in the calf-Achilles complex.
Stand on a step with the balls of your feet supported and your heels hanging slightly off the edge. Rise up onto both toes, then slowly lower your heels for three to five seconds. Beginners can use a wall or railing for balance. Start with two sets of 8 to 12 reps.
For a video demonstration, emphasize slow lowering. This is not a race. If it looks like someone is bouncing to invisible dance music, slow it down.
3. Bent-Knee Soleus Raises
The soleus is a deep calf muscle that works hard during running and walking. Because it is active when the knee is bent, it deserves its own exercise.
Stand with knees slightly bent and feet hip-width apart. Keeping the knees bent, raise your heels off the floor, pause, then lower with control. You can also do this seated with weight on your thighs. Try two sets of 12 to 15 reps.
This exercise is especially useful for runners because the soleus helps manage repeated ground contact. A prevention routine that ignores the soleus is like making a sandwich and forgetting the bread.
4. Heel Walks
Heel walks strengthen the front of the lower leg and improve ankle control. They also look slightly ridiculous, which means they are perfect for a video. Fitness should be effective, but it does not always need to look glamorous.
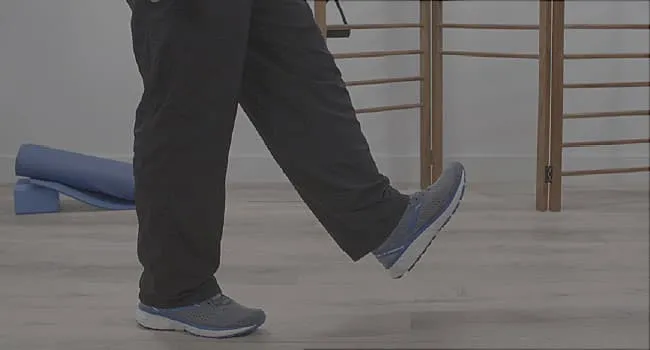
Lift your toes off the ground and walk forward on your heels for 20 to 30 seconds. Keep your steps small and controlled. Rest, then repeat two or three times.
Viewers should feel the front of the shins working. If the movement causes sharp pain, stop and switch to gentler toe raises.
5. Calf Stretch Against the Wall
Tight calves can increase stress on the shin and ankle. The classic wall calf stretch targets the gastrocnemius, the larger calf muscle.
Place both hands on a wall. Step one foot back, keep the back knee straight, and press the heel into the floor. Lean forward until you feel a stretch in the calf. Hold for 20 to 30 seconds per side.
In a video, show the difference between keeping the heel down and letting it float up. A floating heel reduces the stretch and makes the wall wonder why it got involved.
6. Bent-Knee Calf Stretch
This stretch targets the soleus. Set up like the wall calf stretch, but bend the back knee while keeping the heel down. The stretch should feel lower in the calf, closer to the Achilles area. Hold for 20 to 30 seconds per side.
Pairing straight-knee and bent-knee calf stretches gives the lower leg a more complete flexibility routine. It is simple, quick, and far more productive than blaming your shoes for everything.
7. Ankle Alphabet
The ankle alphabet improves ankle mobility and light muscular control. Sit on a chair or the floor, lift one foot, and draw the alphabet in the air with your big toe. Move slowly and make the letters large.
This is a great warm-up or recovery drill. It is also a humbling reminder that your ankle may have worse handwriting than a doctor with a deadline.
8. Resistance Band Dorsiflexion
This exercise strengthens the shin muscles more directly. Anchor a resistance band in front of you and loop it around the top of your foot. Sit with your leg extended. Pull your toes toward your shin against the band, then return slowly.
Do two sets of 10 to 15 reps per side. In a video, show the band angle clearly and remind viewers to move through the ankle, not the knee or hip.
9. Resistance Band Inversion and Eversion
Shin splint prevention is not only about the shin. The ankle needs side-to-side strength too. Inversion moves the sole of the foot inward; eversion moves it outward. Both help improve stability during running, jumping, and quick direction changes.
Use a light resistance band and move slowly through a comfortable range of motion. Start with one or two sets of 10 reps each direction. Control is more important than resistance. Your ankle is not trying to win a powerlifting meet.
10. Single-Leg Balance
Balance training helps the foot, ankle, knee, and hip work together. Stand on one leg for 20 to 30 seconds. Keep your hips level and your foot tripod stable: big toe base, little toe base, and heel gently pressing into the floor.
To progress, turn your head slowly, close your eyes, or stand on a folded towel. Only progress when the basic version feels steady. Wobbling is normal; flailing like an inflatable tube dancer is a sign to make it easier.
11. Short-Foot Exercise
The short-foot exercise strengthens the small muscles of the arch. Stand or sit with your foot flat. Without curling your toes, gently draw the ball of your foot toward your heel to lift the arch slightly. Hold for five seconds, then relax.
This drill is subtle, so it helps to show a close-up in a video. Viewers should avoid gripping the floor with their toes. The goal is arch control, not toe panic.
12. Glute Bridge
Weak hips can affect lower-leg mechanics. If the hips are not helping control the leg, the shin may end up doing extra work. Glute bridges are simple and effective.
Lie on your back with knees bent and feet flat. Squeeze your glutes and lift your hips until your body forms a straight line from shoulders to knees. Pause, then lower slowly. Perform two sets of 10 to 15 reps.
For a more advanced version, try single-leg bridges. But earn the progression. Your glutes should be working, not your lower back performing an unpaid internship.
A Simple Shin Splint Prevention Routine
Here is a practical routine that works well as a video sequence. It takes about 12 to 18 minutes and can be done three times per week.
Warm-Up: 3 Minutes
Start with easy marching, ankle circles, and ankle alphabet movements. The goal is to wake up the lower legs before asking them to be athletic.
Strength Block: 8 to 10 Minutes
Perform toe raises, eccentric calf raises, bent-knee soleus raises, heel walks, and resistance band dorsiflexion. Keep the reps controlled and stop before pain changes your form.
Stability Block: 3 to 5 Minutes
Use single-leg balance and short-foot exercises. These drills teach your feet and ankles to organize themselves before impact. It is basically a team meeting for your lower body.
Cool-Down: 3 Minutes
Finish with straight-knee calf stretches and bent-knee calf stretches. Hold each stretch gently. Stretching should feel like a polite suggestion, not a medieval negotiation.
How Often Should You Do Shin Splint Prevention Exercises?
For prevention, two to three sessions per week is a good starting point. Runners or athletes with a history of shin splints may benefit from shorter daily mobility drills plus two focused strengthening sessions weekly.
Do not suddenly add every exercise at full volume. That is how prevention becomes provocation. Start with four or five exercises, keep the effort moderate, and build gradually over several weeks.
Training Tips That Matter as Much as Exercise
Exercises help, but they cannot fully protect you from a training plan that behaves like a raccoon on espresso. Shin splints often show up when activity increases too quickly. A sudden jump in mileage, hills, sprinting, court sports, or hard-surface workouts can overload the lower leg.
Increase Gradually
Build distance, speed, and intensity slowly. Change one major variable at a time. If you increase mileage, do not also add hills and speed intervals in the same week. Your shins are not interested in your motivational quote collection.
Choose Surfaces Wisely
Concrete and uneven terrain can increase impact stress. Softer tracks, trails, grass, or treadmills may be useful during a gradual return. Variety can help reduce repetitive load.
Wear Proper Shoes
Good-fitting athletic shoes that match your activity and foot type can reduce unnecessary stress. Replace worn-out shoes before they become sad foam pancakes with laces.
Cross-Train
Low-impact activities such as cycling, swimming, rowing, and elliptical training help maintain fitness while giving your shins a break from pounding. Cross-training is not cheating. It is strategy.
Warm Up Before You Run
A dynamic warm-up prepares the muscles and joints for impact. Try brisk walking, light jogging, leg swings, ankle circles, marching, and gentle skipping drills before harder sessions.
Common Mistakes to Avoid
Pushing Through Sharp Pain
Mild muscle fatigue is normal. Sharp, worsening, or one-sided pinpoint pain is not something to “win” against. Stop and reassess. If pain persists, get evaluated.
Only Stretching, Never Strengthening
Stretching can help tight muscles, but shin splint prevention usually needs strength too. The lower leg must absorb and control force. Flexibility without strength is like having a door that opens beautifully but falls off the hinges.
Doing Too Much Too Soon
Even good exercises can irritate the shins if added aggressively. Start small. Build slowly. Let your tissues adapt.
Ignoring the Hips and Feet
The shin is often where pain appears, not always where the whole problem begins. Foot control, ankle mobility, calf strength, hip stability, and running mechanics all matter.
When to See a Professional
See a healthcare professional, sports medicine clinician, or physical therapist if shin pain does not improve with rest and training changes, if pain becomes severe, if you limp, if pain occurs at rest, or if one small area of the bone is very tender. These signs may point to something more serious than ordinary shin splints.
A physical therapist can assess ankle mobility, calf strength, hip control, running form, training load, footwear, and recovery habits. Sometimes the best “exercise” is not another drill; it is fixing the reason your body is yelling in the first place.
How to Turn This Into a Helpful Video
If you are creating a video on the best exercises to prevent shin splints, structure it like a mini workout. Start with a quick explanation of shin splints, then move into demonstrations. Keep each exercise short, clear, and beginner-friendly.
Use captions such as “strengthens front shin,” “targets calf control,” “improves ankle stability,” and “stop if sharp pain occurs.” Show common mistakes beside correct form. Viewers love seeing what not to do because, secretly, many of us are doing exactly that.
A strong video should also remind viewers that prevention is not only about exercises. Training progression, proper shoes, recovery, and low-impact cross-training all play major roles. The most useful video is not the flashiest one; it is the one people can actually follow without needing a gym, a sports science degree, or a personal assistant named Chad.
Experience-Based Tips for Preventing Shin Splints
One of the most common experiences with shin splints starts innocently: someone decides to get fit, downloads a running app, buys shoes that look fast, and runs four days in a row because motivation is high and patience is low. By the end of the week, the shins feel tight. By the next week, every step feels like the legs are sending angry text messages.
The lesson is simple: your lungs may adapt faster than your bones, tendons, and lower-leg muscles. You might feel capable of running farther, but your shins need time to build tolerance. A good prevention plan respects that timeline. It does not punish you for being enthusiastic; it simply gives your body a chance to catch up.
A helpful real-world approach is to treat shin splint exercises like brushing your teeth. You do not wait until your teeth file a complaint. You do a little maintenance regularly. Toe raises while waiting for coffee, calf raises after a walk, ankle alphabet while sitting at your desk, and single-leg balance while brushing your teeth can add up. Just avoid balancing near sharp bathroom corners unless you enjoy unnecessary drama.
Another useful experience: many people discover that their “shin problem” improves when they stop running the same route at the same pace on the same hard surface every day. Repetition is sneaky. It feels disciplined, but the body sometimes reads it as “same stress, same tissue, same complaint.” Adding softer surfaces, rest days, strength training, or cycling can reduce the repeated load.
Footwear can also be an eye-opener. Some runners keep shoes long after the cushioning has retired emotionally. If your shoes are visibly worn, feel uneven, or have hundreds of miles on them, they may no longer provide the support you think they do. New shoes will not magically fix every shin issue, but worn-out shoes can definitely keep the problem alive.
Beginners often benefit from run-walk intervals. Instead of running continuously until the shins complain, alternate short running periods with walking. For example, run for one minute and walk for two minutes for 20 minutes total. Over time, increase running gradually. This method may feel too easy at first, but “too easy” is often exactly what keeps you consistent.
People returning after shin splints should also avoid the comeback trap. After pain improves, it is tempting to return immediately to old mileage. Unfortunately, the calendar remembers your break, but your ego may not. Start below your previous level and rebuild slowly. Pain during the run, pain that worsens afterward, or soreness that changes your walking pattern means the plan needs adjusting.
Finally, the most underrated prevention tip is listening early. Shin splints rarely begin at maximum volume. They usually whisper first: a little tightness, a dull ache, a strange pulling sensation. Responding early with rest, mobility, strength work, and training adjustments is much easier than waiting until the whisper becomes a marching band.
Conclusion
The best exercises to prevent shin splints are not complicated, but they do need consistency. Toe raises, eccentric calf raises, soleus strengthening, heel walks, calf stretches, ankle mobility drills, resistance band work, single-leg balance, short-foot exercises, and hip strengthening can all help build a more resilient lower body.
A video on shin splint prevention should focus on clear form, simple progressions, and realistic advice. No one needs a superhero routine. Most people need a smart plan they can repeat, a reminder not to increase training too fast, and permission to take shin pain seriously before it becomes a bigger problem.
Your shins are not the enemy. They are just very honest reviewers of your training choices. Give them strength, mobility, recovery, and gradual progression, and they are much more likely to cooperate on your next run, walk, practice, or workout.
Note: This article is for educational and fitness content purposes. Anyone with severe, worsening, persistent, or localized shin pain should consult a qualified healthcare professional before continuing exercise.