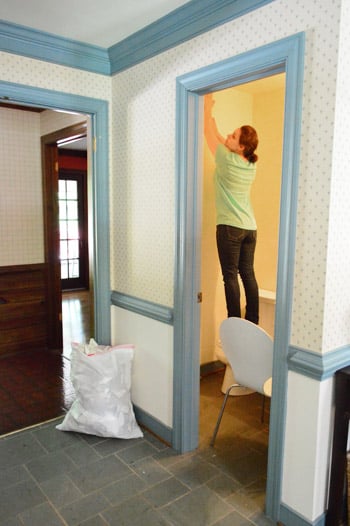
Old wallpaper has a remarkable ability to outlive decorating trends, furniture, and sometimes the people who installed it. Fortunately, removing it does not always require harsh chemicals, an industrial steamer, or the patience of a museum conservator. In many rooms, hot water is enough to soften the wallpaper paste and release the covering from the wall.
The method is inexpensive, relatively simple, and effective on many traditional paper wallcoverings. Success, however, depends on identifying the wallpaper, allowing the water to reach the adhesive, and resisting the urge to attack the wall with a scraper like it personally offended you. This guide explains how to strip wallpaper with hot water while protecting drywall, plaster, trim, flooring, and electrical fixtures.
Can Hot Water Really Remove Wallpaper?
Hot water works because many traditional wallpaper pastes are water-based. Moisture penetrates the paper, softens or reactivates the adhesive, and reduces its grip on the wall. Heat helps the moisture work faster than cool water, particularly when the paper has been installed for years.
The method works especially well on ordinary paper wallpaper, pre-pasted wallcoverings, and peelable wallpaper after its decorative top layer has been removed. It may be less effective on washable vinyl, foil, painted wallpaper, heavily coated paper, or several layers installed on top of one another. Those coverings prevent water from reaching the paste, so they usually require peeling, light scoring, a commercial remover, or steam.
Identify the Wallpaper Before Soaking It
A two-minute test can save an afternoon of unnecessary scraping. Start near a seam, outlet cover, or inconspicuous corner and gently lift the wallpaper with a plastic putty knife.
Strippable wallpaper
If the entire sheet pulls away cleanly, continue peeling slowly at a low angle. You may need little or no water. Pulling outward instead of sharply away from the wall reduces the chance of tearing the drywall facing.
Peelable wallpaper
Some wallcoverings have a vinyl or decorative face that separates from a thin paper backing. Peel off the top layer first. The backing can then be soaked with hot water and removed in sections.
Traditional paper wallpaper
If the surface absorbs a small amount of water and becomes darker, plain hot water may be all you need. Give the moisture time to penetrate before scraping.
Washable, vinyl, foil, or painted wallpaper
If water forms beads and rolls down the wall, the surface is blocking it. Try removing the outer layer first. When that is impossible, lightly perforate the covering with a wallpaper-scoring tool. Use minimal pressure because deep scoring can puncture the drywall paper underneath.
Tools and Supplies
You do not need an elaborate wallpaper-removal arsenal. Gather the following basic supplies:
- Very hot tap water
- A bucket, spray bottle, pump sprayer, or large sponge
- A 3- to 6-inch plastic or flexible metal putty knife
- A wallpaper-scoring tool, if necessary
- Plastic sheeting or waterproof drop cloths
- Painter’s tape
- Rubber gloves and safety glasses
- Clean rags and cellulose sponges
- A step ladder for high areas
- Trash bags or a large garbage can
A plastic scraper is safer for beginners because it is less likely to gouge drywall. A flexible metal knife can work faster, but its corners should be smooth rather than sharp. Keep a second bucket of clean water nearby for removing softened paste.
How to Strip Wallpaper With Hot Water
1. Protect the room
Move furniture away from the walls or place it in the center of the room and cover it. Tape plastic sheeting along the top of the baseboards so water cannot run behind them. Cover the floor with plastic first and an absorbent drop cloth or old towels on top. The plastic blocks moisture, while the fabric keeps the room from turning into a low-budget skating rink.
Remove curtains, wall decorations, vent covers, switch plates, and outlet covers. Wallpaper scraps become surprisingly sticky when wet, so placing a trash container within arm’s reach will make cleanup easier.
2. Turn off electricity near the work area
Switch off the appropriate circuits at the breaker panel before working around outlets, switches, or wall-mounted fixtures. Verify that the power is off, cover electrical boxes, and never spray water directly into an opening. Apply moisture near those areas with a damp sponge or rag instead of a sprayer.
Water and live electrical components are not suitable project partners. Treat this step as essential, not as an optional intermission between finding the scraper and making coffee.
3. Test a small section
Choose an area about 2 feet square. Apply hot water with a sponge or sprayer and wait several minutes. If the paper darkens, bubbles, or begins lifting at a seam, the method is working.
If nothing changes, try peeling away the decorative face. Score the covering only when water cannot penetrate it. Testing first prevents unnecessary perforations and reveals how much moisture the wall can tolerate.
4. Prepare the hot water
Begin with plain, very hot tap water. It should be hot enough to soften adhesive but safe enough to handle with gloves. Boiling water creates an avoidable burn hazard and can damage some painted or delicate surfaces. One wallpaper-remover manufacturer specifies hot tap water around 120 degrees Fahrenheit when mixing its concentrate; when using a commercial product, follow its label rather than inventing a stronger recipe.
If plain water is not effective, a hot-water-and-vinegar mixture is a common next step. Ratios vary among professional guides, ranging from approximately one part vinegar to two parts water to equal portions of each. Start with the weaker mixture and test it. A small amount of clear dish soap can also help wet the paper and loosen paste residue.
Do not combine vinegar with bleach, ammonia, commercial removers, or unidentified cleaning products. Use one method at a time and rinse the wall before changing solutions.
5. Work in manageable sections
Apply the hot water to an area roughly 3 feet by 3 feet, or no wider than you can scrape before it dries. A pump sprayer offers fast coverage, while a sponge gives better control around trim, ceilings, and electrical openings.
Wet the surface evenly without flooding it. Allow approximately five minutes for ordinary paper and up to 10 or 15 minutes for stubborn backing. Reapply water if the surface begins drying. The goal is sustained dampness, not a single dramatic splash followed by immediate scraping.
6. Lift and scrape carefully
Start at a seam or loose corner. Hold the scraper at a shallow angle and slide it between the wallpaper and wall. When possible, use the tool only to start the edge and then pull the paper away by hand.
Long, slow pulls are usually more productive than rapid scraping. If the paper tears into confetti-sized pieces, stop and add more water. Hard scraping is rarely the solution to dry adhesive; it is merely an efficient way to create a drywall-repair project.
7. Keep the next area soaking
Wallpaper removal moves faster when one section is soaking while another is being scraped. Wet the next section, return to the softened area, and continue this rotation around the room. Replace the water when it becomes cool or cloudy with paste.
Remove fallen paper regularly. Wet scraps can stick to shoes, ladders, floors, and innocent pets who happened to investigate the renovation.
8. Remove the backing and remaining adhesive
After the decorative layer is gone, inspect the wall under bright side lighting. A thin paper backing may be difficult to see when wet but will appear fuzzy, wrinkled, or slightly darker than the wall.
Apply fresh hot water, wait, and scrape the backing gently. Next, wash the wall with warm water and a small amount of clear dish soap. Work on one section at a time and wipe away the softened glue with a clean sponge. Change the water frequently so you do not spread dissolved paste back across the wall.
9. Rinse and check the wall
Wipe the surface with clean water and allow it to dry. Run a hand over the wall afterward. Any slick, shiny, or tacky area probably still contains adhesive and should be cleaned again.
Removing all paste is important before painting. Residue can interfere with primer, cause paint to crack or flake, and produce uneven shiny patches. Sherwin-Williams recommends removing the old adhesive as part of preparing previously wallpapered walls for paint.
10. Let the wall dry before repairing or painting
Give the wall sufficient time to dry completely, generally at least overnight. Drying may take longer in humid rooms or where several soaking cycles were required.
Patch gouges with joint compound, let the repairs dry, and sand only as much as necessary. Prime the entire wall with a suitable sealer or primer before applying finish paint. Priming helps create uniform porosity and isolates small traces of adhesive that survived cleanup.
How to Avoid Damaging Drywall
Drywall is covered with paper, which means the wall and the wallpaper share an inconvenient family resemblance. Once drywall facing becomes saturated, aggressive scraping can peel it away with the wallcovering.
- Use the smallest amount of water that keeps the wallpaper damp.
- Work in small sections rather than soaking the entire room.
- Hold the scraper almost parallel to the wall.
- Stop immediately if brown drywall paper appears.
- Do not force a dry section; wet it again.
- Use light pressure when scoring coated wallpaper.
Plaster walls generally tolerate moisture and scraping better than drywall, but they are not indestructible. Cracked, loose, or deteriorated plaster can detach when excessively soaked.
Important Safety Note for Older Homes
Wallpaper removal itself may be wet and relatively low-dust, but the work can expose old painted surfaces or lead to scraping and sanding afterward. Homes built before 1978 are more likely to contain lead-based paint. The U.S. Environmental Protection Agency warns that renovation activities that disturb old paint can create hazardous lead dust.
Before sanding, scraping painted areas, or repairing extensively damaged walls in an older home, consider lead testing or hiring an EPA-certified lead-safe professional. Keep children and pets away from the work area and use lead-safe practices when applicable.
Troubleshooting Common Wallpaper Problems
The hot water beads on the surface
The wallpaper probably has a vinyl, foil, painted, or washable coating. Peel off the top layer if possible. Otherwise, perforate it lightly with a scoring tool and reapply the water.
The wallpaper comes off in tiny pieces
It is probably too dry or has not soaked long enough. Apply more hot water, wait several minutes, and try pulling from a different seam. Removing larger sheets is easier when the adhesive has softened uniformly.
The wall surface is peeling with the wallpaper
Stop scraping. The drywall facing may be wet or the wall may not have been properly primed before the wallpaper was installed. Let the area dry and use a gentler angle. Severe damage may require sealing and skim coating.
Several layers are hiding underneath
Remove one layer at a time. Trying to saturate multiple layers can make the outer paper mushy while leaving the oldest paste untouched. A wallpaper steamer or commercial remover may be more efficient for a heavily layered wall.
Glue remains after the paper is gone
Apply hot, soapy water to a small area and let it soften the residue. Rub gently with a sponge or nonabrasive pad, then rinse. Do not paint until the wall feels clean rather than slick or tacky.
Hot Water vs. Wallpaper Steamer vs. Chemical Remover
Plain hot water should usually be the first method attempted because it is inexpensive and contains no added stripping chemicals. It is well suited to small rooms, paper wallcoverings, and projects where the adhesive responds quickly.
A commercial wallpaper remover can help when plain water repeatedly fails. These products are formulated to penetrate and break down stubborn paste, but they should be mixed and applied exactly as directed.
A wallpaper steamer is useful for painted paper, several layers, older adhesive, or large areas. Steamers rely on heated water rather than stripping chemicals, but they create very hot steam and can drip hot water. Excessive steaming can also oversaturate drywall, loosen plaster, or damage nearby finishes. Wear gloves, follow the equipment instructions, and keep the steam plate moving section by section.
Practical Experiences and Lessons From Wallpaper-Removal Projects
The following representative project experiences illustrate why technique matters more than brute force. They combine commonly reported DIY situations and professional removal guidance rather than describing one specific home.
Experience 1: The paper that looked impossible but was simply thirsty
In a typical spare bedroom, the wallpaper may appear completely bonded after the first spray. The natural reaction is to assume that hot water has failed and reach for a sharper scraper. A better approach is to apply a second light coat of water and wait.
On many older paper wallcoverings, the first application moistens the decorative surface while the second reaches the paste. After seven or eight minutes, seams that previously seemed welded to the wall can begin curling. Once one corner lifts, an entire panel may pull away in a long sheet.
The lesson is simple: dwell time matters. Wallpaper removal is often less about applying more force and more about giving moisture enough time to travel through several layers of paper and dried adhesive. A sharp tool used too early creates gouges; another spongeful of hot water often does not.
Experience 2: The vinyl layer that laughed at the spray bottle
A bathroom wall frequently presents a different problem. Water beads on the wallpaper and runs directly to the baseboard. The paper is not refusing to cooperate out of spite; its washable vinyl face is doing exactly what it was designed to doresist moisture.
The breakthrough usually comes from separating the vinyl face at a seam. Once the outer material is peeled away, the dull paper backing absorbs hot water quickly. Areas where the face cannot be lifted may need very light scoring, but excessive pressure can leave hundreds of tiny marks in the drywall.
This experience demonstrates why identifying the covering is more useful than immediately strengthening the removal solution. No amount of vinegar, dish soap, or motivational speech will help if the liquid cannot reach the adhesive.
Experience 3: The small test area that prevented a large repair
Consider a hallway where the wallpaper was installed directly over unprimed drywall. As the wet paper is pulled away, the gray-brown drywall facing begins coming with it. Continuing at the same speed could damage the entire wall.
A safer strategy is to stop, allow the surface to dry, and test a less visible area with shorter soaking times. A plastic scraper held nearly flat may remove the wallpaper while preserving more of the facing. Some damage may still occur because of the original installation, but careful work keeps it manageable.
The broader lesson is that removal difficulty is not always caused by the wallpaper. Poor wall preparation during installation can determine how cleanly it comes off years later. When drywall starts delaminating, patience and later surface repair are safer than trying to win an argument with the wall.
Experience 4: The glue that remained invisible until painting day
One of the most common mistakes is celebrating as soon as the patterned paper reaches the trash bag. The wall may look clean while still carrying a thin film of paste. When dry, that film can be almost invisible, but it often feels slick under the fingertips.
Washing the wall twicewith hot, mildly soapy water followed by clean rinse watercan prevent later problems. Side lighting from a work lamp helps reveal shiny adhesive streaks. A final hand check is equally useful.
This cleanup stage is not glamorous, but neither is watching new paint blister over old glue. The removal project is complete only when the wall is clean, dry, repaired, and properly primed.
Frequently Asked Questions
How hot should the water be?
Use very hot tap water that can be handled safely with gloves. It does not need to boil. Refresh the bucket when the water becomes lukewarm because cooler water generally softens paste more slowly.
Can I use only hot water?
Yes. Plain hot water is the best starting point for many paper wallcoverings and pre-pasted products. Add vinegar or use a commercial remover only when testing shows that water alone is not doing enough.
How long should hot water soak into wallpaper?
Begin with approximately five minutes. Stubborn paper may need 10 to 15 minutes and a second application. Do not let the section dry before scraping.
Does vinegar make wallpaper removal easier?
Vinegar can help soften certain wallpaper pastes, but it is not universally necessary. Test a diluted hot-water-and-vinegar solution on a small section before treating the entire room.
Can hot water damage drywall?
Yes, especially when drywall is flooded or left saturated. Apply controlled amounts, work in small sections, and stop if the drywall facing begins lifting.
Should I score every wallpapered wall?
No. Score only when the surface prevents water from penetrating. Strippable paper and exposed paper backing often absorb water without perforation.
Can I paint immediately after removing wallpaper?
No. Remove all adhesive, rinse the wall, and allow it to dry completely. Repair damaged areas and apply an appropriate primer before painting.
Conclusion
Using hot water to strip wallpaper is one of the simplest and most affordable ways to refresh a room. The process works best when you identify the wallcovering, protect the room, disable electricity near the work area, and give the water enough time to soften the paste.
Start with plain hot water, work in small sections, and scrape with a light hand. When the paper resists, determine whether a coating is blocking moisture before reaching for stronger products. Most importantly, clean away every trace of adhesive and let the wall dry before repairing, priming, or painting. Wallpaper removal may never become anyone’s favorite weekend hobby, but with the right technique, it does not have to become a family legend either.
Note: This article synthesizes practical guidance from The Home Depot, Lowe’s, This Old House, Sherwin-Williams, HGTV, Better Homes & Gardens, Bob Vila, Angi, Architectural Digest, Apartment Therapy, Rust-Oleum/Zinsser, and the U.S. Environmental Protection Agency.