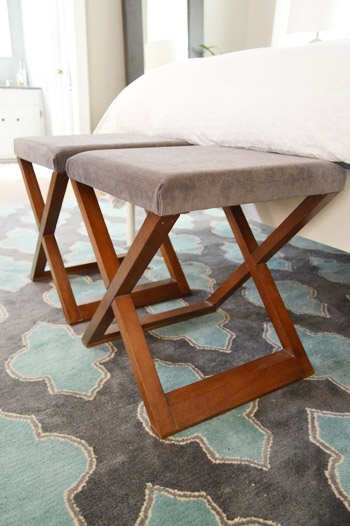
Some furniture projects whisper, “I’m a sensible weekend upgrade.” This one practically kicks the door open and says, “Move over, boring bench. We’re doing something smarter.” Turning side tables into upholstered benches is one of those DIY ideas that feels delightfully clever because it solves two problems at once: it repurposes furniture you may already own, and it creates custom seating that looks far more expensive than it really is.
At its core, this project is about using two sturdy side tables as the bench ends, then bridging them with a solid seat base, foam, batting, and fabric. The result can work in an entryway, at the foot of a bed, in a mudroom, in a reading nook, or anywhere a normal bench would be welcome but a custom-built piece would cost a small emotional breakdown and half your savings account.
The best part is that this furniture makeover can be tailored to your style. Want a modern upholstered bench in crisp linen? Easy. Prefer a cozy cottage look with painted legs and striped fabric? Also easy. Craving a dramatic velvet bench that says, “Yes, I do have opinions about throw pillows”? Even easier.
Why This DIY Furniture Makeover Works So Well
Side tables are some of the most versatile small furniture pieces in a home. They already have finished surfaces, stable legs, and the kind of proportions that make them perfect candidates for repurposing. When you place two matching or coordinating tables several feet apart and connect them with a seat, they naturally form the structure of a bench without requiring you to build everything from scratch.
That shortcut matters. Instead of constructing two leg frames from raw lumber, you’re starting with ready-made bench ends. That saves time, cuts down on measuring mistakes, and gives the finished piece more personality than a plain rectangular bench ever could. In practical spaces like entryways and mudrooms, upholstered benches are especially useful because they provide a comfortable place to sit while putting on shoes, setting down bags, or pretending you are the kind of person who always leaves the house on time.
Best Places to Use an Upholstered Bench Made From Side Tables
Entryway
This is the obvious winner. A custom side table bench adds seating without making the space feel bulky. If your tables have shelves or drawers, you may also gain room for gloves, leashes, mail, or the mysterious single shoe that lives near every front door.
Bedroom
At the foot of the bed, an upholstered bench looks polished and useful. It becomes a place to sit while getting dressed, drape tomorrow’s outfit, or stack decorative pillows that somehow multiply overnight.
Mudroom or Hallway
A cushioned bench makes hardworking spaces feel more intentional. Choosing a stain-resistant or outdoor-friendly fabric is especially smart here because these zones attract wet jackets, dusty backpacks, and chaos with alarming efficiency.
Living Room or Reading Nook
When styled correctly, a bench made from side tables can double as an accent piece. It can sit under a window, behind a sofa, or near a bookcase, quietly showing off your DIY confidence.
How to Choose the Right Side Tables
Not every side table should volunteer for bench duty. The best candidates are sturdy, level, and close in height. Matching tables create the cleanest look, but coordinating tables can work if they share similar scale and visual weight.
Look for solid wood or well-built engineered wood pieces with strong legs and minimal wobble. If the tables are flimsy, too lightweight, or held together with hopes and tiny staples, skip them. A bench has to support seated weight, not just a lamp and a hardcover novel no one has finished since 2022.
Pay attention to height and depth. Most benches feel comfortable when the finished seat height lands around standard bench range once the foam and fabric are added. If the tables are already tall, use thinner foam. If they are low, a thicker seat can help balance the proportions.
Planning the Seat Structure
The seat is what turns two separate tables into one functional upholstered bench. In most cases, the simplest solution is a plywood panel cut to size and attached securely between the tables. The plywood becomes the seat base, while support cleats, ledgers, aprons, or brackets help carry the load.
Before you cut anything, decide your finished bench length. Measure the space, then determine how much of the seat will overlap or rest on each side table. The span should feel intentional, not like two end tables got trapped in a seating arrangement by accident.
For a stronger build, many DIYers add interior support pieces beneath the plywood. That may include wood cleats screwed into the inside faces of the tables, a frame under the seat, or metal corner brackets. Wood glue and screws are much more reliable here than glue alone. This is furniture, not a trust fall exercise.
Prep Work Before Upholstery
If You’re Painting the Tables
Clean first, then lightly sand so paint can adhere properly. If your side tables are laminate, melamine, or another slick manufactured surface, use a bonding primer before painting. A durable furniture paint or cabinet-style enamel works well because benches get touched, bumped, and scooted around more than purely decorative pieces.
If You’re Staining or Refinishing Wood
If you want a natural wood look, smooth the surface properly before applying stain. A common finishing sequence is to sand with a coarser grit such as 120 to remove roughness or leftover finish, then move to 220 for a smoother result. Always sand with the grain, remove dust thoroughly, and test stain in a less-visible spot before committing. A protective clear coat helps the finish survive real life, which is full of keys, denim, pet claws, and coffee cups that “definitely had a lid on them.”
Choosing Foam, Batting, and Fabric
Foam
The foam controls comfort and profile. For indoor seating, high-density upholstery foam is the sweet spot because it keeps its shape better and resists sagging longer than flimsier alternatives. If you want a more luxurious seat, you can layer a firmer foam on the bottom and a softer layer on top. That combination gives support without feeling like you are sitting on a decorative brick.
Batting
Batting wraps around the foam and softens the edges, which helps the bench look finished instead of sharp and boxy. It also smooths out minor imperfections and makes fabric lie better. Cut it generously so it can wrap around the seat base before stapling underneath.
Fabric
This is where style meets common sense. Heavy upholstery fabric, performance fabric, or outdoor-friendly fabric tends to work best for a bench because it handles wear more gracefully than lightweight decorative textiles. In high-traffic areas, stain-resistant fabric is a smart choice. In bedrooms, you can lean more into softness and texture.
If your fabric has a stripe, floral, or geometric pattern, take time to center it before stapling. Nothing ruins a triumphant DIY reveal faster than realizing the pattern is drifting off the edge like it got bored halfway through the project.
Step-by-Step: Turning Side Tables Into Upholstered Benches
1. Measure Everything Twice
Measure your tables, the space where the bench will go, and the planned seat size. Confirm that both tables are level and the same height. If they are slightly off, you may be able to correct that with furniture pads or minor adjustments, but large differences will be noticeable.
2. Build or Cut the Seat Base
Cut a plywood panel to the desired length and depth. Dry-fit it over the tables so you can check the look before attaching anything. If needed, add a simple wood frame beneath the plywood for extra rigidity.
3. Add Supports
Install cleats, brackets, or an apron structure so the seat has solid support. Fasten the seat to the tables with screws placed in unobtrusive locations. Test for movement before moving on. If the bench rocks now, it will not magically become stable later just because you introduced pretty fabric.
4. Finish the Base
Paint, stain, or seal the side tables and any exposed wood seat structure. Let everything dry fully before upholstering. Patience here prevents fingerprints, smudges, and the classic DIY phrase: “I thought it felt dry.”
5. Cut Foam and Batting
Cut upholstery foam to match the seat. An electric carving knife, sharp utility blade, or foam-cutting tool can help create a cleaner edge. Then cut batting several inches larger on all sides so it wraps around the foam and seat base.
6. Attach the Batting
Place the foam on the plywood, wrap with batting, pull it snug, and staple it underneath. Keep the top smooth and the corners neat. This layer is the secret to a softer, more tailored appearance.
7. Upholster the Seat
Lay the fabric face down, center the padded seat on top, then begin stapling from the center of each side outward. Pull the fabric taut as you work, smoothing the top surface regularly. Leave the corners for last, then fold them into neat pleats and staple securely. The goal is crisp and smooth, not “gift-wrapped by a raccoon.”
8. Finish the Underside
If you want the bench to look polished from every angle, cover the staple area underneath with a dust cover or lightweight fabric panel. It’s a small detail, but it makes the project feel more custom and less “weekend chaos with a staple gun.”
Common Mistakes to Avoid
Using Weak Tables
A pretty table is not automatically a bench-worthy table. Stability matters more than charm.
Skipping Surface Prep
If you paint without cleaning, sanding, or priming correctly, the finish is more likely to chip or peel. Benches get hard use, so prep is not optional.
Choosing Foam That’s Too Soft
Cheap foam may feel nice for five minutes and sad forever after that. Use upholstery-grade material intended for seating.
Stapling Randomly
Work from the center out on each side. That keeps the fabric tension more even and reduces wrinkles.
Ignoring Safety
Cutting and sanding wood creates dust, and wood dust is not something to casually inhale like it is artisanal cinnamon. Wear eye protection, keep the area ventilated, and use appropriate protective gear when sanding, drilling, or cutting.
Styling Ideas for the Finished Bench
Once your upholstered bench is done, a little styling goes a long way. In an entryway, place a mirror above it and tuck baskets underneath. In a bedroom, pair it with a throw and a tray on one side table shelf. In a hallway, add a slim lamp or framed artwork nearby. The beauty of this design is that the side tables can still offer storage or display space, so the bench works harder than a standard one-piece version.
You can also customize the mood with fabric choice. Neutral boucle or textured linen creates a calm designer look. Velvet makes it more glamorous. Stripes feel classic. A botanical print gives the project cottage charm. Basically, this bench can become whatever personality your room is missing.
Final Thoughts
Turning side tables into upholstered benches is the kind of DIY project that earns repeat compliments because it looks inventive without being fussy. It repurposes existing furniture, adds useful seating, and gives you plenty of room to personalize the result with paint, stain, fabric, and size. More importantly, it proves that great furniture makeovers do not always start with a trip to the lumber aisle and a heroic amount of confidence.
If you choose strong side tables, build a solid seat base, and upholster with care, you can create a custom bench that looks right at home in an entryway, bedroom, mudroom, or cozy corner. It is practical, stylish, and just unusual enough to make people ask where you bought it. That is your cue to smile modestly and say, “Oh, that old thing? I made it from side tables.” Then wait for the admiration to arrive exactly on schedule.
Real-World DIY Experiences With Turning Side Tables Into Upholstered Benches
One of the most common experiences people have with this project is surprise at how fast it goes from “random furniture parts” to “that actually looks like a bench.” In the beginning, two side tables can look awkward sitting apart with a plywood board balanced across them. It has strong garage-experiment energy. But once the seat is secured and the foam is in place, the project starts to make visual sense. That shift is encouraging, especially for newer DIYers who need a small emotional victory before the staple gun comes out.
Another frequent experience is realizing that table quality matters more than expected. Many people begin with whatever side tables they have on hand, then quickly notice that even slight wobble becomes a much bigger deal when the furniture is expected to hold seated weight. A table that worked perfectly well beside a sofa may suddenly reveal loose joints, uneven feet, or a top that is less solid than it looked. That moment is not a failure. It is just the project politely informing you that “cute” and “structural” are not always the same thing.
Fabric selection is also where a lot of real-life lessons happen. A bold print may look amazing in the store, but once stretched across a bench, the pattern repeat becomes much more obvious. Stripes need alignment. Geometrics need centering. Florals can look either charming or mildly chaotic depending on scale. Many DIYers end up saying the same thing after their first upholstery project: a solid, textured fabric is more forgiving than it has any right to be. It hides small wrinkles, disguises tiny stapling imperfections, and keeps the overall bench looking clean and intentional.
Then there is the foam experience, which can be unexpectedly humbling. People often assume any craft foam will do, only to discover that bench seating needs support, not just softness. Better foam makes the bench feel like furniture. Inferior foam makes it feel like a padded apology. Once people sit on a properly cushioned seat with batting wrapped smoothly around the edges, they usually understand why upholstery materials matter so much.
Perhaps the most satisfying experience, though, is the styling moment at the end. You slide the finished bench into place, step back, and realize it solved a room problem you had been ignoring for months. Suddenly the entryway feels finished. The bedroom feels layered. The mudroom feels less like a dumping zone and more like a real part of the house. That is the magic of this project. It is not just about building a bench. It is about making a space feel more useful, more polished, and a little more personal.