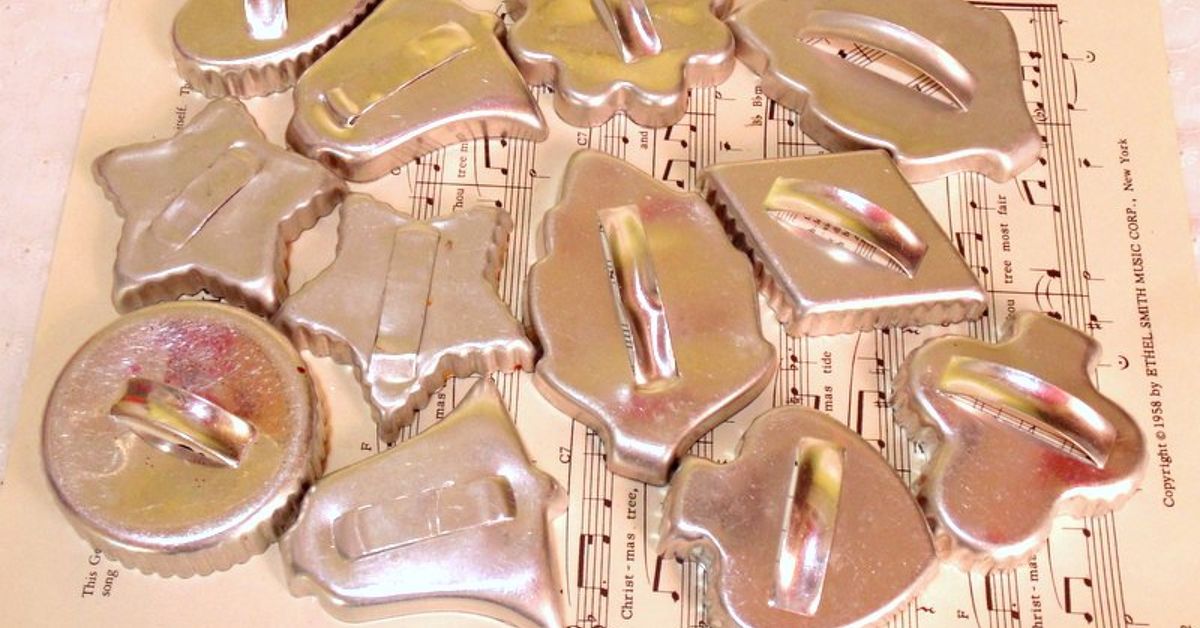
A dusty tin of old cookie cutters has a peculiar superpower: it can make you nostalgic for holiday kitchens you may never have visieral complaints with management. Before those shapes disappear into the back of a drawer, give them a second act.
Vintage cookie cutter ornaments are inexpensive, personal, and delightfully imperfect. They can hang on a Christmas tree, brighten a winter window, top a wrapped gift, or become a small keepsake for someone who prefers handmade charm to another scented candle. Better still, the project does not require advanced crafting skills. If you can trace a shape, tie a bow, and occasionally tell hot glue where to go, you are qualified.
Why Vintage Cookie Cutters Make Such Good Ornaments
Old cutters already bring three useful things to the craft table: recognizable silhouettes, a touch of metal shine, and instant character. A star needs no explanation. A heart works for Christmas, Valentine’s Day, or an anniversary. A rabbit can join spring décor. Even the baffling shapes deserve a moment. Is it a tulip? A mitten? A mysterious blob from 1978? Congratulations: it is now folk art.
Open metal cutters also behave like ready-made frames. Add a photo, patterned paper, fabric, sheet music, or a miniature scene, and the cutter suddenly looks intentional. The rim creates a clean boundary around the design, which is the craft-world equivalent of putting on sunglasses: everything looks a little more polished.
Start With the Right Cutters
Sort your collection into three groups: keep for baking, preserve as sentimental heirlooms, and transform into décor. Choose retired cutters with good shapes, light surface wear, or small dents that add personality. Open-outline cutters are ideal for photo inserts, paper backings, and wrapped rims. Solid-back aluminum cutters work beautifully as tiny shadow boxes.
Skip anything with flaky coatings, sharp broken seams, heavy rust, or edges likely to snag fingers or ribbon. Wash and dry display-only cutters before crafting. Once you paint, glue, seal, or fill a cutter with non-food materials, retire it from baking for good. Do not turn it into an ornament on Saturday and use it for sugar cookies on Sunday. The cookie deserves better, and so does your stomach.
Supplies for DIY Cookie Cutter Ornaments
- Retired metal cookie cutters
- Cardstock, scrapbook paper, old holiday cards, fabric scraps, or printed photos
- Scissors, a pencil, double-sided tape, craft glue, and a low-temperature glue gun
- Ribbon, baker’s twine, velvet cord, yarn, or narrow fabric strips
- Small beads, buttons, tiny bells, faux greenery, pom-poms, or sequins
- Acrylic paint and a small brush for color accents
Four Easy Ways to Turn Cookie Cutters Into Ornaments
1. Frame a Favorite Photo or Pretty Paper
This is the easiest way to make a meaningful vintage cookie cutter ornament. Place the cutter on the back of your chosen paper or photo and trace around its outside edge. Cut just inside the line so the insert fits behind the metal rim. Check the fit, trim where necessary, then attach it to the back with double-sided tape.
For a photo ornament, pick an image with a clear subject near the center: a child in a snowsuit, grandparents at a picnic, a beloved dog with suspiciously good posture. Black-and-white prints look classic; faded-color photos pair nicely with velvet or metallic ribbon. Add a second circle or shape of cardstock behind the photo for a neater back. Finish with a loop of ribbon and a handwritten year. Future family members will appreciate knowing whether that toddler is Aunt Maria or a very young accountant.
2. Wrap the Metal Rim in Twine or Ribbon
A wrapped cutter proves that a little twine can make almost anything look intentional. Use baker’s twine for cottage charm, velvet ribbon for a dressier tree, or thin yarn for cozy texture. Anchor one end on an inconspicuous spot with a tiny dot of glue, then wrap the material around the metal in neat, slightly overlapping turns.
For thin cutters, wrap at a gentle angle and move slowly around the shape. Keep the glue modest. Too much turns a rustic ornament into a sticky archaeological site. Hide the final end beneath a previous wrap, add a loop of matching twine, and finish with one small accent: a wooden bead, a bell, or a bow. A bow on a gingerbread person becomes a bow tie, and suddenly he is ready for a tiny office holiday party.
3. Build a Mini Shadow-Box Scene
Solid-back cookie cutters are little metal trays waiting for a personality. Start with a fitted background of felt, patterned paper, or fabric. Glue it inside the cutter, then build a lightweight scene with small holiday details: a bottlebrush tree, faux snow, a button, a tiny wooden initial, a scrap of plaid, or a cluster of sequins.
A star can become a snowy night with navy paper and a small moon. A heart can hold a photo, an initial, and a bit of faux greenery. A stocking can become a candy-shop scene with red felt and miniature peppermints. Keep the scale small. When pieces are too large, the cutter stops looking like a frame and starts looking like a craft-store drawer that fell over.
Build in layers and let glue set before adding the next item. Foam adhesive gives selected pieces a little depth without making the ornament heavy. Add a simple ribbon hanger so the cutternot the attachment methodgets the attention.
4. Paint a Quietly Modern Heirloom
Some cutters have great shapes but a finish that says “forgotten in a basement” rather than “vintage treasure.” A thin coat of acrylic paint can help. Clean and dry the metal, then use two light coats in cream, forest green, deep red, charcoal, or soft gold. Two thin coats look smoother than one thick coat with the texture of a waffle.
For a worn finish, brush on color and gently wipe a little away before it dries completely. The paint will settle into creases while a hint of metal remains visible. Once dry, add velvet ribbon or leather cord and stop. A painted cutter usually needs nothing else. This is the craft equivalent of leaving the party before someone suggests karaoke.
Choose a Style That Fits Your Holiday Décor
Farmhouse and cozy: Use natural twine, gingham fabric, kraft paper, wooden beads, and soft colors such as cream, faded red, pine green, and warm brown. Stars, hearts, animals, and trees are especially easy to style.
Vintage Christmas: Pair shiny metal with old-fashioned red and green paper, tiny bells, gold cord, faded family photos, plaid ribbon, and warm white lights. The goal is collected and nostalgic, not “every drawer in the craft room is now on the tree.”
Scandinavian-inspired: Keep it clean with white paper inserts, red thread, pale wood beads, and simple shapes. Use fewer embellishments and let the silhouette do the work.
Playful family tree: Invite children to choose the filler materials. Bright pom-poms, painted initials, bold paper, and snapshots from the year may not all match. Neither do families. That is usually the fun part.
Make Them Gift-Worthy, Then Display Them Everywhere
A personalized cookie cutter ornament is a thoughtful gift for teachers, neighbors, coworkers, hosts, grandparents, or relatives who insist they “do not need anything.” Add a photo for grandparents, a first initial for a friend, a pet portrait for an animal lover, or a small printed recipe fragment for someone who bakes.
Wrap each ornament in tissue inside a small box, cookie tin, or paper envelope. Tie on a tag with the year and a short note such as “For your tree” or “Officially too cute to use for cookies.” Beyond the tree, hang several from a window at different lengths, attach one to a wrapped gift as a reusable topper, or add a cluster to a kitchen wreath.
After the season, cushion paper-insert ornaments with tissue and store them in a shallow divided box. Keep heavy pieces away from delicate photos. Choose a dry, moderate place. A damp basement is not a charming vintage setting; it is how “patina” becomes “why is this fuzzy?”
Experiences From a Cookie Cutter Ornament Crafting Afternoon
The first time I turned a cookie cutter into an ornament, I had a plan that was ambitious and suspiciously dependent on glitter. The cutter was a small aluminum star with one bent point and a dull finish. It had been hiding in the back of a kitchen drawer beside a rolling pin, three expired coupons, and one mysterious screw. I planned to make a refined, magazine-worthy star. Naturally, I began by covering my work surface in enough supplies to open a tiny craft kiosk.
The first lesson arrived quickly: the cutter did not need rescuing from every sign of age. After I polished it, painted it, added glitter, added more glitter, and attempted a bow, it looked less like a vintage heirloom and more like a disco snowflake with unresolved issues. I made tea, started again, and used another star. This time, I slipped a black-and-white photo behind the rim, tied on a velvet ribbon, and stopped. The result was simple, imperfect, and much better. The bent point became part of the charm.
A later afternoon involved heart-shaped cutters that had belonged to a neighbor’s mother. Some were too precious to alter, so we left them alone. The retired ones became photo ornaments for her grandchildren. We picked candid pictures rather than formal portraits: a child laughing with frosting on her nose, two siblings in rain boots, a dog looking deeply offended by a birthday hat. Each photo was backed with cream cardstock and labeled with a name and year.
The unexpected part was how many stories surfaced. One bell had been used for a school fundraiser. A tiny angel appeared every December, even though nobody in the family liked the angel-cookie recipe. A large heart was blamed for a batch of dough that spread into one giant, delicious continent. The ornaments became less about flawless holiday décor and more about giving ordinary stories a place to live.
Children add another kind of energy to this project. Their definition of “helping” may include placing nine pom-poms in one corner and calling it modern art, but that does not make the result wrong. Give younger makers simple jobs: choose paper, trace shapes, select ribbon, or write the year on the back. Older children can create gifts for teachers and relatives. Their choices may be sparkly, loud, and gloriously unrestrained. That is not a flaw. It is proof that a real person made it.
I also learned something from making a small batch for a gift exchange. I created six nearly identical twine-wrapped stars, convinced that matching ornaments would look polished. They did. But the last one, made from leftover twine with a tiny wooden bead and a slightly crooked bow, was everyone’s favorite. It had character. It looked handmade in the best sense: cared for, not factory-produced.
That is the quiet appeal of turning vintage cookie cutters into ornaments. The project makes you slow down just enough to notice a worn edge, an old photograph, a favorite color, or the way a ribbon changes the mood of a simple metal shape. There is no single correct outcome. The best ornament is the one that makes someone pause, smile, and ask, “Where did you get that?” Few answers are more satisfying than, “It used to make cookies.”
Conclusion: Give Old Cutters a New Tradition
Turning vintage cookie cutters into charming ornaments is a small project with a big emotional return. A simple metal shape can frame a photo, hold a miniature scene, wear a cozy twine wrap, or become a handmade gift that marks a particular year. Choose retired cutters, keep food-use pieces separate from craft supplies, and let dents, scratches, and odd shapes become part of the design. The goal is not a flawless ornament collection. It is a tree, window, or gift package with a little more personality.
Note: Once a cookie cutter has been painted, glued, sealed, or filled with non-food materials, keep it for decoration only rather than returning it to baking.