Research synthesis: U.S. waste-reduction and carton-recycling guidance informed the preparation, reuse, and disposal recommendations.
Before you toss that empty milk or juice carton, take another look. Beneath the nutritional facts, splashy fruit graphics, and suspiciously cheerful cartoon cow is the framework for one of the easiest backyard projects imaginable: a homemade bird feeder.
A DIY drink carton bird feeder costs almost nothing, takes less than an afternoon to build, and transforms an ordinary piece of packaging into a lively backyard attraction. One minute, the carton is waiting beside the recycling bin. The next, it is serving lunch to chickadees, finches, cardinals, sparrows, and possibly one squirrel who believes every buffet was created in its honor.
This project is especially useful for families, beginning birdwatchers, teachers, renters, and anyone who wants a sustainable backyard decoration without buying another object that arrives wrapped in three layers of plastic. With thoughtful construction, safe placement, and regular maintenance, an empty drink carton can become a charming and practical accessory for your outdoor space.
Why Turn a Drink Carton Into a Backyard Bird Feeder?
Food and beverage cartons are lightweight, easy to cut, and naturally shaped like small houses. Gable-top milk cartons already come with a roof. Shelf-stable juice cartons offer a compact rectangular structure. In other words, packaging designers have unknowingly been building tiny bird cafés for years.
Reusing a carton before disposing of it extends the useful life of the material. The U.S. Environmental Protection Agency places source reduction and reuse ahead of recycling in its waste-management hierarchy. Recycling remains important, but getting another practical use from an item first can be an equally valuable household habit.
Cartons are made primarily from paper fiber, with thin protective layers that may include polyethylene and, in shelf-stable packaging, aluminum. Those layers help the container hold liquids, but they also mean recycling rules vary by location. Turning one carton into a temporary feeder is a creative reuse option, especially when local carton collection is unavailable.
A Small Project With Several Benefits
A recycled carton bird feeder can:
- Introduce children to birds, recycling, and basic tool safety.
- Create a low-cost birdwatching station outside a window.
- Add color and personality to a patio, balcony, or backyard.
- Provide supplemental food for visiting birds.
- Encourage closer observation of seasonal wildlife.
- Give an everyday household item a useful second life.
It will not replace native plants, clean water, natural shelter, or responsible habitat management. Think of it as one piece of a bird-friendly backyard rather than an all-inclusive luxury resort with unlimited seed service.
Materials You Will Need
You probably have most of the required supplies already:
- One empty paper milk, juice, broth, or plant-based beverage carton
- Warm water and dish soap
- Scissors or a craft knife
- A pencil and ruler
- A wooden dowel, untreated twig, or bamboo skewer
- Natural twine or durable outdoor cord
- A hole punch, awl, or pointed tool
- Water-based acrylic paint for the exterior, if desired
- Paintbrushes
- Quality birdseed
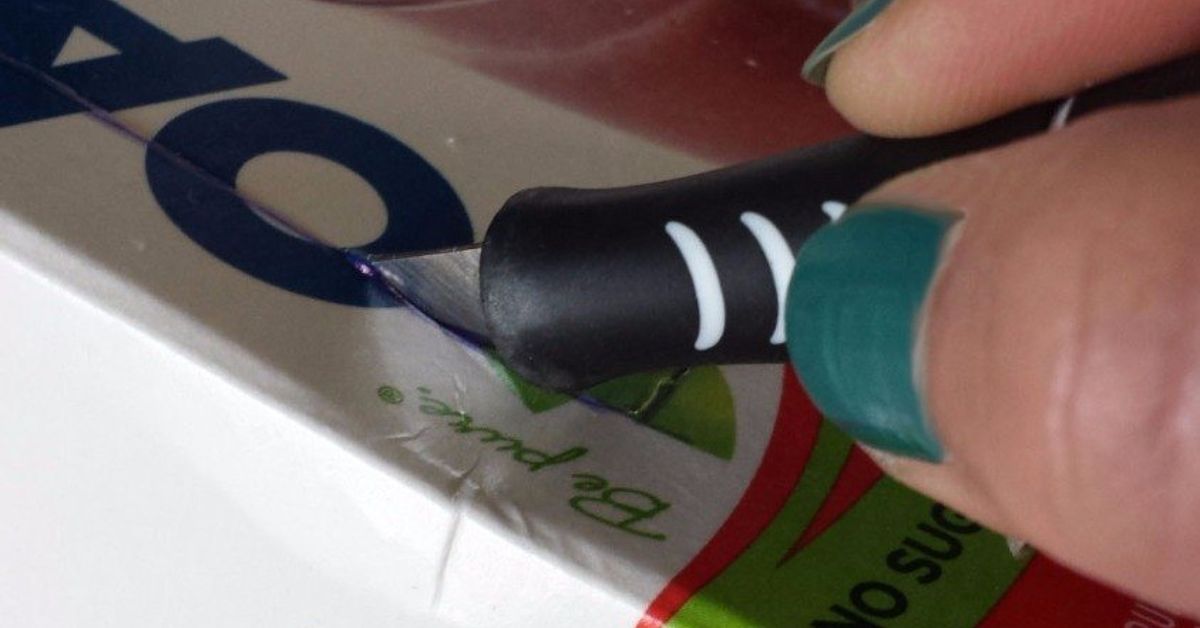
Adults should perform or closely supervise all cutting and hole-making. Cartons may look cooperative, but a craft knife does not care that this is supposed to be a wholesome family activity.
Research synthesis: Audubon carton-feeder projects and bird-feeding guidance informed the construction, seed, decoration, and supervision recommendations.
Step 1: Clean and Dry the Carton Thoroughly
Open the carton completely enough to rinse every interior surface. Wash it with warm water and a small amount of dish soap, then rinse until no odor or residue remains.
This step matters more than it appears. A carton that still smells like chocolate milk may attract insects, rodents, raccoons, or the neighborhood cat with unusually ambitious career goals. Food residue also encourages mold and bacteria.
Turn the carton upside down and allow it to dry for at least 24 hours. Do not begin painting or cutting while the paperboard is damp. Moisture can soften the seams and shorten the feeder’s outdoor life.
Step 2: Plan the Feeding Openings
Use a pencil and ruler to draw a large rectangular opening on one broad side of the carton. Leave at least two or three inches of material below the opening so the bottom can hold seed.
You can cut a matching window on the opposite side to create a fly-through feeder. Two openings improve visibility and give birds more than one escape route. However, avoid cutting all four sides. Removing too much material weakens the carton and may turn your feeder into a collapsible seed purse.
Round the corners of each opening rather than leaving sharp points. Smooth edges are safer for birds and less likely to tear as the feeder moves in the wind.
Step 3: Add Drainage Holes
Poke several tiny drainage holes in the bottom of the carton. They should be large enough to release rainwater but small enough to retain seed.
Drainage is essential because wet seed can spoil, clump, or develop mold. A feeder with no drainage may look perfectly fine from a distance while quietly producing a damp mixture no self-respecting bird ordered.
Do not rely on the carton’s liquid-resistant lining to keep everything dry. Rain can enter through the feeding window, and condensation can develop during temperature changes.
Step 4: Install a Simple Perch
Make a small hole approximately half an inch below the main opening. Push a short wooden dowel or untreated twig through the hole. For a two-sided feeder, extend it through a matching hole on the opposite wall.
The perch only needs to project a few inches. A long perch adds leverage and may tear the carton when larger birds land on it. It can also provide squirrels with a convenient front porch from which to plan their next robbery.
A perch is optional. Many small birds can cling to the edge of a well-cut opening, and eliminating the perch may discourage heavier visitors. Choose the design that best suits the species in your area.
Step 5: Create a Secure Hanger
Punch two holes near the top of the carton, keeping them away from folded seams that could split. Thread natural twine or outdoor cord through the holes and tie a strong loop.
Test the hanger indoors before adding seed. Fill the carton with a small amount of dry rice, hold it over a table, and gently shake it. If the holes begin to tear, reinforce the upper area with small pieces of untreated wood or select a stronger carton.
Avoid loose string ends, frayed fibers, exposed wire, or loops in which feet could become tangled. Keep the hanging system simple, short, and secure.
Step 6: Decorate Without Creating Hazards
Decoration is where your recycled bird feeder becomes a genuine backyard accessory. Paint the exterior to resemble a cottage, barn, school bus, lighthouse, diner, flower shop, or tiny suburban home with property taxes no bird could possibly afford.
Use water-based acrylic paint only on the outside. Keep paint away from the interior, feeding edges, seed tray, drainage holes, and perch. Allow every coat to dry completely before hanging the feeder.
A simple painted design is safer than one covered with loose craft materials. Avoid glitter, beads, plastic gems, dangling ribbons, exposed tape, and large blobs of glue near areas birds may touch. Decorations that peel off can become litter or create snagging and ingestion hazards.
Easy Design Ideas
- Backyard cottage: Paint windows, flowers, and a tiny front door.
- Classic barn: Use red exterior paint with white trim.
- Modern feeder: Choose simple geometric shapes and neutral tones.
- Kids’ nature project: Paint leaves, feathers, clouds, and local bird species.
- Seasonal design: Try pumpkins in fall, snowflakes in winter, or wildflowers in spring.
Choose the Right Birdseed
Black-oil sunflower seed is a reliable starting choice because many common feeder birds can open its relatively thin shell. Cardinals, chickadees, nuthatches, titmice, finches, and several sparrow species may visit for it.
A quality blend containing sunflower seed and millet can attract a broader range of birds, although inexpensive mixtures filled with less desirable seed may create substantial waste. Begin with a small quantity and observe what local birds actually eat.
Do not fill the carton to the top. Add only enough seed for a day or two, particularly during humid or rainy weather. Smaller portions stay fresher and make it easier to inspect the feeder regularly.
Avoid salted nuts, seasoned snacks, moldy seed, candy, processed foods, or leftover bread. Your feeder is a bird café, not a place to dispose of the final handful of ranch-flavored crackers.
Where Should You Hang the Carton Feeder?
Research synthesis: Cornell Lab, U.S. Fish and Wildlife Service, National Wildlife Federation, and university extension guidance informed feeder placement, window safety, cleaning, native-plant, predator, and disease-prevention advice.
Choose a location protected from heavy rain and strong wind. A covered porch edge, sheltered tree branch, or pole beneath a broad roofline can help the carton last longer.
Window placement requires special attention. Bird experts commonly recommend placing feeders within three feet of a window or more than approximately 30 feet away. A feeder close to the glass gives a departing bird less distance to build dangerous speed, while a feeder placed well away reduces the attraction toward the window area. Treat reflective glass with exterior screens, closely spaced patterns, cords, or other bird-friendly methods when necessary.
Nearby shrubs or trees can provide resting and escape cover, but do not position the feeder directly beside dense vegetation where outdoor cats can hide. Keeping pet cats indoors is one of the most effective ways to reduce predation around a feeding area.
Hang the carton roughly five feet above the ground when practical. Keep it away from grills, fire pits, pesticides, busy doorways, and places where falling seed will create a slippery mess.
How to Maintain a Carton Bird Feeder
Commercial feeders can often be scrubbed and disinfected repeatedly. A paperboard carton is different. It is a temporary feeder, not an heirloom you will one day leave to a grateful grandchild.
Inspect it every day or two. Remove damp seed, hulls, and droppings. Sweep the ground underneath so old food does not attract rodents or accumulate around feeding birds.
When cleaning, empty the carton and wipe accessible surfaces with warm, soapy water. Rinse carefully and let it dry completely. Do not repeatedly soak the paperboard or assume that a weakened carton can be restored through positive thinking.
Replace the feeder immediately when:
- The bottom becomes soft or swollen.
- The seams begin separating.
- Paint flakes near the feeding area.
- Mold or a sour odor appears.
- The carton becomes heavily soiled with droppings.
- Animals chew or tear the structure.
- The hanging holes begin to split.
If sick or dead birds appear around the feeding station, stop feeding temporarily, remove the carton, clean the surrounding area, and follow current recommendations from local wildlife authorities. Because a used carton cannot be sanitized as reliably as a durable feeder, replacement is generally the sensible option.
Smart Upgrades for a Better Backyard Accessory
Add a Simple Rain Roof
Create a wider roof from a second clean carton or a scrap of untreated, weather-resistant material. Position it above the feeding opening without blocking visibility or trapping moisture. The roof should shed water away from the seed tray.
Build a Seed-Catching Tray
A shallow tray beneath the feeder can catch fallen seed and reduce waste. Make sure it drains freely and does not become a platform for wet seed, droppings, or rodents.
Create a Coordinated Feeder Collection
Use several cartons of different sizes and paint them with a shared theme. Space feeders apart to reduce crowding and competition. One can hold sunflower seed while another offers millet or nyjer seed in a design suited to smaller birds.
Pair the Feeder With Native Plants
A feeder is most valuable when it complements a healthy landscape. Native flowers, grasses, shrubs, and trees can provide natural seeds, fruits, insects, shelter, and nesting opportunities. They also continue working when your carton feeder has retired after one thunderstorm too many.
Common Mistakes to Avoid
Skipping the Cleaning Step
A quick rinse is not enough when milk, juice pulp, soup, or sweetened beverages remain in the seams. Wash the carton carefully and allow it to dry completely.
Making the Opening Too Low
If the bottom of the opening sits close to the base, seed will pour out whenever the feeder moves. Leave a deep reservoir below the window.
Using Too Much Adhesive
Tape and glue can peel in outdoor conditions. Sticky areas may catch feathers, while loose decorations can become litter. Keep embellishments minimal and well away from birds and seed.
Ignoring Rain
A carton may hold liquid from the inside, but that does not make a cut and painted feeder weatherproof. Add drainage, choose a sheltered location, and inspect it after storms.
Leaving Old Seed in Place
Seed is not immortal. Heat, moisture, droppings, and insects can quickly make it unsuitable. Offer modest portions and discard anything damp or spoiled.
Trying to Make the Feeder Permanent
The beauty of this project is its simplicity. When the carton deteriorates, remove it and make another. Covering it with layers of plastic, heavy sealant, and mystery chemicals defeats much of the purpose.
A Realistic Backyard Experience: What You Can Expect
Imagine starting this project on a Saturday morning with an empty half-gallon milk carton. After washing it, you discover the first important lesson: cartons hold onto smells with the determination of a gym bag. A second rinse and a full day of drying solve the problem.
On Sunday, you draw two windows and cut them with rounded corners. The first side looks surprisingly professional. The second looks as though a beaver assisted. Fortunately, birds do not leave online reviews about architectural symmetry.
You paint the exterior a muted green and add a white roofline. Instead of attaching beads or plastic decorations, you keep the design flat and simple. A small twig becomes the perch, and several pin-sized holes provide drainage. Once everything is dry, you thread twine through the top and add a small scoop of black-oil sunflower seed.
For the first hour after hanging it, nothing happens. This can be mildly insulting. You have built, painted, and stocked a restaurant, yet every bird in the neighborhood appears to have made other lunch plans.
Then a chickadee lands on a nearby branch. It studies the feeder, hops closer, retreats, returns, and finally grabs a seed. A second bird follows. By late afternoon, the carton has become a regular stop, and you begin noticing behaviors that were easy to miss before. Some birds approach directly. Others wait in cover. A cardinal may feed cautiously near the opening, while a smaller chickadee performs a rapid seed-grab and disappears.
The next lesson arrives with the weather. After a humid night, a few seeds near the opening feel damp. You discard them, enlarge the drainage holes slightly, and move the feeder beneath a better-protected branch. That tiny adjustment makes the setup more reliable.
A squirrel eventually appears because squirrels have an advanced global notification system for unattended sunflower seed. It hangs upside down, swings the carton, and demonstrates why the original perch did not need to be six inches long. You shorten the perch and relocate the feeder farther from the fence.
During the following week, checking the feeder becomes part of the morning routine. It takes less than a minute to shake out hulls, inspect the seams, and add fresh seed. You also sweep beneath it, which prevents a miniature crop of volunteer sunflowers from taking over the flower bed.
After several rain showers, the feeder begins to soften near one corner. Instead of wrapping it in duct tape and demanding another month of service, you retire it. The painted, weather-exposed carton may no longer meet local recycling requirements, so you check the community’s disposal guidance rather than automatically placing it in the recycling bin.
The project’s biggest reward is not the feeder itself. It is the attention the feeder creates. You start recognizing regular visitors, noticing how weather affects feeding activity, and listening for calls you previously ignored. Children may keep a simple bird list. Adults may discover that staring out the window at a chickadee is considerably more restorative than staring at another notification.
The second feeder is easier to build. Its drainage is better, its windows are neater, and its hanging holes are stronger. Soon, an object that once seemed like disposable packaging has encouraged a small cycle of creativity, observation, and responsible backyard care.
Final Thoughts
Turning an empty drink carton into a backyard bird feeder is an easy way to combine reuse, creativity, wildlife observation, and outdoor decoration. The project requires few materials, welcomes almost unlimited design possibilities, and can help families engage with the birds living just beyond their doors.
The key is to treat the carton as a temporary, carefully maintained feeder. Clean it before construction, add drainage, use bird-safe exterior decoration, offer fresh seed, choose a responsible location, and replace the feeder when it becomes worn or dirty.
It may not be the most expensive backyard accessory you own. It may not survive a determined squirrel or a week of sideways rain. But when the first bird lands on something you rescued from the waste stream, that humble carton suddenly looks like the smartest decoration in the yard.
Note: Adult supervision is required when cutting or puncturing a carton. Recycling acceptance varies by community, and a painted, food-contaminated, or weather-damaged feeder may not be recyclable. Check local disposal instructions after use.