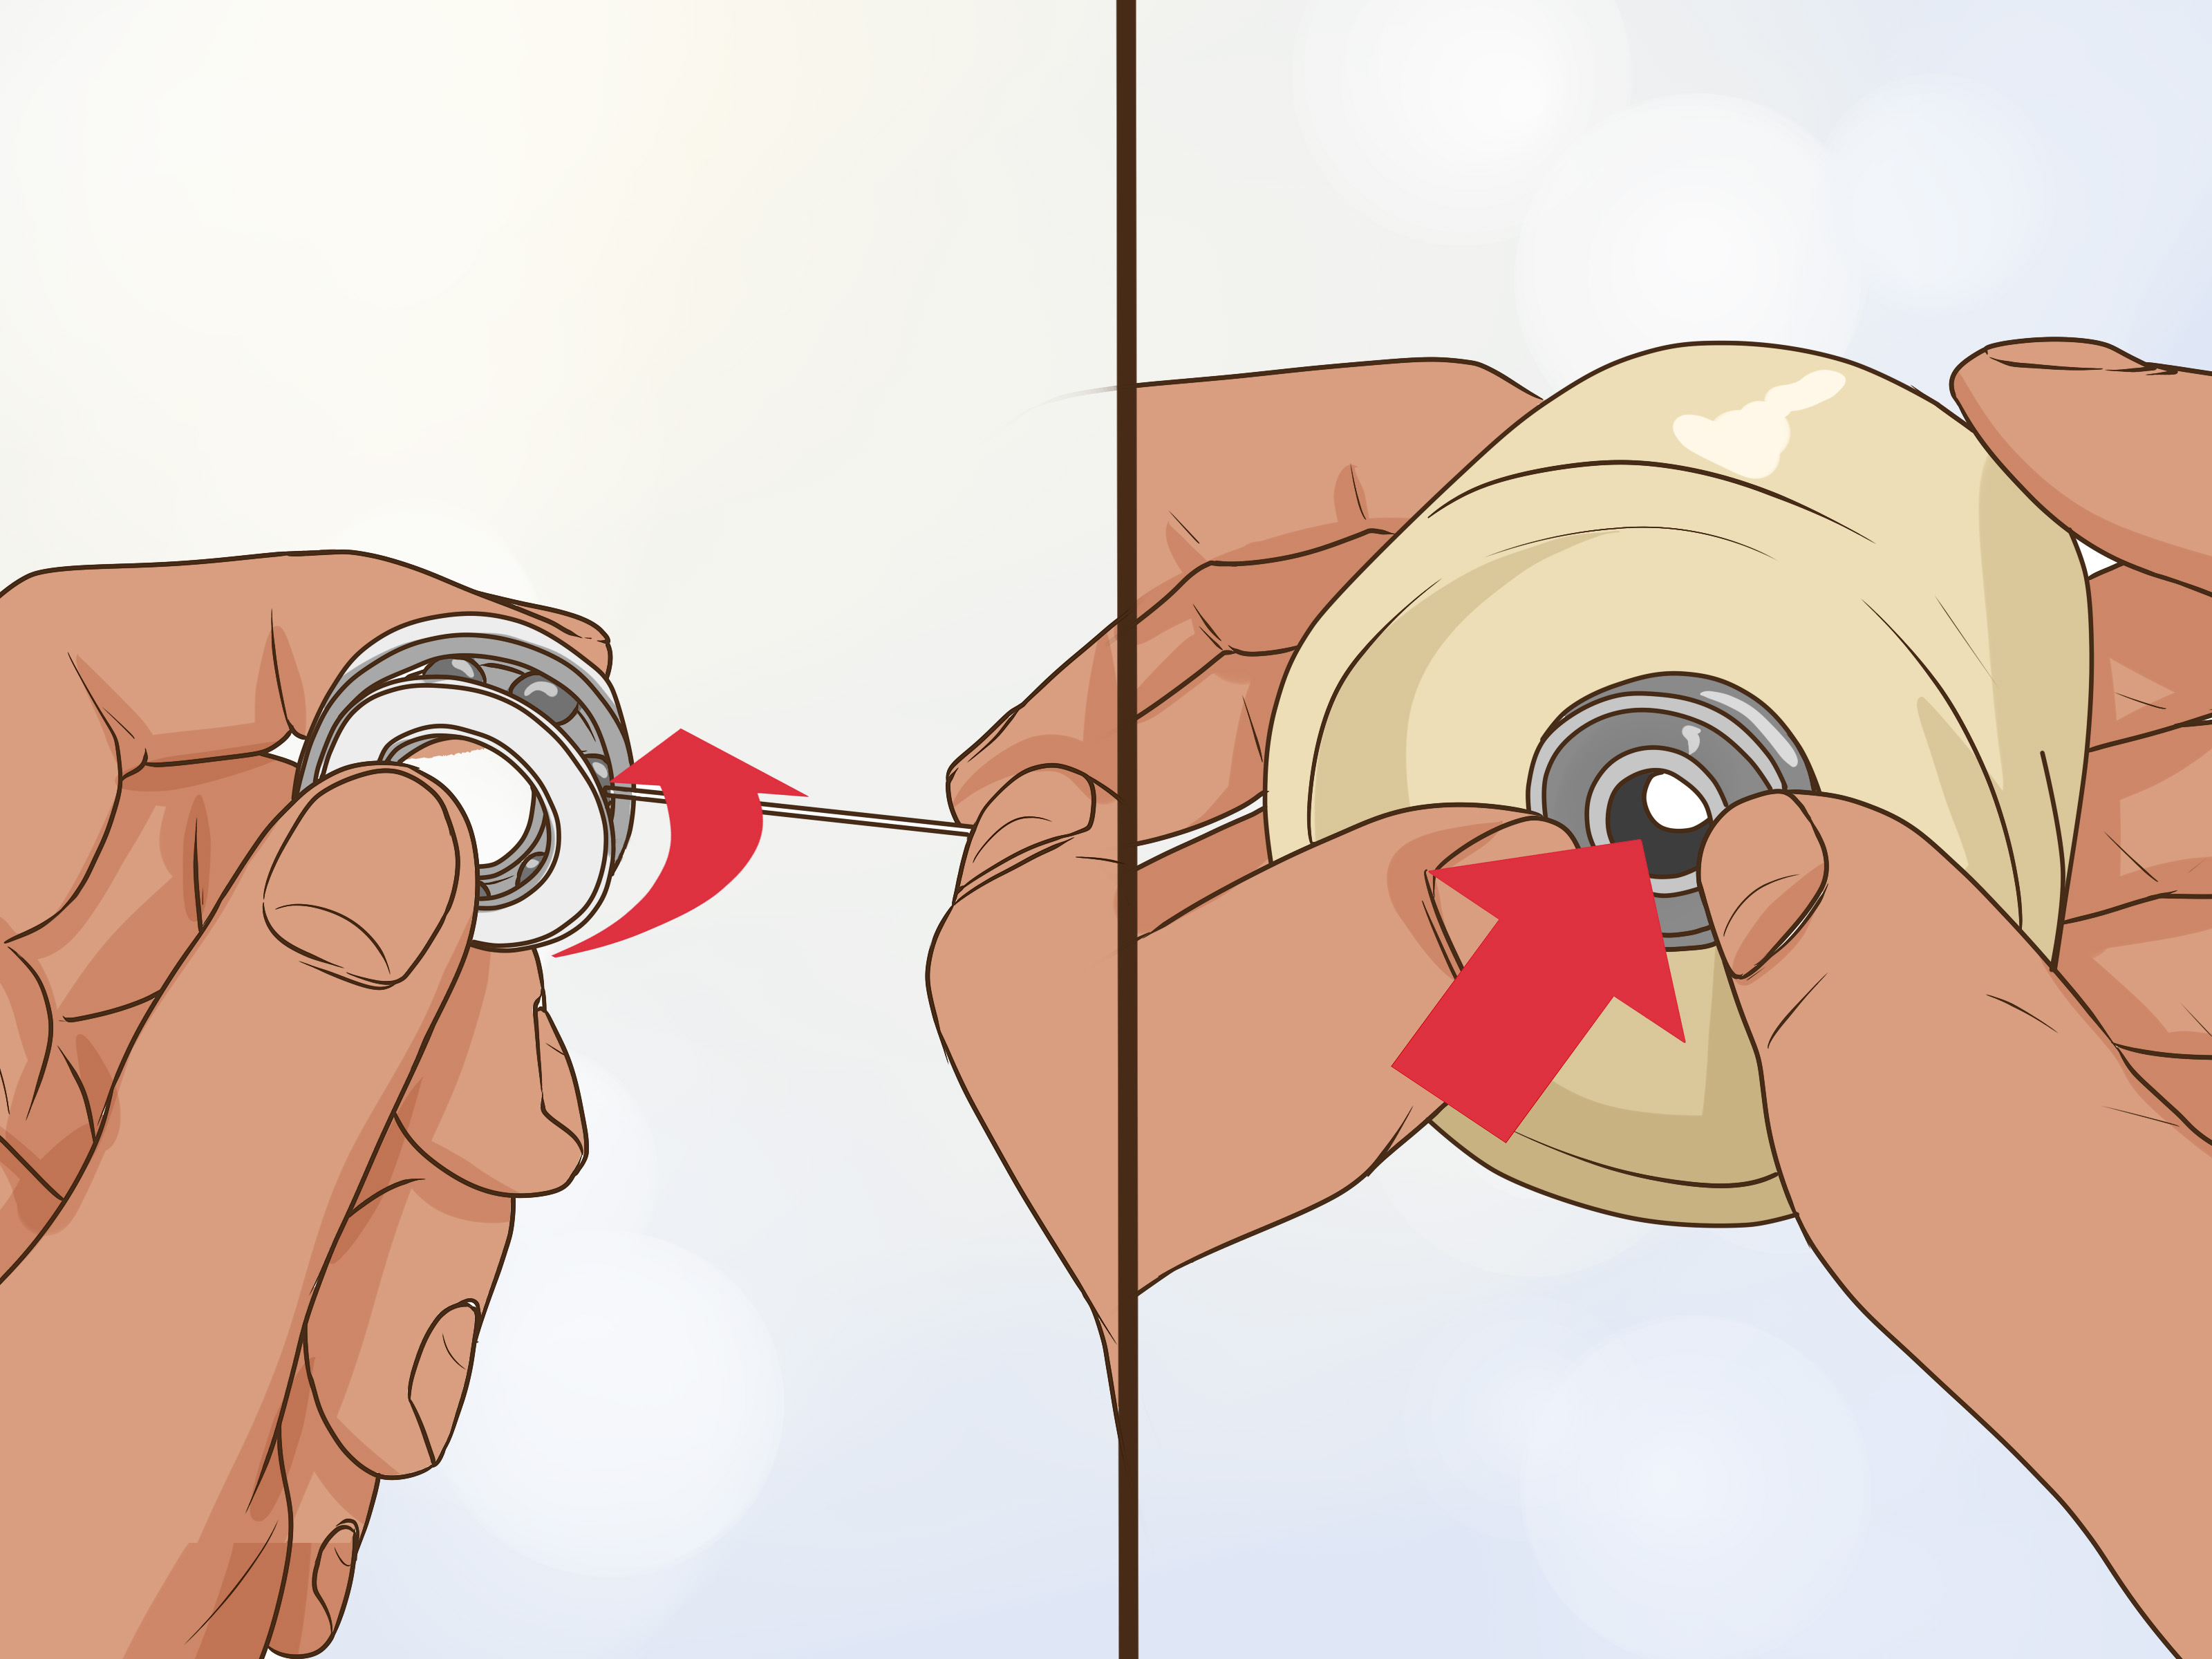
Removing skateboard bearings sounds like one of those tiny maintenance jobs that should take thirty secondsright up until you are sitting on the garage floor, holding a stubborn wheel, wondering whether your board has personally betrayed you. Good news: getting bearings out of skateboard wheels is usually simple. You do not need a fancy workshop, a secret skate-shop handshake, or the strength of a caffeinated gorilla. In most cases, the easiest way is to use the truck axle itself as a lever.
This guide breaks down the cleanest, safest, most beginner-friendly method for removing bearings from skateboard wheels, plus what to do when they are stuck, rusty, dirty, or acting like they signed a lifetime lease inside your wheels. Whether you are cleaning your bearings, replacing old ones, swapping wheels, or trying to figure out why your board sounds like a shopping cart with emotional damage, this article will help you get the job done without wrecking your gear.
Why Skateboard Bearings Matter More Than They Look
Skateboard bearings are small metal rings that sit inside your wheels and allow them to spin around the axle. Each skateboard wheel uses two bearings, which means a complete skateboard setup has eight bearings total. They may be tiny, but they do a lot of work. Smooth bearings help your wheels roll faster, reduce friction, and make pushing feel less like dragging a sofa across carpet.
Most standard skateboard bearings are the same general size and fit typical skateboard wheels and trucks. That is why skaters can usually swap bearings between different wheel brands without much drama. The main difference is quality, sealing, lubrication, and how well they handle dirt, impact, moisture, and repeated abuse from street skating, cruising, transition skating, or downhill riding.
The Easiest Way to Get Bearings out of Skateboard Wheels
The easiest method is the truck axle lever method. You remove the wheel, slide it partway onto the truck axle so only one bearing catches on the axle, then gently pry the wheel outward until the bearing pops out. Flip the wheel and repeat for the second bearing.
This method works because the axle grabs the inner race of the bearing while the wheel gives you leverage. It is simple, fast, and does not require a bearing press or puller. In skate terms, it is the “use what you already have” approach. Your truck axle becomes the tool. Your wheel becomes the handle. You become the calm, capable mechanic you always suspected was hiding under your hoodie.
Tools You Need
You do not need much to remove skateboard bearings. A basic skate tool is ideal because it fits axle nuts, kingpin nuts, and mounting hardware. If you do not have one, a socket wrench that fits your axle nuts can work. You may also want a small container to hold axle nuts and washers because those little parts love to disappear into another dimension.
Basic tool list
- Skate tool or socket wrench
- Your skateboard truck axle
- Small cup or tray for nuts and washers
- Clean rag or paper towel
- Optional: bearing puller or bearing press
- Optional: bearing cleaner and lubricant if you are cleaning them afterward
Step-by-Step: How to Remove Skateboard Bearings
Step 1: Take the Wheel off the Truck
Place your skateboard upside down on a stable surface. Use your skate tool or socket wrench to loosen the axle nut on one wheel. Remove the nut and set it aside in a small container. If your setup has washers on either side of the wheel, keep track of them too. Washers are not glamorous, but they help your wheel spin properly and prevent the nut from rubbing directly against the bearing.
Step 2: Slide the Wheel Halfway onto the Axle
Now slide the wheel back onto the truck axle, but only partway. The goal is to catch just the inner edge of one bearing on the axle. Do not push the wheel all the way on. You want the axle to sit inside one bearing, while the other side of the wheel remains free.
Think of it like opening a bottle capbut gentler, because your bearings are not soda and your skateboard does not need to explode in celebration.
Step 3: Pry the Wheel Outward
Hold the wheel firmly and pull it outward at a slight angle. Use slow, steady pressure. The axle should act as a lever, and the bearing should begin to loosen from the wheel core. Do not yank wildly. If the bearing resists, wiggle the wheel slightly while maintaining pressure.
Once the bearing releases, it may stay on the axle or drop into your hand. Either outcome is fine. Just avoid letting it fall onto a dirty floor if you plan to clean and reuse it.
Step 4: Flip the Wheel and Repeat
Each skateboard wheel has two bearings. After the first bearing comes out, flip the wheel over and repeat the same axle lever method on the other side. Slide the wheel halfway onto the axle, catch the second bearing, and gently pry it out.
Step 5: Repeat for All Four Wheels
If you are cleaning or replacing a full set, repeat the process for the remaining wheels. You should end up with eight bearings total. If your wheels use bearing spacers, those may fall out after the bearings are removed. Keep them with your hardware so they do not vanish under a workbench and begin a new life as household mystery objects.
What If the Bearings Are Stuck?
Sometimes bearings do not pop out easily. This usually happens when the wheels are old, the bearings are rusty, the wheel core is tight, or dirt and moisture have made everything cling together like a bad group project.
Try gentle rocking pressure
Instead of forcing the wheel, rock it back and forth while keeping the bearing caught on the axle. Small movements often work better than one big pull. The goal is to loosen the bearing evenly, not bend it or damage the wheel.
Use a bearing puller
If the axle method is not working, a bearing puller can help. Many skate tools include a built-in bearing remover. This tool hooks into the bearing and lets you pull it out more directly. It is especially useful for tight wheels or newer urethane that grips the bearing firmly.
Avoid stabbing the bearing with random tools
A screwdriver may seem tempting, but it can damage the shield, dent the bearing, or chew up the wheel core if used carelessly. If you must use a small tool, apply pressure to the inner race area and work slowly. Never jam sharp metal into the wheel like you are trying to win a fight against urethane.
Common Mistakes to Avoid
Pulling too hard at the wrong angle
The axle method works best with controlled leverage. If you pull too aggressively, you may damage the bearing seat inside the wheel or bend a shield. Use steady pressure and let the bearing loosen gradually.
Losing washers and spacers
Axle washers and bearing spacers are easy to misplace. Always set them aside in a cup, tray, or magnetic bowl. A missing washer can cause rubbing, uneven tightening, or annoying wheel noise later.
Cleaning bearings while they are still inside the wheel
Spraying cleaner around the outside of a wheel might make things look cleaner, but it will not properly clean the inside of the bearing. To clean skateboard bearings correctly, remove them from the wheels first, take off removable shields if your bearing design allows it, clean them with an appropriate solvent or bearing cleaner, dry them completely, and apply proper bearing lubricant.
Adding oil to dirty bearings
Oil is not magic soup. Adding lubricant to dirty bearings can move grit around inside the bearing instead of solving the problem. If bearings are gritty, sticky, or noisy, clean them before re-lubricating.
Should You Clean or Replace Skateboard Bearings?
Once the bearings are out, inspect them. If they spin smoothly after cleaning and do not make harsh grinding sounds, they may be worth keeping. If they are rusty, seized, cracked, missing shields, or still rough after cleaning, replacement is usually the better choice.
For casual skating, bearings can last a long time with basic maintenance. For riders who skate in wet conditions, dusty streets, sandy areas, or rough spots, bearings may need cleaning more often. Water is especially rough on bearings because it can cause rust. If you skate through puddles and your board later sounds like a tiny lawn mower, your bearings are probably asking for help.
How to Clean Bearings After Removing Them
If you removed your bearings because they feel slow or dirty, cleaning them can bring back a smoother roll. Start by wiping visible dirt from the outside. If your bearings have removable rubber shields, gently lift the shield with a pin or small tool from the inner edge. Be careful not to bend or tear the shield.
Place the bearings in a bearing cleaning container or a small jar with an appropriate bearing cleaner. Many skaters use isopropyl alcohol, acetone, citrus-based cleaner, or a dedicated bearing cleaner. Always work in a ventilated area, keep chemicals away from flames, and follow product safety directions. After soaking and shaking the bearings, remove them and dry them completely. Moisture left inside bearings is bad news wearing a tiny metal costume.
Once dry, add one or two drops of skateboard bearing lubricant to each bearing. Do not overdo it. Too much lubricant attracts dirt and can slow the bearing down. Reinstall the shields, spin the bearings by hand, and make sure they feel smooth before pressing them back into the wheels.
How to Put Bearings Back into Skateboard Wheels
Reinstalling bearings is the reverse of removal, but with less prying and more pressing. Place one bearing onto the truck axle with the shield facing outward if your bearing has a visible shield side. Put the wheel over the bearing and press down evenly until the bearing seats into the wheel. Flip the wheel, add a spacer if you use one, and press the second bearing into the other side.
When the wheel is back on the truck, reinstall the washers and axle nut. Tighten the nut until it is snug, then back it off slightly if the wheel does not spin freely. A properly installed wheel should spin smoothly without wobbling excessively from side to side.
Best Method Compared: Axle vs. Bearing Puller vs. Press
The truck axle method is the easiest for most skaters because it requires no extra equipment. It is perfect for quick swaps, cleaning days, and basic maintenance. A bearing puller is better for stubborn bearings or riders who remove bearings often. A bearing press is the cleanest option for installing and removing bearings with less stress, but it is not necessary for every skater.
If you are new, start with the axle method. If you work on boards regularly, a skate tool with a bearing puller is a smart upgrade. If you maintain multiple boards or help friends with setups, a bearing press can save time and keep everything neat. Basically, the more bearings you remove, the more you appreciate tools that make bearings behave.
Signs Your Bearings Need Attention
Your bearings may need cleaning or replacement if your wheels stop quickly when spun by hand, make grinding or hissing noises, feel uneven while rolling, or require more pushing than usual. Another sign is visible rust or dirt around the shields. If your board feels sluggish even with decent wheels, the bearings are a likely suspect.
However, do not judge bearings only by free-spin time. A wheel spinning in the air does not perfectly represent how bearings perform under body weight. Still, if one wheel stops immediately while the others keep spinning, that bearing deserves a closer look.
Safety Tips for Younger or Beginner Skaters
Removing skateboard bearings is not dangerous when done carefully, but small parts and tools can still cause problems. Work on a flat surface with good lighting. Keep fingers away from pinch points when prying the wheel. Avoid using sharp tools unless necessary, and ask an experienced skater, parent, or local skate shop for help if a bearing is seriously stuck.
Also, never use strong solvents without understanding the safety label. Some cleaners are flammable or irritating to skin and eyes. If you are not sure what to use, choose a skate-specific bearing cleaner or ask a reputable skate shop. Your bearings should roll fast; your cleaning routine should not turn into a science experiment with consequences.
Experience-Based Tips: What Actually Makes Bearing Removal Easier
After removing plenty of skateboard bearings, one lesson becomes obvious: patience beats force. The first time many skaters try to remove bearings, they pull the wheel at a dramatic angle, grunt like they are lifting a car, and wonder why nothing happens. The trick is not raw power. It is getting the axle seated inside the bearing properly and using a smooth rocking motion.
A helpful habit is to clean the outside of the wheel before removing the bearings. This sounds minor, but it keeps grit from falling into the bearing once it pops out. A quick wipe with a rag can make the whole job feel less messy. It also helps you see what you are doing, especially if your wheels have collected dust, wax flakes, or mystery sidewalk powder.
Another real-world tip: remove bearings over a towel. Bearings, washers, and spacers love to bounce. A towel softens the landing and keeps parts from rolling across the floor. If you have ever chased an axle washer under a refrigerator, you already understand why this matters. The towel method is not glamorous, but neither is crawling around with a flashlight muttering at household appliances.
For very tight wheels, avoid trying to remove the bearing in one dramatic movement. Instead, pry a little, rotate the wheel slightly, and pry again. This spreads the pressure around the bearing seat. It also reduces the chance of warping the bearing shield or chewing up the wheel core. A stuck bearing is usually not trying to ruin your afternoon; it just needs more even pressure.
If you are swapping old bearings into new wheels, inspect them before installation. A bearing that felt “fine” in old wheels may reveal problems once it is out. Spin it between your fingers. If it feels gritty, crunchy, or uneven, clean it before putting it into fresh wheels. Installing dirty bearings into new wheels is like wearing muddy shoes on clean carpet. Technically possible, emotionally questionable.
One of the best habits is keeping a small maintenance kit. It does not need to be fancy. A skate tool, rag, small container, bearing lubricant, and a few spare washers can save a session. When your wheel starts squeaking or your bearing feels rough, you will not have to hunt through drawers like a detective in a low-budget mystery film.
Finally, know when to stop fighting old bearings. Cleaning can revive many sluggish bearings, but it cannot fix everything. Rust, dents, broken retainers, missing shields, and deep grinding usually mean replacement is smarter. Bearings are not the most expensive part of a skateboard, and a fresh set can make your board feel dramatically better. If your old bearings sound like gravel in a blender, thank them for their service and let them retire with dignity.
Conclusion
The easiest way to get the bearings out of skateboard wheels is to use the truck axle as a lever. Remove the wheel, slide it halfway onto the axle so one bearing catches, then gently pry the wheel outward until the bearing pops free. Flip the wheel and repeat. It is quick, practical, and beginner-friendly.
For stubborn bearings, use gentle rocking pressure or a bearing puller. Avoid forcing sharp tools into the wheel, keep track of washers and spacers, and clean bearings properly before adding lubricant. With a little patience and the right technique, bearing removal becomes one of the simplest skateboard maintenance skills you can learn. Your wheels will roll smoother, your pushes will feel easier, and your board will stop sounding like it has been haunted by a rusty shopping cart.
Note: This article is original web publishing content based on widely accepted skateboard maintenance practices from reputable skate shops, bearing manufacturers, and skate education resources. Always follow cleaner safety labels and ask a qualified adult or local skate shop for help if a bearing is severely stuck.