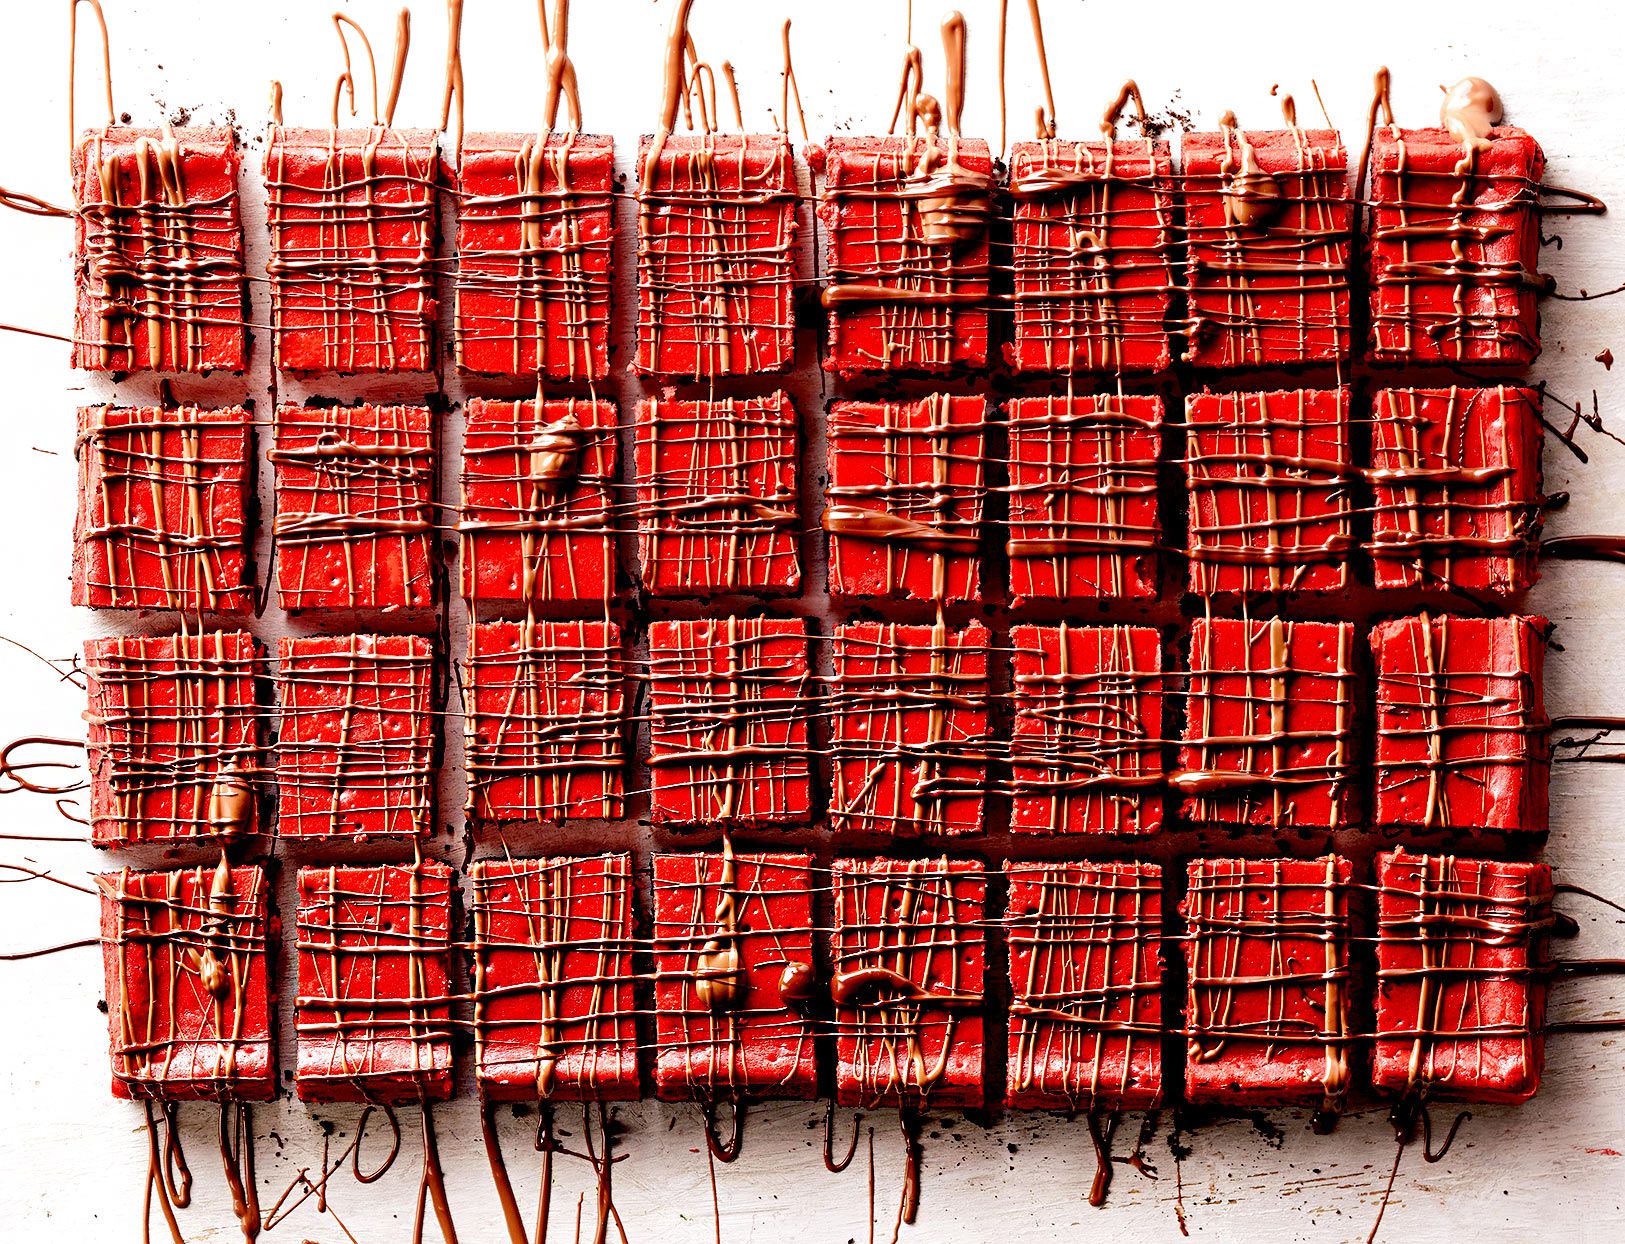
Red velvet cheesecake bars are the dessert equivalent of showing up to a party in a velvet blazer: dramatic, smooth, and absolutely aware of their own charm. They combine the subtle cocoa tang of red velvet cake with a rich cream cheese swirl, then bake everything into neat, handheld squares that look fancy without requiring a pastry degree, a rotating cake stand, or emotional support sprinkles.
This Red Velvet Cheesecake Bars Recipe is made for home bakers who want something impressive but realistic. No water bath. No towering layer cake. No frosting bag quietly judging you from the drawer. Instead, you get a tender red velvet base, a creamy cheesecake layer, pretty marbling, and slices that are perfect for Valentine’s Day, Christmas dessert trays, birthdays, bake sales, potlucks, or any Tuesday that needs a little more red food coloring.
The magic is in the balance. Red velvet should not taste like plain vanilla cake wearing a red costume, and it should not be a full chocolate brownie either. The best version has a mild cocoa flavor, a little tang from buttermilk or vinegar-style acidity, plenty of vanilla warmth, and a soft crumb that pairs beautifully with cream cheese. These bars take that classic flavor profile and turn it into an easy, sliceable dessert with a cheesecake ribbon running through every bite.
Why You’ll Love These Red Velvet Cheesecake Bars
There are many reasons this recipe deserves a permanent spot in your dessert lineup. First, it is easier than a traditional cheesecake. Since the cheesecake layer is thinner and baked over a red velvet base, it sets more quickly and does not need the long, nervous oven babysitting that a full cheesecake requires.
Second, these bars are easier to serve than cake. You can cut them into small squares for a dessert table, larger bars for a plated treat, or tiny bite-size cubes if you want guests to say, “I’ll just have one,” six different times.
Third, the flavor is crowd-friendly. The red velvet base is lightly chocolatey, the cheesecake swirl is creamy and tangy, and the whole thing tastes rich without being heavy. It is sweet, but not the kind of sweet that makes your teeth send a resignation letter.
What Makes Red Velvet Cheesecake Bars Different?
Red velvet desserts are often misunderstood. They are not just chocolate desserts with red dye. Classic red velvet gets its identity from a combination of cocoa powder, vanilla, acidity, and a tender texture. In cake form, buttermilk and vinegar are often used to create that signature softness and tang. In bar form, we simplify the formula while keeping the important flavors intact.
These bars are denser than red velvet cake but softer than a brownie. Think of them as a red velvet blondie-brownie hybrid with a cheesecake upgrade. The red velvet layer holds its shape when sliced, while the cheesecake layer adds moisture, tang, and that beautiful bakery-style swirl.
Ingredients for Red Velvet Cheesecake Bars
Good ingredients make a big difference here because this recipe is simple. There is nowhere for bland cocoa or cold cream cheese lumps to hide. Here is what you will need.
For the Red Velvet Base
- Unsalted butter: Melted butter gives the bars richness and a slightly fudgy texture.
- Granulated sugar: Sweetens the base and helps create a tender crumb.
- Large egg: Adds structure and moisture.
- Vanilla extract: Rounds out the cocoa and cream cheese flavors.
- Unsweetened cocoa powder: Use natural cocoa powder for the most classic red velvet taste.
- Red food coloring: Gel coloring gives a bold color without adding too much liquid.
- White vinegar or buttermilk: Adds the light tang associated with red velvet.
- All-purpose flour: Provides structure without making the bars cakey.
- Salt: Balances the sweetness and sharpens the flavor.
For the Cheesecake Swirl
- Cream cheese: Use full-fat brick-style cream cheese, softened to room temperature.
- Granulated sugar: Sweetens the cheesecake layer without making it gritty.
- Egg yolk: Helps the swirl set while keeping it rich and creamy.
- Vanilla extract: Adds warmth and dessert-shop aroma.
- A pinch of salt: Makes the cream cheese flavor pop.
Recommended Equipment
You do not need specialty tools for this recipe, which is part of its charm. A basic 8-inch square baking pan, parchment paper, two mixing bowls, a whisk, a rubber spatula, and a butter knife or skewer for swirling will do the job. An electric mixer is helpful for the cheesecake layer, but a strong arm and a determined attitude can also work if the cream cheese is properly softened.
Red Velvet Cheesecake Bars Recipe
Ingredients
Red Velvet Layer
- 1/2 cup unsalted butter, melted and slightly cooled
- 3/4 cup granulated sugar
- 1 large egg, room temperature
- 2 teaspoons vanilla extract
- 1 tablespoon unsweetened cocoa powder
- 1 tablespoon red gel food coloring, or enough to reach your preferred color
- 1 teaspoon white vinegar or 1 tablespoon buttermilk
- 3/4 cup all-purpose flour, spooned and leveled
- 1/4 teaspoon salt
Cheesecake Layer
- 8 ounces full-fat cream cheese, softened
- 1/4 cup granulated sugar
- 1 large egg yolk, room temperature
- 1/2 teaspoon vanilla extract
- Pinch of salt
Instructions
Step 1: Prepare the Pan
Preheat the oven to 350°F. Line an 8-inch square baking pan with parchment paper, leaving a little overhang on two sides. This overhang acts like dessert handles later, which is far more useful than it sounds. Lightly grease the parchment and exposed sides of the pan.
Step 2: Make the Red Velvet Batter
In a medium bowl, whisk the melted butter and sugar until smooth. Add the egg, vanilla extract, cocoa powder, red food coloring, and vinegar or buttermilk. Whisk until the color is even and the mixture looks glossy.
Add the flour and salt. Fold gently with a rubber spatula just until no dry streaks remain. Do not overmix. Overmixing can make the bars tough, and nobody came here for red velvet doorstops.
Step 3: Reserve Batter for Swirling
Set aside about 1/4 cup of the red velvet batter. Spread the remaining batter evenly into the prepared pan. Use an offset spatula or the back of a spoon to push it into the corners.
Step 4: Make the Cheesecake Filling
In a separate bowl, beat the softened cream cheese until completely smooth. Add the sugar, egg yolk, vanilla, and salt. Beat until creamy and lump-free. Scrape down the sides of the bowl so every bit of cream cheese gets invited to the party.
Step 5: Layer and Swirl
Spread the cheesecake mixture over the red velvet base. Drop small spoonfuls of the reserved red velvet batter over the cheesecake layer. Drag a butter knife or skewer through the batter in loose figure-eight motions to create a swirl. Stop before you overdo it. A few dramatic ribbons look beautiful; too much swirling turns everything into pink confusion.
Step 6: Bake
Bake for 28 to 34 minutes, or until the edges are set and the center has only a slight jiggle. The top should look set, not wet. Avoid overbaking, because cheesecake continues to firm as it cools.
Step 7: Cool and Chill
Let the bars cool completely in the pan at room temperature. Then refrigerate for at least 2 hours before slicing. Chilling is not optional unless you enjoy smearing cheesecake across your knife like edible spackle.
Step 8: Slice and Serve
Lift the bars from the pan using the parchment overhang. For clean cuts, use a sharp knife dipped in hot water and wiped dry between slices. Serve chilled or slightly cool. Store leftovers in an airtight container in the refrigerator.
Expert Tips for the Best Red Velvet Cheesecake Bars
Use Room Temperature Cream Cheese
Cold cream cheese is the number one reason cheesecake layers turn lumpy. Let it sit at room temperature until soft enough to press easily with a finger. If you forgot, cut it into cubes and let it rest on a plate for 20 to 30 minutes.
Measure Flour Correctly
Too much flour makes the red velvet base dry. Spoon flour into the measuring cup and level it off with a knife. Do not scoop directly from the bag unless you enjoy mystery-density baking.
Do Not Overbake
The bars should come out when the center is just set. A slight wobble is fine. The cheesecake layer firms up during cooling, and overbaking can lead to dryness or cracks.
Choose the Right Food Coloring
Gel food coloring creates a stronger red color with less liquid. Liquid food coloring works too, but you may need more of it. If you prefer a softer, more natural look, use less coloring and accept a deeper mahogany-red shade.
Let the Bars Chill Before Cutting
Warm cheesecake bars may smell irresistible, but they are not ready to slice. Chilling gives the cheesecake structure and makes the red velvet layer cleaner and neater.
Common Mistakes to Avoid
Using Spreadable Cream Cheese
Tub-style cream cheese is designed for bagels, not baking. It often contains extra moisture and stabilizers that can make the cheesecake layer too soft. Use brick-style full-fat cream cheese for the best texture.
Mixing the Cheesecake Too Aggressively
Beat the filling until smooth, but do not whip it like frosting. Too much air can cause the cheesecake layer to puff in the oven and sink as it cools.
Skipping the Parchment Paper
Parchment paper makes removal and slicing much easier. Without it, you may still get delicious bars, but the first piece might come out looking like it lost a wrestling match.
Adding Too Much Cocoa Powder
Red velvet should have a gentle cocoa note, not a full brownie flavor. Too much cocoa can overpower the tangy cream cheese and darken the red color.
Flavor Variations
White Chocolate Red Velvet Cheesecake Bars
Fold 1/3 cup white chocolate chips into the red velvet batter before spreading it into the pan. White chocolate adds sweetness and a creamy contrast that works beautifully with the cocoa.
Oreo Red Velvet Cheesecake Bars
Add a thin layer of crushed chocolate sandwich cookies between the red velvet base and cheesecake layer. The cookies soften slightly while baking and give the bars a cookies-and-cream twist.
Holiday Peppermint Version
Add 1/8 teaspoon peppermint extract to the cheesecake layer and sprinkle crushed peppermint candies on top after baking and cooling. Go light with peppermint extract; it is powerful enough to take over a dessert and start making executive decisions.
Mini Chocolate Chip Version
Stir 1/4 cup mini chocolate chips into the red velvet batter. Mini chips distribute more evenly than regular chips and keep the bars easy to slice.
How to Store Red Velvet Cheesecake Bars
Because these bars contain cream cheese, they should be stored in the refrigerator. Place them in an airtight container and refrigerate for up to 5 days. For the cleanest texture, separate layers with parchment paper if stacking.
You can also freeze red velvet cheesecake bars. Chill them first, slice them, and place the pieces on a baking sheet until firm. Then wrap each bar tightly and store in a freezer-safe container for up to 2 months. Thaw overnight in the refrigerator before serving.
Serving Ideas
These bars are lovely on their own, but they also play well with extras. Serve them with fresh strawberries, raspberries, whipped cream, a drizzle of melted white chocolate, or a dusting of powdered sugar. For parties, place each bar in a cupcake liner to make serving easier and keep fingers cleaner.
They are especially good for holidays because the red-and-white swirl looks festive without requiring complicated decorating. For Valentine’s Day, cut them into small squares and serve with chocolate-dipped strawberries. For Christmas, add a few green sprinkles after baking for a cheerful dessert tray. For birthdays, pile them on a platter and watch them disappear faster than the person who promised to help with dishes.
Frequently Asked Questions
Can I make red velvet cheesecake bars ahead of time?
Yes. In fact, they taste even better after chilling. Make them one day ahead, refrigerate overnight, and slice before serving.
Can I double this recipe?
Yes. Double the ingredients and bake in a 9-by-13-inch pan. The baking time may increase slightly, so start checking around 32 minutes and continue until the center is just set.
Can I use a boxed red velvet cake mix?
You can, but the texture will be different. Cake mix versions are usually softer and more cake-like. This from-scratch recipe creates a sturdier bar with a richer homemade flavor.
Why did my cheesecake layer crack?
Cracks usually happen from overbaking, sudden temperature changes, or too much air beaten into the filling. The good news is that a swirl hides small cracks well, and cracked cheesecake still tastes like cheesecake, which is a win.
Can I make these bars without food coloring?
Yes. The bars will taste great, but the color will be more brownish-red than bright red. You can also try natural food coloring, though the shade may be softer.
Experience Notes: What Baking Red Velvet Cheesecake Bars Teaches You
Red velvet cheesecake bars are one of those recipes that quietly teaches several useful baking lessons at once. The first lesson is patience. The bars smell wonderful when they come out of the oven, and every instinct says, “Cut one now.” Do not listen to that tiny dessert goblin. Warm cheesecake has not finished setting, and slicing too early can turn your neat bars into a delicious landslide. Cooling and chilling are part of the recipe, not a polite suggestion.
The second lesson is that texture matters as much as flavor. A good red velvet base should be tender but sturdy enough to support the cheesecake layer. If it is too cakey, the bars feel dry. If it is too fudgy, the cheesecake can seem heavy. The sweet spot is right in the middle: soft, moist, slightly dense, and easy to bite through. That balance comes from using melted butter, measuring flour carefully, and stopping the mixing as soon as the batter comes together.
The cheesecake layer teaches another important rule: smooth ingredients make smooth results. Softened cream cheese blends beautifully with sugar and egg yolk. Cold cream cheese fights back. It clumps, sticks to the bowl, and makes the filling look like it has tiny white pebbles. Those lumps usually remain after baking, so the best fix is prevention. Let the cream cheese soften properly, scrape the bowl, and mix until the filling looks satiny.
The swirl is where personality comes in. Every batch looks a little different, and that is part of the fun. Some bakers prefer thin, elegant ribbons. Others like bold red streaks across the top. The key is restraint. After a few passes with a knife, step away from the pan. Over-swirling blends the layers too much, and the beautiful contrast disappears. Think of it like marble, not tie-dye.
Another helpful experience is learning how your oven behaves. Some ovens run hot, which can set the edges quickly while the center still looks soft. Others bake more gently and need an extra few minutes. Start checking early. The bars are done when the edges look set and the center has a small, gentle wobble. If the center looks liquid, keep baking. If the entire top is firm and puffed, it may be slightly overdone, though still very edible.
Serving these bars also teaches the value of presentation. A hot, clean knife makes a dramatic difference. Dip the knife in hot water, wipe it dry, slice, and repeat. It may feel fussy, but the result is bakery-style edges that make the bars look polished. This is especially useful for potlucks, dessert boxes, or holiday platters where appearance matters almost as much as taste.
Finally, this recipe proves that homemade desserts do not need to be complicated to feel special. Red velvet cheesecake bars look festive, taste rich, and travel well. They can be casual enough for a family snack or pretty enough for a celebration. Once you make them a few times, you will probably start customizing them with chocolate chips, cookie crumbs, peppermint, or fruit. That is when a recipe becomes more than instructions. It becomes one of those dependable desserts you can pull out whenever you want people to hover near the kitchen and ask, “Are those ready yet?”
Conclusion
This Red Velvet Cheesecake Bars Recipe delivers everything people love about red velvet cake and cheesecake in one easy dessert. The red velvet base is tender, lightly chocolatey, and colorful, while the cheesecake swirl adds creamy tang and eye-catching contrast. With simple ingredients, practical baking steps, and make-ahead convenience, these bars are perfect for holidays, parties, gifting, or late-night “quality control.”
For the best results, use room temperature cream cheese, avoid overmixing, bake only until just set, and chill before slicing. Those small details turn a good dessert into a great one. Whether you serve them plain, dress them up with berries, or add white chocolate for extra sweetness, red velvet cheesecake bars are the kind of treat that looks impressive and disappears quickly.