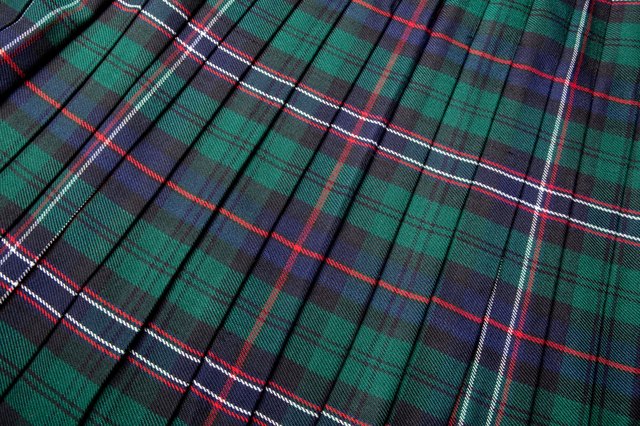
Making a kilt sounds simple until you meet your first tartan repeat, also known as the moment a rectangle of fabric turns into a plaid math exam. The good news is that a traditional kilt does not require a complicated paper pattern with mysterious curves, notches, and pieces that somehow disappear under the sewing table. A classic kilt pattern is built from measurements, straight lines, careful pleating, and enough patience to make your tape measure feel emotionally supported.
This guide explains how to create a practical pattern for making a kilt, from measuring the wearer to calculating aprons, pleats, waistband, lining, straps, and finishing details. Whether you are making a traditional tartan kilt, a beginner-friendly costume kilt, or a modern utility-style version, the same basic idea applies: the front lies smooth, the back is pleated, and the entire garment wraps around the body with structure, movement, and dignity.
Before cutting anything expensive, remember the golden rule of kilt making: measure twice, calculate twice, pin everything, take a snack break, then sew. Tartans are beautiful, but they are not forgiving when cut in a hurry.
What Makes a Kilt Pattern Different?
A sewing pattern for a kilt is less like a dress pattern and more like a custom drafting plan. Traditional kilts are usually made from a long rectangle of tartan fabric, shaped by pleats rather than curved seams. The design has three main zones: the under-apron, the pleated back and sides, and the over-apron. These parts wrap around the wearer and fasten with straps and buckles.
The front apron gives the kilt its clean, polished appearance. The pleated section provides movement, weight, and that satisfying swing people secretly test in front of mirrors. The waistband stabilizes everything, while canvas or interfacing helps the top section hold its shape. A lining can make the inside more comfortable and protect the wool from wear.
Unlike many garments, a kilt pattern depends heavily on the fabric design. If you are using tartan, the repeat of the plaid, called the sett, affects pleat width, pleat depth, fabric yardage, and the finished look. A plain cotton practice kilt is much easier; a wool tartan kilt demands respect, tea, and a clear workspace.
Tools and Materials You Will Need
Basic Sewing Tools
You do not need a castle workshop, although that would be nice. You will need a flexible tape measure, fabric scissors or a rotary cutter, ruler, tailor’s chalk, pins or clips, sewing needles, thread, iron, pressing cloth, and a sewing machine if you do not plan to sew the whole kilt by hand. Hand sewing is traditional for many fine kilts, but machine stitching can work well for a beginner-friendly version.
Fabric and Notions
For a traditional kilt, medium-weight or heavy-weight wool tartan is the classic choice. Many kilts use several yards of fabric because pleats consume more material than beginners expect. A casual or costume kilt may use cotton, poly-viscose tartan, denim, canvas, or another sturdy woven fabric. Stretch fabrics are not ideal because they can distort the pleats and make the waistband behave like it has weekend plans.
You will also need waistband interfacing or canvas, lining fabric if desired, two or three leather straps, matching buckles, strong thread, and optional belt loops. If you are making a simplified kilt skirt, you may use buttons, snaps, hooks, or Velcro for the inner closure, but traditional straps and buckles look cleaner and last longer.
Take Accurate Kilt Measurements
A good kilt pattern begins with accurate body measurements. Do not use jeans size as the waist measurement. Jeans are professional liars. A kilt usually sits higher than modern pants, often around the natural waist or near the navel, depending on the style.
Waist Measurement
Measure around the body where the top of the kilt will sit. Keep the tape snug but not tight. The wearer should stand naturally, breathe normally, and avoid the heroic stomach-sucking pose. Write this measurement down as the kilt waist.
Hip or Seat Measurement
Measure around the widest part of the hips and seat. This number determines how much room the kilt needs through the lower fitted area. The hip measurement is usually several inches larger than the waist. Add enough ease so the kilt can move comfortably when sitting, walking, and performing emergency snack retrieval.
Length Measurement
Measure from the kilt waist down to the desired hemline. Traditional men’s kilts usually fall around the middle of the knee. For a kilt skirt or modern variation, the length may be shorter, longer, or styled according to preference. Measure while standing straight; looking down can change the measurement and create a kilt that plays peekaboo with your kneecaps.
Fell Measurement
The fell is the upper section where the pleats are stitched down from the waist toward the hip. Measure from the waistline to the widest part of the hip. This distance helps shape the pleats so the kilt narrows at the waist but has enough room at the seat.
Drafting the Basic Kilt Pattern
The simplest kilt pattern is a long rectangle with planned sections. You will divide the total fabric width into the under-apron, pleated area, and over-apron. The exact numbers depend on the wearer’s waist, hips, desired apron overlap, tartan sett, and available fabric.
Step 1: Plan the Aprons
The apron is the smooth front panel. A common beginner method is to make the visible over-apron about one-half of the hip measurement, plus a little extra for overlap and adjustment. The under-apron should be similar or slightly narrower, depending on the fastening method. The aprons should cover the front neatly without pulling open when the wearer walks or sits.
For example, if the hip measurement is 40 inches, the over-apron might be about 20 inches wide, with additional allowance for turn-back and fastening. The under-apron might also be around 20 inches, adjusted to suit the wrap. Always test the wrap with pins before final stitching.
Step 2: Calculate the Pleated Section
The remaining fabric becomes the pleated back and sides. Pleats are usually arranged between the two aprons. For tartan, you must decide whether to pleat to the sett or pleat to the stripe. Pleating to the sett repeats the full tartan pattern across the back, creating a balanced traditional look. Pleating to the stripe centers the same vertical stripe on each pleat, often producing a strong, uniform effect.
For a beginner kilt, choose pleat widths between about 1/2 inch and 1 inch on the outside fold, depending on the fabric and the tartan repeat. The depth hidden under each pleat may be several inches. This hidden depth is why kilts require so much fabric. Pleats are basically fabric origami with better posture.
Step 3: Add Seam and Turn-Back Allowances
Add extra fabric for apron turn-backs, inner finishing, waistband attachment, and any edge treatment. If your fabric has a selvage edge that will serve as the bottom hem, you may not need a deep hem. Many traditional kilts avoid bulky hems because multiple layers of wool can become thick enough to qualify as light armor.
How Much Fabric Do You Need?
Fabric yardage depends on kilt style, wearer size, fabric width, pleat depth, and whether you are making a full traditional kilt or a simplified version. A casual beginner kilt may use about 3 to 4 yards of wide fabric. A traditional-style tartan kilt can require 6 to 8 yards or more, especially when deep pleats are used.
If you are using expensive wool tartan, buy enough fabric from the same dye lot. Tartan shades may vary between batches, and nothing says “homemade adventure” quite like one apron being slightly different from the other. When in doubt, purchase extra for matching the sett, making straps, testing stitching, and correcting small mistakes.
Choosing Pleats: Knife Pleats vs. Box Pleats
Knife Pleats
Knife pleats are the most common choice for modern kilts. Each pleat folds in the same direction, creating a smooth flowing back. They are easier to draft and press than box pleats, making them the best option for most home sewists.
Box Pleats
Box pleats are made from two folds facing away from each other. They create a bolder, broader look and use fabric differently. Box-pleated kilts can be striking, but they require careful planning so the tartan pattern remains balanced.
Pleating to Sett or Stripe
Pleating to the sett keeps the tartan pattern repeating across the pleats. This looks harmonious and is common in many traditional and dance kilts. Pleating to the stripe centers one vertical stripe on every pleat, giving the back a crisp, regimented appearance. Neither choice is wrong; the best option depends on the tartan, the purpose of the kilt, and the look you want.
Marking and Pinning the Kilt Pattern
Lay the fabric flat on a large table or clean floor. If the fabric is tartan, align the horizontal and vertical lines before marking. Start by marking the under-apron, then the pleated section, then the over-apron. Use chalk, removable fabric marker, or tailor’s tacks. Avoid permanent markers unless you enjoy living dangerously.
For each pleat, mark the fold line and placement line. Fold the fabric so the chosen stripe or sett section lands exactly where planned. Pin each pleat from top to bottom. Stand back often to check the visual rhythm. If the tartan looks crooked now, it will look even more crooked after sewing, and it will whisper about your choices every time the kilt is worn.
Fitting the Kilt Before Sewing
Once the pleats and aprons are pinned, wrap the kilt around the wearer. Check the waist, hip, overlap, and length. The apron should lie flat. The pleats should hang straight. The kilt should feel secure without squeezing. Have the wearer sit down, walk, and turn. If the pleats pull open badly or the apron shifts, adjust before stitching.
This fitting stage is the best time to correct the pattern. You can make small changes to pleat depth, apron width, or waist shaping. After the fell is sewn and the waistband is attached, adjustments become more complicated and less fun.
Sewing the Pleats
Begin by basting the pleats in place. Press each pleat carefully with steam and a pressing cloth. Wool responds beautifully to pressing, but too much heat can create shine or damage the fabric. Cotton and poly-viscose also need controlled pressing to prevent distortion.
Stitch the pleats down through the fell area, tapering from the hip measurement to the waist measurement. This shaping is what makes the kilt fit the body instead of hanging like a festive plaid shower curtain. The stitched fell should be smooth and firm, while the lower pleats should remain free for movement.
Constructing the Aprons
Finish the inside edges of the under-apron and over-apron. Turn back the edges neatly and press them flat. If using tartan, try to match visible lines at the apron edge for a professional look. The over-apron should be clean and symmetrical because it is the first thing people see.
Add inner reinforcement where straps will attach. Leather straps place stress on the fabric, so do not attach them to a single unsupported layer. Use sturdy interfacing, canvas, or extra fabric patches inside the kilt. A beautiful kilt with weak straps is just a dramatic skirt waiting for a plot twist.
Adding Waistband, Lining, Straps, and Buckles
The waistband should fit the waist measurement plus enough overlap for fastening. Cut the waistband from matching fabric if possible. Interfacing gives it strength and prevents stretching. Attach it carefully across the top edge, keeping the tartan pattern aligned where it is visible.
A partial lining can be added inside the upper kilt for comfort and structure. Cotton lining is a practical choice because it breathes and protects the outer fabric. Straps and buckles are usually placed so the under-apron fastens inside and the over-apron fastens outside. Some kilts use two straps; others use three for added security.
Try on the kilt again after the fasteners are attached. The kilt should sit level around the body. The apron should not sag, twist, or pull. The pleats should fall straight from the fell and swing freely below it.
Finishing the Bottom Edge
If your fabric has a clean selvage edge at the bottom, you may leave it as the finished edge. If you need to hem the kilt, keep the hem as flat as possible. A deep bulky hem can change the hang of the garment. Press the finished edge gently and check that the length is even all around.
A kilt pin may be worn on the lower corner of the outer apron as decoration and to add a little weight. Do not pin through both aprons. Doing so can restrict movement, distort the hang, and create stress on the fabric.
Beginner-Friendly Kilt Pattern Example
Here is a simple drafting example for a casual kilt. Suppose the wearer has a 34-inch kilt waist, 40-inch hip, and 23-inch length. You might plan a visible over-apron of about 21 inches, an under-apron of about 20 inches, and a pleated back section wide enough to wrap around the remaining hip area with fullness. If using 60-inch-wide fabric, you may need to piece the length horizontally depending on the desired yardage and tartan direction.
For a practice kilt, cut a long rectangle to the finished length plus top seam allowance and hem allowance if needed. Mark the aprons first. Then create evenly spaced knife pleats across the remaining section. Fit the pinned rectangle around the wearer, adjust the waist by tapering pleats through the fell, and attach a reinforced waistband. This simplified method teaches the core logic before you attempt an heirloom wool tartan kilt.
Common Mistakes to Avoid
Using Pants Size Instead of Body Measurements
A kilt waist is not the same as a jeans waist. Always measure the body where the kilt will actually sit.
Ignoring the Tartan Repeat
When working with tartan, the pattern must guide the pleats. Random pleating can make the back look chaotic, even if the sewing is technically neat.
Skipping the Fitting Stage
A pinned fitting reveals problems before they become permanent. Skipping this step is like baking without tasting and then blaming the oven.
Under-Pressing the Pleats
Pleats need careful pressing to hold their shape. Press as you go, and use a pressing cloth to protect the fabric.
Weak Fastener Placement
Straps and buckles must be reinforced. The kilt should feel secure during movement, not like it is negotiating an escape.
Experience Notes: What Making a Kilt Teaches You
The first thing many sewists learn from making a kilt is humility. A kilt looks like a rectangle, and rectangles seem friendly. Then the tartan appears, the pleat calculations begin, and suddenly that rectangle has opinions. The experience is still deeply rewarding because every step teaches a useful sewing skill: measuring accurately, matching patterns, pressing fabric, fitting a wrap garment, and building structure without relying on complicated curved pattern pieces.
One practical lesson is that the cutting stage should never be rushed. With ordinary fabric, being off by half an inch may be annoying. With tartan, half an inch can move a stripe into the wrong position and make the whole garment look slightly cross-eyed. Before cutting, lay the fabric out completely, smooth it, check the grain, and decide which stripe or section will sit at the center front. Taking photos on your phone can help you compare layouts before committing.
Another experience-based tip is to baste more than you think necessary. Pins are useful, but basted pleats behave better during fitting and pressing. Long temporary stitches can hold the folds securely while you test the wrap on the wearer. This is especially helpful when working with wool, which has weight and spring. A loosely pinned wool kilt can shift the moment you lift it, usually right after you have congratulated yourself for being organized.
Pressing is also more important than beginners expect. The iron is not just a finishing tool; it is part of the construction process. Pressing each pleat helps the fabric understand its new job. Use steam carefully, protect the cloth with a pressing cloth, and let the pleats cool before moving them. This cooling time helps set the shape. It is a small detail, but it can make the difference between sharp pleats and folds that look like they slept in a suitcase.
Fitting teaches patience. The kilt may look perfect on the table and then need adjustment on the body. That is normal. Bodies are not flat, and fabric behaves differently when wrapped around hips, waist, and movement. Check the apron overlap, the level of the waistband, and the fall of the pleats. Have the wearer sit, walk, and turn. A kilt should look formal when standing but still allow normal life, including stairs, chairs, and the bold decision to bend down and tie a shoe.
Finally, making a kilt teaches respect for traditional craftsmanship. Professional kiltmakers spend years perfecting pleat balance, hand stitching, shaping, and tartan matching. A home-sewn kilt does not need to be perfect to be meaningful, but it should be made thoughtfully. Start with a practice fabric if you are nervous. Keep notes on your measurements and pleat calculations. Label the inside with the date if you like. When the kilt is finished, you will not just have a garment; you will have a story made of cloth, math, steam, and determination.
Conclusion
A pattern for making a kilt begins with simple geometry but becomes a true sewing project through measurement, pleating, fitting, pressing, and finishing. The most important steps are choosing the right fabric, measuring the waist and hips accurately, planning the aprons, calculating pleats, and shaping the fell so the garment fits comfortably. Tartan adds beauty and complexity, while plain fabric offers a friendly way to practice.
If this is your first kilt, do not aim for museum-level perfection on day one. Aim for clean measurements, balanced pleats, secure fasteners, and a finished garment that hangs well. Once you understand the basic pattern, you can refine the details: deeper pleats, better tartan matching, hand-sewn finishing, traditional canvas shaping, and more polished apron construction. In other words, your first kilt teaches you how to make your second kilt much better. That is not a mistake; that is sewing wisdom wearing plaid.
Note: This article provides general educational guidance for drafting and sewing a kilt pattern. For formal Highland dress, heirloom tartan wool, or ceremonial use, consulting an experienced kiltmaker is recommended.