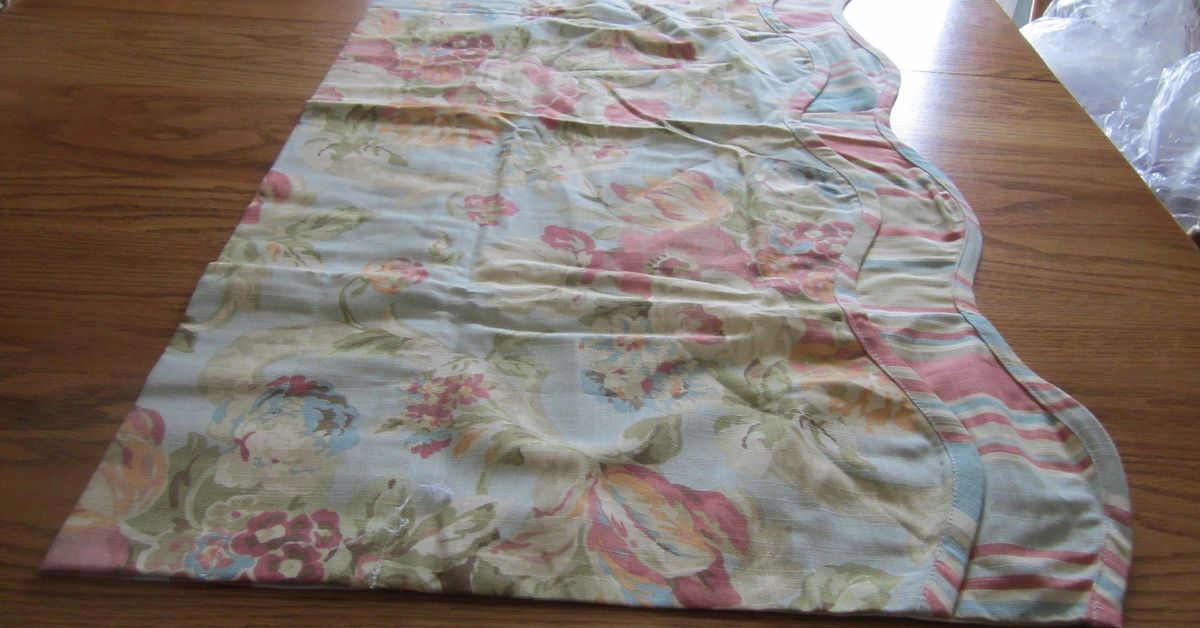
Curtain valances are the home-decor equivalent of a great haircut: they frame everything, make the room look more put-together,
and somehow convince guests you definitely have your life together (even if there’s a laundry mountain auditioning for Everest behind the couch).
The best part? You don’t need to “find the perfect pattern” if you can make the perfect patternone that fits your window,
your style, your fabric, and your tolerance for redoing things at 10:47 p.m.
Valance 101: What It Is (and Why a Pattern Makes Everything Easier)
A curtain valance is a short window treatment that hangs across the top of a window. It can be soft (fabric) or structured (mounted over a board),
simple (a straight band) or dramatic (swags, tails, scallops, pleatsbasically window jewelry).
If you’ve ever bought a valance that was almost righttoo short, too skimpy, too “why is it doing that weird wave thing?”you’ve already met the value of a pattern.
A good pattern is simply a plan: measurements, shapes, seam allowances, and placement marks so you can cut once and sew with confidence.
Think of pattern-making as the difference between “winging it” and “being the person who owns a measuring tape and uses it.”
Tools for Pattern-Making (No Fancy Studio Required)
Here’s what you need to draft a curtain valance pattern at home:
- Measuring tape (the flexible kind)
- Metal ruler or straightedge (great for long, clean lines)
- Pattern paper (or kraft paper, wrapping paper, even taped-together printer paper)
- Pencil + marker (pencil for drafting, marker for final lines and labels)
- Scissors (paper scissors, not your fabric shearsprotect the good scissors like they’re royalty)
- Painter’s tape or masking tape (for piecing paper together)
- French curve (optional, nice for scallops and swags)
- Muslin or cheap fabric for a test version (highly recommended)
Bonus: a notebook page where you write down the measurements so you don’t “totally remember it” and then absolutely do not.
Measuring Windows Like a Pro (Width, Drop, Returns, and Rod Room)
Before you draft anything, decide how the valance will hang. Will it slide onto a curtain rod (rod pocket)?
Use rings? Clip on? Or wrap around a board and mount to the wall?
Step 1: Measure the rod width (not just the window)
If your valance will hang on a rod, measure the rod or track from end to end. That measurement often matters more than the glass itself,
because it determines the “visual width” of the window treatment.
Step 2: Count the “returns” (the bits on the sides)
“Returns” are the distance the rod extends past the window on each side, heading back toward the wall.
If you want your valance to look full and finished from the front, you usually include returns in your width planning.
Step 3: Decide the drop (finished height)
Valances commonly range from about 10–18 inches finished, but the “right” number depends on ceiling height, window size, and style.
A taller ceiling can handle a taller valance; a small kitchen window might look best with something shorter and crisp.
Step 4: Check rod clearance (“rod room”)
If you’re making a rod pocket, you need enough space for the rod to slide through easily. Oversized decorative rods need more room
than skinny café rods. When in doubt, give the rod pocket a little extra breathing spaceyour fabric will not be offended.
The (Actually Simple) Math: Fullness, Hems, and Cutting Size
Most soft valances look best with fullnessextra width gathered, pleated, or softly folded so it doesn’t lie flat like a bedsheet auditioning for a curtain role.
A common guideline for many rod-pocket styles is about 2× fullness (twice the finished width), but you can adjust based on fabric bulk and the look you want.
Your basic cut-width formula
Cut Width = (Finished Width × Fullness) + Side Hems
Side hems are typically 1–2 inches per side (or more if you like a chunky, luxe hem). If you’re lining the valance, you’ll account for that in construction,
but the pattern still needs the same “real estate.”
Your basic cut-height formula
Cut Height = Finished Height + Top Allowance + Bottom Hem
- Top allowance depends on how you’re hanging it (rod pocket, tabs, rings, board wrap).
- Bottom hem is often 3–4 inches for a nice drape, but you can do less for lightweight fabrics.
Example (because math feels friendlier with a real window)
Let’s say your rod width is 60″, you want 2× fullness, and 1.5″ side hems per side.
- Cut Width = (60″ × 2) + (1.5″ + 1.5″) = 120″ + 3″ = 123″
If your finished valance height is 14″, you want a 3″ bottom hem and a 3″ top allowance:
- Cut Height = 14″ + 3″ + 3″ = 20″
That means you’re drafting a pattern (or rectangle) that represents a valance panel cut at about 123″ × 20″,
plus any style-specific shaping.
Draft a Straight (Tailored) Valance Pattern
A straight valance is the best place to start because it’s basically a rectangle with good manners.
It can be plain, lightly gathered, or softly pleatedand it’s easy to customize with trim, contrasting bands, or a shaped bottom edge later.
Step-by-step drafting
-
Draw your finished rectangle on pattern paper:
mark Finished Width (usually rod width) and Finished Height (your chosen drop). -
Add seam allowances:
add side hems (often 1–2″) and a bottom hem (often 3–4″). -
Add the top allowance based on hanging method:
- Rod pocket: add a fold-over amount plus a “pocket depth” (enough for your rod).
- Rings/clips: you may only need a small top hem or facing.
- Board-mounted: add extra to wrap around the board and staple on the back.
-
Label everything:
“Cut 1 main,” “Cut 1 lining,” grain direction, fold lines, and notes like “Rod pocket stitching line.”
Lining and structure (optional, but sometimes magical)
Lining helps the valance hang nicely, adds privacy, and gives the fabric more body. If you want a crisp, tailored look (especially for pleats),
consider a sturdier lining or interlining. If you want a softer, casual fold, keep it lighter.
Pro tip: if your main fabric is medium weight and your lining is super stiff, your valance may stand at attention like it’s being inspected.
That can be great for some stylesjust make sure it’s the vibe you want.
Draft a Box-Pleat Valance Pattern (Crisp, Classic, and Weirdly Addictive)
Box pleats look polished and “designer,” but the pattern is still just planning: where pleats fold, how deep they are, and where the front faces land.
Once you make one, you’ll start box-pleating everything. Pillows. Tote bags. Possibly your friendships.
Choose your pleat plan
A common setup is an odd number of “boxes” across the front (like 3, 5, or 7) so the center looks balanced.
Each “box” is made from folds that create a structured front panel.
Box pleat math (the friendly version)
- Finished Width = the width you want across the front (often the rod width).
- Pleat depth = how much fabric tucks back into each pleat (deeper = more dramatic, but bulkier).
- Number of pleats/boxes = how many repeats you want across.
A practical way to draft: decide how wide you want each front “box” to appear (for example, 8–12 inches),
then choose a pleat depth that gives you enough fabric to fold cleanly (for example, 3–5 inches per side of a box pleat).
Drafting steps
- Draw a baseline the length of your cut width on paper.
- Mark your center and work outward so the design stays symmetrical.
-
Create repeat sections:
mark each “box face” width and add fold-back areas for pleat depth. - Mark fold lines clearly (mountain folds vs. valley folds if that helps you).
-
Add notes for pattern placement if your fabric has big motifs:
you may want specific motifs centered on the front faces so each box looks intentional.
If your fabric has large prints (florals, medallions, animals wearing tiny hats), plan which parts land on the front “faces.”
Many pros label faces A/B/A/B across the pattern to alternate motifs in a pleasing way.
Draft a Scalloped Valance Pattern (Curves Without Chaos)
Scallops look fancy, but they’re basically repeated half-circles (or soft arcs) along the bottom edge.
The trick is consistency: evenly spaced scallops and a seam allowance that lets the curve turn smoothly.
Step 1: Start with your straight-valance rectangle
Draft your rectangle first (with all allowances), then you’ll shape the bottom edge on the pattern.
Step 2: Decide scallop size and count
Divide the finished width into equal sections: 3 scallops, 5 scallops, 7 scallopswhatever looks right for your scale.
Bigger scallops feel bold and traditional; smaller scallops feel sweet and cottage-y.
Step 3: Draw the scallops
- On the finished edge line (not the cut edge), mark equal divisions.
- Use a round object (bowl, plate, compass) or freehand a gentle arc connecting the marks.
- Step back and eyeball it. Your eyes catch weird spacing faster than a calculator does.
Step 4: Add seam allowance on the curve
Add your seam allowance outside the scallop line (often 1/2″). Then add notches and “clip points” notes
so you remember where to clip when turning curves after sewing.
Shortcut: make one perfect scallop template
Draft one scallop on cardstock, cut it out neatly, then trace it repeatedly along the bottom.
This keeps the pattern consistent, and you get to feel like a tiny window-treatment architect.
Stripes, Repeats, and Bold Prints: How to Keep Your Valance From Looking “Accidentally Abstract”
Fabric patterns are gorgeous until they land crooked, mismatched, or upside downthen suddenly your window looks like it’s wearing a confused necktie.
Pattern-making helps you control where the design sits.
Use these print-friendly habits
- Find the motif center and mark it on your pattern so your valance looks balanced.
- Plan pleat faces so key motifs land on the front panels (not swallowed by folds).
-
Check fabric orientation:
some prints run “up the roll,” while others are “railroaded” (running across the width).
That affects how you cut long pieces and where seams might land. - Buy extra yardage if matching is important. Pattern-matching is rarely a “perfect on the first try” situation.
If your fabric is striped, use your pattern to align stripes at the center and keep them level across the width.
A slightly off-level stripe reads “tilted room,” even when the room is perfectly fine. (The stripe becomes the drama.)
Make a Muslin Mockup: The Practice Cookie That Saves the Batch
A muslin mockup is a test version made from inexpensive fabric (or an old sheet you were about to “someday” fold properly).
It lets you check:
- Is the height right?
- Does the fullness look good?
- Are the pleats behaving?
- Do scallops look cute… or like cartoon teeth?
Do the mockup with quick basting stitches, pin pleats into place, and hang it up for a day.
Look at it morning and night. If you still like it after coffee and after a long day, it’s probably a winner.
“Whatever Else Your Heart Wants”: Turn Valance Pattern Skills Into Other Projects
Here’s the secret: once you can draft a valance pattern, you can draft patterns for a ton of home projects.
You’ve already learned the core skillsmeasuring, adding allowances, marking folds, and planning structure.
Easy projects that use the same pattern logic
- Café curtains: same width + fullness math, just longer and often simpler at the top.
- Roman shades: the “rectangle plus planning lines” approach is pattern-making in disguise.
- Throw pillow covers: square/rectangle drafting with seam allowances and closures.
- Table runners and toppers: long rectangles, hems, sometimes shaped ends.
- Headboard slipcovers: pattern the shape, add seam allowance, plan closures.
If you can sketch it, measure it, and imagine where the folds go, you can make a pattern for it.
And if you can’t imagine the folds… make a paper mockup first. Paper is cheaper than regret.
Common Mistakes (and the “No Panic” Fixes)
Mistake: Valance looks skimpy
Fix: Increase fullness (go from 1.5× to 2×) or choose deeper pleats. Skimpy valances often just need more width.
Mistake: Rod pocket is too tight
Fix: Increase pocket depth or use a smaller rod. When drafting, add a little ease so fabric slides without a wrestling match.
Mistake: Fabric sags or loses shape
Fix: Use lining, add interlining for body, or choose a fabric with more structure.
Tailored pleats often look best when the fabric has enough stiffness to hold a crease.
Mistake: Scallops look bumpy
Fix: Clip curves more carefully, press thoroughly, and consider a slightly larger scallop radius.
Small scallops demand more precision because tiny curves show every wobble.
Mistake: Prints don’t line up
Fix: Mark motif centers on your pattern and cut single-layer when precision matters.
Also: forgive yourself. Pattern matching is a skill, not a personality trait.
Conclusion: Your Window, Your Rules, Your Pattern
Making a curtain valance pattern is less about “being a sewing genius” and more about having a plan that respects reality:
rods have thickness, hems need space, and fabric has opinions.
Once you draft one solid patternstraight, box-pleated, or scallopedyou’ve unlocked a repeatable skill.
You can resize it, reshape it, swap fabrics, and apply the same steps to other home décor projects.
In other words: you now own the superpower of making your house look expensive on purpose.
So grab paper, measure carefully, label everything like future-you is your favorite person, and remember:
measure twice, cut once, press always.
Real-World Experiences: What People Learn When They Actually Make a Valance ()
People rarely mess up a valance because they “can’t sew.” Most hiccups happen because of tiny planning gaps that only show up once fabric is hanging in the real world.
One of the most common experiences is the “it looked perfect on the table” surprise. Flat on a table, a valance seems cooperative. Hanging on a rod, gravity joins the project,
and gravity is famously unbothered by your confidence. That’s why makers who do a quick mockuppinning folds and testing heighttend to feel like they discovered a cheat code.
Another big lesson is how much fabric choice changes everything. People often start with a lightweight cotton because it’s easy to sew, then wonder why a box-pleated style
looks soft and a little slouchy. The next attempt might use a sturdier fabric or add liningand suddenly those pleats look crisp, with clean edges that hold their shape.
That “aha” moment is usually when someone realizes window treatments are part sewing, part engineering, and part interior design.
Print placement is another real-life teacher. Someone falls in love with a bold floral, cuts the fabric quickly, and then notices the largest flower is hidden inside a pleat
while a random leaf is centered like it paid rent. The next time, they mark the pattern’s center and deliberately place motifs on the front faces.
That small shiftplanning what showsoften makes a DIY valance look dramatically more professional.
There’s also the “rod pocket reality check.” People draft a pocket based on the rod’s diameter but forget that seams, folds, and fabric thickness eat up space.
The result: a valance that technically fits the rod, but only if you slide it on with the patience of a museum curator.
After living that experience once, most makers start adding a little extra ease to the pocket and feel instant relief.
Pressing is the quiet hero people learn to respect. Many beginners think pressing is optional, like parsley.
Then they see the difference: pressed hems lie flatter, pleats look sharper, scallops curve smoothly, and the whole piece hangs better.
The experienced DIYers aren’t “better sewers” so much as “more consistent pressers.”
Finally, a lot of people discover that drafting patterns builds confidence fast. The first valance pattern feels like a big step,
but it teaches a repeatable process: measure, draft, add allowances, label, mock up, refine. After that, it’s not unusual for someone
to look around the room and think, “I could pattern that.” A pillow cover. A table runner. A café curtain. Maybe a cushioned bench pad.
And that’s when “whatever else your heart wants” stops being a cute phrase and becomes a very real plan for the weekend.