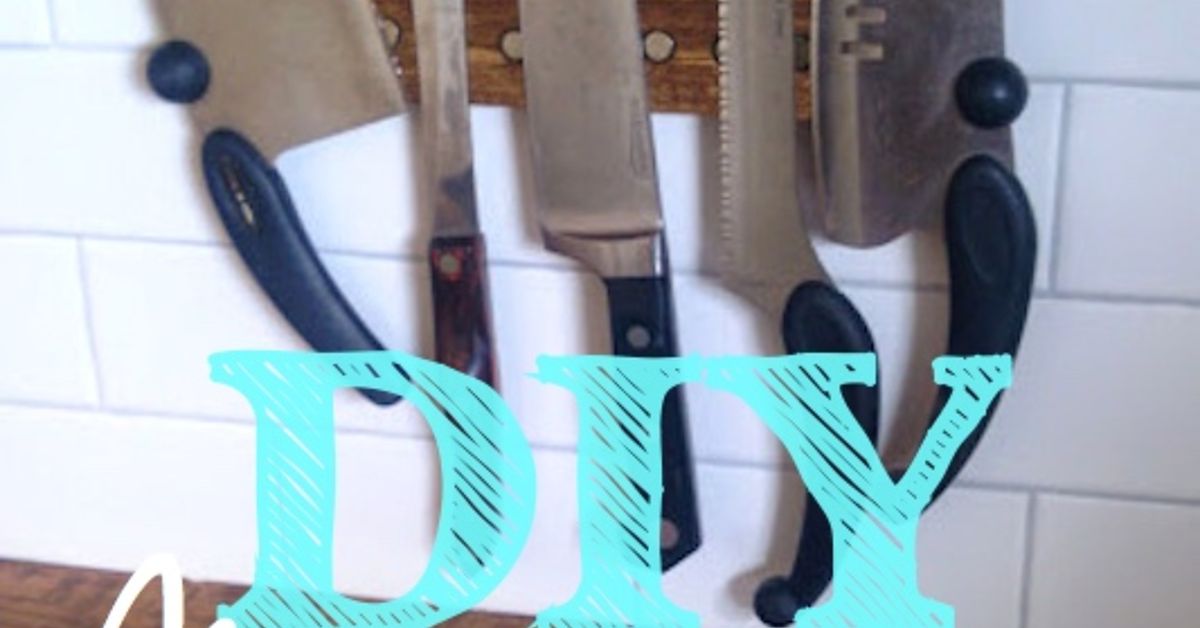
Some scrap wood sits in the corner of the garage looking like yesterday’s leftovers. A magnetic knife rack, however, sees potential. That odd walnut offcut, the maple strip from an old shelf, or the “too nice to throw away” board you have moved six times can become one of the most useful upgrades in your kitchen. Even better, it can make your knives easier to see, faster to grab, and less likely to rattle around in a drawer like tiny metal sharks.
A DIY magnetic knife rack is a practical woodworking project that blends storage, safety, and style. It does not require an enormous workshop or exotic lumber. The secret is simple: hide strong rare-earth magnets inside the back of a smooth wooden strip, mount the strip securely to the wall, and let the front face show off the grain. The result is a clean, custom knife holder that looks like it came from a boutique kitchen storeexcept you made it, and you probably spent more time finding your pencil than building the thing.
This guide walks through how to make a magnetic knife rack out of scrap wood, including wood selection, magnet placement, drilling, finishing, installation, safety, and real-world tips that make the project smoother. Whether you are a weekend woodworker, a renter with a careful mounting plan, or a home cook tired of digging for the chef’s knife, this project is a satisfying way to turn leftover material into everyday function.
Why Build a Magnetic Knife Rack?
A magnetic knife rack solves three common kitchen problems: cluttered counters, dull knife edges, and awkward access. Traditional knife blocks can take up valuable counter space, and drawers can be rough on blades unless every knife has a protective sleeve or dedicated insert. A wall-mounted magnetic knife holder keeps knives visible and separated, which makes cooking feel more organized before the onion even starts making you cry.
There is also a design advantage. A scrap wood magnetic knife rack can be tailored to your kitchen’s exact style. Rustic oak works beautifully in farmhouse kitchens. Walnut adds a rich, modern look. Maple, cherry, ash, and reclaimed hardwoods can all make excellent choices. Even a simple pine board can work if it is straight, smooth, and finished properly, though hardwoods are generally better for durability and appearance.
The best part is that this project rewards precision without punishing imperfection. The magnets are hidden. The back side does not need to win a beauty contest. The front just needs to be smooth, clean, and thick enough to hold the magnets close to the knives without letting them break through.
What You Need to Make a DIY Magnetic Knife Rack
Materials
- One piece of scrap hardwood, about 14 to 24 inches long
- Rare-earth neodymium magnets, usually disc magnets or bar magnets
- Two keyhole hangers, French cleat, or mounting screws
- Wood glue or two-part epoxy for securing magnets
- Food-safe mineral oil, cutting board oil, or a durable kitchen-safe finish
- Sandpaper in grits such as 120, 180, and 220
- Wall anchors or screws suitable for your wall type
Tools
- Tape measure and pencil
- Drill or drill press
- Forstner bit sized to your magnets
- Clamps
- Level
- Stud finder
- Router or roundover bit, optional
- Safety glasses and hearing protection
The dimensions are flexible. A 16-inch rack can hold several common kitchen knives, while a 20- to 24-inch rack gives more breathing room for larger collections. If you own heavy cleavers or lots of wide chef’s knives, build longer and use stronger magnets. Knife storage is one of those places where “good enough” should still mean “secure enough.” Nobody wants a falling santoku to introduce itself to a toe.
Choosing the Right Scrap Wood
Hardwood is the best choice for a magnetic knife rack because it resists dents, looks attractive, and holds a finish well. Walnut, maple, cherry, oak, beech, and ash are all solid options. Reclaimed wood can also be excellent, but inspect it carefully for nails, staples, cracks, soft spots, old finish, or mystery stains. “Character” is charming. Hidden metal in a saw blade is less charming.
The board should be thick enough to hide the magnets while leaving a thin layer of wood between the magnet and the knife blade. Many builders aim for a front face thickness of roughly 1/8 inch to 1/4 inch between the magnets and the knife. If the wood is too thick, the magnetic pull may feel weak. If it is too thin, you risk drilling through the front or creating visible bumps. The sweet spot depends on magnet strength, magnet size, wood species, and the weight of your knives.
Before cutting, hold your scrap board in the kitchen and visualize the rack in place. Is it long enough? Does the grain look good horizontally? Will the knives hang with enough clearance from cabinets, outlets, children’s reach, and busy prep areas? This five-minute reality check can prevent a rack that looks beautiful but lives in the wrong spot.
Picking Magnets That Actually Hold Knives
The heart of a wooden magnetic knife rack is not the wood. It is the magnets hiding behind the wood, doing all the heavy lifting while pretending not to be there. Neodymium magnets are commonly used for this type of project because they are compact and strong. Disc magnets are popular because they are easy to recess with a Forstner bit. Bar magnets can create a more continuous magnetic field, but they may require routing a channel instead of drilling individual holes.
For a typical rack, use multiple magnets spaced evenly along the board. A common approach is to drill two rows of magnet holes along the back, offset or aligned depending on your layout. Two rows give better coverage for knives of different widths and help prevent blades from pivoting. Larger knives benefit from stronger pull across more surface area.
Do not rely on one tiny magnet per knife unless you enjoy suspense. Test your magnets with your actual knives before final assembly. Place a thin scrap of wood between the magnet and blade to simulate the front face of the rack. If the knife slides, rotates too easily, or feels barely attached, upgrade the magnets, reduce the wood thickness between magnet and blade, or add more magnets.
Step-by-Step: How to Make a Magnetic Knife Rack Out of Scrap Wood
Step 1: Cut and Square the Board
Start by cutting your scrap wood to length. A width of 2 to 3 inches works well for most kitchen knives. The board should be wide enough to hide the magnets and tall enough to create stable contact with the blade, but not so bulky that it looks like a floating fence rail.
Square the ends if needed, then flatten and smooth the front face. If the board is cupped or twisted, plane or sand it until it sits flat against the wall. A rack that rocks on the wall will be harder to mount securely and may look homemade in the less flattering sense of the word.
Step 2: Design the Magnet Layout
Flip the board over and mark the back. Draw a centerline lengthwise, then mark magnet positions at regular intervals. For many racks, placing magnets every 1 to 1.5 inches creates reliable holding power. If using two rows, keep them far enough apart to spread the pull but not so close to the edges that you weaken the wood.
Leave space at both ends for mounting hardware. This is easy to forget when you are excited about magnet spacing. Then you drill perfect holes, reach for the keyhole hangers, and discover you have designed a magnetic board with no place to hang. That is not woodworking. That is character development.
Step 3: Drill Recesses for the Magnets
Use a Forstner bit that matches the magnet diameter. A drill press gives the cleanest, most consistent depth, but a handheld drill can work if you use care and a depth stop. Drill from the back side only. The goal is to create flat-bottomed holes that bring the magnets close to the front face without breaking through.
Go slowly. Check depth often. If your board is 3/4 inch thick and you want about 1/8 inch of wood left at the front, your holes should be roughly 5/8 inch deep. That is only an example; measure your actual board and magnets. The closer the magnet sits to the front, the stronger the hold will feel.
Step 4: Test the Magnetic Pull
Before gluing anything, place magnets into a few holes and test the front of the board with your knives. Hold the board upright and gently attach a knife. It should snap into place firmly but not so aggressively that removing it feels like wrestling a kitchen goblin. If the pull is weak, deepen the holes slightly, add more magnets, or use stronger magnets.
Also test blade movement. A good magnetic knife rack should hold knives in place without letting them slide down. Wide knives should sit securely. Narrow paring knives should not spin like a compass at a ghost convention.
Step 5: Glue the Magnets in Place
Once the layout works, glue the magnets into the holes using epoxy or strong adhesive. Pay attention to polarity. If you stack magnets or place them in rows, keep orientation consistent so the magnetic field works predictably across the rack. Mark one side of each magnet with a permanent marker before installation to avoid confusion.
Wear eye protection when handling strong magnets, and keep them away from small children, pets, phones, credit cards, and medical devices. Neodymium magnets can snap together with surprising force, chip if mishandled, and create serious hazards if swallowed. This is the one part of the project where the tiny shiny discs deserve full respect.
Step 6: Seal the Back
After the adhesive cures, consider covering the magnet holes with a thin wood veneer, hardboard strip, or a layer of epoxy. This is optional, but it protects the magnets and gives the back a cleaner look. If the rack will sit flat against the wall, make sure any covering does not interfere with your mounting hardware.
Step 7: Shape and Sand the Front
Now make the visible side pleasant to touch. Sand the front and edges through progressively finer grits. A small roundover on the edges makes the rack look finished and helps prevent splinters. You can use a router, sanding block, or just patience. Patience is cheaper than a router, though admittedly less fun to plug in.
Aim for a smooth surface that will not scratch knife blades. The knives should contact clean wood, not rough grain, dried glue, or gritty finish. Wipe away dust before applying finish.
Step 8: Apply a Kitchen-Friendly Finish
For a natural look, apply food-safe mineral oil or cutting board oil. It is easy to refresh and brings out the grain beautifully. For more protection, use a finish suitable for kitchen items and follow the manufacturer’s curing instructions. Avoid finishes that remain tacky, smell strongly, or are not appropriate near food-prep areas.
Even though the rack is not a cutting board, it lives in the kitchen. It may encounter moisture, fingerprints, cooking oils, and the occasional splash from an overconfident tomato sauce. A good finish helps the wood resist stains and makes cleaning easier.
Step 9: Mount the Rack Securely
Mounting matters as much as magnet strength. A knife rack loaded with steel should be attached securely to studs, a French cleat, or proper wall anchors rated for the weight. Use a level, mark carefully, and avoid placing the rack where someone can bump it with a shoulder, elbow, cabinet door, or enthusiastic dance move while cooking pasta.
Install the rack high enough that children cannot reach the knives, but low enough for adults to remove knives safely. Many kitchens work well with the rack placed above a prep counter, away from the stove’s heat and steam. Keep blade tips clear of the countertop and make sure handles are easy to grab without brushing against sharp edges.
How to Use a Magnetic Knife Rack Safely
Attach knives spine-first, then let the blade settle onto the wood. When removing a knife, twist the spine away from the rack before pulling the blade off. This reduces scraping and helps protect the cutting edge. Do not slap knives onto the rack like you are closing a car door in an action movie. The rack is strong, but your knife edge deserves manners.
Only store clean, dry knives. Moisture trapped between steel and wood can encourage staining, rust on some blades, or discoloration on the rack. Hand wash knives, dry them immediately, and place them carefully back on the holder. Avoid storing loose scissors, bottle openers, or random metal tools on the rack unless the magnets are strong enough and the layout makes sense.
Common Mistakes to Avoid
Using Weak Magnets
Weak magnets are the fastest way to turn a good idea into a kitchen hazard. Test before gluing, and test with your heaviest knives. If your cleaver laughs at the rack, listen to the cleaver.
Leaving Too Much Wood Over the Magnets
A beautiful thick board can weaken magnetic pull if the magnets sit too far behind the face. Drill carefully so magnets are close to the front while leaving enough wood intact.
Forgetting About Wall Strength
A strong knife rack attached poorly is still poorly attached. Use studs or appropriate anchors. Drywall alone is not a magical force field.
Skipping the Finish
Raw wood can absorb moisture and grime. A simple oil finish makes the rack easier to maintain and much better looking.
Placing It in a Bad Location
Do not mount the rack where children can reach it, where heat and steam hit it constantly, or where knife handles stick into a walkway. Good storage should reduce chaos, not audition for a kitchen blooper reel.
Design Ideas for a Scrap Wood Magnetic Knife Rack
A magnetic knife rack can be as simple or as stylish as you want. For a minimalist look, use a single clean board with softened edges and an oil finish. For a rustic design, keep a live edge, but sand it thoroughly and seal it well. For a modern kitchen, use walnut with hidden mounting hardware. For a cheerful cottage look, paint the edges while leaving the front grain exposed.
You can also combine scraps. Glue contrasting strips of maple and walnut together for a striped effect. Use leftover cutting board pieces for an end-grain look. Add a small lower ledge for kitchen shears or a few hooks beneath the rack for measuring spoons, though hooks should be placed so they do not interfere with knife removal.
If you want a premium feel, use a French cleat for mounting. It creates a strong hold and lets the rack sit neatly against the wall. Keyhole hangers are another clean option, but they require accurate layout. Visible screws are simpler and can look intentional if you use attractive brass, black, or stainless hardware.
Maintenance: Keeping the Rack Clean and Strong
Wipe the rack regularly with a damp cloth, then dry it. Do not soak it. Do not spray harsh cleaners directly onto unfinished or oil-finished wood. Refresh an oil finish when the wood starts looking dry. If the rack becomes sticky from kitchen grease, use mild soap on a barely damp cloth, wipe clean, and dry immediately.
Every few months, check that the mounting hardware remains tight. Also check the magnetic grip. If a knife seems less secure, inspect the rack, the wall mount, and the knife surface. Usually the issue is placement or moisture, but it is worth taking seriously. Gravity has no sense of humor.
Real-World Experience: What You Learn While Making One
The first thing you learn when making a magnetic knife rack out of scrap wood is that scrap wood has opinions. A board that looked perfectly straight under the workbench may suddenly reveal a tiny bow, a stubborn knot, or a mysterious dent shaped like regret. That is not a reason to abandon the project. It is a reason to slow down and let the material guide the design. Sometimes the best-looking rack comes from trimming away a cracked end, rotating the board, or choosing the side with the more interesting grain.
The second lesson is that magnet testing is not optional. On paper, a magnet may sound powerful. In real life, the wood thickness, knife weight, blade shape, and magnet spacing all affect performance. Testing with actual knives before glue-up saves frustration. A chef’s knife may hold perfectly while a narrow utility knife wants to twist. A heavy cleaver may need two rows of stronger magnets. A thin paring knife may need a more continuous magnetic field. This is where the project becomes less like assembling furniture and more like tuning an instrument.
Another practical experience: drilling depth is where confidence goes to be humbled. A Forstner bit removes material quickly, and the difference between “perfectly recessed” and “hello, front face” can be tiny. Use a depth stop, tape on the bit, or a drill press stop. Stop early and check often. If you accidentally drill too deep but do not break through, you may still be fine. If you break through the front, you have three choices: call it a design feature, cut the board shorter, or start over with the calm dignity of a person who has learned something.
Finishing also teaches patience. Oiled wood often looks fantastic after the first coat, then drinks it up and asks for more. Let the finish cure or absorb properly before mounting knives. Rushing this step can leave fingerprints, dull patches, or oil transfer. The rack is going on the wall where you will see it every day, so give the finish time to look its best.
Installation is the moment when the project becomes real. Holding a handmade rack against the wall, seeing the level bubble settle, and driving the final screw feels surprisingly satisfying. It is also the moment to be practical. If the rack is near a stove, steam and grease may shorten the finish life. If it is near a sink, water splashes may become annoying. If it is too close to an upper cabinet, long knives may be awkward to remove. The best location is usually near the prep zone, above the counter, with plenty of room for handles and blade tips.
Once installed, the daily experience is excellent. Knives are visible. The counter is clearer. Cooking feels more efficient because the right tool is right there. Guests may ask where you bought it, which gives you the rare pleasure of saying, “I made it from scrap wood,” while trying not to grin like you just won a tiny woodworking Oscar.
There is also a small behavioral change. A magnetic rack encourages better knife care. You are more likely to wash and dry a knife promptly when its storage spot is visible. You are less likely to toss it into a drawer. You may even start arranging knives by size, which is not required but does make you feel like the executive chef of your own Tuesday night dinner.
In the end, this project is rewarding because it turns leftovers into something genuinely useful. It is not just a decorative strip of wood with magnets. It is a smarter kitchen habit, a cleaner counter, a safer storage solution, and a small daily reminder that good DIY does not always start with a shopping cart. Sometimes it starts with the scrap pile.
Conclusion
Making a magnetic knife rack out of scrap wood is one of those rare DIY projects that is affordable, attractive, practical, and not secretly trying to take over your entire weekend. With a straight hardwood offcut, strong neodymium magnets, careful drilling, a smooth finish, and secure wall mounting, you can create a custom knife holder that looks polished and works beautifully.
The keys are simple: choose solid wood, keep the magnets close to the front face, test the pull before gluing, mount the rack properly, and use it with care. Do that, and your scrap wood graduates from “garage clutter” to “kitchen hero.” Not bad for a board you almost threw away.