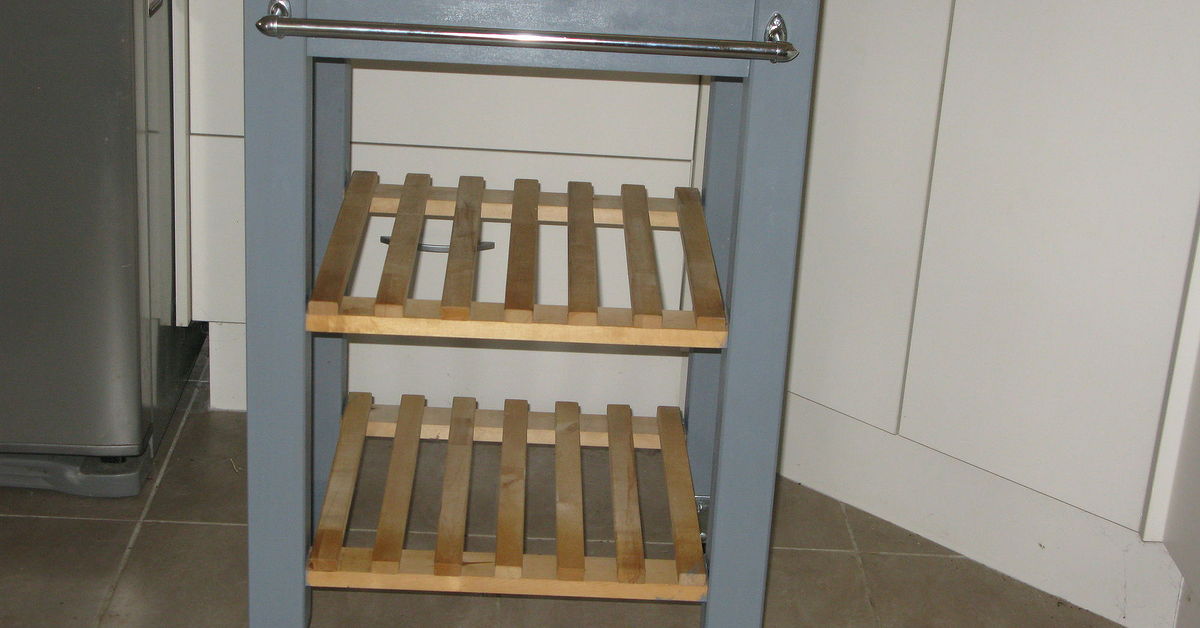
An Ikea butchers block or kitchen island makeover is one of those home projects that feels suspiciously achievable. You look at a plain wood-topped island, maybe a VADHOLMA, TORNVIKEN, FÖRHÖJA cart, or a well-loved Ikea butcher block countertop, and think, “Surely this can look like something from a boutique kitchen showroom.” The good news: it can. The even better news: you do not need a contractor, a demolition crew, or a dramatic reality-TV reveal where someone cries next to a backsplash.
Ikea kitchen islands are popular for a reason. They are affordable, functional, fairly easy to assemble, and blessed with the magical ability to fit into kitchens that were clearly designed by someone who thought counter space was optional. But straight out of the box, they can look a little too recognizable. A butcher block top may feel warm and practical, but the base might be too plain, the finish might not match your cabinets, and the whole thing may need personality. That is where a smart makeover comes in.
This guide walks through how to plan, refinish, paint, seal, style, and maintain an Ikea butcher block kitchen island so it looks custom without requiring a custom-sized bank account. We will cover design ideas, surface prep, wood care, storage upgrades, common mistakes, and real-life experience tips from the kind of DIY project where the island starts as furniture and ends as the emotional center of the kitchen.
Why an Ikea Butcher Block Kitchen Island Is Worth Making Over
A butcher block kitchen island adds something many kitchens desperately need: warmth. Stainless steel can feel clinical, stone can feel formal, and laminate can feel practical but not exactly hug-worthy. Wood, on the other hand, says, “Come chop vegetables here. Maybe also drink coffee and avoid answering emails.”
Ikea kitchen islands and carts are especially makeover-friendly because their designs are simple. The clean lines make them easy to customize with paint, stain, hardware, hooks, shelves, baskets, rails, or even a new countertop. Many Ikea islands also use oak, bamboo, or wood veneer surfaces that can work beautifully when properly cleaned, protected, and styled.
The biggest advantage is flexibility. A freestanding Ikea kitchen island can work in a rental apartment, a small galley kitchen, a farmhouse-style space, or a modern kitchen that needs a little texture. Unlike a built-in island, it can often be moved, adjusted, or updated again later. In DIY language, that means you are not marrying the island. You are just dating it seriously with a quart of paint.
Popular Ikea Pieces for a Kitchen Island Makeover
VADHOLMA Kitchen Island
The VADHOLMA island is one of Ikea’s most recognizable kitchen island options. It usually features a black base with an oak butcher block-style top, giving it an industrial-meets-farmhouse look. It offers open shelving, a sturdy work surface, and enough presence to become a true kitchen centerpiece.
For a makeover, VADHOLMA works well with matte black touch-ups, brass hooks, woven baskets, under-shelf lighting, or a deeper wood tone on the top. Because the design already has contrast, small changes can make a big impact.
TORNVIKEN Kitchen Island
TORNVIKEN leans more cottage and farmhouse, often with an off-white base and oak top. It is ideal for kitchens that need extra prep space and a softer, more traditional look. A TORNVIKEN makeover might include painting the base sage green, navy, charcoal, or warm beige, then sealing the butcher block top for durability.
This island is also a strong candidate for decorative side panels, cup hooks, towel bars, or fabric-covered storage baskets. If your kitchen has open shelving, TORNVIKEN can look wonderfully intentional instead of “I bought this because my counter disappears when I put down one toaster.”
FÖRHÖJA Kitchen Cart
The FÖRHÖJA cart is smaller, lighter, and great for apartments or tight kitchens. It may not have the commanding presence of a full island, but it is extremely hackable. Paint the base, stain the top, add casters, use baskets on the shelves, or turn it into a coffee station, baking cart, bar cart, or microwave stand.
Small Ikea butcher block carts are perfect for beginner DIYers because there is less surface area to mess up. Translation: if your first coat of stain looks like a raccoon applied it with a sock, recovery is easier.
Before You Begin: Decide What Kind of Makeover You Want
Before grabbing sandpaper and making aggressive eye contact with the island, decide what you want the final piece to do. A kitchen island makeover should improve both style and function. Otherwise, you are just creating prettier clutter storage, which is still clutter storage wearing lipstick.
Ask yourself a few practical questions. Do you need more prep space? More hidden storage? A baking station? A breakfast bar? A coffee corner? A place to park the air fryer that has somehow become the family’s most respected appliance?
Then choose a design direction. For a modern farmhouse look, try a white or cream base with a warm butcher block top, black hardware, and woven baskets. For a modern industrial look, keep or add a black base, deepen the wood tone, and use metal hooks or rails. For a Scandinavian look, keep the palette light with natural wood, soft neutrals, and minimal accessories. For a bold custom look, paint the base forest green, navy blue, terracotta, or deep charcoal.
Step 1: Clean the Island Thoroughly
Every good Ikea kitchen island makeover begins with cleaning. This is not glamorous, but neither is painting over grease and discovering your primer is sliding around like a toddler on a hardwood floor.
Remove everything from the island, including shelves, drawers, baskets, hooks, and hardware if possible. Wipe the surface with a mild dish soap and warm water solution. For sticky spots, use a gentle degreaser that is safe for painted or wood surfaces. Avoid soaking the butcher block top. Wood and standing water are not friends; they are coworkers who should not be left alone in a conference room.
Dry the island completely before sanding or painting. Moisture trapped under finish can lead to uneven results, cloudy sealers, or future peeling.
Step 2: Sand the Butcher Block Top
If the wood top is scratched, stained, dry, or too orange for your taste, sanding can bring it back to life. Start with a medium grit sandpaper, such as 120 grit, to remove surface wear. Then move to 180 or 220 grit for a smoother finish. Always sand with the grain, not against it.
For a light refresh, you may only need a quick sanding with fine grit paper. For a deeper makeover, especially if you plan to stain the top, be more thorough. Existing finishes can block stain from penetrating evenly, which creates blotchy results. Blotchy butcher block is the kitchen equivalent of a bad spray tan: technically color, but not the color anyone requested.
After sanding, vacuum the dust and wipe the surface with a slightly damp microfiber cloth. Let it dry fully before applying stain, oil, or sealer.
Step 3: Choose the Right Finish for the Wood Top
The best finish depends on how you use the island. A decorative island that mainly holds flowers, cookbooks, and the occasional bowl of lemons can handle a different finish than a hard-working prep station where knives, spills, and pizza dough regularly appear.
Food-Safe Oil
Mineral oil and butcher block conditioner are popular for wood surfaces used in food prep. They are easy to apply, help prevent the wood from drying out, and can be refreshed regularly. The downside is that oil does not create a hard film, so the surface remains more vulnerable to stains, water rings, and scratches.
Oil-Wax Finish
Oil-wax products add slightly more protection and a soft, natural sheen. They are a good choice if you want the butcher block to feel like wood, not plastic. They still need maintenance, but they offer a beautiful hand-rubbed look that suits Ikea islands nicely.
Polyurethane or Water-Based Topcoat
If your island is more of a serving station or storage piece than a chopping surface, a durable polyurethane or water-based topcoat can offer stronger protection against water and stains. Use cutting boards for food prep if the finish is not intended for direct cutting or food contact.
For many households, the smartest approach is simple: treat the island top as a work surface, but not as a giant cutting board. Use a separate cutting board for knives, wipe spills immediately, and protect the wood from hot pans. Your butcher block will live a longer, happier life and will not develop the haunted look of a neglected picnic table.
Step 4: Paint the Base for a Custom Look
Painting the base is often the biggest visual upgrade in an Ikea kitchen island makeover. The butcher block top may already have charm, but the base is where you can make the piece match your kitchen.
First, lightly sand the base to scuff the finish. This helps primer grip. Next, use a high-quality bonding primer, especially if the base has a slick factory finish. After priming, apply two thin coats of durable cabinet or furniture paint. Thin coats are better than one heavy coat because heavy paint tends to drip, sag, and generally behave like it has somewhere better to be.
Popular colors for Ikea kitchen island makeovers include soft white, greige, olive green, navy, black, mushroom, clay, and deep blue-gray. If your kitchen cabinets are white, a painted island can add contrast. If your cabinets are dark, a lighter island can keep the room from feeling too heavy.
Step 5: Upgrade the Hardware and Accessories
Hardware is the jewelry of the kitchen island. It may be small, but it can change the whole outfit. Swap basic knobs or pulls for brass, matte black, bronze, nickel, or wood hardware depending on your style.
You can also add practical accessories. A towel bar on one side keeps dish towels handy. S-hooks can hold measuring cups, mugs, small pans, or utensils. A rail system can create extra storage without taking up counter space. Baskets on open shelves hide visual clutter while still keeping items accessible.
For a family kitchen, consider adding labeled bins for lunch containers, baking supplies, snacks, or reusable bags. For an entertaining kitchen, store cocktail tools, napkins, serving boards, and candles. For a baking station, keep flour, sugar, mixing bowls, and parchment paper within arm’s reach.
Step 6: Make the Island Look Built-In Without Actually Building It In
A freestanding Ikea island can look custom if it connects visually with the rest of the kitchen. The trick is repetition. Use a paint color that appears elsewhere in the room. Match the hardware finish to cabinet pulls or lighting. Repeat wood tones from shelves, flooring, or dining furniture.
Another strategy is to style the island with intention. A small lamp, a ceramic bowl, a vase of herbs, or a neat stack of cutting boards can make the island feel designed rather than dropped into the room like a helpful wooden meteor.
If the island has open shelving, avoid overloading it. Open shelves are honest. They will tell everyone if you own 47 mismatched plastic containers and no lids. Use baskets, jars, or matching bins to create order.
Smart Design Ideas for an Ikea Butcher Block Island Makeover
Modern Farmhouse Makeover
Paint the base warm white or soft gray, lightly sand and oil the butcher block top, and add black cup pulls or simple knobs. Use woven baskets on the shelves and hang a striped towel on the side. This look works especially well with subway tile, shaker cabinets, and wood floors.
Moody Modern Makeover
Choose a deep color such as charcoal, black, navy, or forest green for the base. Stain the wood top a medium walnut tone and add brass or aged bronze hardware. Keep the styling minimal: one tray, one plant, and maybe a bowl of fruit that makes you look like the kind of person who definitely meal plans.
Small Kitchen Storage Makeover
Use a smaller Ikea cart or island and maximize every inch. Add casters if mobility helps. Use stackable bins, hooks, magnetic strips, and shelf baskets. Keep the top mostly clear so it can function as real prep space. In a small kitchen, empty surface area is luxury real estate.
Rental-Friendly Makeover
If you rent, choose reversible changes. Add peel-and-stick wallpaper to the back panel, use removable hooks, style with baskets, and avoid permanent modifications if you plan to resell or move the island later. A freestanding island can transform a rental kitchen without angering the landlord, which is always a win.
How to Maintain an Ikea Butcher Block Kitchen Island
Maintenance is the secret to keeping butcher block beautiful. Wood is forgiving, but it does not enjoy neglect. Wipe spills quickly, especially water, wine, coffee, tomato sauce, and anything mysteriously sticky that appears after children visit the kitchen.
Clean the top with mild soap and water, then dry it immediately. Avoid harsh chemicals, abrasive scrubbers, and letting wet towels sit on the surface. Use trivets under hot pans and cutting boards under knives. If the wood starts to look dry or dull, refresh it with the appropriate oil or conditioner.
For scratches, lightly sand the affected area and reapply finish. That repairability is one of butcher block’s best qualities. Stone may be glamorous, but when it chips, it acts expensive. Wood gets a scratch and says, “No problem, pass the sandpaper.”
Common Mistakes to Avoid
The first mistake is skipping prep. Paint and stain need clean, sanded, dry surfaces. If you rush this stage, the finish may peel, streak, or look uneven. The second mistake is choosing the wrong finish for the way you use the island. A food-prep surface needs food-safe care, while a decorative or serving surface can use tougher protective coatings.
The third mistake is over-accessorizing. A kitchen island should make your kitchen easier to use, not become a small museum of trays, jars, candles, and decorative cutting boards that nobody is allowed to touch. Leave enough open space for chopping, mixing, serving, or setting down groceries.
The fourth mistake is ignoring scale. A huge island in a small kitchen can make the room feel cramped. A tiny cart in a large kitchen can look lonely. Measure walkways before buying or modifying an island. Ideally, you want enough room to move comfortably around it, open appliance doors, and avoid performing a sideways crab walk every time you need the refrigerator.
Budget Breakdown: What an Ikea Kitchen Island Makeover May Cost
The cost of an Ikea butcher block kitchen island makeover depends on how far you go. A basic refresh with sandpaper, oil, and new knobs can be very affordable. A larger transformation with primer, paint, stain, sealer, hardware, baskets, hooks, and lighting will cost more but still usually comes in far below the price of a custom island.
A practical budget might include sanding supplies, tack cloths or microfiber cloths, primer, cabinet-grade paint, a wood finish, brushes or foam rollers, new hardware, and storage accessories. If you already own basic tools, the project becomes even more budget-friendly.
The smartest place to spend money is on primer, paint, and finish. Cheap accessories can be swapped later, but poor surface products can create peeling, tackiness, or water damage. In other words, save money on the cute basket, not the stuff protecting the wood from spaghetti night.
Experience Notes: What It Is Really Like to Make Over an Ikea Butchers Block Kitchen Island
The real experience of an Ikea butchers block kitchen island makeover is part design project, part patience test, and part “why is there sawdust in my coffee?” adventure. The first thing you learn is that the island always looks worse before it looks better. Once you remove the hardware, sand the top, and tape the edges, the piece may briefly resemble something abandoned behind a garage. Do not panic. This is the awkward middle stage, and every good DIY project has one.
One of the most satisfying moments is sanding the butcher block top. Even a tired, scratched surface can start to look fresh after a careful pass with sandpaper. You see the grain come back, the old stains soften, and the wood begin to feel smooth again. It is oddly therapeutic, unless you forget to wear a dust mask, in which case it becomes oddly sneezy.
Painting the base is where personality enters the room. Many people start with safe colors, but a kitchen island is a great place to be braver than usual. A deep green base with a warm wood top can make the island look custom. Navy can feel classic and crisp. Black can look modern and grounded. Soft beige or mushroom creates a calm, designer-style look without shouting for attention. The island is separate from the cabinets, so it can act like an accent piece rather than needing to match everything perfectly.
The biggest lesson is to respect drying time. DIY enthusiasm often whispers, “Touch it. It is probably dry.” This whisper is a liar. Paint and sealer need time to cure, not just time to stop feeling wet. If you rush the process, you may leave fingerprints, dents, or tacky spots. Give each coat the time recommended by the product label, and be extra gentle with the surface for the first several days.
Another real-life discovery is that storage styling matters more than expected. Open shelves can either look charming or chaotic. Baskets are the easiest solution. They hide bulky items, soften the look, and make the island feel finished. Clear jars can work for dry goods, but only if you are willing to keep them neat. Otherwise, a basket full of baking supplies is much more forgiving than a glass jar displaying three lonely chocolate chips and a flour explosion.
Functionally, the makeover changes how the kitchen feels. A refreshed Ikea island becomes a landing zone for groceries, a prep station for dinner, a buffet for guests, a homework spot, and occasionally the place where everyone puts mail even though nobody agreed to that. The key is to create zones. Keep the top clear enough for work, use one shelf for daily items, and reserve another for less-used pieces like serving bowls or seasonal linens.
Maintenance becomes part of the rhythm. Oiling the butcher block top is not difficult, but it does require consistency. The wood will tell you when it is thirsty by looking dull or feeling rough. A quick clean, light sanding if needed, and a fresh coat of conditioner can make it look revived. That is the beauty of butcher block: it ages, but it can also be renewed. Unlike some surfaces that simply look damaged, wood develops character and then lets you buff out the drama.
The best overall advice from experience is to design for your actual life, not your imaginary magazine life. If you cook every day, prioritize a durable finish and easy-clean storage. If you entertain, create space for serving trays and drinks. If your kitchen is small, keep the island mobile and uncluttered. If your household is busy, choose finishes that forgive fingerprints, crumbs, and the occasional mystery splash.
An Ikea butchers block kitchen island makeover is not just about making a budget piece look expensive. It is about making the kitchen work better. When the project is done, the island should feel like it belongs there, as if your kitchen was waiting for it all along. And if someone asks where you bought your “custom” island, you can smile modestly and say, “Oh, it was just a little Ikea makeover,” while quietly accepting your imaginary DIY trophy.
Conclusion
An Ikea butchers block kitchen island makeover is one of the most practical and rewarding DIY upgrades for a kitchen. It adds warmth, storage, prep space, and personality without the cost or chaos of a full renovation. With thoughtful planning, careful sanding, the right finish, durable paint, and smart accessories, a basic Ikea island can become a custom-looking centerpiece that works hard every day.
The secret is balance. Make it beautiful, but keep it useful. Protect the butcher block, but let the wood show its natural charm. Add storage, but do not overcrowd it. Choose colors and hardware that connect with your kitchen, but do not be afraid to give the island its own identity. A great kitchen island makeover should look good, clean easily, and make cooking feel less like a chore and more like something you might actually enjoy on a Tuesday.