Note: The exact screw order, vacuum port locations, and idle-speed spec can vary from one motorcycle to another, so always check your service manual before you start. Carb synchronization is a precision job, not a backyard guessing contest with a screwdriver and blind confidence.
If your motorcycle has started idling like it had three espressos too many, vibrates more than usual at stoplights, or hesitates when you crack the throttle, your carburetors may be out of sync. On multi-carb bikes, synchronization means balancing airflow so each cylinder carries its fair share of the work. When the carbs are synchronized properly, the engine idles smoother, responds more cleanly, and stops feeling like four tiny arguments are happening under the tank.
The good news? You do not need a wizard robe or a shrine to vintage Hondas to do it. You do need patience, a proper carb sync tool, and enough discipline to make tiny adjustments instead of turning screws like you are opening a pickle jar. This guide walks through how to synchronize motorcycle carburettors in 10 practical steps, with safety tips, common mistakes, and real-world advice that can save you from turning a tune-up into a melodrama.
Why Carburetor Synchronization Matters
On a multi-carb motorcycle, each carburetor feeds one cylinder. If one throttle plate or butterfly is slightly more open than the others, that cylinder pulls harder and ends up doing more work. The result is rough idle, uneven response, annoying vibration, and that nagging feeling that your bike is technically running but emotionally unavailable.
A proper motorcycle carb sync helps restore:
- Smooth, stable idle
- Cleaner off-idle throttle response
- Less buzz through the bars and pegs
- Better low-speed rideability
- More balanced cylinder loading
It is also worth saying what carb synchronization cannot do. It will not fix clogged jets, bad compression, cracked intake boots, stale fuel, weak ignition, or valves that are out of spec. Carb sync is a finishing step, not a magic spell.
Tools You’ll Need Before You Start
- A motorcycle carburetor synchronizer, vacuum gauges, or a manometer
- The correct vacuum-port adapters for your bike
- Screwdrivers or sync tools for the adjuster screws
- Your factory service manual
- A fan to keep the engine cool while idling
- An auxiliary fuel tank, if the main tank blocks access
- Basic hand tools for tank and bodywork removal
- Shop rags and a calm personality
If your gauges are mismatched or inaccurate, the readings can mislead you. That is why many experienced mechanics prefer a quality matched gauge set or a mechanical manometer. Cheap tools can work, but only if they are consistent.
How to Synchronize Motorcycle Carburettors: 10 Steps
Step 1: Make Sure the Engine Is Worth Synchronizing
Before you even think about touching the sync screws, confirm the engine is mechanically sound. Valve clearances should be set correctly, idle speed should be in spec, and the carbs should already be clean enough to run properly. If the intake boots are cracked, the fuel is ancient, or the throttle cables are routed badly, syncing will be inaccurate and frustrating.
This is the step most people skip because it is less glamorous than “adjusting stuff.” But it matters. A vacuum sync is meaningful only when the bike is already in reasonably good tune. Otherwise, you are balancing a bad system very carefully instead of fixing it.
Step 2: Warm the Engine to Operating Temperature
Start the bike and bring it up to normal operating temperature. Carb synchronization should be done with the engine warm, not cold. A cold engine lies to you. It idles differently, responds differently, and generally behaves like a sleepy coworker before coffee.
Once warm, shut the engine off so you can access the vacuum ports and tool connections safely.
Step 3: Remove the Tank or Raise It for Access
Most motorcycles hide the carburetors and vacuum ports under the fuel tank, because motorcycles enjoy making simple jobs slightly annoying. Remove the tank or prop it up if your model allows. If the tank must come off completely, use an auxiliary fuel bottle or remote fuel source so the engine can run while you work.
This is also the moment to locate the vacuum ports, rubber caps, and any emissions or fuel-valve vacuum lines that must be temporarily disconnected. Keep track of what came from where. “I’ll remember that later” is how extra bolts are born.
Step 4: Hook Up the Carb Sync Tool Correctly
Connect the vacuum gauges or manometer hoses to the correct intake vacuum ports. On some bikes, one carburetor serves as the fixed or master carb, and the others are adjusted to match it. Your service manual will tell you which carb is the reference point and what order to follow.
If your tool requires adapters, install the correct size. Make sure every hose fits tightly and there are no leaks. A loose line can create false readings, which is a fun way to waste 40 minutes and learn nothing.
Step 5: Set Up Cooling and Ventilation
Point a fan at the engine before you restart it. Carb syncing usually takes place at idle or just above idle, with the bike standing still, which means airflow over the engine is basically nonexistent. That is great for overheating and terrible for your afternoon.
Work in a well-ventilated area. Exhaust fumes build up quickly, and no tune-up has ever improved because the mechanic got dizzy.
Step 6: Start the Engine and Check Your Baseline Readings
Restart the bike and let it settle at the correct idle speed. Watch the gauges or fluid columns. You are looking for differences in vacuum between cylinders. On a four-cylinder bike, the goal is not drama; it is harmony. The readings should be close and stable, not bouncing around like popcorn.
A little flutter can be normal, especially on some engines. Severe bouncing may suggest the need for restrictors, dampers, or better hose routing. It can also point to deeper engine or carb issues.
Step 7: Adjust the Sync Screws in Tiny Increments
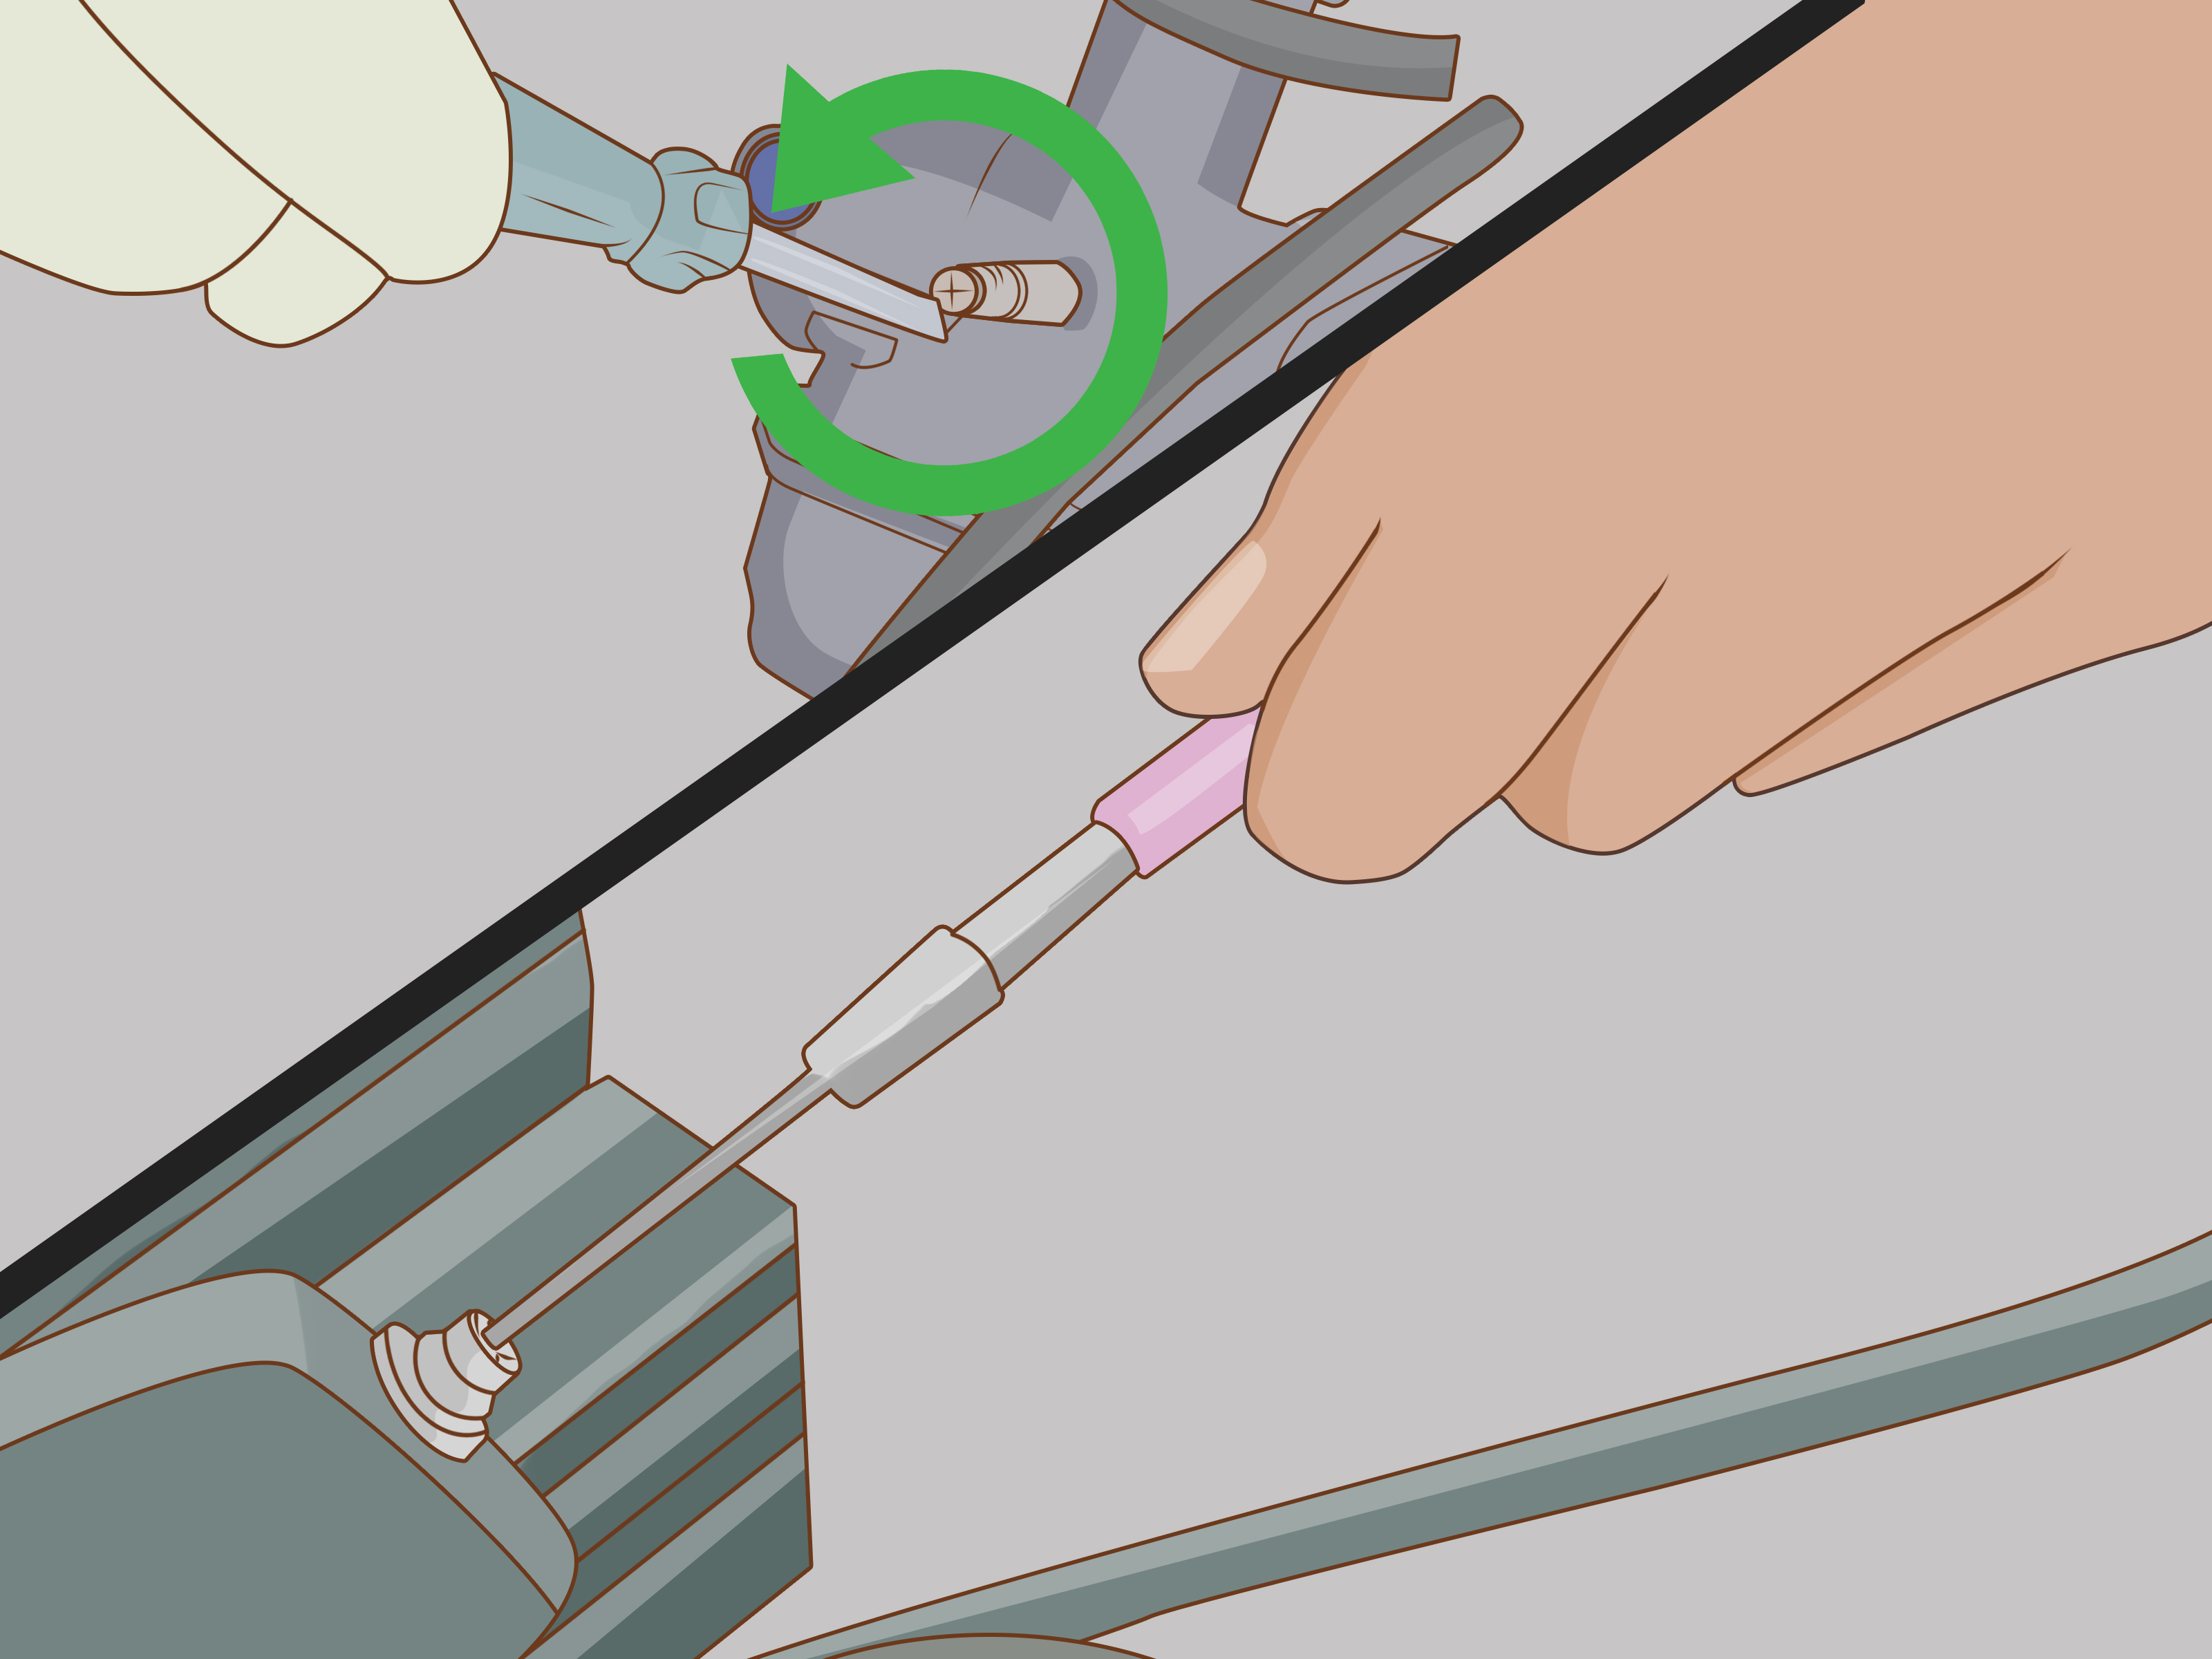
Now for the actual synchronization. Turn the carb sync screws in very small increments, usually no more than an eighth of a turn at a time. The goal is to match the vacuum reading of the adjustable carburetor to the master carburetor, then work across the bank according to the sequence in your manual.
Small changes matter. Tiny. Microscopic. “Did I even turn that?” tiny. Large adjustments usually overshoot the mark and create a new problem two carbs away. Make an adjustment, wait a moment for the engine to stabilize, then read the tool again.
Step 8: Recheck Idle Speed as You Go
As the carburetors come into balance, the idle speed often changes. That is normal. Reset the idle speed to the manufacturer’s specification whenever needed, then continue synchronizing. If you skip this step, you can end up chasing a moving target and wondering why yesterday you were a confident person.
Think of idle speed as the stage floor. If it keeps rising or falling, everybody standing on it looks crooked.
Step 9: Blip the Throttle, Let It Settle, and Verify the Readings Again
After the gauges are closely matched, gently blip the throttle and let the engine settle back to idle. Then check the readings again. Sometimes the carburetors return slightly out of balance after the linkage moves. If that happens, make another small correction.
This step separates a quick tune from a good tune. You are checking that the balance holds after the system moves through its range instead of looking perfect for one dramatic second.
Step 10: Remove the Tool, Reinstall Everything, and Test Ride
Once the readings are balanced and the idle is correct, shut the engine off. Remove the hoses, reinstall all vacuum caps and lines, and make sure nothing is left unplugged. Refit the tank, side covers, and bodywork carefully.
Then take the motorcycle for a short test ride. Pay attention to idle quality, off-idle pickup, throttle smoothness, and vibration. A properly synchronized carbureted motorcycle should feel calmer, cleaner, and more eager to pull. Not transformed into a superbike, obviously. Let us stay grounded.
Common Carb Sync Mistakes to Avoid
Skipping the Basics
If the valves are out of adjustment, the carbs are dirty, or the intake boots leak, synchronization will not fix the root problem. It may even disguise it just enough to confuse you later.
Using Poorly Matched Gauges
Not every vacuum gauge set tells the truth equally well. If the gauges are inconsistent, your readings can be misleading. A quality manometer or matched set is usually a better long-term investment than buying the cheapest thing with hoses in the box.
Making Big Adjustments
Big turns create big chaos. Carb sync screws are a “sneak up on it” situation, not a “send it” situation.
Ignoring Engine Temperature
A hot engine can overheat quickly while standing still. Use a fan, keep the session efficient, and do not let the bike cook itself for the sake of perfection.
Forgetting Vacuum Caps or Hoses
Reassembly errors are more common than people admit. A missing cap or disconnected line can create a vacuum leak that ruins the tune immediately and makes you blame innocent carburetors.
How Often Should You Synchronize Motorcycle Carburetors?
You do not need to synchronize motorcycle carburetors every weekend for sport. Usually, carb sync is worth doing when:
- You have removed or rebuilt the carburetors
- The bike has developed a rough idle or hanging idle
- Throttle response feels uneven
- You notice increased vibration
- You are finishing a major tune-up
On a healthy bike, synchronization tends to stay stable for a while. On an old bike with aging boots, tired cables, and decades of “creative maintenance,” it may drift more often.
Real-World Experience: What Carb Synchronization Actually Feels Like in the Garage
Here is the part nobody tells you in the glamorous “how-to” summaries: syncing carburetors is usually less like a lightning-bolt moment of mechanical genius and more like a conversation with a stubborn but ultimately reasonable machine. You remove the tank, set up the hoses, restart the engine, stare at the gauges, and discover that one cylinder is being dramatic while the others are trying their best. Then the process becomes surprisingly personal. You make a tiny adjustment, the idle changes, the gauges settle, and suddenly the bike starts sounding less irritated with the world.
One of the most memorable parts of doing a carb sync is how subtle the improvements can seem at first and how obvious they feel once you ride the bike. In the garage, you hear the idle smooth out and think, “Nice, I guess.” But on the road, the transformation becomes clearer. The throttle picks up more cleanly from a stop. The bike feels less buzzy through the bars. Rolling through a parking lot at low speed stops feeling like you are negotiating with four separate opinions. It becomes one engine again instead of a committee meeting.
There is also a psychological side to it. Carb synchronization rewards patience more than force, and that is unusual in a hobby where many jobs involve breaker bars, torque specs, and the occasional muttered insult. With carb sync, impatience almost always makes things worse. If you rush, the readings drift. If you make huge adjustments, the balance moves in the wrong direction. If you panic and start changing multiple screws at once, congratulations: you have invented your own puzzle. Riders who enjoy this job usually are the ones who learn to slow down, breathe, and treat each adjustment like a nudge rather than an attack.
Another real-world truth is that carb syncing teaches you a lot about the overall condition of a motorcycle. Sometimes the process goes smoothly, and that is great. Other times, the gauges refuse to cooperate, the idle hangs, and one cylinder behaves like it did not get the memo. That can be frustrating, but it is also useful. It tells you the bike may have an intake leak, a valve issue, a cable problem, or a carb that needs deeper attention. In that way, synchronization is not just an adjustment procedure; it is a diagnostic window into how evenly the engine is breathing.
And yes, there is a little satisfaction in finishing the job and hearing the engine settle into a smooth, even idle that sounds confident instead of chaotic. It is one of those maintenance wins that feels disproportionately rewarding because the tools look complicated, the setup is fiddly, and the result is genuinely noticeable. You clean up the hoses, reinstall the tank, and suddenly you feel like the sort of person who casually says things like “I just synced the carbs this morning,” which is deeply annoying to everyone who has never done it.
Most of all, the experience reminds you that older carbureted motorcycles respond well to careful attention. They are not always quick to tune, and they definitely do not forgive sloppiness, but they communicate clearly when you get things right. When the carburetors are balanced, the engine tells you. The idle steadies. The vibration softens. The throttle becomes smoother. The whole bike feels more cooperative, like it appreciates the effort. That is part of the charm of carbureted motorcycles: they make you earn the good behavior, but they absolutely pay you back.
Conclusion
Learning how to synchronize motorcycle carburettors is one of those maintenance skills that sounds intimidating until you understand the rhythm of it. Warm engine, proper tools, tiny adjustments, repeated checks, and zero heroics. Done correctly, carb synchronization can improve idle quality, smooth out throttle response, and make an older multi-carb bike feel far more refined.
The secret is respecting the process. Do the pre-checks. Use accurate tools. Follow the service manual. Keep the engine cool. Move slowly. In other words, be methodical instead of dramatic. The motorcycle has enough drama already.