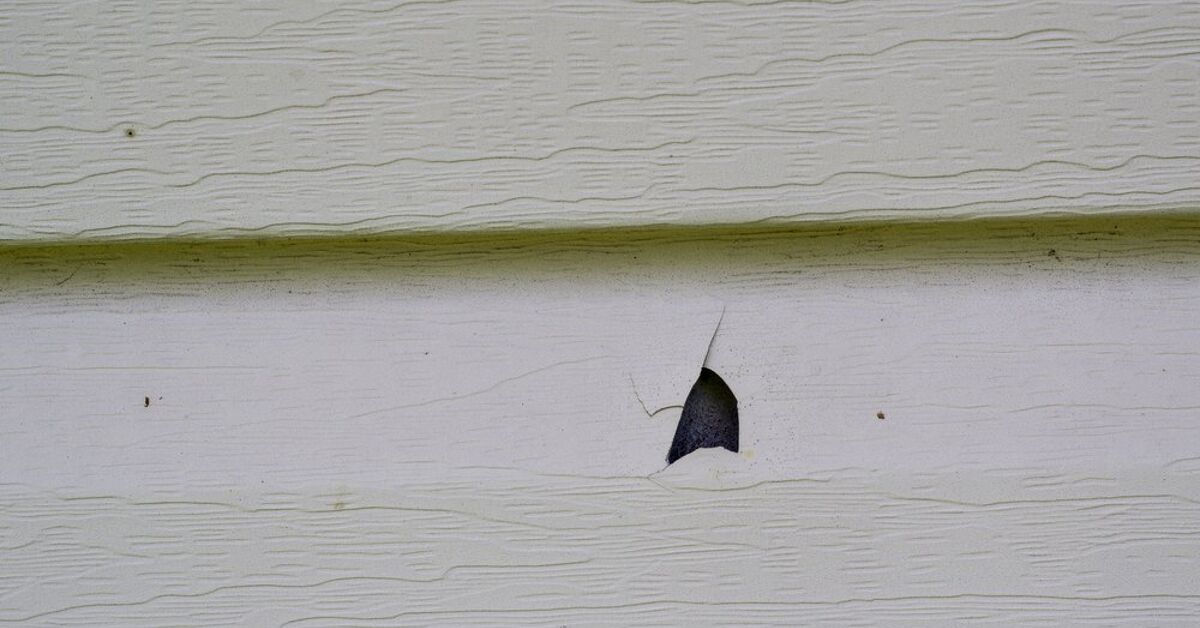
Vinyl siding is the reliable pickup truck of exterior materials: practical, budget-friendly, and not especially dramaticuntil a baseball, hailstone, grill flare-up, or runaway ladder leaves it with a crack big enough to make your curb appeal wince. The good news? Learning how to repair vinyl siding is one of the most approachable home exterior projects for a careful DIYer. You do not need a contractor’s truck, a tool belt with mysterious pockets, or the ability to say “substrate” with a straight face. You do need the right tools, a patient approach, and an understanding that vinyl siding is designed to move.
This guide explains how to fix holes, cracks, loose panels, damaged corners, and warped sections while avoiding the common mistakes that make a small repair look like a bad haircut. Whether you are patching a small puncture or replacing an entire vinyl siding panel, the goal is the same: protect the wall behind the siding, restore the appearance of your home, and make the repair disappear as much as possible.
Why Vinyl Siding Gets Damaged
Vinyl siding is durable, but it is not invincible. It expands in heat, contracts in cold, flexes in wind, and takes plenty of abuse from daily life. Common causes of damage include hail, fallen branches, lawn equipment, wind-blown debris, ladders, outdoor furniture, and accidental impact from sports equipment. Heat can also be a villain. A grill placed too close to the wall, reflected sunlight from energy-efficient windows, or a fire pit with ambitious flames can warp panels quickly.
Age matters too. Older vinyl siding may become brittle, faded, or less flexible. Once the material loses flexibility, small impacts can create cracks instead of harmless dents. That is why prompt vinyl siding repair is important. A tiny hole may seem cosmetic, but it can allow moisture, insects, or wind-driven rain to reach the house wrap and sheathing behind the siding.
Repair or Replace: How to Choose the Right Fix
Before grabbing a utility knife like a weekend warrior, inspect the damage carefully. The best repair method depends on the size, location, and cause of the problem.
Use a Patch for Small Holes and Cracks
Small holes, narrow cracks, and minor punctures can often be patched. This is the fastest solution and works best in low-visibility areas or when the damaged spot is less than a few inches wide. A patch can be made from a scrap piece of matching vinyl siding or from a paintable vinyl siding repair kit.
Replace a Section for Larger Damage
If the panel has a large crack, missing piece, melted section, or deep impact damage, replacing the damaged vinyl siding panel is usually cleaner and more durable. Replacement is also the smarter choice when the panel no longer locks properly into the panel above or below it.
Call a Pro When the Wall Behind It Is Damaged
If you remove siding and find rot, mold, wet sheathing, missing house wrap, damaged flashing, or insect activity, stop and reassess. Vinyl siding is the raincoat, not the body. If the layer underneath is compromised, simply snapping on a new panel is like putting a bandage over a leaky pipe and calling it emotional growth.
Tools and Materials You Will Need
The most important tool for vinyl siding repair is a zip tool, also called a siding removal tool. It unlocks the lower lip of a panel from the panel below it without destroying the siding. Do not try to replace it with a screwdriver unless you enjoy turning a small repair into a larger one.
Basic Tool List
- Vinyl siding zip tool
- Utility knife with sharp blades
- Flat pry bar
- Hammer
- Tape measure
- Speed square or straightedge
- Tin snips or aviation snips
- Caulk gun
- Ladder, if needed
- Work gloves and safety glasses
Materials
- Matching vinyl siding panel or scrap piece
- Exterior-grade vinyl-safe caulk or butyl caulk
- Galvanized, aluminum, or corrosion-resistant siding nails
- Paintable vinyl siding patch kit, if patching
- Mild soap and water for cleaning
- Exterior paint suitable for vinyl, if color matching is needed
Safety First: A Pro-Looking Repair Starts With Not Falling Off a Ladder
Vinyl siding repair is usually simple, but exterior work still has risks. Work on a dry day with mild temperatures if possible. Vinyl becomes more brittle in cold weather and more flexible in extreme heat, so spring and fall are often ideal. If you must work in cold conditions, handle panels gently and avoid forcing locks or cuts.
Use ladder safety basics: place the ladder on firm, level ground, keep three points of contact, and never lean sideways like you are auditioning for a circus act. If the repair is above the first story, near electrical service lines, or on a steep grade, hiring a professional is not admitting defeat. It is choosing to keep your bones in their original arrangement.
How to Patch a Small Hole in Vinyl Siding
Patching is best for small punctures, screw holes, narrow cracks, and minor damage where the panel is still structurally sound. Clean work matters here because the patch should shed water and blend visually with the surrounding siding.
Step 1: Clean the Damaged Area
Wash the area with mild soap and water, then rinse and let it dry completely. Dirt, chalky residue, and mildew can prevent caulk or adhesive from bonding. A soft-bristled brush works well. Avoid harsh abrasives that scratch the siding finish.
Step 2: Trim Loose Edges
Use a sharp utility knife to remove jagged edges around the hole or crack. Do not cut more than necessary. The goal is to create a clean surface, not carve a decorative window into your house.
Step 3: Cut the Patch
Use a scrap piece of matching siding if available. Cut a patch that extends at least one inch beyond the damage on all sides. If the siding has a profile or curve, match the shape so the patch sits flat and follows the existing panel design. For a repair kit, cut the patch material according to the manufacturer’s instructions.
Step 4: Apply Caulk or Adhesive
Apply a bead of exterior-grade vinyl-safe caulk around the damaged area. Do not completely smother the back of the patch with adhesive. You want a strong seal, but you do not want globs squeezing everywhere like an overfilled jelly doughnut.
Step 5: Press and Secure
Press the patch into place and wipe away excess caulk. Painter’s tape can hold the patch while the caulk cures. Allow it to dry according to the product label. If the patch is paintable and the color does not match, use exterior paint approved for vinyl siding and choose a shade close to the existing siding.
How to Replace a Damaged Vinyl Siding Panel
Replacing a full or partial panel is the most professional-looking repair for major cracks, melted siding, broken locking edges, or large holes. The secret is to unlock the siding carefully, remove only what is damaged, and reinstall the new piece without fastening it too tightly.
Step 1: Find a Matching Replacement Panel
Check your garage, basement, attic, or shed for leftover siding from the original installation. Builders often leave a few pieces behind, and those scraps are basically treasure in the world of siding repair. If you do not have extras, remove a small sample or take clear photos and visit a siding supplier. Matching color, profile, texture, and exposure width is important.
Be aware that new siding may look darker or brighter than old siding because existing panels fade over time. For highly visible repairs, one pro trick is to take a matching panel from a less noticeable area, such as behind a shrub or on the back of the house, use that piece on the front, and install the new piece in the hidden spot.
Step 2: Unlock the Panel Above
Slide the curved end of the zip tool under the bottom edge of the panel above the damaged one. Hook the tool onto the locking lip and pull downward while sliding the tool along the panel. This unlocks the upper panel and exposes the nail hem of the damaged panel.
Step 3: Remove the Nails
Use a flat pry bar or hammer claw to remove the nails holding the damaged panel. Work carefully so you do not bend, crack, or gouge nearby siding. If you are replacing only a section, remove enough nails to free the damaged area and allow the replacement piece to slide into position.
Step 4: Cut Out the Damaged Section
Use a utility knife, tin snips, or aviation snips to cut out the damaged section. Cut clean, straight lines. A speed square helps keep the cut neat. If you are removing a full panel, slide it out after the nails are removed.
Step 5: Cut the Replacement Piece
Measure the opening and cut the replacement panel slightly longer than the damaged section you removed, allowing overlap at both ends. A good overlap helps shed water and makes the repair less visible. Match the siding profile so the new panel locks properly into the course below.
Step 6: Install the Replacement Panel
Slide the new piece into place and lock its bottom edge into the panel below. Make sure it sits flat and lines up with the surrounding courses. If it looks crooked now, it will look even more crooked every time you pull into the driveway. Fix alignment before fastening.
Step 7: Nail It Correctly
Vinyl siding must be fastened loosely because it expands and contracts with temperature changes. Place nails in the center of the nailing slots. Drive them straight, not angled, and leave a small gap between the nail head and the siding nail hem. The panel should be able to slide slightly side to side. If you nail vinyl siding tightly, it can buckle, ripple, or warp.
Step 8: Relock the Upper Panel
Use the zip tool to pull the bottom lip of the upper panel down and snap it back into the top lock of the replacement panel. Run your hand along the seam to confirm the panel is fully locked. The finished repair should be secure but not rigid.
How to Fix Loose Vinyl Siding
Loose siding often happens when a panel pops out of its lock, usually from wind, impact, or poor installation. In many cases, the fix is simple. Use the zip tool to unlock the panel above the loose area, then push the loose panel back into its lock. Reconnect the upper panel with the zip tool and check that the seam is engaged across the full length.
If the same area keeps popping loose, inspect the locking edges. They may be cracked, worn, or distorted. Also check for tight nails that prevent movement. A panel that cannot expand and contract properly may buckle or disengage over time.
How to Repair Cracked Corner Trim
Corner trim takes abuse from ladders, snow shovels, bikes, trash bins, and other objects that apparently believe corners are punching bags. Small cracks in vinyl corner posts may be patched with a vinyl repair kit, but larger damage often requires replacing the corner post or covering the damaged area with a matching corner repair piece.
Replacing an entire corner post can be more involved because siding panels from both walls may need to be unlocked or loosened. If the corner is badly broken or water can get behind it, repair it promptly. Corners help direct water away from the wall assembly, and a cracked corner can become a sneaky leak path.
How to Deal With Warped or Melted Vinyl Siding
Warped vinyl cannot be unwarped in a reliable, professional way. Once the siding has melted, stretched, or distorted, replacement is the best fix. Look for the cause before installing a new panel. If the damage came from a grill, move the grill farther away from the house. If sunlight is reflecting from nearby windows, you may need window screens, exterior shades, landscaping changes, or a professional evaluation.
Installing a new panel without solving the heat source is like replacing a snowman in July and hoping for character development. The same problem will likely return.
Color Matching Tips for a Seamless Vinyl Siding Repair
Color matching is often the hardest part of vinyl siding repair. Even if you find the same manufacturer and color name, the siding on your home may have faded from years of sun exposure. Start by searching for leftover panels. If none are available, take a sample to a local siding supplier rather than relying only on photos.
If the match is close but not perfect, place the new piece in a less visible area and move an older matching panel to the front or side where the repair is obvious. Another option is to paint the repaired area with vinyl-safe exterior paint, but painting only one panel can sometimes draw attention. If you plan to paint a larger section, choose a color that is the same shade or lighter than the original siding to reduce heat absorption and warping risk.
Common Mistakes to Avoid
Nailing Too Tightly
This is the classic rookie mistake. Vinyl siding needs room to move. Tight nails can cause ripples, buckling, and cracked panels.
Using the Wrong Caulk
Use exterior-grade, vinyl-compatible caulk. Interior caulk, brittle fillers, or products not designed for exterior movement may fail quickly.
Forcing Cold Vinyl
Cold vinyl can crack when bent or snapped aggressively. Work gently or wait for a warmer day.
Ignoring Water Damage
If the sheathing behind the siding is wet, soft, stained, or moldy, fix the underlying issue before reinstalling siding.
Skipping the Zip Tool
A zip tool is inexpensive and designed for this job. Screwdrivers and pry bars can chew up locking edges and make the repair look rough.
Maintenance After the Repair
Once the repair is complete, clean the surrounding siding so the whole area blends better. A garden hose, mild soap, and a soft-bristled brush are usually enough for regular cleaning. Avoid blasting water upward behind the siding, especially near seams, windows, doors, vents, and electrical penetrations.
Inspect your siding at least once a year. Look for cracks, loose panels, missing caulk around penetrations, warped sections, and signs of moisture. Pay extra attention after hailstorms, high winds, or any event involving children, sports balls, and suspicious silence.
When to Hire a Professional
DIY vinyl siding repair is practical for small holes, cracks, loose panels, and single-panel replacements on accessible walls. Hire a siding contractor if the damage is widespread, located high above the ground, near electrical equipment, or connected to water intrusion. A professional is also a smart choice when you need to replace corner posts, flashing, house wrap, insulation board, or damaged sheathing.
Professional repair costs vary depending on the size of the job, local labor rates, siding availability, height, and whether hidden damage is involved. Small repairs may be affordable, while extensive repairs can climb quickly. The advantage of DIY is cost savings; the advantage of hiring a pro is speed, safety, and a better chance of catching problems hiding behind the siding.
Real-World Experience: What Pro-Looking Vinyl Siding Repair Teaches You
The first thing you learn when repairing vinyl siding is that the wall is more flexible than it looks. From the driveway, siding seems like a solid shell. Up close, it is a layered system of interlocking panels, nailing slots, trim channels, laps, and tiny allowances for movement. Once you understand that, the repair becomes less intimidating. You are not rebuilding the house; you are carefully unlocking, adjusting, and relocking a weather-resistant skin.
One practical lesson is to slow down during removal. Many beginners attack the damaged panel first, but the real work starts with the panel above it. If you unlock the upper course cleanly with a zip tool, the rest of the job becomes easier. If you pry randomly, you can crack the locking edge, and suddenly one damaged panel becomes two. Vinyl siding rewards patience. It does not reward enthusiasm with sharp tools.
Another experience-based tip is to cut less at first. When trimming a replacement piece, it is tempting to cut exactly to your measurement and declare victory. But walls are rarely perfect, panels shift slightly, and overlaps matter. Test fitting is your best friend. Cut the piece a little long when appropriate, check the fit, then trim carefully. A snug, aligned panel looks professional. A short panel with awkward gaps looks like the siding equivalent of pants that shrank in the wash.
Color matching also teaches humility. You may find the exact same brand, style, and color, only to discover the new panel looks like it just returned from a spa vacation while the old siding has spent fifteen summers facing west. That is normal. Sun exposure changes vinyl over time. The best-looking repairs often come from moving an older panel from a hidden area to the visible repair spot and placing the new panel where no one will notice. This extra step takes more time, but it can make the difference between “nice repair” and “why is that one piece glowing?”
Temperature matters more than many homeowners expect. On a cold day, vinyl siding can feel stiff and unforgiving. On a hot day, it can feel almost too flexible. Mild weather gives you the best balance. If you have to repair siding in winter, warm the replacement piece indoors before cutting and handle it gently outside. If you are working in summer, avoid leaving panels in direct sun until you are ready to install them.
The most important pro habit is checking the cause of the damage. A cracked panel from a baseball is simple. A warped panel near a grill is a warning. A loose panel that keeps popping out may point to tight nails or poor installation. A hole with soft sheathing behind it is no longer just siding repair; it is moisture repair. Great repairs do not only cover damage. They solve the reason the damage happened.
Finally, the best vinyl siding repairs are boring in the best possible way. They do not call attention to themselves. They shed water, allow movement, match the surrounding profile, and blend into the wall. When you finish and no one notices the repair, congratulationsyou have achieved the highest form of siding glory: invisibility.
Conclusion
Repairing vinyl siding like a pro comes down to three ideas: choose the right repair method, respect vinyl’s need to expand and contract, and take your time with matching and alignment. Small holes can often be patched, while larger cracks, melted areas, and broken panels should usually be replaced. A zip tool, sharp blade, corrosion-resistant nails, and vinyl-safe caulk will handle most basic repairs.
The real professional touch is not speed. It is restraint. Do not over-nail. Do not force brittle panels. Do not ignore water damage. Do not assume a close color match will be invisible in full sunlight. With careful inspection and a methodical approach, you can restore your home’s exterior, protect the wall behind it, and save money without making your siding look like it lost an argument with a toolbox.
Note: This article is for general DIY guidance. For structural damage, active leaks, electrical hazards, second-story repairs, or extensive siding failure, consult a qualified siding professional.