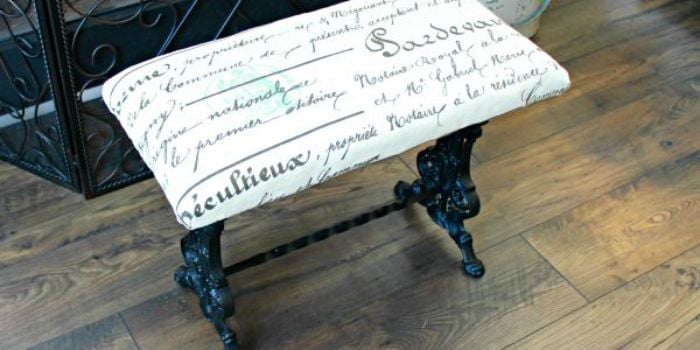
Note: This guide is written for a sturdy thrifted iron or wrought-iron-style bench that is safe to sit on after inspection. Always follow the instructions on your paint, primer, rust remover, and sealant labels, and use protective gear when sanding or spraying.
Introduction: From “Yikes” to “Yes, Please”
A thrifted iron bench is one of those secondhand treasures that can look either charmingly vintage or like it lost a wrestling match with the weather. The good news? Rust, chipped paint, faded color, and mystery garden grime do not automatically mean the bench belongs in the “nope” pile. With the right prep, a smart paint choice, and a little patience, you can turn a sad metal seat into a patio, porch, entryway, or garden statement piece.
This project is especially satisfying because iron benches usually have strong bones. Many older metal benches were built to last, and their curves, scrollwork, and weighty frames often have more personality than brand-new outdoor furniture. A makeover lets you keep that character while giving the bench a cleaner, safer, more weather-resistant finish. In other words, you are not just painting a bench; you are rescuing a little piece of outdoor furniture drama and giving it a fresh season two.
In this step-by-step guide, you will learn how to inspect a thrifted iron bench, remove rust, clean the surface, prime properly, choose paint, apply smooth coats, and protect the final finish. You will also find practical design ideas, common mistakes to avoid, and real-world experience notes from the kind of project where the bench looks worse before it looks fabulous. That is normal. DIY makeovers are basically glow-ups with sandpaper.
Why a Thrifted Iron Bench Is Worth Saving
Before you start scrubbing and painting, it helps to know why this project is worth your weekend. A thrifted iron bench can be affordable, durable, and visually unique. Unlike lightweight plastic seating, iron has a grounded look that works beautifully in cottage gardens, farmhouse porches, modern patios, and traditional front yards. Even when the paint is tired, the shape may still be excellent.
Iron furniture is also a great candidate for refinishing because metal can usually be cleaned, sanded, primed, and repainted without losing its structure. Rust is the main enemy, but surface rust is manageable when handled early. If the bench is structurally sound, a makeover can extend its life and save it from the landfill. Your wallet gets a break, your outdoor space gets a new focal point, and the bench gets to stop looking like a haunted garden prop.
Step 1: Inspect the Bench Before You Buy or Begin
Not every thrifted iron bench is a good project. Some are charming fixer-uppers; others are one dramatic sit away from becoming scrap metal. Before you spend time or money, inspect the frame carefully.
Check for structural damage
Look at the legs, seat supports, arms, backrest, welds, and connection points. A little surface rust is expected. Deep rust holes, cracked welds, loose joints, or badly bent legs are bigger problems. Sit gently on the bench only if it appears stable. If it wobbles like a nervous flamingo, check whether the issue is loose hardware or actual frame damage.
Look for missing hardware
Many iron benches have bolts, screws, brackets, or wooden slats attached to the metal frame. Missing hardware can often be replaced, but take photos before disassembly so you know how everything fits together later. Future-you will thank present-you. Future-you does not enjoy guessing where twelve almost-identical bolts belong.
Be cautious with old paint
If the bench is very old or has multiple layers of flaking paint, treat it carefully. Older painted items may contain lead-based paint. Avoid aggressive dry sanding or grinding unknown old coatings. If you suspect lead paint, use a lead test kit, choose safer containment methods, or ask a professional for help. A pretty bench is not worth creating unsafe dust.
Step 2: Gather the Right Supplies
A smooth thrifted iron bench makeover starts with having the right tools ready before your hands are covered in rust dust and regret. You do not need a professional workshop, but you do need basic prep and safety supplies.
Recommended supplies
- Drop cloth or cardboard
- Work gloves
- Safety glasses
- Dust mask or respirator suitable for sanding and painting
- Wire brush
- Paint scraper
- Sandpaper in coarse, medium, and fine grits
- Sanding sponge for curves and scrollwork
- Bucket of warm soapy water
- Clean rags or microfiber cloths
- Degreaser or mild cleaner
- Rust remover or rust converter, if needed
- Rust-inhibiting metal primer
- Outdoor metal paint or enamel spray paint
- Clear outdoor sealer, optional but helpful
- Replacement bolts, screws, or washers, if needed
For a bench with ornate details, spray paint is often easier than brushing because it reaches curves, spindles, and decorative scrolls. For a bench with broad flat surfaces, brush-on or roll-on direct-to-metal paint can also work well. The best choice depends on the design, your workspace, and the finish you want.
Step 3: Set Up a Safe Work Area
Work outdoors or in a very well-ventilated area. Place the bench on a drop cloth, cardboard, or plastic sheeting to catch paint chips, sanding dust, primer, and overspray. Avoid painting on windy days unless you want your fresh finish to include bonus leaves, dust, and one confused insect permanently preserved like patio furniture amber.
Choose mild weather if possible. Extreme heat, cold, humidity, direct sun, and strong wind can affect how paint dries and adheres. A dry, calm day is ideal. Keep children and pets away from the work zone, especially during sanding, priming, and spraying.
Step 4: Clean the Bench Thoroughly
Cleaning is not glamorous, but it is one of the most important parts of refinishing metal furniture. Paint does not bond well to dirt, grease, loose rust, pollen, cobwebs, or whatever mysterious sticky substance has been living on that thrift-store bench since 2009.
Start by brushing off loose debris. Wash the bench with warm water and mild dish soap or a gentle degreaser. Use a sponge or soft brush to reach corners and decorative details. Rinse well and let the bench dry completely. Moisture trapped under primer can encourage rust to return, so do not rush this step.
Step 5: Remove Loose Paint and Rust
Once the bench is clean and dry, remove loose paint, flaking coating, and rust. Use a wire brush, scraper, or sanding sponge. Focus on areas where paint is lifting or rust is rough and powdery. The goal is not always to strip the entire bench to bare metal. In many cases, you only need to remove unstable material and smooth the surface so primer can grip.
When to sand to bare metal
Sand down to bare metal where rust is active, bubbling, or spreading under the old paint. Coarse sandpaper can help with stubborn rust, while medium and fine grits smooth the transition between old paint and exposed metal. For curved arms or decorative ironwork, a sanding sponge is easier to control than flat sandpaper.
When to use rust converter
If the bench has tight scrollwork or lightly rusted areas that are hard to sand perfectly, a rust converter can help stabilize remaining rust before priming. Rust converters are not magic potions, despite sounding like something from a wizard hardware aisle. They work best after loose rust is removed and the surface is cleaned according to the product label.
Step 6: Wipe Away Dust and Let the Bench Dry
After sanding, wipe every surface with a damp rag or tack cloth to remove dust. Pay special attention to corners, seams, and decorative joints where sanding residue hides like it owes rent. Let the bench dry fully before primer. If dust remains, your paint may look gritty or peel earlier than expected.
This is also the moment to inspect your progress. Run your hand lightly over the surface while wearing gloves. It should feel mostly smooth, not flaky or rough. A few small imperfections are fine, especially on a vintage iron bench. The goal is a refreshed finish, not a laboratory-grade spaceship panel.
Step 7: Prime With a Rust-Inhibiting Metal Primer
Primer is the bridge between old metal and new paint. For outdoor iron furniture, choose a rust-inhibiting primer made for metal. Primer helps improve adhesion, seals bare spots, and slows future corrosion. Skipping primer may save a few minutes today and cost you a peeling paint job later. That is not a bargain; that is DIY revenge.
If using spray primer, shake the can thoroughly. Hold it about 8 to 12 inches from the bench, depending on the product instructions, and spray in light, even passes. Slightly overlap each pass. Start with the underside and hard-to-reach areas, then move to visible surfaces. Multiple thin coats are better than one heavy coat because heavy coats can drip, bubble, or dry unevenly.
Allow the primer to dry for the recommended time. Dry-to-touch and ready-to-recoat times vary by product, weather, and humidity. Read the label and respect the recoat window. Paint cans are not just tiny metal novels; the instructions matter.
Step 8: Choose the Best Paint Color and Finish
Color changes everything. A black thrifted iron bench feels classic and formal. White looks cottage-style and bright. Sage green blends beautifully into a garden. Navy blue feels crisp and coastal. Terracotta, mustard, or deep red can turn the bench into a cheerful statement piece.
Best paint types for an iron bench
Choose paint labeled for metal and outdoor use. Rust-preventive enamel, direct-to-metal paint, or outdoor spray paint designed for metal furniture are common options. A satin finish hides minor flaws better than high gloss, while gloss can be easier to wipe clean. Matte finishes look stylish but may show dust and scuffs sooner in outdoor spaces.
Design tip: match the setting
Think about where the bench will live. For a shady garden corner, a light color can brighten the area. For a front porch, black or charcoal may coordinate with railings and hardware. For a playful backyard, a bold color can make the bench feel intentional instead of merely “rescued from a garage sale at 7 a.m.”
Step 9: Paint in Light, Even Coats
Spray or brush the paint in thin layers. If spraying, keep the can moving before, during, and after each pass to avoid heavy spots. Start with the underside, legs, and back corners. Then turn the bench or adjust your angle to reach every side. Iron benches often have more hidden surfaces than expected, especially if they include scrollwork.
Do not try to achieve full coverage in one coat. The first coat may look uneven, and that is fine. A light first coat gives later coats something to grip. Let each coat dry according to the product label before applying the next. Two to three light coats usually create a more durable and attractive finish than one thick coat.
Step 10: Seal and Cure the Finish
A clear outdoor sealer is optional, but it can add protection, especially if the bench will sit in sun, rain, or heavy use. Use a clear coat compatible with your paint. Some outdoor metal paints already include strong protective properties, so always check the label before layering products.
After painting, allow the bench to cure before regular use. Paint may feel dry quickly but still be soft underneath. If you sit on it too soon, move cushions around, or drag it across a patio, you may leave marks in the finish. Give the paint time to harden fully. Patience is the secret ingredient that never appears in the supply list but somehow controls the whole project.
Step 11: Add Comfort and Style
Once the bench has cured, add finishing touches. Outdoor cushions can soften the seat and introduce pattern. A lumbar pillow adds comfort without hiding too much of the ironwork. For a garden bench, consider placing it near potted plants, lanterns, gravel paths, or climbing vines. For a porch bench, coordinate it with a doormat, planters, or house numbers.
If the bench has wood slats, you can refinish or replace them. Sand the wood, apply exterior stain or paint, and seal it for outdoor use. Mixing a freshly painted iron frame with warm wood slats creates a timeless look. Just make sure the wood is fully dry before reinstalling it.
Common Mistakes to Avoid
Painting over loose rust
Paint cannot rescue unstable rust. It may cover the problem temporarily, but the rust will continue working underneath. Remove loose corrosion first, then prime properly.
Skipping cleaning
Even the best paint struggles on dirty metal. Clean before sanding and wipe again after sanding. Think of it as giving the bench a shower before its makeover montage.
Applying paint too thickly
Thick coats cause drips, slow drying, and uneven texture. Light coats look better and last longer.
Ignoring the weather
Humidity, wind, rain, and blazing direct sun can ruin an otherwise careful paint job. Choose your painting day wisely.
Using indoor paint outdoors
Indoor paint is not built for rain, UV exposure, and temperature changes. Use exterior metal paint for a bench that will live outside.
Maintenance: Keep the Bench Looking Fresh
After your thrifted iron bench makeover, maintenance is simple. Wipe it down occasionally with mild soap and water. Touch up chips quickly before moisture reaches bare metal. During harsh weather, move the bench to a covered area or use a breathable furniture cover. Avoid leaving wet cushions on the seat for long periods because trapped moisture can invite rust.
Inspect the bench at the start and end of each outdoor season. Look for scratches, chips, and tiny rust spots. Small touch-ups take minutes; major rust repairs take weekends. The earlier you catch problems, the easier they are to fix.
Budget-Friendly Makeover Ideas
A thrifted iron bench makeover does not need to be expensive. If your budget is tight, spend money where it matters most: rust treatment, primer, and outdoor paint. Decorative extras can be simple. A washable cushion, a pair of outdoor pillows, or a nearby planter can make the bench feel styled without turning the project into a financial event.
For a high-end look, choose one strong color and keep accessories restrained. A matte black bench with cream cushions looks elegant. A deep green bench surrounded by terracotta pots feels collected and garden-inspired. A bright yellow bench can make a small patio feel sunny even when the weather is being emotionally complicated.
Real-World Experience Notes: What This Project Teaches You
The first thing you learn while making over a thrifted iron bench is that the bench has more sides than you thought. Front, back, underside, inside curves, leg bottoms, arm joints, decorative swirlssuddenly you are painting geometry. This is why setting the bench on blocks, sawhorses, or sturdy cardboard risers can make the job easier. Raising it slightly helps you reach the feet and lower rails without performing advanced yoga in the driveway.
The second lesson is that prep takes longer than painting. Many beginners imagine the exciting part is choosing the color, shaking the spray can, and watching the old bench transform. That part is fun, but the real success comes from cleaning, scraping, sanding, dusting, drying, and priming. If the prep feels boring, that usually means you are doing it correctly. A rushed prep job is the reason many outdoor furniture makeovers start peeling before they have even received their first compliment.
Another experience worth mentioning is that rust can be sneaky. A bench may look only lightly rusty from the front, then reveal heavier corrosion underneath the seat or around the feet. These areas collect moisture and dirt, so they need extra attention. Flip the bench carefully or work around it from multiple angles. If you only paint what you can see while standing up, the hidden parts may become the first places where rust returns.
Color choice also feels different in real life than it does on a paint cap. A color that looks calm in the store may appear much brighter in full sun. Black can look sleek but may show dust and pollen. White can look beautiful but may need more cleaning. Green, bronze, charcoal, and navy are forgiving choices for outdoor iron benches because they work with plants, stone, brick, and wood. If you are nervous, test the color on cardboard and place it near the bench’s future location before committing.
One practical trick is to begin painting on the least visible area. The underside is a great practice zone. You can learn how fast the paint sprays, how close to hold the can, and how easily drips form before you move to the seat back or arms. By the time you reach the most visible areas, your hand will be steadier. It is the DIY equivalent of stretching before a workout, except the workout smells like enamel.
You may also discover that perfection is not necessary. A thrifted iron bench often looks best when it keeps a little character. Tiny surface texture, small age marks, or subtle irregularities can make the finished piece feel authentic instead of factory-flat. The goal is not to erase its history completely. The goal is to make it clean, strong, comfortable, and attractive enough that guests ask where you bought itand you get to casually say, “Oh, I made it over,” as if you are not internally doing a victory parade.
Finally, the most satisfying part comes after the paint cures and the bench takes its place outside. Add a cushion, set a plant nearby, and suddenly the whole area feels more intentional. A forgotten thrift-store find becomes a useful seat, a design feature, and a small reminder that good style does not always arrive brand-new in a box. Sometimes it arrives rusty, dusty, slightly wobbly, and deeply in need of a weekend intervention.
Conclusion: A Thrifted Iron Bench Can Become the Star of Your Outdoor Space
Making over a thrifted iron bench is one of the most rewarding outdoor furniture projects because the transformation can be dramatic without being overly complicated. The key is to respect the process: inspect the bench, clean it well, remove loose rust and paint, prime with a rust-inhibiting metal primer, apply outdoor metal paint in thin coats, and let the finish cure before use.
With smart prep and a little creativity, an old iron bench can become a polished garden seat, a welcoming porch accent, or a colorful patio centerpiece. It is budget-friendly, eco-conscious, and wonderfully personal. Plus, every time someone compliments it, you get the quiet satisfaction of knowing you saw potential where everyone else saw rust. That is not just a furniture makeover. That is thrift-store magic with a wire brush.