Keys have a mysterious talent for disappearing exactly when you are already late. They hide under mail, migrate into yesterday’s jacket, or quietly settle between sofa cushions like tiny metal vacationers. A wall-mounted key holder solves that daily scavenger hunt, and you do not need an expensive woodworking setup to make one.
In this cardboard DIY project, you will create a decorative wall key holder using recycled corrugated cardboard, craft paper, paint, simple hardware, and a hidden reinforcement strip. The finished organizer can look like a small house, a boho arch, a cloud, a botanical plaque, or nearly any shape that matches your home décor.
The project combines two useful entryway ideas: keeping grab-and-go items in one designated location and using vertical wall space when a foyer is small or nonexistent. Both strategies are commonly recommended for compact entryway organization.
Research note: This guide synthesizes practical craft and organization guidance from Michaels, Elmer’s, 3M Command, X-ACTO, Fiskars, Cricut, Plaid Crafts, HGTV, Better Homes & Gardens, Martha Stewart, Apartment Therapy, The Spruce, Real Simple, The Home Depot, and Lowe’s.
Project Overview
- Difficulty: Beginner to intermediate
- Working time: About 2 to 3 hours
- Drying time: Several additional hours
- Estimated cost: Approximately $8 to $20, depending on the hardware and decorations
- Recommended size: About 12 inches wide by 8 inches tall
- Best use: Lightweight house keys, car keys, small lanyards, and pet tags
Cardboard is excellent for the decorative body because it is inexpensive, easy to shape, and readily available. It is not, however, a miniature steel beam. The secret to making this project functional is placing a slim wooden craft strip behind the row of hooks. The cardboard provides the style; the hidden strip handles the pulling force.
Materials and Tools You Will Need
Main Materials
- Three or four flat pieces of corrugated cardboard
- One wooden paint stirrer, wide craft stick, or thin strip of scrap wood
- Three to five small screw-in cup hooks
- White craft glue or PVA glue
- Hot glue and a glue gun for adult use
- Kraft paper, scrapbook paper, fabric, or thin wrapping paper
- Acrylic paint in your preferred colors
- Clear decoupage medium or water-based craft sealer
- Twine, ribbon, wooden letters, beads, or other decorations
- Two metal eyelets, grommets, or reinforced hanging loops
- Wall hooks, screws, anchors, or another mounting system suitable for your wall
Tools
- Pencil and eraser
- Metal ruler
- Scissors
- Sharp craft knife
- Self-healing cutting mat
- Paintbrushes or foam brushes
- Awl, nail, or hole punch
- Binder clips or clothespins
- Heavy books for pressing the cardboard flat
Recycled cereal boxes and packaging cardboard can also supply decorative layers, while corrugated shipping boxes provide the thickness needed for the main structure. Craft glues and glue sticks are commonly formulated to bond cardboard, and decoupage mediums can be used on cardboard when decorative paper is added.
Choose a Key Holder Design
Before cutting anything, decide how you want the finished wall decoration to look. A simple rectangle is the easiest choice, but cardboard is cooperative enough to become something more interesting.
Easy Shape Ideas
- House: Add a peaked roof and paint “HOME” above the hooks.
- Boho arch: Use rounded corners, neutral paint, and thin rainbow lines.
- Cloud: Paint it white or pale blue and hang small raindrop ornaments below.
- Botanical plaque: Cover the front with floral paper or painted leaves.
- Family monogram: Place a large initial in the center with hooks underneath.
- City skyline: Cut a simple roofline silhouette across the top edge.
Keep narrow projections and intricate details to a minimum. A cardboard cactus with seventeen tiny spikes might look impressive on paper, but cutting it may cause you to reconsider every decision that led to craft night.
Wall decorations made from recycled cardboard can be both inexpensive and visually distinctive, while a coordinated hook design helps an entryway function as part of the décor rather than looking like an afterthought.
How to Make a Cardboard Key Holder Wall Decoration
Step 1: Select and Prepare the Cardboard
Choose clean, dry corrugated cardboard without oily stains, moisture damage, deep creases, or crushed sections. Shipping boxes are usually stronger than thin food packaging, although cereal-box cardboard is useful for covering rough surfaces.
Cut three or four rectangles slightly larger than your final design. For a finished holder measuring 12 by 8 inches, begin with pieces measuring about 13 by 9 inches. The excess gives you room to trim all the layers together later.
Look at the direction of the corrugated channels. Rotate every second layer 90 degrees before gluing. Alternating the direction of the flutes helps the laminated panel resist bending in more than one direction.
Step 2: Laminate the Cardboard Layers
Spread a thin, even coat of white craft glue over the first sheet. Avoid large puddles, which can soak the paper facing and create waves. Position the second layer on top, rotate its corrugation direction, and press it firmly into place.
Repeat until you have three or four layers. Place wax paper or scrap plastic above and below the stack so stray glue does not attach your project permanently to the table. Add a flat board or several heavy books and leave the panel pressed until the glue is dry.
Thin glue layers and firm, even pressure produce a flatter panel than one heroic blob of adhesive in the middle. Binder clips can also help hold smaller laminated pieces together while the glue sets.
Step 3: Add the Hidden Hook Reinforcement
Mark a horizontal line about 1½ to 2 inches above the bottom edge. This is where the key hooks will be installed.
On the back of the laminated panel, position a wooden paint stirrer or wide craft stick directly behind that line. The strip should extend behind all the planned hooks. Attach it with strong craft glue or hot glue, then cover it with an additional rectangle of cardboard.
This reinforcement is essential. Without it, repeated use can crush the corrugation or enlarge the hook holes. The wood strip gives the cup-hook threads something solid to grip while remaining hidden inside the cardboard construction.
Step 4: Trace and Cut the Decorative Shape
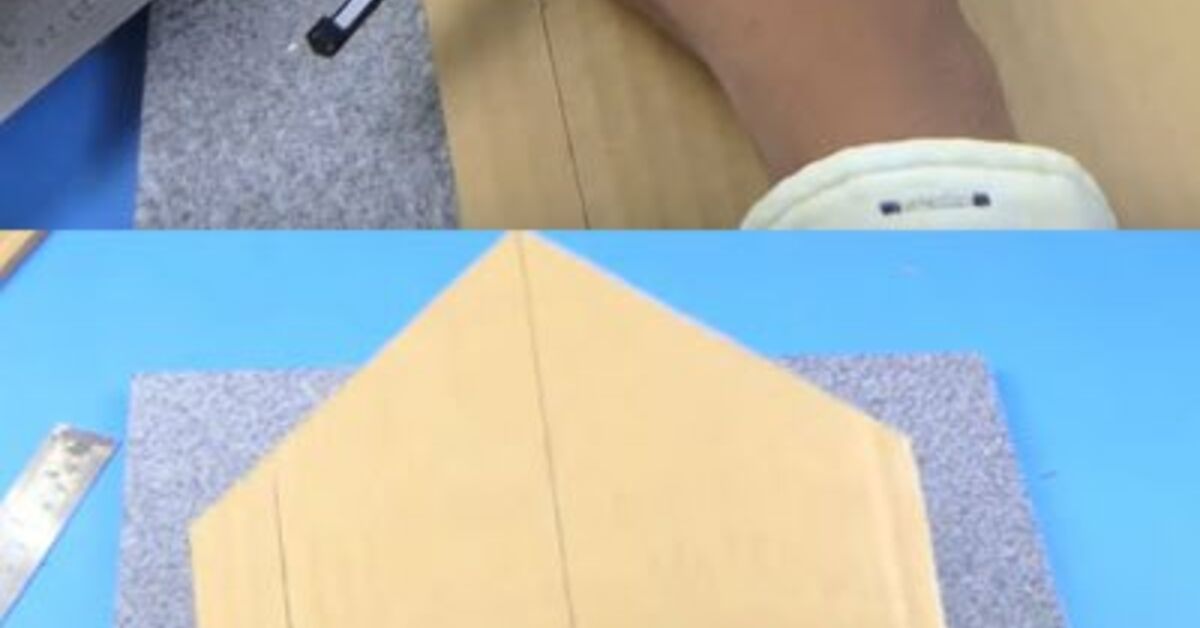
Draw the shape directly onto the front or create a paper template first. Check that the design is symmetrical before cutting. It is much easier to move a pencil line than to negotiate with a missing chunk of cardboard.
Place the panel on a cutting mat. Hold a metal ruler along straight lines and make several light passes with a sharp craft knife. Do not try to force the blade through every layer in one dramatic stroke. For curves, rotate the cardboard gradually instead of twisting your wrist into an uncomfortable angle.
A sharp blade generally produces cleaner edges than a dull one, which can drag, tear, and require excessive pressure. X-ACTO notes that blades used on cardboard may need frequent replacement, while Cricut distinguishes between flat and corrugated cardboard when selecting cutting settings. Children should use age-appropriate scissors or cardboard-cutting tools under adult supervision.
Step 5: Finish the Exposed Edges
Freshly cut corrugated edges can look rough, especially when the project is viewed from the side. Cut strips of kraft paper about 1 inch wide. Brush glue onto each strip and wrap it over the exposed edges like binding tape.
Make small snips along the paper when wrapping curves so it can overlap neatly. Smooth each strip with your fingers or a craft stick. After drying, the edges will look cleaner and the layers will be less likely to separate.
Step 6: Prime and Decorate the Front
For a painted finish, brush on a thin layer of white acrylic paint or gesso. Allow it to dry before adding color. Two thin coats are usually better than one thick coat because excessive moisture can warp cardboard.
For a patterned finish, cut decorative paper slightly larger than the panel. Apply decoupage medium in a thin layer, position the paper, and smooth outward from the center. A plastic card wrapped in a soft cloth can help remove bubbles without tearing the paper.
You can also combine techniques. Paint the background, add a strip of floral paper, stencil a word, outline the border with jute, and attach wooden letters. Cardboard accepts paper, paint, lightweight fabric, and small decorative elements, but heavy stones and chunky ceramic ornaments should remain on speaking terms with gravity somewhere else.
Step 7: Seal the Surface
Once the decoration is completely dry, apply one or two thin coats of water-based decoupage medium or craft sealer. Sealing helps protect the paper and paint from dirty fingertips and light scuffing.
Do not soak the panel. Apply the finish sparingly, let the first coat dry, and then inspect the surface before adding another. Seal the edges as well, particularly if the key holder will be placed near an exterior door where humidity may change.
Step 8: Install the Key Hooks
Mark evenly spaced hook positions along the reinforced line. Four hooks on a 12-inch board usually provide comfortable spacing. Leave approximately 2 to 2½ inches between them so key rings do not form a tangled metal committee.
Use an awl or small nail to create pilot holes through the front cardboard and into the hidden wooden strip. Twist each cup hook into the wood by hand. Stop when the hook is secure and upright; overtightening can crush the front surface.
Test each hook with one lightweight key ring. If a hook moves or tilts, remove it, add a drop of strong adhesive in the pilot hole, and reinstall it after the adhesive becomes tacky.
Step 9: Add a Wall-Hanging System
The most dependable cardboard-friendly option is a two-point hanging system. Punch holes near the upper corners, reinforce them with extra cardboard patches, and install eyelets or grommets. Hang the holder from two appropriately installed wall hooks or screws. Two mounting points prevent the plaque from swinging whenever someone removes a key.
Adhesive picture-hanging strips may be useful for lightweight decorations, but raw cardboard is not always an approved bonding surface. When using adhesive products, follow the manufacturer’s surface, weight, cleaning, curing, and waiting-time instructions. For example, 3M recommends cleaning compatible wall surfaces with rubbing alcohol and allowing newly painted walls to cure before installation.
Step 10: Mount and Test the Finished Holder
Choose a location near the door but outside the door’s swing path. The holder should be easy for adults in the household to reach without becoming an irresistible toy for very young children.
Mount the empty plaque first. Press gently on different areas to check for movement. Add one key ring, wait, and then add the others gradually. A careful load test is far less exciting than hearing every key in the household crash onto the floor at 2 a.m., but that is exactly the point.
Creative Ways to Customize the Cardboard Key Holder
Add Names or Labels
Assign one hook to each household member using painted initials, small name tags, or different colors. You can also label hooks “HOUSE,” “CAR,” “MAIL,” and “PET” to organize keys by purpose.
Include a Tiny Message Pocket
Fold thin cardboard into a shallow envelope and glue it above the hooks. Use it for appointment cards, outgoing mail, grocery reminders, or the note that says, “The spare key is not under the flowerpot anymore.”
Create a Small Shelf
A narrow folded-cardboard ledge can hold extremely light objects such as a note card or decorative paper flower. Do not use it for phones, wallets, glass containers, or anything you would be unhappy to see falling.
Use Seasonal Decorations
Attach removable paper accents with hook-and-loop dots. Try leaves in fall, snowflakes in winter, flowers in spring, or tiny sunglasses in summer. The base remains in place while the decorations change.
Turn It Into an Entryway Command Center
Pair the holder with a small mirror, wall basket, or pinboard. Entryway guides frequently recommend combining hooks with vertical storage for mail, sunglasses, reminders, and other daily essentials.
Common Problems and Easy Fixes
The Cardboard Warped
Too much wet glue or paint was probably applied to one side. Lightly mist or coat the opposite side, place the panel between clean protective sheets, and press it flat under books. For future coats, use less liquid and allow complete drying between layers.
The Cut Edges Look Fuzzy
Replace the blade and use several shallow passes. Cutting too quickly or forcing a dull blade through thick corrugated material usually tears the paper facing.
The Hooks Are Loose
Check whether the hooks entered the internal wood strip. If not, reposition them. You can also glue another craft stick across the back, drill new pilot holes, and cover the repair with decorative paper.
The Holder Tilts When Keys Are Removed
Use two wall-mounting points instead of one central loop. You can also attach small removable bumpers to the lower corners so the plaque rests evenly against the wall.
The Adhesive Mounting Strips Will Not Stick
Verify that both the wall and the back of the holder are compatible with the chosen product. Dust, textured surfaces, uncured paint, raw paper fibers, humidity, and excessive weight can all interfere with bonding. Switch to reinforced holes and mechanical wall hooks when adhesive mounting is unreliable.
Practical Maker Experience: What a Typical First Build Teaches You
A common first-build experience begins with optimism and one suspiciously soft shipping box. The maker draws a beautiful house shape, cuts one cardboard layer, glues on several hooks, and expects the project to behave like a wooden rack. It looks charming for approximately six minutes. Then the heaviest key ring pulls forward, the cardboard bends, and the lesson becomes clear: decorative cardboard needs structural help.
The most useful improvement is laminating several layers before decorating. Three crossed layers feel dramatically more substantial than one thick-looking sheet. Pressing the glued stack under books also matters more than beginners expect. Without pressure, the layers dry with small gaps, producing a panel that feels hollow and uneven. With pressure, the finished piece behaves more like lightweight board.
Another lesson arrives during cutting. The temptation is to press the craft knife hard enough to finish each edge in one pass. That approach usually creates crushed corners, wandering lines, and language unsuitable for a family craft tutorial. Light repeated passes take longer, but the blade follows the template more accurately. Replacing a dull blade can instantly improve the project, especially around curves and roof peaks.
Decoration introduces its own surprise: cardboard dislikes being flooded. A thick coat of paint can make a perfectly flat panel curl like a potato chip. The better experience comes from using a nearly dry foam brush, applying thin coats, and painting the reverse side lightly if the front begins to pull. Decorative paper is often faster than paint, although it should be smoothed carefully from the center to avoid bubbles.
The hidden wood strip is the detail that turns the project from wall art with ambitions into a usable key holder. During a typical successful build, the maker places the strip before covering and decorating the front. The cup hooks then twist into solid material instead of chewing through corrugated paper. This also makes the hooks easier to align because each one tightens at roughly the same depth.
Spacing deserves attention too. Four hooks may fit mathematically across a small plaque, but keys are wider than hooks. Bulky car fobs, decorative keychains, and lanyards need breathing room. Laying the actual key rings on the unfinished board before drilling prevents crowding. It also reveals whether one hook should be placed slightly lower for a longer keychain.
Mounting is usually the final reality check. One central string may hold the plaque, but the entire piece swings whenever a key is removed. Two upper attachment points feel much more stable. On a rough or textured wall, screws or properly selected wall hooks are generally more predictable than adhesive strips. For rental spaces, a lightweight version with removable mounting products may work, provided every manufacturer instruction and weight limit is followed.
The finished project does not need to look factory-made. Slightly handmade edges, layered paper, brush marks, and imperfect lettering give it character. More importantly, the keys finally have a home. After a few days of hanging them in the same place, the holder becomes part of the household routine rather than just another decoration. That is the best result: less clutter, fewer frantic searches, and one recycled box promoted to management.
Final Thoughts
Learning how to make a key holder wall decoration craft using cardboard is an easy way to combine recycling, organization, and personalized home décor. The project succeeds when you treat cardboard as the decorative structure while reinforcing the hook area with a hidden wooden strip. Build several crossed layers, cut with patience, use thin decorative coatings, space the hooks for real key rings, and select a wall-mounting method appropriate for the finished weight.
Once the basic method is understood, you can adapt the design for nearly any room or decorating style. Make a cheerful house for a family entryway, a minimalist arch for an apartment, or a colorful name plaque for a child’s backpack tags. Your keys may still attempt an occasional escape, but at least they will have an official address.