Making a harness for your fat cat sounds like the setup to a comedy sketch: one determined human, one suspicious loaf of fur, and one measuring tape that has clearly offended the household monarch. But a well-made cat harness can be genuinely useful. For a larger or overweight cat, the right harness can support safe outdoor enrichment, gentle movement, and supervised adventures without putting pressure on the neck.
The key phrase is well-made. A cat harness is not just a tiny dog harness with extra attitude. Cats are flexible, dramatic, and surprisingly skilled at turning into liquid when they want to escape. A fat cat may also have a rounder chest, softer belly, shorter visible neck, and less defined waist, which makes sizing more important than guessing. The goal is not to squeeze your cat into a “cute” outfit. The goal is to create a comfortable, secure, adjustable harness that allows your cat to move, breathe, and look mildly disappointed in your life choices.
This guide explains how to make a DIY cat harness for an overweight or large cat, how to measure correctly, which materials to use, how to test the fit, and how to introduce the harness without turning your living room into a rodeo.
Why a Fat Cat Needs a Different Harness Approach
A larger cat is not simply a regular cat scaled up like a photocopy at 125 percent. Weight changes the way a harness sits on the body. The belly may swing lower, the chest may be wider, and the shoulder area may be harder to define. Some overweight cats also tire faster, move more carefully, or dislike pressure around the ribs.
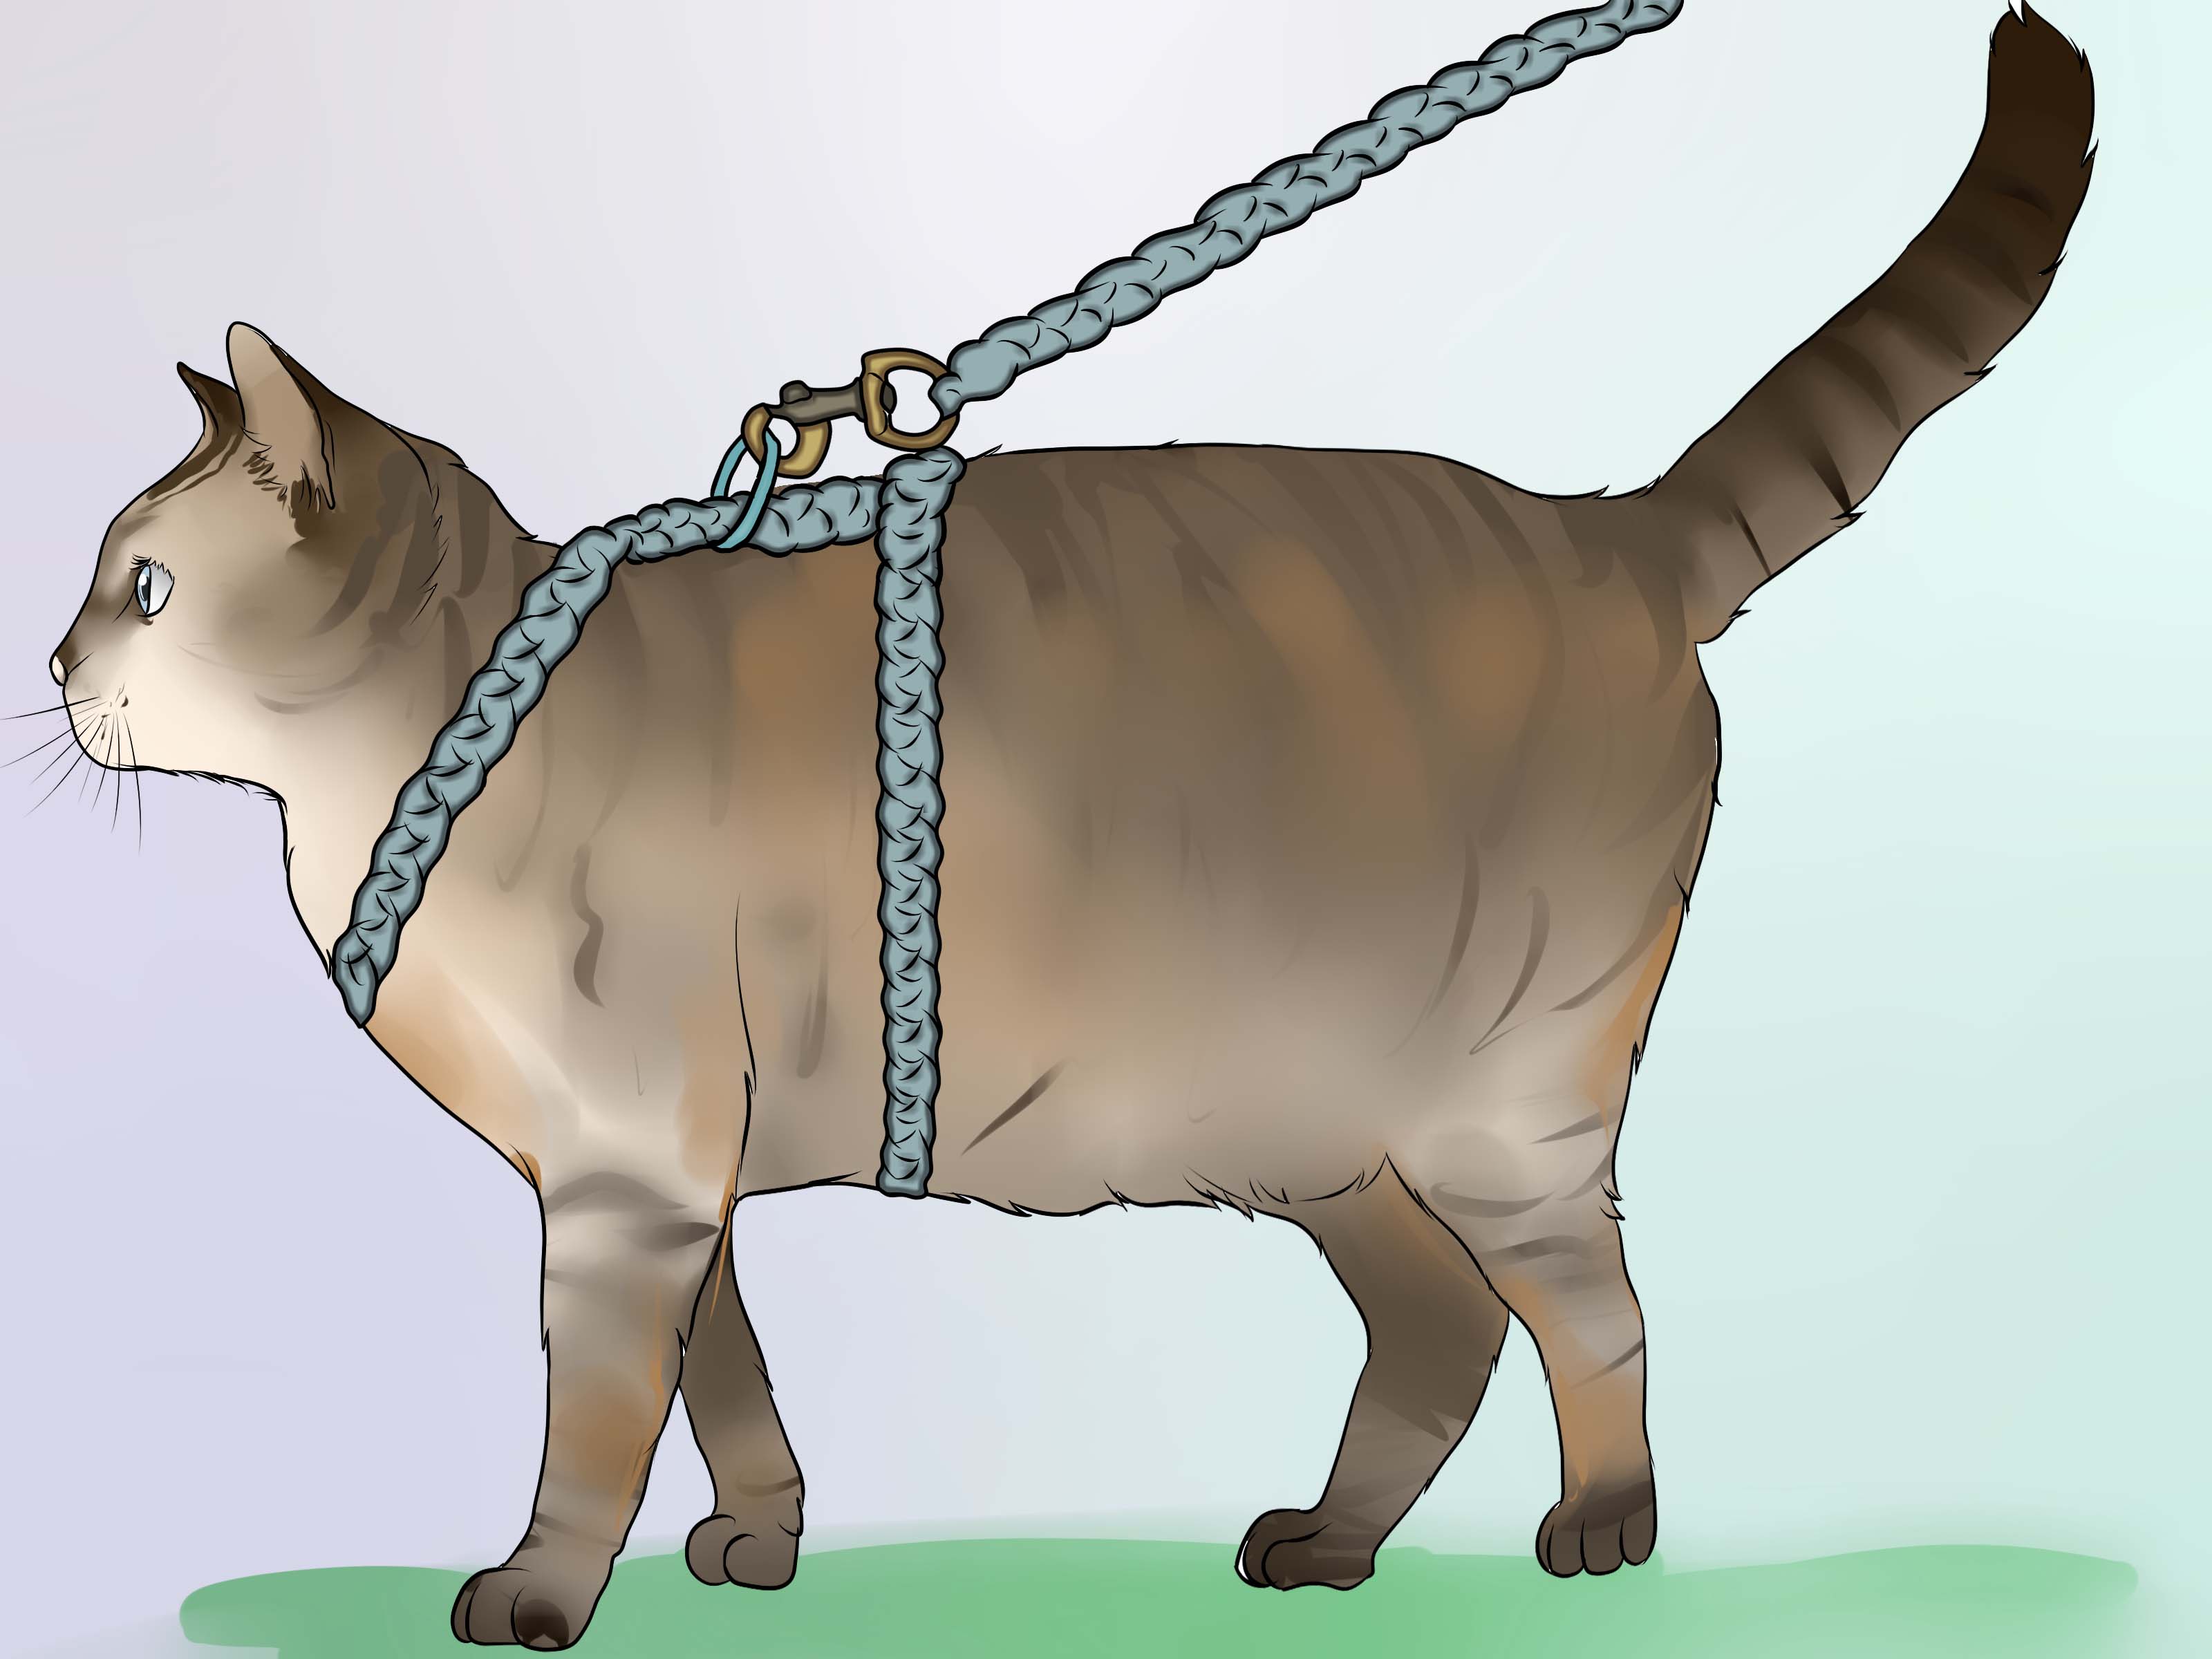
That is why a harness for a fat cat should prioritize three things: wide support, adjustability, and escape resistance. Thin straps can dig into soft tissue, especially if your cat suddenly crouches, backs up, or performs the classic “no bones today” collapse. A vest-style or walking-jacket-style harness usually spreads pressure more evenly across the chest and shoulders. An H-style harness can work for some cats, but for a round-bodied cat, a padded vest design is often easier to fit securely.
Before starting, remember that a harness is not a weight-loss plan by itself. If your cat is overweight, your veterinarian can help create a safe plan for food, activity, and health checks. Cats should never be put on crash diets because rapid weight loss can be dangerous. Think of the harness as one tool for enrichment and gentle movement, not a miracle belt with whiskers.
Best Harness Style for a Fat Cat
For a large or overweight cat, the safest DIY option is usually a soft vest harness with adjustable neck and chest closures. This style looks like a small fabric jacket with a D-ring on the back for leash attachment. It should cover part of the chest and upper back without wrapping tightly around the throat or pressing into the armpits.
Good Design Features
A good DIY fat cat harness should include a wide chest panel, a sturdy back panel, adjustable straps or hook-and-loop closures, reinforced stitching, and a leash ring placed between the shoulder blades. The front should sit low enough to avoid choking but high enough that your cat cannot step out of it. The belly strap should sit behind the front legs, not directly in the armpits.
Designs to Avoid
Avoid attaching a leash to a collar. Cats can slip collars easily, and pressure on the neck is unsafe. Also avoid flimsy figure-eight designs for a heavier cat, especially if the harness is homemade and has not been tested indoors. Thin ribbon-only harnesses may look simple, but they can twist, tighten unevenly, or slide over a round belly.
Materials You Will Need
You do not need a professional sewing studio. You do need materials strong enough to handle a cat who suddenly decides the patio is haunted.
- Soft but sturdy fabric, such as cotton canvas, denim, duck cloth, or quilted cotton
- Soft lining, such as fleece, flannel, or breathable mesh
- One small metal D-ring for leash attachment
- Nylon webbing for reinforcement along the back
- Hook-and-loop fastener or adjustable side-release buckles
- Heavy-duty thread
- Measuring tape
- Paper for making a pattern
- Fabric scissors
- Sewing machine or strong hand-sewing needle
- Clips or pins
- Optional reflective trim for visibility
For chunky cats, choose strength over decoration. Sequins, dangling charms, and tiny bows may be adorable, but your cat does not need to look like a parade float. Keep the harness smooth, lightweight, and snag-free.
How to Measure Your Fat Cat Correctly
Measuring is the most important step. Do it when your cat is relaxed, standing naturally, and preferably distracted by treats. If your cat is lying down like a furry doorstop, the measurements may be too wide or oddly shaped.
Measurement 1: Neck Base
Measure around the lower part of the neck where a harness would sit, not high up like a collar. For many fat cats, the neck blends beautifully into the shoulders, creating what scientists call “the majestic potato silhouette.” Keep the tape snug but not tight.
Measurement 2: Chest Girth
Measure around the widest part of the chest, usually just behind the front legs. This is the most important measurement for an overweight cat. Add about two inches for adjustment and comfort, depending on fabric thickness.
Measurement 3: Back Length
Measure from the base of the neck to a point just behind the front legs. The harness should not run too far down the back. A long harness may shift, bunch, or annoy your cat when they sit.
Measurement 4: Chest Width
Measure across the front of the chest between the front legs. This helps you design a front panel that supports the body without rubbing the legs.
After measuring, write everything down. Do not trust memory. Cat measurements have a mysterious way of vanishing the moment you pick up scissors.
Step-by-Step: How to Make a Harness for Your Fat Cat
Step 1: Create a Paper Pattern
Draw a simple vest shape on paper. The pattern should have a back panel that rests between the shoulders, two side wings that wrap around the chest, and a front chest section that sits below the neck. Think of it as a tiny sleeveless jacket, not a tight tube.
Use your cat’s measurements to size the pattern. Add a seam allowance of about half an inch around the edges. For the chest and neck closures, add extra length so the harness can be adjusted. This matters because fat cats can change shape depending on posture. Standing, sitting, crouching, and loafing are basically four different body types.
Step 2: Test the Pattern With Scrap Fabric
Before cutting your final fabric, make a rough test version from scrap cloth or an old T-shirt. Do not attach a leash yet. Place it gently over your cat’s back and check whether the front panel sits comfortably. Make sure the fabric does not press into the throat, rub behind the front legs, or cover too much of the belly.
If your cat freezes, flops, or walks like a tiny alien in snow boots, do not panic. Many cats act strangely the first time they feel a harness. Keep the first fitting short and positive.
Step 3: Cut the Final Fabric and Lining
Once the pattern looks right, cut one piece from your outer fabric and one matching piece from your lining. The outer fabric gives strength; the lining adds comfort. For an overweight cat, lining is especially helpful because it reduces rubbing across the chest and belly.
If your cat runs warm, choose breathable materials. A heavy fleece harness may be cozy in winter but uncomfortable in warm weather. Your goal is a secure harness, not a wearable oven.
Step 4: Add Reinforcement for the Leash Ring
Cut a short strip of nylon webbing and place it along the center of the back panel. This is where the D-ring will attach. Fold the webbing through the D-ring and stitch it securely to the back panel. Sew a box shape with an “X” through it for strength. This area takes the most pressure if your cat pulls, crouches, or reverses like a furry dump truck.
The D-ring should sit between the shoulder blades, not near the neck and not halfway down the spine. A centered back attachment helps distribute leash pressure more evenly.
Step 5: Sew the Outer Fabric and Lining Together
Place the outer fabric and lining with the right sides facing each other. Sew around the edges, leaving a small opening so you can turn the harness right side out. After turning, press the edges flat and sew a topstitch around the entire harness. This strengthens the shape and gives the harness a cleaner finish.
Step 6: Attach Closures
For the neck and chest closures, use wide hook-and-loop fastener, adjustable buckles, or a combination of both. For a fat cat, adjustability is your best friend. The chest closure should have enough overlap to stay secure but enough range to loosen slightly if your cat gains or loses weight.
If using hook-and-loop fastener, choose a strong, high-quality type and sew it thoroughly. If using buckles, make sure they are not bulky under the body. Hardware should never poke, pinch, or sit directly in the armpit area.
Step 7: Check Every Edge
Run your fingers along every seam, corner, and closure. Look for scratchy edges, loose threads, sharp hardware, or bulky seams. If anything feels uncomfortable to your hand, it will probably feel worse to your cat.
Step 8: Do the Indoor Fit Test
Put the harness on your cat indoors. You should be able to fit one to two fingers under the harness, depending on the design and your cat’s body shape. It should be snug enough that your cat cannot back out of it, but loose enough for comfortable breathing and movement.
Watch your cat walk, sit, turn, and crouch. Check the neck, chest, shoulders, and behind the front legs. If your cat’s movement looks restricted or the harness slides dramatically to one side, adjust the pattern before using it outside.
How to Introduce the Harness Without Drama
Cats are not famous for appreciating sudden costume changes. Introduce the harness gradually. Leave it near your cat’s favorite sleeping spot for a day or two so it smells familiar. Offer treats near it. Let your cat sniff it. If your cat gives it a suspicious side-eye, that still counts as progress.
Next, drape the harness over your cat’s back for a few seconds, reward, and remove it. Later, fasten it loosely for a short indoor session. Gradually increase the time. Add the leash only after your cat can move comfortably in the harness.
When you attach the leash indoors, keep it loose and follow your cat. Do not pull your cat forward like a tiny dog. Cat walking is more like guided wandering. Your cat may sniff one leaf for six minutes and consider that a complete expedition.
Outdoor Safety Tips for Large or Overweight Cats
Start in a quiet, enclosed outdoor space if possible. A fenced yard, calm patio, or secure garden is better than a noisy sidewalk. Avoid loose dogs, traffic, loud children, and busy areas. Keep the first outdoor session short. Five calm minutes are better than thirty chaotic ones.
Make sure your cat is up to date on vaccines and parasite prevention before outdoor adventures. Bring treats, stay close, and never leave your cat tethered alone. Even a secure harness cannot protect a cat from every outdoor risk.
If your cat panics, crouches, pants, or tries to bolt, calmly return indoors. Do not chase. Do not yank the leash. Training should build confidence, not turn the backyard into a feline escape documentary.
Common Mistakes When Making a Harness for a Fat Cat
Making It Too Loose
Many owners loosen the harness because they want it to feel comfortable. Unfortunately, too loose can mean too escapable. A cat can back out of a loose harness faster than you can say, “Wait, where did the cat go?”
Making It Too Tight
A tight harness can restrict breathing, rub the skin, and make your cat hate the entire process. Check the fit every time, especially if your cat is losing weight.
Using Weak Closures
Cheap hook-and-loop fastener, thin ribbon, or poorly sewn D-rings can fail under pressure. Reinforce stress points and test the harness indoors before trusting it outside.
Skipping Training
Even the best DIY cat harness will fail if your cat is terrified of wearing it. Slow training is not optional. It is the difference between “pleasant backyard sniff session” and “emergency search party under the porch.”
How a Harness Can Support a Healthier Lifestyle
A harness can help a fat cat safely experience new smells, sights, and gentle movement. Outdoor sniffing may not look like exercise to humans, but it can encourage standing, walking, turning, balancing, and exploring. Mental stimulation also matters. A bored indoor cat may nap more, beg more, or treat the food bowl like a full-time hobby.
Still, keep expectations realistic. Some cats love harness walks. Some tolerate them. Some believe harnesses are a betrayal written in fabric. If your cat truly hates the harness after patient training, try indoor play, puzzle feeders, climbing furniture, or a secure catio instead.
Cleaning and Maintaining the Harness
Wash the harness regularly, especially if your cat rolls on the ground or explores dusty areas. Hand washing is usually safest for homemade harnesses. Check the D-ring, stitching, closures, and fabric before every walk. Replace the harness if the fabric stretches, the fastener weakens, or your cat’s body size changes significantly.
For overweight cats on a weight-loss plan, remeasure every few weeks. A harness that fit perfectly two months ago may become too loose as your cat slims down. That is a good problem, but still a problem.
Real-Life Experience: What I Learned Making a Harness for a Fat Cat
The first thing I learned is that measuring a fat cat requires patience, snacks, and emotional resilience. My imaginary test subject, let’s call him Biscuit, had the build of a throw pillow and the confidence of a retired king. The measuring tape was not welcome. The paper pattern was not welcome. The fabric was inspected, sat on, and briefly attacked. Progress was slow, but slow turned out to be the secret.
The first version of the harness looked great on the table and terrible on the cat. That is a common DIY trap. Flat fabric does not automatically understand round cat geometry. The chest panel was too narrow, so when Biscuit crouched, it shifted sideways. The belly strap sat too close to the front legs, which made him walk like he had received shocking news. The lesson was simple: a fat cat harness needs more chest coverage and less armpit interference.
The second version used wider fabric, softer lining, and a longer adjustable chest closure. That made a huge difference. Instead of thin pressure points, the vest spread contact across the upper body. Biscuit still performed the traditional harness flop, but after treats appeared, he remembered he had legs. This is another important discovery: many cats do not instantly “walk” in a harness. They reboot first. Give them time.
I also learned that the leash ring placement matters more than expected. When the D-ring sat too far back, the harness shifted when Biscuit turned. Moving it closer to the shoulder blades made the harness feel more balanced. Reinforcing that area with nylon webbing also made the whole design feel safer. A homemade harness should never rely on fabric alone where the leash attaches.
Training worked best in tiny sessions. One minute near the harness. One minute wearing it. Then two minutes. Then walking indoors with the leash dragging lightly. The goal was not to win a speed contest. The goal was to make the harness boring. Boring is excellent in cat training. Exciting usually means someone is bleeding or a lamp has fallen.
The first outdoor trip was not a walk. It was a supervised sniff. Biscuit stood on the patio, smelled the air, judged a bird, and took six heroic steps. That was enough. For a large cat, especially one that is not used to exercise, small wins matter. Over time, those small sessions can become part of a healthier routine, alongside proper food portions, indoor play, and veterinary guidance.
The biggest lesson is that a DIY harness should fit the cat you actually have, not the cat on the package label. Fat cats can be strong, sensitive, stubborn, and surprisingly agile. A good harness respects all of that. It should be secure without being tight, supportive without being bulky, and simple enough that putting it on does not require three adults and a motivational speech.
In the end, making a harness for your fat cat is less about sewing perfection and more about thoughtful design. Measure carefully. Use strong materials. Test indoors. Train slowly. Watch your cat’s body language. And remember: if your cat takes three steps outside and then sits majestically in a sunbeam, that still counts as enrichment. Royalty moves at its own pace.
Conclusion
Learning how to make a harness for your fat cat is a practical project that combines comfort, safety, and a little feline negotiation. The best DIY harness for a large or overweight cat is soft, adjustable, reinforced, and shaped to support the chest without pressing on the throat or rubbing behind the legs. Measure carefully, choose sturdy materials, introduce the harness slowly, and test everything indoors before stepping outside.
A harness can help your cat enjoy safe outdoor enrichment and gentle activity, but it should always be used with patience and supervision. Some cats become confident explorers. Others prefer indoor kingdoms, window watching, and judging squirrels from a climate-controlled throne. Either way, the right approach keeps your cat safer, more comfortable, and slightly less likely to vanish under the couch the moment the harness appears.