Learning how to make a dreamcatcher can be relaxing, creative, and surprisingly satisfyingright up there with untangling a necklace on the first try or finding scissors exactly where you left them. This easy 4-part guide walks you through the process step by step, from gathering materials to weaving the web, adding decorations, and hanging your finished piece with pride.
Before we get crafty, one important note: dreamcatchers have deep cultural roots, especially connected to Ojibwe and other Indigenous traditions. Today, many people make dreamcatcher-inspired crafts for home decor, gifts, or creative learning. The respectful approach is simple: learn the history, acknowledge the culture, avoid treating sacred designs like trendy props, and support Indigenous artists whenever buying authentic pieces.
This tutorial is designed for beginners, teens, parents, teachers, and anyone whose craft drawer contains “mystery string” and at least one bead that escaped its container in 2019. You do not need expensive supplies. You do need patience, gentle tension, and the emotional strength to redo one knot without declaring war on yarn.
What Is a Dreamcatcher?
A dreamcatcher is traditionally made with a circular hoop and a woven web. Many versions include beads, feathers, ribbons, or hanging cords. In common explanations, the web is associated with filtering dreams, while the center opening allows good dreams to pass through. Modern craft versions often focus on the visual design: a balanced hoop, radial webbing, dangling accents, and colors that match a bedroom, nursery, reading nook, or boho wall display.
For a personal craft project, think of your DIY dreamcatcher as a handmade wall hanging inspired by a traditional form. That mindset keeps the project creative without pretending to own a cultural meaning that deserves respect.
Supplies You Need to Make a Dreamcatcher
Here is the beginner-friendly supply list. You can upgrade later, but this version keeps things simple and wallet-friendly.
- Hoop: embroidery hoop, metal craft ring, wooden ring, willow hoop, grapevine ring, or a sturdy wire circle
- Wrapping material: suede cord, yarn, ribbon, leather cord, fabric strips, or macrame cord
- Web string: waxed cord, embroidery floss, nylon string, hemp cord, faux sinew, or strong yarn
- Decorations: beads, charms, ribbons, tassels, lace, fabric strips, or ethically sourced/synthetic feathers
- Tools: scissors, craft glue or hot glue, tape, ruler, and a blunt needle for threading beads
If you are crafting with kids, use large beads, blunt tools, pre-cut strings, and adult supervision. Tiny beads have a magical ability to roll under furniture and become future archaeology.
Part 1: Prepare and Wrap the Hoop
Step 1: Choose the right hoop size
For beginners, a hoop between 5 and 8 inches wide is ideal. Smaller hoops are cute but can be fiddly. Larger hoops look dramatic but require more string and more patience. A 6-inch embroidery hoop is the sweet spot: big enough to work with, small enough to finish before your coffee gets cold.
Step 2: Secure your wrapping cord
Add a small dot of craft glue or hot glue to the top of the hoop. Press the end of your cord onto the glue and hold it until secure. If you prefer a no-glue method, tie a tight double knot and hide the knot under your wrapping.
Step 3: Wrap around the hoop
Wrap the cord around the hoop tightly, placing each wrap close to the previous one. The goal is full coverage with no gaps. Keep the tension firm but not aggressive. If you pull like you are starting a lawn mower, your hoop may bend.
Continue until the entire hoop is covered. Finish where you started, add another small dot of glue, and press the cord end down. Trim extra material neatly.
Part 2: Weave the Dreamcatcher Web
Step 1: Tie the web string to the hoop
Cut a long piece of web stringabout 5 to 7 feet for a 6-inch hoop. Tie one end to the top of the hoop with a double knot. This knot becomes your starting point and can later hide under the hanging loop.
Step 2: Create the first round of loops
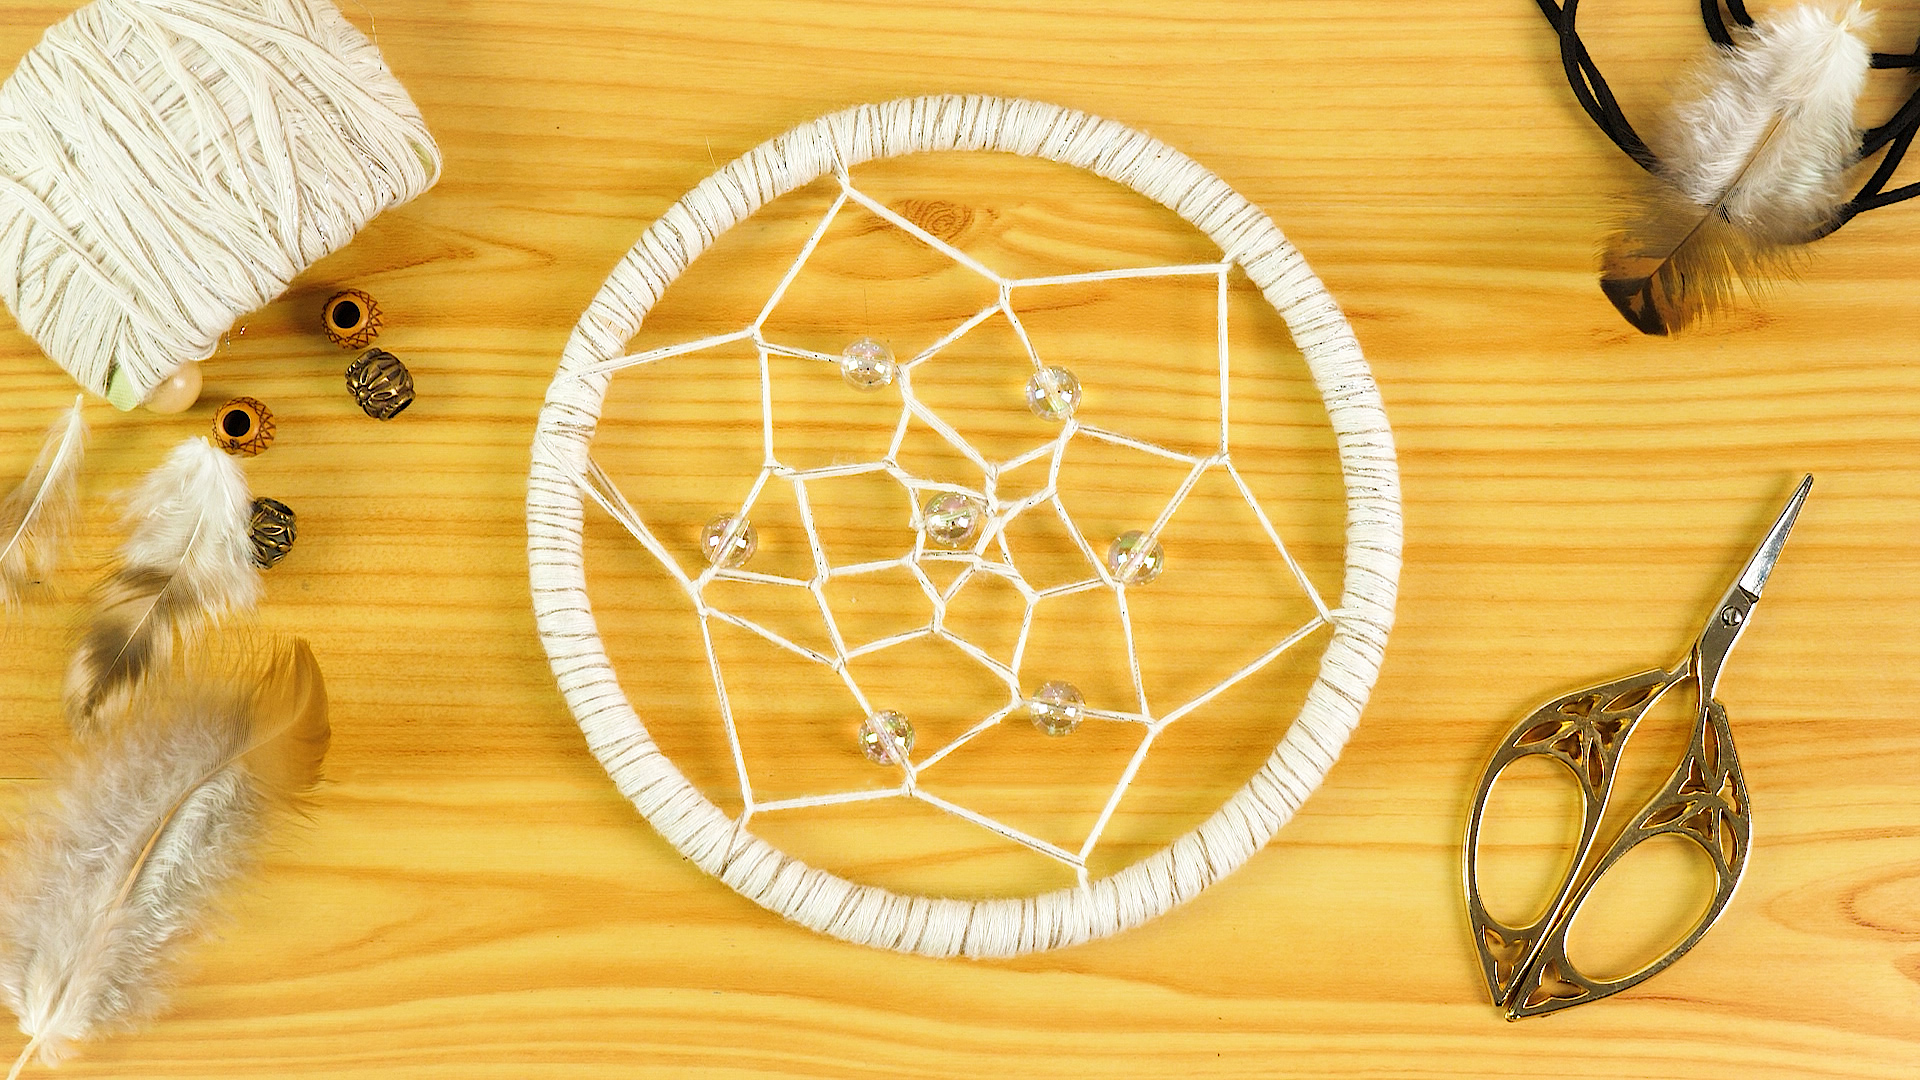
Move about 1 to 1.5 inches around the hoop. Bring the string over the hoop, wrap it around, and pull it back through the loop you just created. Pull gently until it sits neatly. Continue around the hoop, spacing each loop evenly.
Most beginner dreamcatchers look best with 6 to 10 outer loops. Fewer loops create a relaxed, open web. More loops create a tighter, more detailed pattern. Either way, consistency matters more than perfection.
Step 3: Begin weaving inward
When you return to the starting point, do not wrap around the hoop again. Instead, loop your string through the middle of the first string segment from the previous round. Pull gently. Continue looping through the center of each segment, round after round, moving inward.
You will start to see a star-like or spiderweb pattern forming. This is the moment when the project goes from “random string situation” to “I might actually be good at this.”
Step 4: Add beads while weaving
To add beads inside the web, thread one bead onto your string before making a loop. Slide the bead into place, then continue weaving. Add beads sparingly for a clean design, or use several for a more colorful, playful look.
Keep the web tension even. Too loose, and the web droops. Too tight, and the hoop may warp. Aim for “snug,” not “professional tug-of-war finalist.”
Step 5: Finish the center
As the web gets smaller, leave a small open circle in the middle. Tie a secure knot around the nearest string segment. Add a tiny dot of glue if needed, then trim the extra string.
Part 3: Add Feathers, Beads, Ribbons, and Personal Details
Step 1: Create hanging strands
Cut three to five pieces of cord, each about 10 to 16 inches long. Tie them to the bottom of the hoop. Place one in the center and the others evenly on both sides. Odd numbers usually look balanced and natural.
Step 2: Add beads to each strand
Thread beads onto the hanging cords. Tie knots beneath the beads to hold them in place. If the bead hole is too large, double-knot the cord or add a smaller bead below it as a stopper.
Step 3: Attach feathers or alternatives
Feathers are common in many dreamcatcher designs, but you can also use tassels, fabric strips, lace, yarn, paper feathers, felt shapes, dried flowers, or small charms. Synthetic feathers are a good choice for easy sourcing and consistent color.
To attach a feather, place the end of the feather stem along the cord and wrap thread around both. Add glue to secure it, then slide a bead over the wrapped area if the bead opening is large enough. This creates a clean finish and hides the attachment point.
Step 4: Make it personal
Choose colors that mean something to you. Soft neutrals feel calm and airy. Bright colors look cheerful in a kid’s room. Metallic thread adds sparkle without requiring your wall to wear sunglasses. You can also add initials, small wooden shapes, charms, shells, or pressed-flower decorations.
Part 4: Finish, Hang, and Style Your Dreamcatcher
Step 1: Add the hanging loop
Cut a short piece of cord, about 6 to 8 inches long. Tie both ends to the top of the hoop to create a loop. Make sure the knot is tight. If the dreamcatcher tilts, adjust the loop until the hoop hangs straight.
Step 2: Trim and clean up
Trim loose threads, check knots, and remove any glue strings. Hot glue strings are the craft world’s version of spiderwebs: they appear everywhere and make you question your life choices. A quick cleanup makes the final piece look polished.
Step 3: Choose the right place to hang it
Dreamcatchers are often displayed above a bed, near a window, on a gallery wall, in a nursery, or in a cozy reading corner. Avoid damp areas like bathrooms, especially if you used natural fibers, feathers, or untreated wood.
Step 4: Use it as decor with respect
If your dreamcatcher is handmade for personal use, display it thoughtfully. If you want an authentic cultural piece, buy directly from Indigenous artists or Native-owned businesses. If you are teaching this craft in a classroom, include cultural context instead of presenting it as just another “boho decoration.” A little respect goes a long way, and it looks better than glitter anyway.
Easy Dreamcatcher Variations for Beginners
Macrame Dreamcatcher
Use cotton macrame cord instead of thin web string. Add square knots, spiral knots, or fringe along the bottom. This version works beautifully as wall decor and pairs well with neutral rooms, plants, and shelves full of books you absolutely plan to read someday.
Kids’ Pipe Cleaner Dreamcatcher
For younger crafters, pipe cleaners can form the hoop and yarn can create the web. Use large beads and paper feathers. This version is colorful, flexible, and less frustrating for small hands.
Minimalist Modern Dreamcatcher
Choose a wooden hoop, white cotton cord, three simple hanging strands, and no feathers. Add one wooden bead in the center for a clean, modern look. It is subtle, stylish, and unlikely to clash with your bedding.
Nature-Inspired Dreamcatcher
Use a grapevine hoop, hemp cord, wooden beads, dried flowers, and earthy ribbons. This version looks rustic and handmade in the best way, like something you would find in a peaceful cabin rather than a chaotic craft bin.
Common Mistakes and How to Fix Them
The web looks uneven
Uneven spacing is the most common beginner issue. Before weaving inward, check your first round. If the outer loops are wildly different sizes, adjust them. A neat first round makes the rest of the web much easier.
The hoop is bending
Your tension is too tight. Loosen the last few loops and continue with a gentler pull. Metal hoops and wooden embroidery hoops hold shape better than soft wire.
The string keeps slipping
Use waxed cord, faux sinew, or embroidery floss with a little texture. Smooth nylon can slide around unless your knots are very secure.
The feathers will not stay attached
Wrap thread around the feather stem and cord, add a small amount of glue, and cover the attachment with a bead. This three-step method usually solves the problem.
It looks too plain
Add one design feature at a time: beads in the web, ribbon tails, lace strips, tassels, or colored thread. Stop before it becomes a craft store explosion. The best dreamcatcher designs have breathing room.
Dreamcatcher Safety Tips
If the dreamcatcher is for a baby’s room or child’s bedroom, hang it securely and out of reach. Small beads, cords, feathers, and strings can be unsafe for infants and toddlers. For classroom crafts, use large materials, avoid sharp tools, and supervise glue guns closely.
Also consider your materials. Synthetic feathers, non-toxic glue, washable yarn, and smooth wooden beads are practical choices. If using natural branches, make sure they are clean, dry, and free of pests. No one wants a handmade wall hanging that comes with surprise roommates.
My Hands-On Experience Making a Dreamcatcher
The first time I made a dreamcatcher, I had confidence, enthusiasm, and absolutely no understanding of string tension. I wrapped the hoop beautifully, stood back like a proud craft wizard, and then began weaving the web. Within three minutes, my perfect circle looked like a tired potato. That was my first lesson: gentle tension is everything.
On my second attempt, I slowed down. Instead of rushing the outer loops, I measured spacing with my finger. That tiny trick changed the whole project. The web formed more evenly, the center stayed round, and I did not have to whisper motivational quotes to a piece of string. I also learned that waxed cord is much easier for beginners than slippery yarn. Yarn looks soft and friendly, but it can stretch and fuzz while you work. Waxed cord behaves like it attended craft school.
The decorating stage was the most fun. I tried three hanging strands first, then five, and discovered that odd numbers really do look more balanced. I added wooden beads and cream-colored ribbons for a calm, natural look. Then, because restraint briefly left the room, I added metallic thread. Surprisingly, it worked. A tiny shimmer can make the design feel finished without turning it into a disco ornament.
One thing I recommend is laying out all decorations before tying them on. Place the beads, feathers, ribbons, and charms below the hoop on a table. Move them around until the layout feels right. This prevents the classic beginner problem of attaching everything and realizing one side looks like it packed for vacation while the other side stayed home.
I also found that dreamcatcher making is more relaxing when you accept imperfections. Handmade items should not look factory-made. A slightly uneven loop or off-center bead gives the piece character. Of course, there is a difference between “charming handmade detail” and “the web has collapsed emotionally,” but most small flaws disappear once the dreamcatcher is hanging.
If you are making one as a gift, choose colors based on the recipient’s space. For a cozy bedroom, use soft neutrals, blush, sage, navy, or warm brown. For a kid’s room, use bright yarn, chunky beads, and paper feathers. For a modern apartment, keep it simple with one color of cord and a few wooden accents.
My biggest takeaway is that making a dreamcatcher is less about perfect technique and more about rhythm. Wrap, loop, pull gently, repeat. After a while, the process becomes calming. It is the kind of craft that lets your hands stay busy while your brain finally stops opening 47 tabs. And when you hang the finished piece, even if it is not perfect, it feels personal. You made it from a hoop, string, and patienceand honestly, patience deserves its own bead.
Final Thoughts
Now you know how to make a dreamcatcher in four simple parts: prepare the hoop, weave the web, add decorations, and finish it for hanging. The best beginner dreamcatcher is not the most expensive or complicated one. It is the one you make thoughtfully, respectfully, and with enough curiosity to learn the story behind the craft.
Start with a small hoop, use forgiving materials, keep your loops even, and do not panic if your first web looks a little wobbly. Every handmade project has a learning curve. The good news is that dreamcatchers are easy to personalize, quick to improve, and beautiful even when they carry a few beginner quirks.
Whether you are making a DIY dreamcatcher for your bedroom, a handmade gift, a classroom craft, or a weekend creative project, take your time and enjoy the process. Crafting should feel peaceful, not like a final exam with feathers.