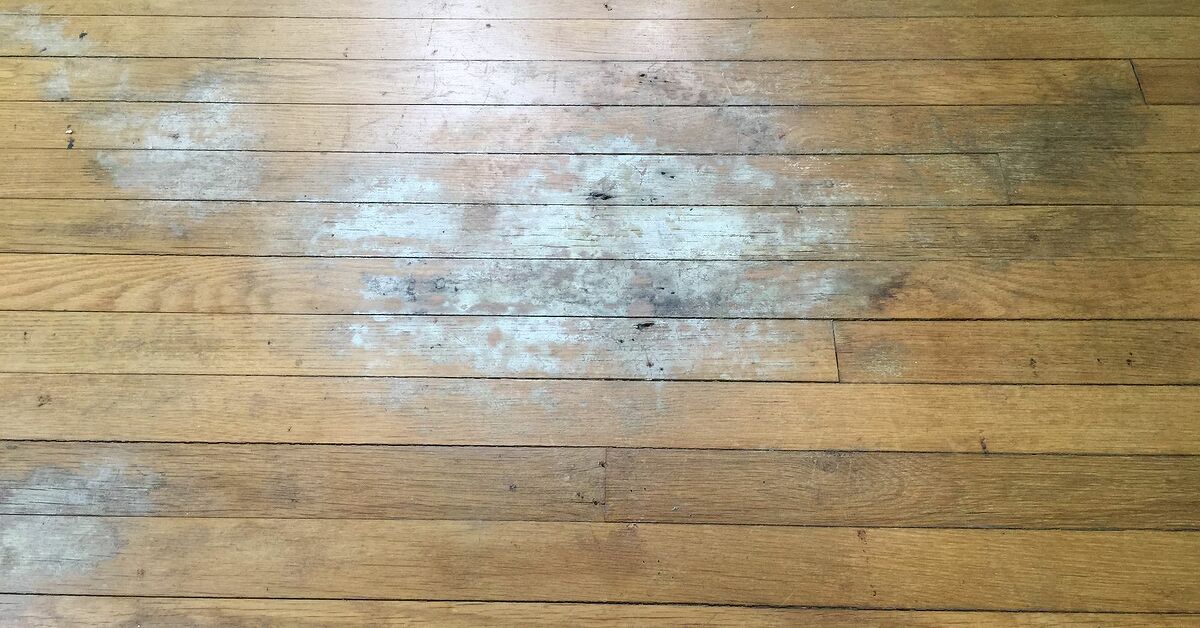
There comes a day in every hardwood floor’s life when it stops looking “warm and charming” and starts looking like it has been hosting indoor scooter races since 1998. The shine disappears. Tiny scratches show up like uninvited relatives. High-traffic areas look tired, dull, and slightly offended. The good news? You may not need to sand, strip, or prime your wood floors to make them look dramatically better.
This DIY guide is for homeowners who want a practical wood floor face lift without renting a giant sander, covering the house in dust, or questioning every life decision by hour three. If your floor has an intact finish, light surface scratches, dullness, or general wear, a no-sanding refresh can bring back depth, glow, and protection. It will not magically erase deep gouges, black water stains, missing finish, or pet damage that has reached the wood itself. But for many “my floors look exhausted” situations, this method can be surprisingly effective.
Think of this project as skincare for hardwood floors. We are not doing surgery. We are cleansing, correcting small flaws, adding a protective layer, and letting the floor walk out of the room looking ten years younger.
What “No Sanding, No Stripping, No Priming” Really Means
A no-sand wood floor refresh is not the same as traditional hardwood refinishing. Traditional refinishing removes the existing top layer with sanding, exposes raw wood, and usually involves staining and sealing. That is the heavy-duty route. It is excellent for serious damage, color changes, and floors that have lost their finish completely.
A no-sanding floor face lift works on the surface. Instead of removing the floor’s finish, you clean it thoroughly, repair small cosmetic marks, and apply a compatible hardwood floor polish, restorer, or reviver. These products are designed to add shine, reduce the appearance of micro-scratches, and provide a fresh protective layer over sealed wood flooring.
Best Floors for This DIY Method
This project is a good match if your hardwood floor is dull but still sealed, lightly scratched but not deeply gouged, worn in traffic lanes but not down to bare wood, and generally solid with no loose boards or major moisture damage. It works especially well on polyurethane-finished floors, which are common in many U.S. homes.
Floors That Need More Than a Face Lift
Skip the quick refresh if your floor has exposed raw wood, peeling finish, gray or black water stains, deep scratches you can feel with a fingernail, heavy wax buildup, cupping, buckling, or boards that move. In those cases, a screen-and-recoat by a professional or a full sand-and-refinish may be the better long-term answer. A bottle of floor polish cannot fix a floor that is basically sending up a tiny wooden distress flare.
Supplies You Will Need
Before starting, gather everything so you are not sprinting through the house with one sock on while the floor cleaner dries unevenly. You will need a soft broom or microfiber dust mop, a vacuum with a hard-floor setting, a pH-neutral hardwood floor cleaner, microfiber mop pads, clean towels, painter’s tape, a plastic putty knife, wood filler or scratch repair marker for small spots, and a hardwood floor polish or floor restorer compatible with your finish.
Choose a product made specifically for sealed hardwood floors. Do not grab random furniture polish, wax, oil soap, steam tools, bleach, ammonia cleaner, or a “miracle” recipe from a comment section written by someone named FloorWizard1972. Hardwood floors prefer gentle products and predictable chemistry.
Step 1: Identify the Floor Finish Before You Start
The biggest mistake in a no-sanding floor makeover is applying a product to the wrong surface. Most modern hardwood floors have a surface finish such as polyurethane. These floors can often accept water-based polish or reviver products made for sealed hardwood. Older waxed floors are different. Wax can prevent new coatings from bonding properly and may cause haze, streaking, or peeling.
Try a simple hidden-area test. Choose a small spot behind a door or under furniture. Put a few drops of water on the floor. If the water beads on top, the finish is likely still present. If it quickly soaks in or darkens the wood, the finish may be worn through. You can also gently rub a hidden spot with a cloth dampened with mineral spirits. If a waxy residue comes up, the floor may have wax, and a standard polish or polyurethane-based restorer may not be appropriate.
When in doubt, test first. A tiny test patch is boring, yes. But it is less boring than discovering your entire living room has developed a cloudy film with the personality of old plastic wrap.
Step 2: Clear the Room and Protect the Edges
Remove furniture, rugs, floor baskets, plant stands, and anything else sitting on the floor. If the furniture is too heavy, move it to one side, complete half the room, then repeat later. Add felt pads to chair and table legs before bringing furniture back. This is one of the cheapest ways to prevent future scratches.
Use painter’s tape along thresholds or areas where you want a clean stopping point. If the floor meets carpet, tile, or a transition strip, tape helps keep the polish or restorer where it belongs. Products that look beautiful on wood can look suspicious on carpet.
Step 3: Dry Clean Like You Mean It
Dust and grit are the villains of hardwood maintenance. They act like tiny pieces of sandpaper under shoes, chair legs, and pet paws. Start by sweeping or dust mopping the entire floor. Then vacuum using the hard-floor setting or a soft brush attachment. Avoid spinning beater bars because they can scratch the finish.
Pay special attention to corners, baseboards, and under cabinets. The goal is to remove every crumb, dust bunny, and mysterious crunchy object before liquid touches the floor. If debris stays behind, the final finish may trap it like a bug in amber. Charming in a museum, not great in your dining room.
Step 4: Deep Clean With a Wood-Safe Cleaner
After dry cleaning, damp-clean the floor with a pH-neutral cleaner made for hardwood floors. Spray lightly and mop with a microfiber pad. Do not flood the floor. Hardwood and puddles are not best friends; they are coworkers who politely avoid each other.
Work in small sections and replace dirty mop pads as needed. If your pad looks gray, brown, or like it has been dragged behind a lawn mower, change it. A dirty pad simply moves grime from one area to another. Let the floor dry completely before moving to the next step.
Avoid These Common Cleaning Mistakes
Do not use a steam mop on hardwood floors. Steam can force moisture into seams and may dull or damage the finish. Avoid soaking wet mops, abrasive scrub pads, vinegar-heavy mixtures, bleach, ammonia, and oil-based cleaners unless your floor manufacturer specifically recommends them. Some popular old-school methods can leave residue that interferes with polish or recoating.
Step 5: Fix Small Scratches and Dull Spots
Once the floor is clean and dry, inspect it in natural light. Light scratches often look worse when the floor is dirty because grime collects in the marks. After cleaning, some may nearly disappear. For remaining shallow scratches, use a wood floor repair marker, blending pencil, or color-matched scratch concealer. Apply lightly, wipe away excess, and build color slowly.
For a small nick or tiny gouge, use a stainable wood filler that matches the floor. Press it in with a plastic putty knife, wipe the surrounding area clean, and allow it to dry according to the product directions. Do not smear filler across the floor like frosting on a cake. The goal is precision, not pastry work.
Deep damage may still show after a no-sand refresh. That is normal. This project improves the overall look; it does not rewrite flooring history.
Step 6: Choose Polish, Restorer, or Reviver
The product you choose matters. A hardwood floor polish usually adds shine and helps fill micro-scratches temporarily. A floor restorer or reviver may create a more durable coating, depending on the formula. Some products are water-based, while others contain polyurethane or acrylic components. Always read the label and confirm it is suitable for your exact floor type.
Use Polish When…
Choose polish when your floor is mostly in good condition but looks dull, lightly scuffed, or uneven in shine. Polish is a cosmetic boost and maintenance layer. It is ideal for quick refreshes in bedrooms, hallways, dining rooms, and living rooms where the finish is still healthy.
Use a Restorer or Reviver When…
Choose a hardwood floor restorer or reviver when the floor needs a stronger surface refresh. These products can help restore shine and add a protective layer over worn polyurethane finishes. They are useful for floors that look tired but are not damaged enough for sanding.
Before committing, apply the product to a hidden test area. Let it dry fully. Check for gloss level, streaking, adhesion, cloudiness, and color change. A product may say “clear,” but your floor gets the final vote.
Step 7: Apply the Product in Small Sections
Shake or rock the bottle exactly as directed. Some products should be rocked, not shaken, because bubbles can create an uneven finish. Pour or squirt the product in a small area, usually around three feet by three feet, then spread it with a clean microfiber applicator or dampened painter’s pad.
Move with the grain of the wood. Keep a wet edge so sections blend together smoothly. Do not overwork the product after it starts to dry. This is not the time to lovingly pet the floor for ten minutes. Spread it evenly, smooth it once or twice, and move on.
Apply thin, even coats unless the product specifically says otherwise. Too much product can cause streaks, cloudy patches, or sticky areas. More is not always better. This is flooring, not nacho cheese.
Step 8: Let the Floor Dry and Cure
Dry time depends on the product, humidity, temperature, and airflow. Keep pets, children, shoes, and furniture off the floor until the manufacturer’s recommended time has passed. Some products allow light foot traffic after several hours, while others need longer before rugs and furniture can return.
Do not rush area rugs back onto the floor. Rugs can trap moisture and affect curing. If the label says to wait several days before replacing rugs, believe it. The floor is not being dramatic; it is chemically settling into its new glow.
Step 9: Prevent the Floor From Looking Tired Again
After your wood floor face lift, build a simple maintenance routine. Dust mop often, vacuum weekly with the hard-floor setting, clean spills quickly, and use a hardwood-safe cleaner when needed. Place mats at entry doors to catch grit before it reaches the floor. Add felt pads under furniture legs. Keep pet nails trimmed. Avoid walking on hardwood in shoes that track gravel, mud, or mysterious parking lot substances.
For high-traffic homes, a water-based polish every few months may help maintain shine, depending on the product and floor condition. However, avoid layering product endlessly without cleaning properly. Too many layers can create buildup. If the floor starts to look hazy, stop adding shine and reassess. Sometimes the answer is less product, not more.
Common Problems and How to Avoid Them
Streaks
Streaks usually happen when the floor was not clean enough, the applicator was dirty, the product was spread too thin or too thick, or sections dried before blending. Work in manageable areas and keep your tools clean.
Cloudy Finish
Cloudiness may come from wax, oil soap residue, moisture, incompatible products, or applying polish over dirt. This is why testing and deep cleaning matter. A cloudy floor is the hardwood version of “we need to talk.”
Sticky Feel
Stickiness often means the product was applied too heavily, the room was too humid, or the drying time was too short. Improve airflow, wait longer, and avoid walking on the floor until it is properly dry.
Uneven Shine
Uneven shine can happen when some areas are more worn than others. A second coat may help if the product allows it, but severely worn areas may need a professional screen-and-recoat or full refinishing.
When to Call a Professional
A DIY no-sand refresh is fantastic for cosmetic improvement, but it has limits. Call a flooring professional if your floor has large bare patches, peeling polyurethane, deep pet stains, water damage, boards that are cupping, or heavy wax contamination. Also call a pro if you want to change the floor color. A no-sanding product can restore shine; it cannot turn orange oak into modern walnut overnight without real refinishing work.
Professional screen-and-recoat services lightly abrade the existing finish and add a new coat. This is more durable than a simple polish and less invasive than sanding to bare wood. It may be the sweet spot for floors that are too worn for a bottle refresh but not damaged enough for a full refinish.
Real-World Experience: What I Learned From a No-Sand Wood Floor Makeover
The first thing you learn when giving a wood floor a face lift without sanding is that the cleaning stage is not the warm-up act. It is the main character. I once helped refresh a living room floor that looked dull enough to qualify for an emotional support lamp. The homeowner wanted to jump straight to the shiny product because, understandably, shiny bottles feel more exciting than microfiber pads. But once we cleaned the floor properly, half the “damage” turned out to be old residue, dust, and traffic grime.
The second lesson is that lighting tells the truth. A floor can look perfect from the doorway and then reveal streaks, missed crumbs, and tiny scratches when sunlight hits it at 4 p.m. Before applying any restorer, walk around the room and inspect the floor from different angles. It feels a little dramatic, like you are judging a dance competition, but it helps you catch problems before they become sealed-in problems.
Another practical tip: do not use your favorite mop pad from the cleaning closet unless it is truly clean. Old detergent residue can interfere with the finish. Fresh microfiber pads are cheap compared with redoing the project. I also like keeping one pad for cleaning and a separate applicator pad only for polish or restorer. Label it if necessary. Nobody wants floor finish accidentally introduced to bathroom cleaner. That is not a romance we need to encourage.
Testing in a hidden spot is also worth the wait. On one older floor, a high-gloss product looked beautiful in the bottle but too reflective on the wood. It highlighted every wave, dent, and historic “character mark.” A satin or low-gloss product would have been more forgiving. Gloss level is personal, but in older homes, softer shine often looks richer and more natural. High gloss can be glamorous, but it can also behave like a spotlight with opinions.
Working in small sections makes the job calmer. When people try to coat a large area at once, they rush, overlap unevenly, and create lap marks. A three-foot section may feel slow, but it gives you control. Move with the grain, keep the applicator damp with product, and resist the urge to keep brushing once the product starts setting. Overworking is one of the easiest ways to create streaks.
Finally, the best results come from realistic expectations. A no-sanding DIY wood floor refresh can make a room feel brighter, cleaner, and more loved. It can reduce the look of light scratches and revive dull areas. It can make guests say, “Did you do something to the floors?” which is the home-improvement version of applause. But it will not remove deep stains, flatten dents, or change the floor’s color. Treat it as a smart maintenance makeover, not a miracle in a jug.
My favorite part of this project is how approachable it is. You do not need a truckload of tools or professional sanding skills. You need patience, clean pads, the right product, and the courage to stop touching the floor while it dries. That last one is harder than it sounds. Freshly polished hardwood has a strange gravitational pull. You will want to step on it. Do not. Make coffee, guard the doorway, and let the floor have its beauty sleep.
Conclusion
Giving a wood floor a face lift without sanding, stripping, or priming is one of the most satisfying DIY upgrades for a tired room. The secret is not magic; it is preparation. Identify your finish, clean thoroughly, repair small marks, choose a compatible hardwood floor polish or restorer, apply it evenly, and let it dry properly. When the floor is a good candidate, the result can be warmer color, improved shine, fewer visible scuffs, and a room that suddenly looks like it has been sleeping eight hours a night and drinking enough water.
This method is best for sealed hardwood floors with light wear and dullness. For deep damage, bare wood, water stains, or color changes, call in a professional. But if your floor simply needs a fresh, budget-friendly glow-up, this no-sand DIY approach can save time, mess, and money while making your home feel polished again. Your floors may not send a thank-you card, but they will absolutely show off when the sunlight hits.