A Kenmore dryer that tumbles but refuses to heat is one of those household problems that feels oddly personal. The machine is moving, humming, and acting busy, yet your towels come out damp enough to file a complaint. Before you start shopping for a new dryer or accusing your laundry room of betrayal, take a breath. In many cases, a Kenmore dryer not heating can be traced to a simple airflow problem, a tripped breaker, a blown thermal fuse, a bad heating element, or a gas ignition issue.
This guide walks you through practical, real-world troubleshooting for both electric and gas Kenmore dryers. The goal is not to turn you into an appliance technician overnight. The goal is to help you understand what to check, what parts commonly fail, when a repair is realistic, and when it is smarter to call a professional before your dryer turns into a very expensive sock tumbler.
Safety First: Before You Touch Anything
Dryers combine electricity, heat, fast-moving parts, and sometimes gas. That is not a great environment for guessing. Before inspecting internal parts, unplug the dryer from the wall. If you have a gas Kenmore dryer, shut off the gas supply valve before moving the appliance or inspecting burner parts. If you smell gas, stop immediately, leave the area, and contact your gas company or emergency service.
For electric dryers, remember that most models require a 240-volt power supply. Even if the drum turns, one side of the power supply may be missing, which means the motor can run while the heater stays cold. That sneaky little detail causes plenty of unnecessary part replacements.
Common Reasons a Kenmore Dryer Won’t Heat
A no-heat dryer is usually not mysterious once you break the system into pieces. Your dryer needs proper power, airflow, heat generation, temperature control, and safe exhaust. If one of those systems fails, the dryer may tumble without producing usable heat.
1. The Dryer Is Set to a No-Heat Cycle
Start with the obvious because the obvious enjoys embarrassing us. Make sure the dryer is not set to Air Fluff, Air Dry, Wrinkle Guard without heat, or another no-heat option. Some Kenmore dryers have delicate or timed cycles that use reduced heat, so test the dryer on a normal timed dry cycle with medium or high heat.
If heat returns, congratulations. You fixed the dryer without tools, drama, or ordering parts at midnight.
2. The Lint Screen or Vent Is Clogged
Poor airflow is one of the most common reasons a Kenmore dryer takes forever to dry clothes or overheats and shuts down its heating system. Clean the lint screen before every load. Then check the lint chute, flexible vent hose, wall duct, and outside exhaust hood.
A clogged vent traps moisture inside the dryer. The machine may feel warm, but the wet air has nowhere to go. That means clothes stay damp, drying times stretch longer, and safety thermostats may trip. In severe cases, lint buildup can create a fire hazard.
To test airflow, run the dryer for a few minutes and check the outside vent. You should feel a strong stream of air. If the airflow is weak, disconnect the dryer vent and clean the duct from the dryer to the exterior hood. Replace crushed plastic or foil-style venting with rigid or semi-rigid metal venting where possible.
3. The Breaker Is Partly Tripped
An electric Kenmore dryer usually needs two hot legs of power. If one breaker trips or one fuse blows, the dryer may still tumble because the motor has enough power, but the heating element will not work. Go to your electrical panel and firmly reset the dryer breaker by switching it fully off and then back on.
If the breaker trips again, do not keep resetting it like you are playing whack-a-mole. A repeated trip can point to a wiring issue, shorted heating element, damaged outlet, or overloaded circuit. Call a qualified electrician or appliance technician.
4. The Thermal Fuse Has Blown
The thermal fuse is a small safety device designed to protect the dryer from overheating. Depending on the model, it may be located on the blower housing, heating element housing, or burner assembly. When it blows, the dryer may stop heating or may stop running entirely.
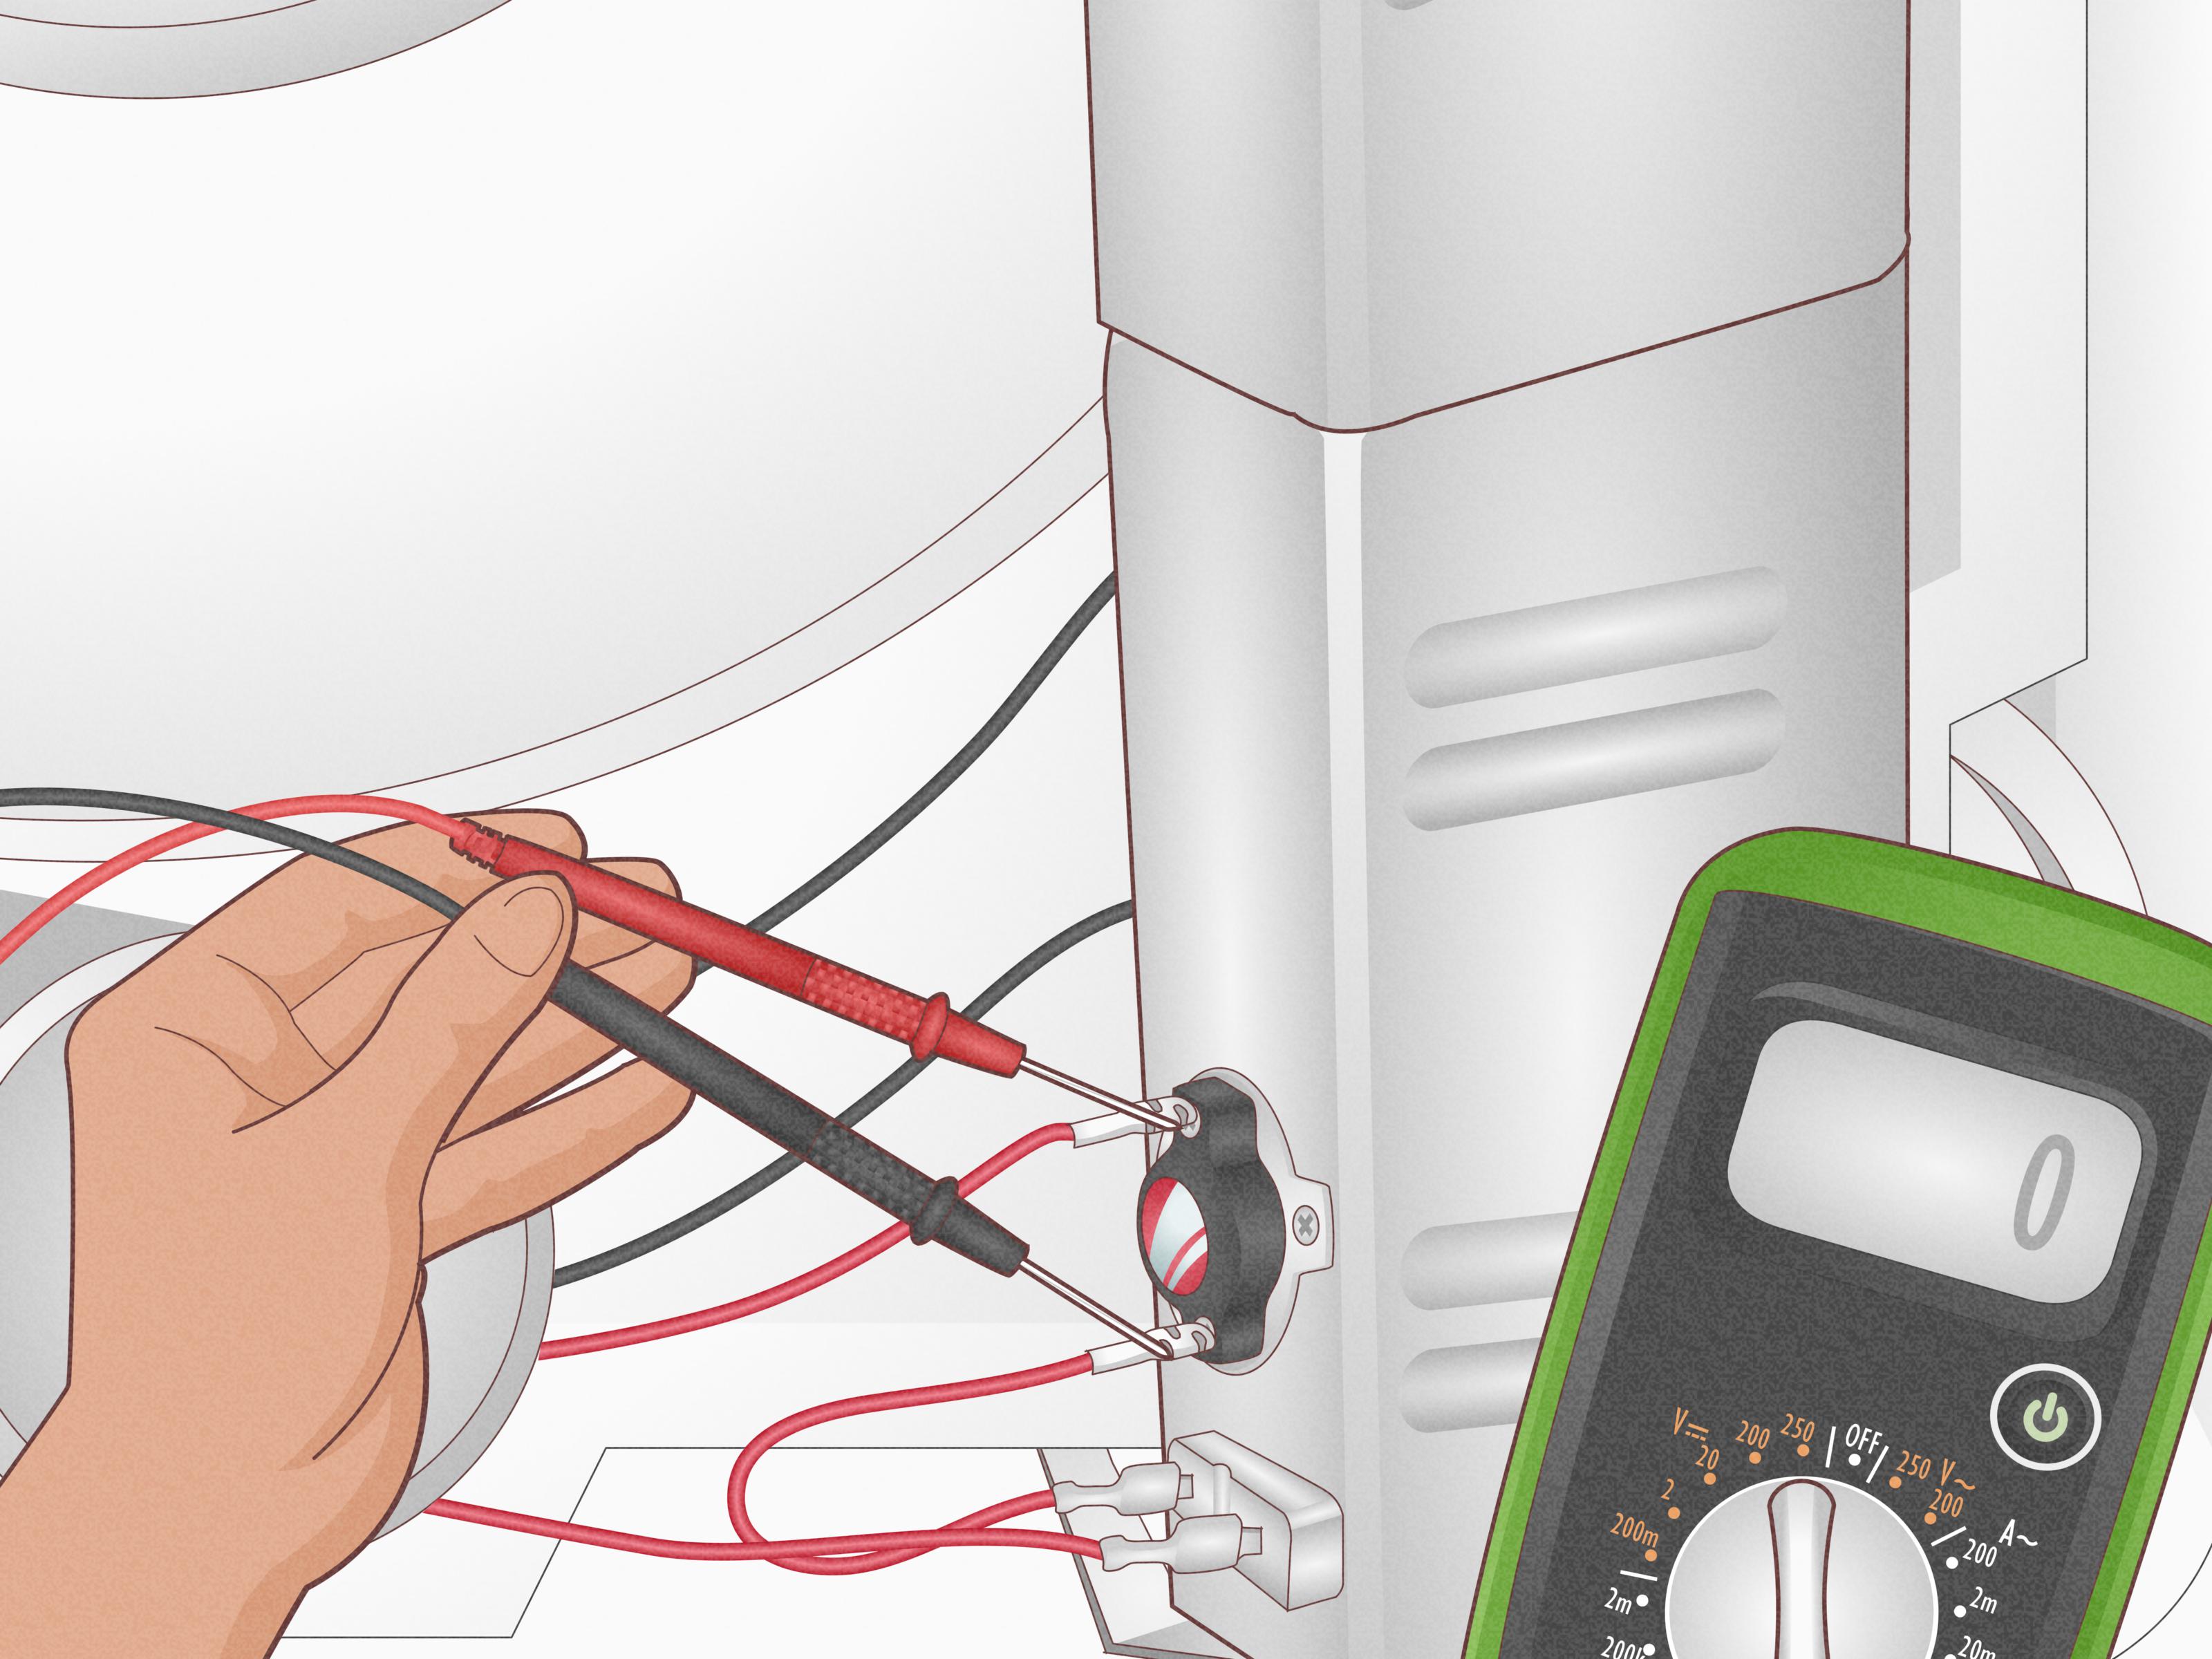
A thermal fuse is tested with a multimeter for continuity. A good fuse should show a continuous electrical path. A blown fuse reads open and must be replaced. Never bypass a thermal fuse as a “test” while running the dryer. That is not clever DIY; that is inviting danger to brunch.
Also, do not replace the thermal fuse and walk away without finding out why it failed. The most common cause is restricted airflow from a clogged lint screen, blocked exhaust duct, crushed vent hose, or dirty blower housing.
5. The Heating Element Is Burned Out
On electric Kenmore dryers, the heating element is the part that actually creates heat. Over time, the element coil can break, burn out, or short against the metal housing. If the dryer tumbles normally and airflow is good but there is no heat, the heating element becomes a prime suspect.
Unplug the dryer, access the heating element assembly, and inspect the coil for visible breaks or burn marks. Use a multimeter to check continuity. If the element has no continuity, replace it with the correct part for your model number.
Kenmore dryers were manufactured by different companies over the years, so parts are not universal. Always use the full model number from the dryer tag, usually found inside the door opening or on the cabinet frame.
6. The High-Limit Thermostat or Thermal Cut-Off Failed
The high-limit thermostat and thermal cut-off help prevent overheating. If these parts fail open, they can interrupt power to the heating element. They are often mounted near the heating element housing on electric models or near the burner area on gas models.
Like the thermal fuse, these parts are usually checked with a multimeter for continuity. If one has failed, replace it with the proper part. If the dryer repeatedly blows high-limit parts, focus on airflow before replacing more components. A dryer with bad airflow will keep destroying safety parts like it has a personal grudge against your wallet.
7. The Operating Thermostat or Thermistor Is Faulty
The operating thermostat or thermistor monitors dryer temperature and tells the control system when to cycle heat on and off. On some Kenmore Elite models, fault codes such as F22, F23, F24, or F25 may point toward outlet or inlet thermistor problems.
If your dryer displays an error code, look up the code for your exact model. A faulty thermistor may cause poor heat, no heat, overheating, or unusual cycle behavior. Testing procedures vary, but many thermistors are checked by measuring resistance at room temperature and comparing it with the service information for that dryer.
8. Gas Supply or Ignition Parts Are Failing
If you have a gas Kenmore dryer, no heat can come from a closed gas valve, weak igniter, bad flame sensor, defective gas valve coils, or a burner assembly problem. First, make sure the gas supply valve is open. Then listen and observe carefully during startup if your model allows safe viewing through an inspection panel.
A common gas dryer symptom is this: the igniter glows, the flame lights once, then later the dryer stops heating. That pattern often points to weak gas valve coils. Many technicians replace gas valve coils as a set because if one is failing, the others may not be far behind.
Gas repairs are an area where caution matters. If you are not comfortable working around gas lines and burner assemblies, hire a qualified appliance technician.
9. The Timer or Electronic Control Board Has a Heating Fault
If all heating parts test correctly, the problem may be in the timer, motor switch, wiring harness, or electronic control board. Some electric dryers route heater power through timer contacts or a heater relay. If those contacts fail, the element never receives power.
This is where diagnosis becomes more advanced. You may need to read a wiring diagram, check voltage under operating conditions, and inspect connectors for heat damage. If you are not trained in electrical testing, this is a sensible time to call a professional.
Step-by-Step Kenmore Dryer No-Heat Troubleshooting
Step 1: Confirm the Dryer Runs Normally
Does the drum turn? Does the motor sound normal? Does the dryer stop early? If the dryer will not run at all, you may be dealing with a door switch, start switch, belt switch, thermal fuse, power supply, or control issue rather than a pure no-heat problem.
Step 2: Check the Cycle and Load Size
Choose a timed dry cycle with heat. Avoid overloading the drum. A stuffed dryer cannot move air properly, and airflow is the secret ingredient in drying. Separate heavy towels from lightweight shirts, and shake out tangled items before loading them.
Step 3: Clean the Lint Screen and Vent System
Remove lint from the screen. Wash the screen with warm water and mild soap if fabric softener residue has created a waxy film. Vacuum inside the lint chute if accessible. Pull the dryer away from the wall, inspect the vent hose, and clear the entire duct to the outside hood.
Step 4: Test for Heat With the Vent Disconnected
With the dryer pulled forward and the vent temporarily disconnected, run a short heated cycle. If heat improves quickly, the problem is likely in the vent system rather than the dryer itself. Do not run the dryer permanently without proper venting; this is only a short diagnostic check.
Step 5: Reset the Breaker
For electric dryers, reset the double-pole breaker. If you use fuses, check both fuses. The dryer may need both sides of the 240-volt circuit to heat properly.
Step 6: Inspect and Test Internal Heating Parts
Unplug the dryer. Access the thermal fuse, heating element, thermostats, and thermal cut-off. Test each part for continuity using a multimeter. Replace any failed part with the correct model-specific component.
Step 7: Check Gas Dryer Ignition
For gas models, verify gas supply, igniter operation, flame sensor function, and gas valve coil behavior. If the igniter glows but no flame appears, the problem may be the gas valve coils, flame sensor, or gas supply. If the igniter does not glow, inspect the igniter, thermal fuse, and related controls.
Step 8: Consider the Control System
If all common parts test good, the issue may be a timer, relay, motor switch, thermistor, wiring harness, or electronic board. Advanced electrical troubleshooting may be required.
When to Repair and When to Replace
A heating element, thermal fuse, thermostat, or gas coil repair is often much cheaper than replacing the entire dryer. However, replacement may make sense if the dryer is very old, has multiple failing parts, has a damaged drum or motor, or needs a control board that costs nearly as much as a used appliance.
As a rough rule, if the repair costs more than half the price of a comparable replacement dryer and your machine is already near the end of its expected life, compare your options carefully. But if the problem is a clogged vent or a modest part, your Kenmore may have plenty of laundry battles left in it.
Maintenance Tips to Keep the Heat Working
Clean the lint screen before every load. Check the vent hose regularly. Make sure the outside flap opens freely. Avoid crushing the dryer vent behind the machine. Do not overload the drum. Keep the laundry area clear of lint, paper, cleaning rags, and other flammable clutter.
Once or twice a year, clean the full exhaust path from the dryer to the outdoors. If your vent run is long, has multiple elbows, or exits through the roof, consider professional cleaning. A clean vent helps the dryer heat correctly, dry faster, use less energy, and avoid overheating.
Real-World Experience: What Usually Happens With a Kenmore Dryer That Won’t Heat
In real homes, a Kenmore dryer no-heat problem rarely begins with a dramatic bang. It usually starts quietly. One week the towels need an extra 20 minutes. A few loads later, jeans come out cold and clammy. Someone says, “Maybe I used the wrong setting.” Then the dryer gets blamed, the laundry pile grows, and everyone starts wearing the weird emergency clothes from the back of the closet.
The most common experience is restricted airflow. Many homeowners clean the lint screen faithfully but forget the vent hose, wall duct, or outside hood. The lint screen catches a lot, but not everything. Fine lint, pet hair, dryer sheet residue, and dust can sneak past and collect inside the exhaust path. When airflow drops, the dryer may still create heat, but moisture cannot escape. The result feels like no heat because the clothes stay wet.
Another very common story involves the electric breaker. The dryer tumbles, so the owner assumes power is fine. But an electric dryer can sometimes run the motor while losing the heating side of the circuit. Resetting the double breaker is a simple check that can save a lot of unnecessary part swapping.
Then there is the thermal fuse. Many people replace a blown fuse and feel victorious for about three loads. Then the new fuse fails too. That usually means the fuse was the symptom, not the root cause. The dryer overheated because the vent was clogged, the blower area was packed with lint, or the exhaust hose was crushed behind the machine. Replacing the fuse without fixing airflow is like putting a new battery in a smoke alarm while the toast is still on fire.
On older electric Kenmore dryers, heating elements are another frequent failure. The coil can break after years of heating and cooling. Sometimes the break is obvious; sometimes the element looks fine until tested with a meter. A correct diagnosis matters because a bad element, failed thermostat, blown cut-off, and missing power can all create the same basic symptom: a drum full of cold laundry.
Gas dryers have their own personality. A gas Kenmore may heat at first and then go cold mid-cycle. That often makes people think the dryer is haunted. More often, the gas valve coils are weakening. They may open when cold but fail after warming up. The igniter may glow beautifully, like it is auditioning for a tiny appliance theater, but the burner never lights consistently.
The best practical habit is to troubleshoot in order. Start with settings, load size, lint screen, vent airflow, and power. Those checks cost little or nothing. Then move to fuses, thermostats, elements, igniters, sensors, and controls. This order prevents the classic DIY mistake of buying three parts before discovering a bird nest in the outside vent hood.
Another useful experience-based tip: take photos before removing wires. Dryer wiring is not the place to trust your memory, especially if you are interrupted by a phone call, a barking dog, or a child asking why socks disappear. Label wires with painter’s tape if needed. Keep screws in a small container. Work slowly and use the model number when ordering parts.
Finally, know your comfort zone. Cleaning vents, checking breakers, and inspecting visible parts are manageable for many homeowners. Testing live voltage, repairing gas burner assemblies, or diagnosing control boards requires more skill and more risk. A good repair is not just one that makes heat return. It is one that makes the dryer safe, reliable, and ready for the next mountain of towels.
Conclusion
Fixing a Kenmore dryer when it won’t use heat is mostly about following a smart sequence. Check the cycle setting, clean the lint system, verify airflow, reset the breaker, and then test the heating parts. For electric models, focus on the thermal fuse, heating element, thermostats, thermal cut-off, power supply, and controls. For gas models, check gas supply, igniter, flame sensor, gas valve coils, and burner operation.
The biggest lesson is simple: heat is only half the drying equation. Airflow matters just as much. A dryer with poor airflow can overheat, blow safety parts, waste energy, and still leave clothes damp. Keep the vent clean, use the correct settings, and replace failed parts with model-specific components. Your Kenmore dryer may go from “cold laundry cave” back to “warm towel hero” faster than you think.
SEO Tags
Note: This guide is for general educational troubleshooting. Always unplug the dryer before internal inspection, shut off gas before working near gas components, and contact a qualified technician when a repair involves live voltage, gas lines, or uncertain wiring.