Trying to display Nintendo Switch games on a Chromebook sounds like it should be easy. After all, the Switch has HDMI. Some Chromebooks have HDMI. So, plug one into the other and enjoy Mario Kart 8 Deluxe on your laptop screen, right?
Not quite. This is where technology puts on a tiny wizard hat and says, “Actually…” Most Chromebooks are designed to send video out to a monitor, projector, or TV. They are not designed to receive HDMI video from another device like a Nintendo Switch. In plain English: your Chromebook is usually not a regular HDMI monitor.
The good news is that you can still display Nintendo Switch games on a Chromebook with the right setup. The most reliable method is to use the Nintendo Switch dock, an HDMI cable, and a USB HDMI capture card that works with ChromeOS as a UVC video device. Once connected, the Switch feed appears on the Chromebook much like an external webcam. It may not be as perfect as playing on a TV, but for casual gaming, recording, streaming, or turning a Chromebook into a portable game-viewing station, it can work surprisingly well.
Can You Connect a Nintendo Switch Directly to a Chromebook?
In most cases, no. A direct HDMI connection from a Nintendo Switch dock to a Chromebook will not display the game on the Chromebook screen. The reason is simple: most Chromebook HDMI ports are HDMI output ports, not HDMI input ports.
An HDMI output sends your Chromebook screen to another display. That is useful when you want to connect your Chromebook to a TV, monitor, or classroom projector. But the Nintendo Switch dock also sends video out. When two devices are both shouting video outward, nobody is listening. It is like two people trying to give directions at the same time and neither one brought a map.
Why the Chromebook Screen Does Not Work Like a TV
A TV or monitor has HDMI input ports. Those ports are built to receive a signal from a console, cable box, streaming device, or computer. A Chromebook screen, however, is internally connected to the Chromebook itself. Its HDMI or USB-C display features are usually meant for external display output.
That is why the common question, “Can I use my Chromebook as a monitor for Nintendo Switch?” has a slightly frustrating answer: not by HDMI alone. You need a device in the middle that converts the Switch’s HDMI signal into something ChromeOS can read.
The Best Way to Display Nintendo Switch on a Chromebook
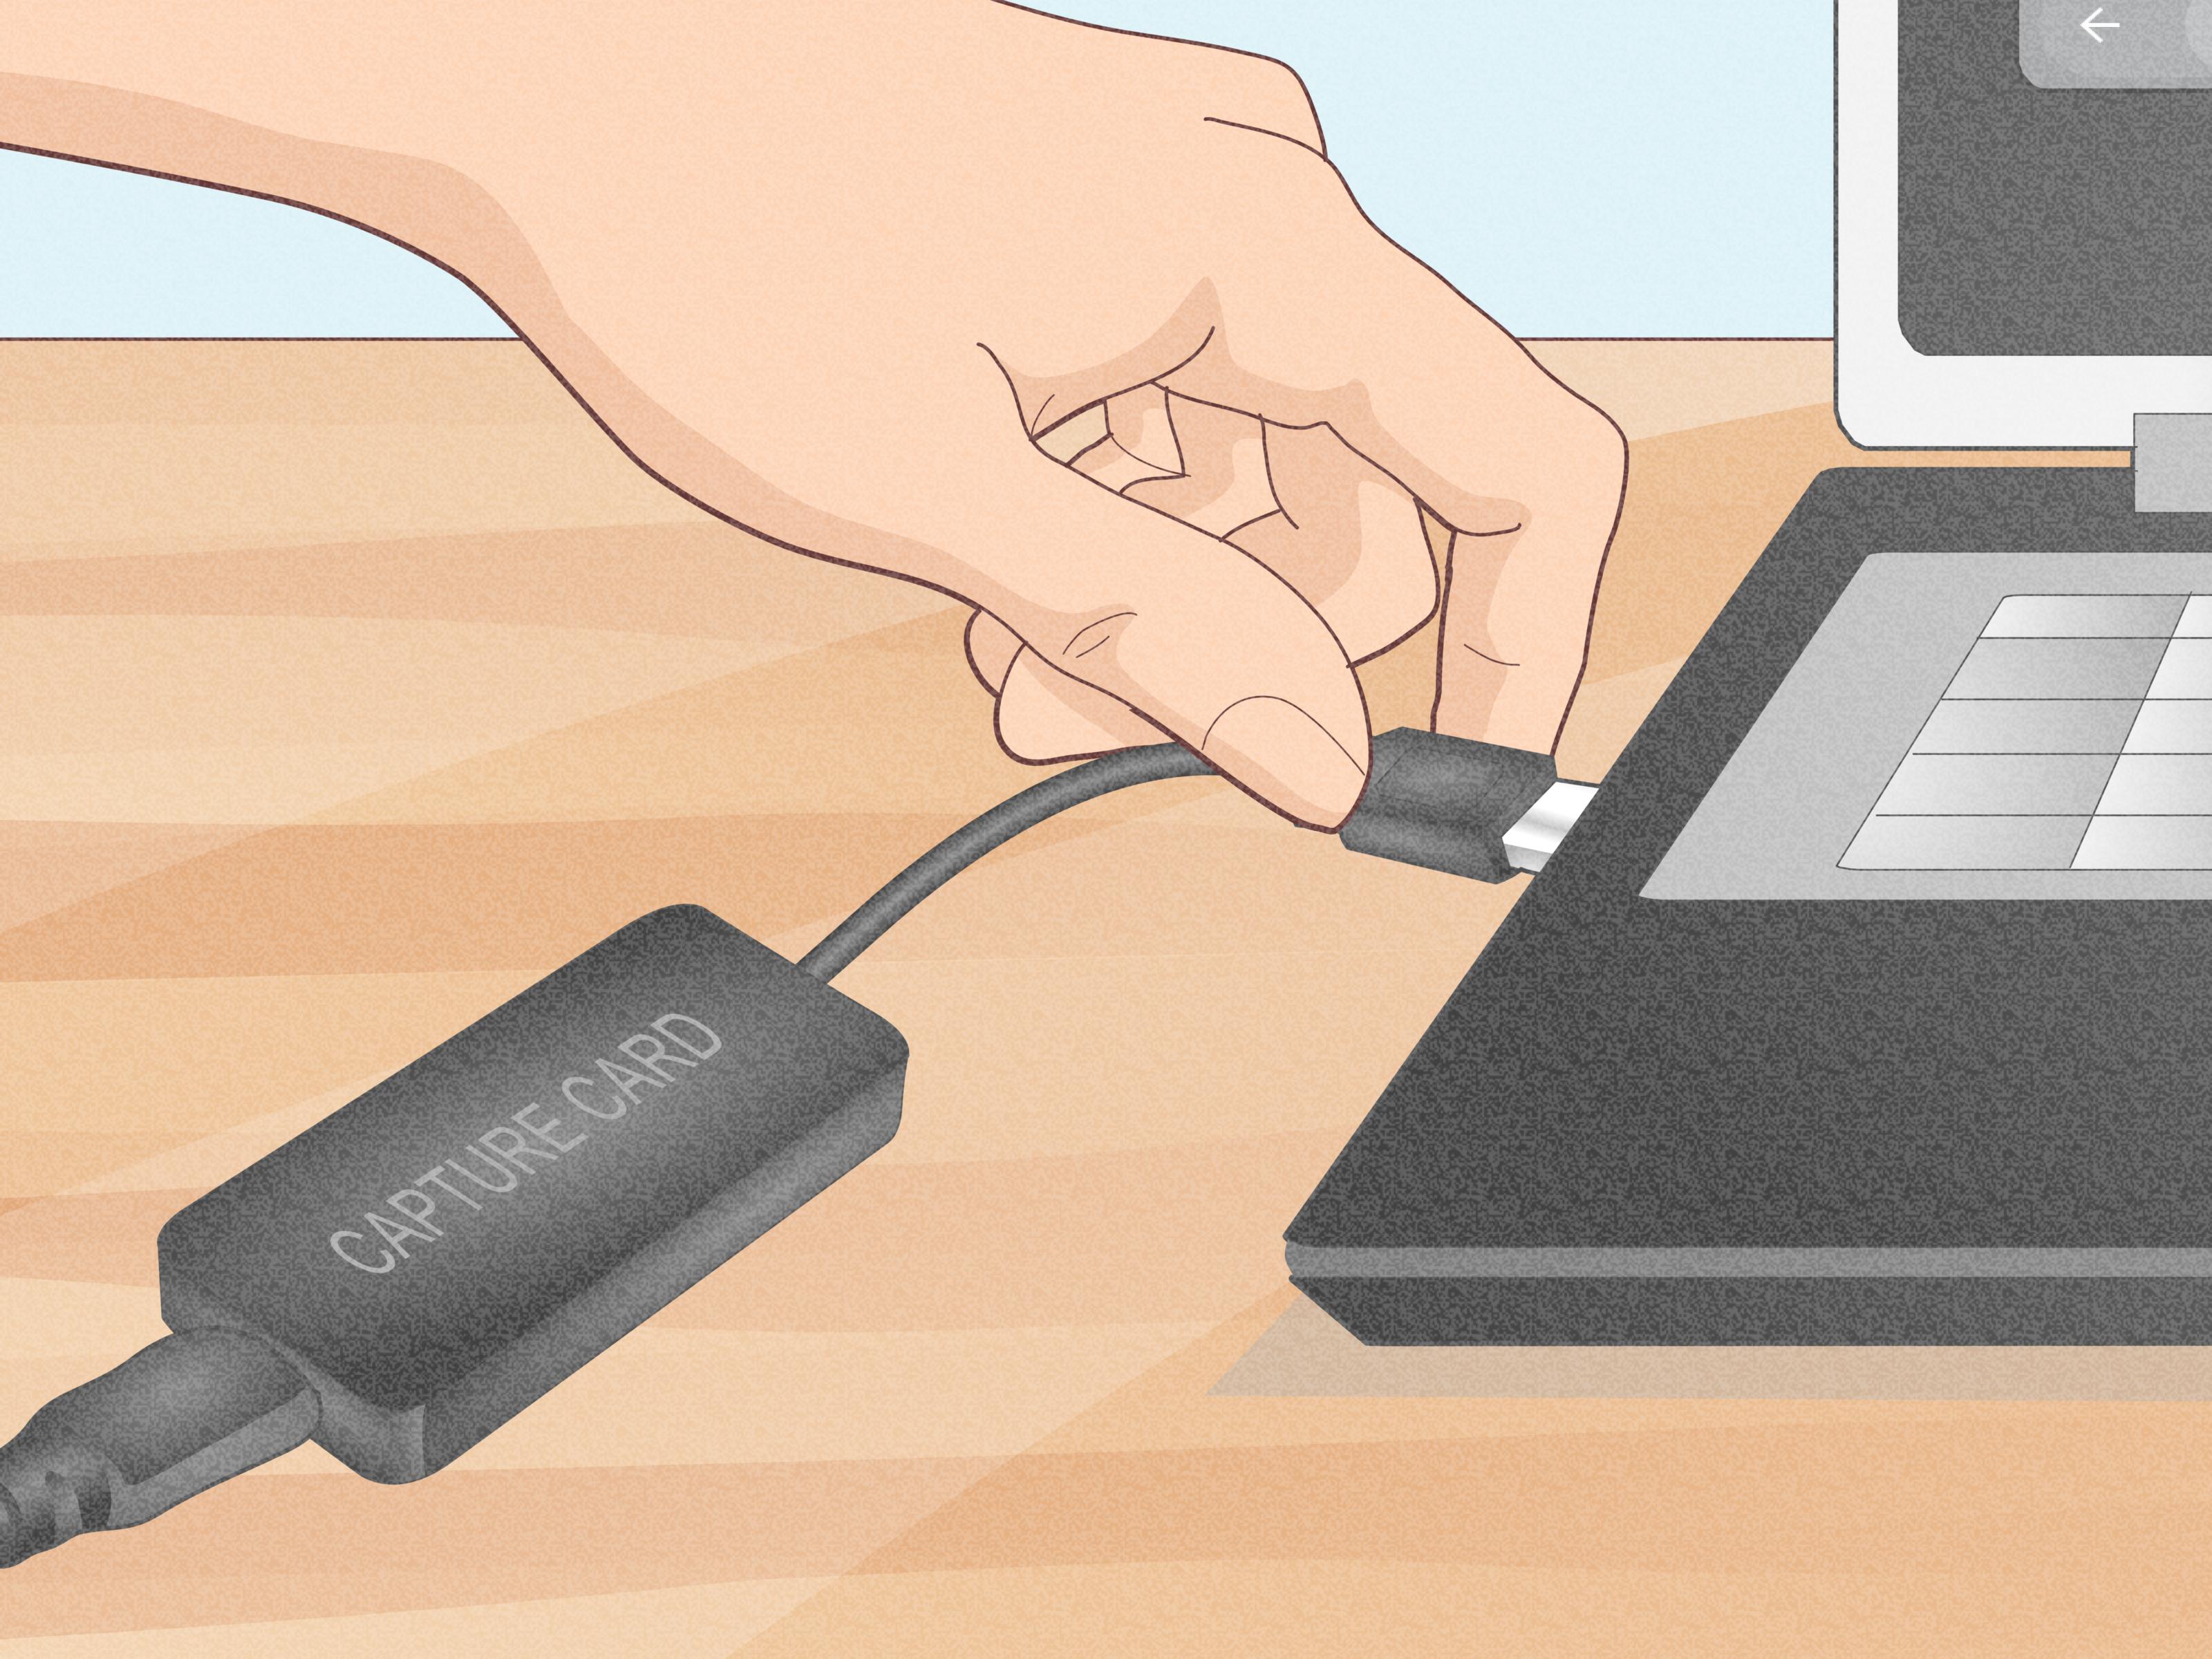
The best method is to use an HDMI capture card. A capture card accepts HDMI input from the Switch dock, converts the signal, and sends it to the Chromebook through USB. If the capture card is compatible with UVC, ChromeOS can often detect it as an external camera.
That means your Nintendo Switch video can appear inside the Chromebook Camera app, a browser-based streaming tool, or another compatible video app. This is not magic, though it may feel like it the first time your Chromebook shows The Legend of Zelda instead of your own tired webcam face.
What You Need
Before starting, gather these items:
- A Nintendo Switch or Nintendo Switch OLED model
- A Nintendo Switch dock
- The official Nintendo Switch AC adapter or a compatible power supply for docked play
- An HDMI cable
- A USB HDMI capture card that supports UVC
- A Chromebook with a USB-A or USB-C port
- A USB adapter or hub if your Chromebook does not have the right port
- The Chromebook Camera app or a compatible web-based video app
For the smoothest experience, choose a capture card that clearly lists support for ChromeOS, UVC, plug-and-play operation, or “works as a webcam.” A USB 3.0 capture card is usually better than a low-bandwidth USB 2.0 model, especially if you want 1080p video.
Step-by-Step: How to Display Nintendo Switch Games on a Chromebook
Once you have the right hardware, the setup is fairly simple. The trick is connecting the cables in the correct order and choosing the capture card as the video source on your Chromebook.
Step 1: Put the Nintendo Switch in the Dock
Open the back panel of the Nintendo Switch dock. Connect the AC adapter to the dock’s power port and plug it into the wall. Then place your Nintendo Switch console into the dock. Make sure it is seated properly. If the Switch is not fully connected, you may get no video signal.
Step 2: Connect HDMI from the Dock to the Capture Card
Take one end of the HDMI cable and plug it into the HDMI OUT port on the Nintendo Switch dock. Plug the other end into the HDMI IN port on the capture card. Do not plug it into an HDMI OUT port if your capture card has passthrough. Input receives the Switch signal; output sends it onward to another display.
Step 3: Connect the Capture Card to the Chromebook
Plug the capture card into your Chromebook using USB-A or USB-C, depending on the device. If your Chromebook only has USB-C and your capture card uses USB-A, use a quality adapter or hub. Avoid extremely cheap hubs if possible, because capture devices can be picky about bandwidth and power.
Step 4: Open the Camera App
On your Chromebook, open the Launcher and search for Camera. Open the Camera app. If the capture card is recognized, you should be able to switch cameras until you see the Nintendo Switch feed.
Some Chromebooks show a small camera-switch icon. Others may require you to open app permissions or refresh the app after plugging in the capture card. If your own face appears instead of your game, congratulations: your webcam is working. Now switch to the other camera before your Joy-Con starts judging you.
Step 5: Adjust Switch TV Settings
On the Nintendo Switch, go to System Settings > TV Settings. If the video feed is unstable, try setting the resolution manually to 1080p or 720p. You can also set TV Sound to Stereo for simpler audio compatibility.
The Nintendo Switch can output up to 1080p through HDMI in TV mode. Many affordable capture cards advertise 4K input but only capture at 1080p. That is fine for the original Switch and Switch OLED because 1080p is the practical target for docked gameplay.
Can You Play Nintendo Switch on a Chromebook Without a Capture Card?
If you mean displaying live Switch gameplay on the Chromebook screen, usually no. Without a capture card, the Chromebook has no normal way to receive the dock’s HDMI video signal.
However, there are a few related alternatives depending on what you actually want to do.
Use a TV or Portable Monitor Instead
If your goal is simply to play on a bigger screen, a TV or portable HDMI monitor is easier. Plug the Switch dock directly into the display and play with almost no setup drama. This is the best option for fast-paced games where input delay matters.
Use the Switch Built-In Capture Button for Short Clips
The Nintendo Switch can save short gameplay clips in supported games by holding the Capture Button. This is useful for quick highlights, funny moments, or proof that yes, you really did win that race by one pixel. But it is not a full live display solution and does not replace a capture card for longer recording.
Use Cloud or Remote Features for Other Platforms
Some gaming platforms support remote play or cloud streaming through a browser. Nintendo Switch does not offer a simple official browser-based remote play feature for displaying the console on a Chromebook. For Switch gameplay, HDMI capture remains the practical route.
Does Nintendo Switch Lite Work With a Chromebook?
No, not for this type of setup. The Nintendo Switch Lite does not support TV mode and does not output video through a dock. Since it cannot send HDMI video, you cannot use a capture card to display Switch Lite gameplay on a Chromebook.
You can still play Switch Lite in handheld mode, of course. But if your plan is to show gameplay on a Chromebook, TV, monitor, or capture card, you need a standard Nintendo Switch or Nintendo Switch OLED model.
Best Capture Card Features for Chromebook Users
Not all capture cards behave the same way on ChromeOS. Some are built for Windows software. Others are plug-and-play and appear as a standard USB camera. Chromebook users should focus on simplicity and compatibility.
Look for UVC Support
UVC stands for USB Video Class. A UVC-compatible capture card works like a webcam without needing special drivers. This matters because ChromeOS does not support every desktop capture-card utility built for Windows or macOS.
Choose 1080p at 60 FPS if Possible
The Nintendo Switch outputs up to 1080p in TV mode, and many games target 30 or 60 frames per second. A capture card that supports 1080p at 60 FPS gives you a cleaner, smoother image. If you only need casual viewing, 1080p at 30 FPS may be acceptable, but action games will feel better at 60 FPS.
Consider HDMI Passthrough
Some capture cards include HDMI passthrough. This lets you send the Switch signal to both the Chromebook and a TV or monitor. Passthrough is useful because it allows you to play on the low-latency display while recording or previewing on the Chromebook.
If your capture card does not have passthrough, you will play directly from the Chromebook preview. That can work, but delay may be noticeable in games that require fast timing.
Common Problems and How to Fix Them
Even with the right setup, things can go sideways. Fortunately, most issues have simple fixes.
No Video Appears on the Chromebook
First, check the cable path. The HDMI cable should run from the Switch dock’s HDMI OUT port to the capture card’s HDMI IN port. Then the capture card should connect to the Chromebook through USB.
If that looks correct, close and reopen the Camera app. Try another USB port. Restart the Chromebook. Make sure the Switch is fully seated in the dock and the dock is powered. Also test the Switch dock with a TV to confirm that the dock and HDMI cable are working.
The Chromebook Shows the Webcam Instead of the Switch
Open the Camera app and switch camera sources. If the capture card is detected, it should appear as an external camera. Browser-based tools may also ask for camera permission. Choose the capture card from the camera list instead of the built-in webcam.
The Picture Is Laggy
Some delay is normal with capture cards, especially cheap ones. Use a USB 3.0 port if available. Close extra browser tabs and apps. Lower the capture resolution to 720p if the feed stutters. For competitive games like Super Smash Bros. Ultimate, use HDMI passthrough to play on a TV or monitor while the Chromebook handles preview or recording.
There Is Video but No Sound
Check the audio settings in the app you are using. In some cases, the capture card sends audio as part of the video device. In other cases, you may need to select the capture card as the microphone or audio input. Setting the Switch TV Sound to Stereo can also help reduce compatibility issues.
The Capture Card Is Not Recognized
If ChromeOS does not detect the card, it may not be UVC-compatible or may require software that ChromeOS cannot run. Try the capture card on another computer, check the manufacturer’s compatibility notes, and test with a different USB cable. A short, high-quality cable often works better than a long mystery cable from the drawer of forgotten electronics.
Can You Record or Stream Nintendo Switch Gameplay on a Chromebook?
Yes, but expectations matter. A Chromebook can be used for simple recording or browser-based live streaming if the capture card appears as a camera source. You may be able to use the Camera app for basic recording, or use web-based streaming tools that accept webcam input.
For advanced streaming layouts, overlays, scene switching, and high-bitrate recording, a Windows PC or Mac is usually easier. OBS Studio is available for Windows, macOS, and Linux, but ChromeOS support can be complicated because Linux apps on Chromebooks do not always get easy access to capture hardware. Some users succeed with certain devices and configurations; others run into walls made of drivers, permissions, and sadness.
If your goal is casual recording, a UVC capture card plus the Chromebook Camera app may be enough. If your goal is professional streaming, use the Chromebook as a backup or lightweight setup, not the main production machine.
Is Playing Nintendo Switch on a Chromebook Worth It?
It depends on your expectations. For relaxed games such as Animal Crossing: New Horizons, Stardew Valley, turn-based RPGs, puzzle games, and slower adventures, the Chromebook method can be perfectly usable. For rhythm games, fighting games, and competitive shooters, even a small delay can make the experience feel off.
The setup shines when portability matters. If you already travel with a Chromebook and do not want to carry a full monitor, a small capture card can turn your laptop into a convenient display. It is also handy for recording tutorials, sharing gameplay in a video call, or streaming casually without buying a full desktop setup.
Safety and Compatibility Tips
Use the official Nintendo Switch dock and power adapter when possible. Third-party docks can work, but low-quality docks have a long history of making Switch owners nervous. If you use third-party accessories, choose reputable brands and read current reviews carefully.
Also remember that capture cards are intended for capturing your own gameplay, not bypassing copy protection. If a device or app uses HDCP-protected video, many capture cards will show a black screen. For normal Nintendo Switch gameplay through the dock, a standard HDMI capture setup is the usual method.
Practical Experience: What It Feels Like to Use a Chromebook as a Switch Display
Using a Chromebook to display Nintendo Switch games is a bit like turning a backpack into a mini entertainment center. It is not the most elegant setup in the world, but when it works, it feels clever. You set the Switch dock on a desk, run HDMI into a tiny capture card, plug that into the Chromebook, open the Camera app, and suddenly your game appears where your webcam preview normally lives. It is a small victory for cable-based problem solving.
The first thing most users notice is convenience. A Chromebook is light, familiar, and already has a built-in screen. If you are in a dorm room, hotel, office break area, or small apartment, using the Chromebook screen can save space. You do not need to borrow the living room TV or explain to anyone why a blue shell incident is more important than their cooking show.
The second thing you notice is latency. The game may appear almost instantly, or it may feel slightly delayed. This depends heavily on the capture card, USB connection, Chromebook performance, and app. Slow-paced games feel comfortable. You can fish, farm, decorate, explore, and chat with villagers without feeling like the controls are swimming through syrup. But in fast games, a tiny delay can matter. Jump timing in platformers, perfect shields in fighting games, and tight corners in racing games can feel less precise.
Audio can also be a little quirky. Some setups carry sound cleanly through the capture card. Others require switching audio inputs or using headphones directly from the Switch. If you are troubleshooting sound, do not assume the whole setup is broken. Often, the video is fine and the audio simply needs to be selected in the right app or simplified through the Switch TV settings.
Screen size is another real-world factor. Many Chromebooks have 11-inch to 14-inch displays. That is bigger than the Switch handheld screen, but smaller than a proper monitor. Text-heavy games may look better than expected at 720p or 1080p, but sitting too far away can make menus hard to read. A Chromebook with a bright 1080p screen gives the best experience.
The biggest lesson is to treat this setup as a practical workaround, not a perfect replacement for a TV. For casual gaming, quick recording, sharing gameplay with friends, or making a portable content setup, it is genuinely useful. For serious competitive play, a monitor with direct HDMI input is still the champ. The Chromebook method wins on flexibility; the monitor wins on speed.
In everyday use, the best version of this setup is simple: a reliable UVC capture card, a short HDMI cable, a powered Switch dock, and a Chromebook with enough performance to show the feed smoothly. Keep the cables labeled, test everything before you travel, and do not wait until five minutes before a livestream to discover that your capture card only likes one USB port. Technology has excellent comedic timing, and it loves embarrassing people on schedule.
Conclusion
You can display Nintendo Switch games on a Chromebook, but not by plugging the Switch directly into the Chromebook’s HDMI port. The dependable method is to use a docked Nintendo Switch, an HDMI cable, and a UVC-compatible HDMI capture card. ChromeOS can often recognize that capture card as an external camera, letting you view the Switch feed in the Camera app or compatible browser-based tools.
For casual play, recording, or a portable setup, this method can be surprisingly helpful. For competitive gaming, use a capture card with HDMI passthrough or play directly on a TV or monitor to avoid input delay. And if you have a Nintendo Switch Lite, remember that it does not support TV mode, so it cannot output gameplay to a Chromebook through HDMI capture.
The short version: your Chromebook is not a TV, but with the right capture card, it can do a decent impression of one.