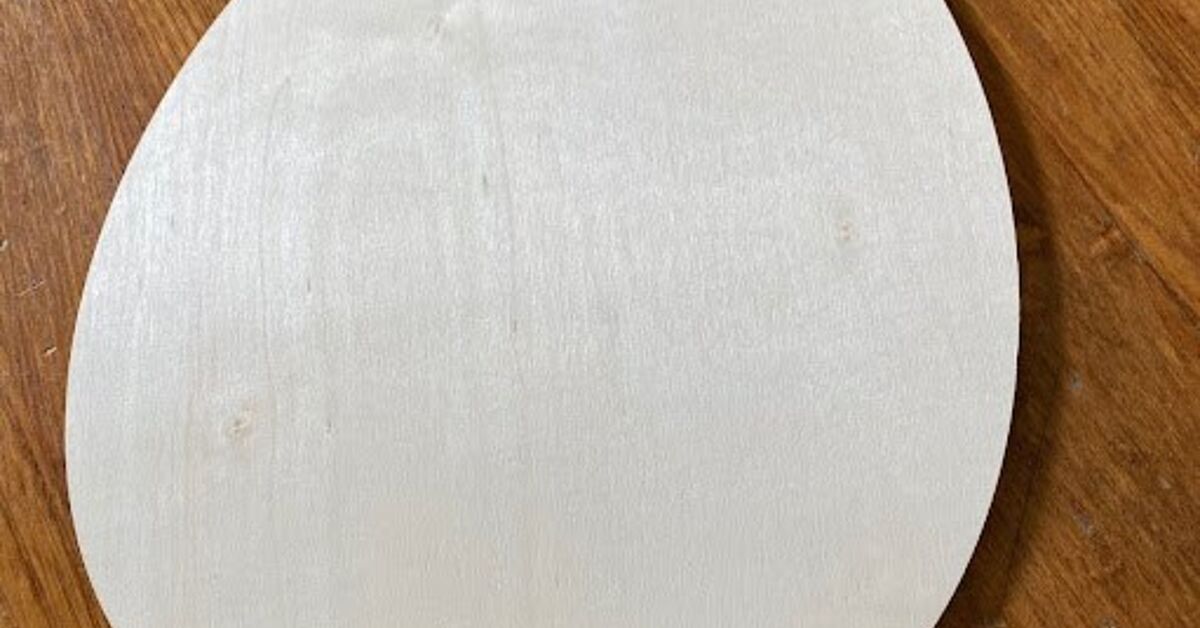
There is something wonderfully satisfying about turning a humble Dollar Tree wood cutout into Easter decor that looks like it wandered out of a boutique, checked the price tag, and decided to be dramatic. With a little paint, ribbon, faux greenery, scrapbook paper, and creativity, those simple bunny, egg, chick, and carrot shapes can become wreath accents, tiered tray pieces, mantel decorations, table signs, or personalized gifts.
The beauty of using Dollar Tree wood cutouts is that they are budget-friendly, lightweight, beginner-friendly, and endlessly customizable. You do not need a professional craft studio. You need a flat surface, a few supplies, and the emotional courage to accept that glitter will probably appear somewhere unexpected three days later.
In this guide, you will learn how to create charming Easter decor with Dollar Tree wood cutouts using simple techniques that work for farmhouse, pastel, rustic, cottagecore, modern, and kid-friendly styles. Whether you are decorating a front entryway, a spring mantel, an Easter brunch table, or a cute little corner that currently says “I forgot this shelf existed,” these ideas will help you make something festive without emptying your wallet.
Why Dollar Tree Wood Cutouts Are Perfect for Easter Decor
Dollar Tree wood cutouts are popular for Easter crafting because they are affordable, easy to paint, and available in seasonal shapes that already do half the design work for you. A bunny silhouette instantly says Easter. An egg shape begs for polka dots. A carrot cutout practically arrives wearing invisible gingham and asking to be placed in a basket.
These cutouts are usually thin and lightweight, which makes them useful for wall hangings, wreaths, signs, garlands, centerpieces, and layered craft projects. You can also combine them with other Dollar Tree Easter supplies such as ribbon, faux flowers, moss, twine, small crates, mini signs, plastic eggs, craft foam, and seasonal fabric.
Another advantage is flexibility. If you love soft pastels, paint your cutouts in blush pink, mint, lavender, butter yellow, and baby blue. If your home leans farmhouse, use white paint, natural jute, wood beads, buffalo check ribbon, and distressed edges. If your Easter style is bright and playful, bring on the dots, stripes, carrots, pom-poms, and tiny bunny tails. The same wood cutout can become sweet, rustic, elegant, or cheerfully ridiculous depending on your supplies.
Supplies You Will Need
You can keep this project very simple or turn your craft table into a full spring command center. Start with the basics and add decorative details as needed.
Basic Supplies
- Dollar Tree Easter wood cutouts such as bunnies, eggs, chicks, carrots, or seasonal signs
- Acrylic paint or chalk paint
- Foam brushes and small detail brushes
- Fine-grit sandpaper
- Hot glue gun or craft glue
- Ribbon, twine, jute cord, or lace
- Mod Podge or another decoupage medium
- Clear sealer for longer-lasting results
- Scrapbook paper, napkins, fabric scraps, or stencils
- Faux greenery, small flowers, moss, pom-poms, wood beads, or buttons
If you are crafting with children, use washable paint, safety scissors, and kid-safe glue instead of hot glue. Adults should handle any cutting, sanding, or heat tools. Easter crafts are supposed to create memories, not a family debate about who touched the glue gun.
Step 1: Choose a Theme Before You Paint
Before opening the paint bottles, decide what kind of Easter decor you want. This step saves time, prevents color chaos, and keeps your final display looking intentional rather than “the craft aisle sneezed.”
Popular Easter Decor Styles
Pastel cottage style: Use soft pink, lavender, sage green, pale yellow, and floral patterns. Add lace, tiny flowers, and soft ribbon.
Farmhouse Easter style: Use white, cream, gray, black, natural wood, burlap, jute, and buffalo check ribbon. Distress the edges for a vintage look.
Bright family-friendly style: Use cheerful colors, polka dots, stripes, glitter accents, and funny bunny faces. This style works especially well for kids’ rooms, classrooms, and Easter egg hunt displays.
Neutral spring style: Use ivory, tan, muted green, soft brown, and natural textures. Add moss, wood beads, and simple lettering for decor that can stay up after Easter.
Choosing a theme also helps when you are making several pieces at once. A matching set of bunny cutouts, egg signs, and carrot accents can make a mantel, tray, or entry table feel coordinated without looking overly perfect.
Step 2: Prep the Wood Cutouts
Dollar Tree wood cutouts are easy to work with, but a little preparation makes a big difference. First, remove any tags, stickers, or hanging strings you do not want to use. If the surface feels rough, lightly sand it with fine-grit sandpaper. Wipe away dust with a dry cloth.
If your cutout has printed artwork and you want a clean base, paint one or two coats of white acrylic paint or chalk paint before adding your final color. This helps cover the original design and gives your new colors a smoother finish.
For a rustic look, do not worry about making the base coat perfect. A slightly uneven coat can actually make the finished piece look more handmade and cozy. In other words, the craft gods have given you permission to stop repainting the same bunny ear twelve times.
Step 3: Paint the Base Color
Paint is the fastest way to transform a wood cutout. Use a foam brush for large areas and a small brush for edges or details. Apply thin coats instead of one thick coat. Thin coats dry more evenly and reduce streaks.
For Easter decor, soft colors usually work beautifully. Try these combinations:
- White bunny with a blush pink bow
- Mint green egg with white polka dots
- Yellow chick with orange feet and a tiny floral crown
- Natural wood carrot with orange paint and raffia greenery
- Lavender egg with gold paint pen accents
If you want a modern look, try painting the entire cutout matte white, then add simple black lettering such as “hop,” “spring,” or “happy Easter.” If you prefer farmhouse style, paint the piece white, let it dry, and lightly sand the edges so the darker wood or printed layer peeks through.
Step 4: Add Patterns and Texture
This is where a plain cutout becomes charming Easter decor. Patterns make the piece feel finished, and texture gives it that handmade, boutique-style personality.
Easy Pattern Ideas
Polka dots: Use the end of a paintbrush handle, pencil eraser, or small round sponge to dot eggs, bunnies, or signs.
Stripes: Use painter’s tape to create clean stripes. Pastel stripes look classic on egg cutouts.
Gingham: Paint a light base color, then add vertical and horizontal lines in a slightly darker shade. This looks adorable on carrots and bunny bows.
Floral accents: Paint tiny flowers along one side of an egg or near a bunny ear. Simple five-dot flowers are easy and forgiving.
Dry brushing: Dip your brush in a tiny bit of paint, wipe most of it off, then lightly drag it across the surface. This creates a weathered effect that works well for farmhouse Easter decor.
You can also use scrapbook paper or paper napkins for decoupage. Cut the paper to fit part or all of the wood cutout, apply a thin layer of Mod Podge, smooth the paper down, and seal over the top. Floral napkins on bunny bodies or patterned scrapbook paper on Easter eggs can create a high-end look with very little effort.
Step 5: Decorate with Ribbon, Twine, and Florals
Accessories are the difference between “painted wood shape” and “adorable Easter decoration that your aunt might ask to borrow forever.” Ribbon, twine, florals, and greenery add dimension and softness.
For bunny cutouts, tie a ribbon around the neck or attach a small bow near one ear. Add a pom-pom or cotton ball for the tail. For egg cutouts, glue a small ribbon loop to the top for hanging, or add a cluster of faux flowers to one corner. For carrot cutouts, wrap the top with jute twine and glue on raffia, faux greenery, or small leaves.
Mini florals are especially useful for Easter projects. Place them sparingly so they look charming, not like the bunny fell into a garden center. A few tiny blooms near the ear, tail, or edge of a sign are usually enough.
Step 6: Turn Cutouts into Finished Easter Decor
Once your wood cutouts are painted and decorated, decide how to display them. This is where Dollar Tree crafting becomes extra fun because you can combine inexpensive pieces into decor that feels custom.
Make an Easter Wreath
Attach bunny, egg, or carrot cutouts to a grapevine wreath, foam wreath form, or wire wreath frame. Add faux greenery, ribbon, plastic eggs, and a large bow. Keep the heavier items near the bottom or one side so the wreath feels balanced. If the wreath will hang outdoors, use a weather-protected spot and seal painted wood pieces first.
Create a Tiered Tray Display
Small wood cutouts are perfect for tiered trays. Place a painted bunny on one level, a mini carrot sign on another, and fill empty spaces with moss, faux eggs, tiny flowers, and small mugs. Use repeated colors to make the tray feel cohesive.
Design a Mantel Scene
For a mantel, create a simple spring village using several cutouts. Use larger bunny or egg shapes as anchors, then add garland, candlesticks, faux tulips, and framed prints. Vary the heights so the arrangement does not look flat.
Make Place Cards or Table Favors
Small egg or bunny cutouts can become Easter brunch place cards. Paint each one, write a guest’s name with a paint pen, and place it on a napkin or mini easel. Guests can take them home as favors, which is much better than sending them home with leftover deviled eggs in suspicious containers.
Create a Garland
Paint several small cutouts in coordinating colors, then attach them to twine with hot glue or mini clothespins. Hang the garland across a mantel, window, shelf, classroom board, or dessert table.
Dollar Tree Wood Cutout Project Ideas
Need inspiration? Here are specific project ideas that are easy to personalize.
1. Farmhouse Bunny Door Hanger
Paint a bunny cutout white, then lightly sand the edges. Add a buffalo check bow around the neck and glue a small pom-pom tail near the bottom. Attach jute twine to the back for hanging. This looks lovely on an interior door, pantry door, or covered porch.
2. Pastel Easter Egg Trio
Paint three egg cutouts in different pastel colors. Add dots to one, stripes to another, and tiny flowers to the third. Display them together on a shelf or attach them to a small wood plank for a cheerful Easter sign.
3. Carrot Patch Mini Sign
Paint carrot cutouts orange and dry brush brown paint around the edges. Add raffia or green ribbon to the tops. Glue them to a painted Dollar Tree sign or crate and write “Carrot Patch” across the front.
4. Decoupage Floral Bunny
Paint the bunny base white. Use floral napkins or scrapbook paper to cover the body with decoupage medium. Add a satin bow and a small flower near one ear. This style looks sweet on a nursery shelf, spring table, or Easter basket display.
5. Kids’ Easter Craft Station
Set out wood cutouts, washable paint, stickers, markers, and pom-poms. Let kids decorate their own Easter shapes. Keep the designs simple and embrace the results. A bunny with seven eyes and one purple ear is not a mistake; it is modern art with whiskers.
Tips for Making Dollar Tree Easter Decor Look More Expensive
The secret to high-end-looking Dollar Tree Easter decor is restraint. You can use inexpensive supplies, but choose colors and textures carefully.
- Use a limited color palette of three to five colors.
- Layer textures such as wood, jute, fabric, greenery, and ribbon.
- Replace shiny plastic accents with matte paint or natural materials.
- Use paint pens for clean lettering and small details.
- Add dimension with raised bows, flowers, beads, or layered cutouts.
- Seal the finished piece if it will be handled often or displayed outside.
Another helpful trick is to mix Dollar Tree pieces with items you already own. A painted wood bunny looks more polished when styled beside real flowers, ceramic dishes, woven baskets, glass jars, or neutral candles. The contrast makes the handmade piece feel intentional and charming.
Common Mistakes to Avoid
Even simple Easter crafts can go sideways if you rush. Avoid these common mistakes for better results.
Using Too Much Glue
Hot glue is helpful, but giant glue blobs can make a project look messy. Use small dots and hold embellishments in place until secure.
Skipping Dry Time
Paint needs time to dry before layering colors, adding paper, or attaching ribbon. If you rush, colors can smear and paper can wrinkle.
Overdecorating Every Inch
Leave some breathing room. A simple bunny with one beautiful bow often looks better than a bunny wearing ribbon, glitter, flowers, pearls, and the emotional weight of every craft supply you own.
Forgetting the Back
If your cutout will be visible from both sides, paint the back too. This is especially important for garlands, hanging signs, and table centerpieces.
How to Store Your Easter Wood Cutout Decor
After Easter, wrap delicate pieces in tissue paper, paper towels, or bubble wrap. Store them in a labeled plastic bin or sturdy box. Keep wreaths in a wreath bag or hang them in a closet if possible. Avoid storing painted wood in damp areas because moisture can warp thin wood or damage paper details.
If you made several small pieces for a tiered tray, place them in a zip-top bag or small container before putting them in your seasonal decor bin. Future you will appreciate not having to dig through faux grass like an archaeologist searching for a missing carrot sign.
Experience-Based Notes: What Actually Works When Crafting with Dollar Tree Wood Cutouts
After making several Easter projects with Dollar Tree wood cutouts, one of the biggest lessons is that simple designs usually turn out best. It is tempting to buy every ribbon, flower, sticker, and glitter bottle in sight because everything feels affordable. But when you bring it home, the craft table can quickly look like the Easter Bunny opened a supply warehouse and then left for lunch. A planned color palette saves the project.
For beginner crafters, white chalk paint or white acrylic paint is a reliable base. It covers printed designs, brightens pastel colors, and gives scrapbook paper a clean background. If the first coat looks streaky, do not panic. A second thin coat usually fixes it. Thick paint creates bumps, especially near the edges, so patience is better than paint overload.
Another useful experience is to test ribbon placement before gluing. A bow that looks adorable in your hand can look strangely enormous on a small bunny cutout. Lay out all embellishments first, take a quick phone photo, and then glue once you like the arrangement. This small step prevents the classic crafter’s regret known as “Why did I put that flower there?”
Decoupage is beautiful, but it works best when the paper is thin and the glue layer is light. Napkins can wrinkle easily, so separate the printed top layer from the plain backing layers before applying it. Smooth gently from the center outward. A few wrinkles are fine; they can even add texture. However, too much medium can tear the paper or make it cloudy.
For outdoor pieces, sealing matters. Painted wood cutouts are not heavy-duty outdoor signs, but a clear sealer helps protect them if they are displayed on a covered porch or door. Avoid leaving thin wood pieces where they will get soaked by rain. They are charming, not superheroes.
The most useful styling trick is repetition. If you use the same ribbon on a bunny wreath, a carrot sign, and a tiered tray piece, the whole room feels connected. The decor looks planned even if each item cost very little. Repeating one accent color, such as sage green or soft pink, also makes a mixed display look polished.
Finally, do not underestimate handmade imperfections. A slightly crooked dot, a distressed edge, or a tiny brush mark can make the piece feel warm and personal. Dollar Tree wood cutouts are not about creating museum-level art. They are about making seasonal decor that feels happy, welcoming, and uniquely yours. The best Easter crafts are the ones that make people smile when they walk into the room.
Conclusion
Creating charming Easter decor with Dollar Tree wood cutouts is one of the easiest ways to decorate for spring on a budget. With paint, ribbon, paper, greenery, and a little imagination, basic wood shapes can become wreaths, garlands, table favors, mantel accents, tiered tray decorations, and personalized signs.
The key is to start with a clear style, prep the wood surface, use thin paint layers, add texture thoughtfully, and display your finished pieces with other spring elements. Whether your Easter look is soft and elegant, rustic and neutral, or bright and playful, Dollar Tree wood cutouts give you an affordable blank canvas for creativity.
Best of all, these projects are approachable. You do not need expert skills or expensive supplies. You just need a few cutouts, a little time, and the willingness to let one or two rogue pieces of moss live permanently somewhere on your floor. That is not mess. That is seasonal character.