Animated GIFs are the internet’s most efficient form of communication: a tiny loop that can say
“here’s the bug,” “here’s the vibe,” or “here’s my cat judging me” faster than a paragraph ever could.
The best part? You don’t need to be a designer, editor, or wizard who lives inside Photoshop. You just
need the right method for your goalsocial post, tutorial, meme, product demo, or quick reaction.
In this guide, you’ll learn multiple ways to create an animated GIF from videos, photos, slides, and
screen recordings, plus the practical optimization tricks that keep file sizes small without turning
your masterpiece into a pixelated crime scene.
What Is a GIF, and When Should You Use One?
A GIF (Graphics Interchange Format) is an image format that can play multiple frames in a looplike a
flipbook that never learned how to stop. The tradeoff is color: GIFs use a limited palette (up to 256
colors), which is why they’re fantastic for simple graphics, UI demos, short clips, and memesbut can
struggle with smooth, high-color video like sunsets, confetti, or your cousin’s wedding fireworks.
Use a GIF when:
- You need a short, looping visual that plays instantly (especially in chats, docs, and social posts).
- You’re showing a quick “before/after,” a UI interaction, or a tiny tutorial step.
- You want silent playback by default (GIFs are basically born muted).
Consider MP4 (or another format) when:
- The clip is longer than a few seconds, needs audio, or must look crisp with lots of gradients.
- You need smaller file sizes for longer animations.
- You care about high-quality playback on every device and platform.
Before You Start: A 60-Second Plan That Saves You 60 Minutes
The biggest mistake people make is starting with the tool, not the destination. Different platforms
have different limits, and your “perfect” GIF can become a 40MB loaf of sadness if you don’t set a few
guardrails first.
Answer these four questions:
- Where will it live? Website? Slack? Email? Social? Product docs?
- What’s the point? Reaction, tutorial, product demo, meme, or announcement?
- How long should it be? Most great GIFs are short and loop cleanly.
- How big should it look? Aim for “clear on a phone screen,” not “cinema IMAX.”
As a practical guideline, short loops (often under ~6 seconds) tend to perform best for messaging and
social contexts, and smaller dimensions are usually more shareable. If you’re uploading to a GIF
platform, pay attention to file size and duration recommendations.
Method 1: Create a GIF Online (Fastest Option)
Online GIF makers are perfect when you want quick results and minimal fuss. They’re especially good
for turning a short video clip into a reaction GIF, adding captions, or trimming to the funniest moment
(you know the one).
Option A: Make a GIF with GIPHY (video or images)
- Upload your content (a short video or a set of images).
- Trim it down to the moment that matters. If your GIF has a “warm-up,” cut it.
- Add text (captions help people understand the GIF even when it’s tiny).
- Decorate lightly (stickers are fun; stickers everywhere is… a choice).
- Create and download or share.
Example: You have a 12-second clip of a new app feature. Trim it to 3 seconds: tap button → menu appears → success state.
That’s the story. Everything else is small talk.
Option B: Make a GIF with Canva (drag-and-drop simplicity)
- Start a design (choose a template or a blank canvas).
- Upload photos or video and place them on the timeline/pages.
- Add text overlays (short, bold captions work best on mobile).
- Download as GIF and test it in a browser or chat app.
Canva is especially handy for “explainer GIFs” like: “Step 1: Choose size,” “Step 2: Click export,” “Step 3: Done.”
It’s less about precision color control, more about speed and polish.
Method 2: Create an Animated GIF in Photoshop (Best Control)
Photoshop is the “control freak’s” optionin the nicest way. If you want the best balance of quality
and optimization (size, color, dithering, looping), Photoshop gives you the knobs to tweak.
Make a GIF from a video in Photoshop
-
Import video frames: Use File → Import → Video Frames to Layers.
Choose a time range (trim it!) and create a frame animation. - Open the Timeline: Use the Timeline panel to preview and adjust frame timing.
-
Clean up frames: Remove unnecessary frames, crop extra space, and resize the canvas.
(The fewer pixels, the smaller the file. Pixels are adorable, but they are also heavy.) -
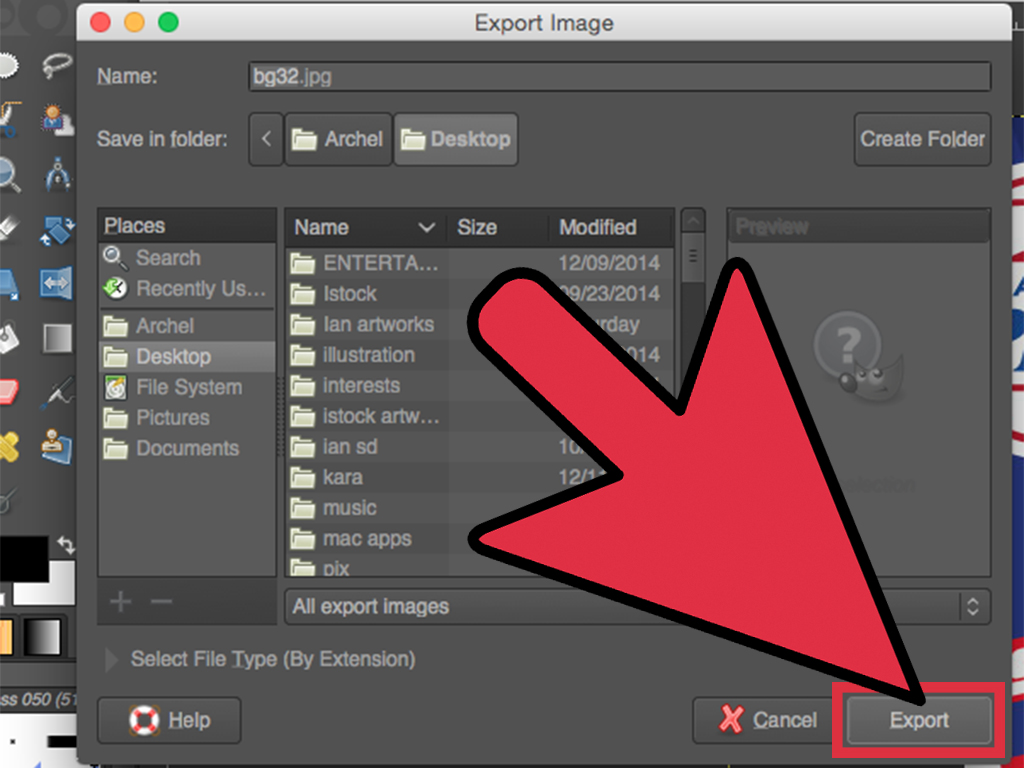
Export properly: Use File → Export → Save for Web (Legacy).
Choose GIF, set looping to Forever, and adjust colors/dithering for the best size/quality balance. - Preview: Test in a browser preview to make sure timing and looping feel right.
Photoshop export settings that usually win:
- Resize first (don’t export a 1920px-wide GIF unless you enjoy regret).
- Reduce colors when you can (256 isn’t always necessary).
- Use dithering carefully (it can improve gradients but often increases file size).
- Lower frame rate for UI demos (often 10–15 fps feels smooth enough).
Specific example: For a simple UI tutorial GIF, try 600–900px wide, ~12 fps, fewer colors if possible, and loop forever.
You’ll usually get a crisp result that doesn’t weigh as much as a small planet.
Method 3: Turn Slides into GIFs (PowerPoint and Keynote)
If you’re making an instructional GIFlike a process diagram, a quick animated headline, or “how it works” stepsslides
are secretly amazing. You can build clean visuals, animate them, then export as a GIF without touching video editing.
PowerPoint: Export a slideshow as an animated GIF
- Build your slide(s) with animations and transitions.
- Export: Use File → Export → Create an Animated GIF.
- Choose quality (and keep dimensions reasonable for the platform where you’ll post it).
- Test the loop to ensure the last frame flows into the first.
Keynote: Export directly to Animated GIF
- Open your presentation in Keynote.
- Export: Use File → Export To → Animated GIF (Mac) or Export → Animated GIF (iPhone/iPad).
- Select resolution and frame rate that matches how the GIF will be viewed.
- Set slide range if you only need part of the deck.
Example: Creating a “3-step onboarding” GIF? Use three slides:
Slide 1: “Pick a plan” (animate highlight) → Slide 2: “Customize” (animate toggles) → Slide 3: “Publish” (animate checkmark).
Export as a GIF and you’ve got a clean loop for social, email, or help docs.
Method 4: Create a GIF on Your Phone
Phone-made GIFs are perfect for quick animations from photos, short reactions, or social-first content. You lose some fine-tuned
optimization, but you gain speedand sometimes that’s the whole game.
Google Photos (Android): Create an animation from photos
- Open Google Photos.
- Tap Create (or the creation option).
- Select Animation.
- Choose the photos and tap Create.
Tip: Pick photos with a small change between frames (waving hand, turning head, progress steps). Huge changes look chaotic,
like your GIF is trying to escape the screen.
iPhone: Make GIFs from Live Photos or clips (common approaches)
Many iPhone workflows use built-in options or shortcuts to convert a Live Photo or short clip into a GIF-like loop. If your
result looks choppy, shorten the clip and reduce the motion (small movements loop better than big camera swings).
Method 5: Record Your Screen and Export as a GIF (Tutorial Gold)
If you create tutorials, report bugs, or show “click here → this happens,” screen-recording-to-GIF is one of the most useful
skills you can learn. It turns “I swear it’s broken” into “here’s exactly what’s broken,” which is basically magic.
Option A: ScreenToGif (Windows-friendly screen recording + editor)
- Record a selected area of your screen (keep the capture region small).
- Edit frames: remove mistakes, pauses, and “oops I clicked the wrong thing.”
- Add annotations (arrows, highlights, text) sparingly for clarity.
- Export as GIF and test playback.
Option B: TechSmith Snagit (quick video-to-GIF workflow)
- Capture your screen or open an existing capture/video.
- Trim to the shortest segment that still tells the story.
- Export as animated GIF and choose settings that balance quality and size.
Example: If you’re demonstrating a software bug, record only the app window (not your entire desktop), trim to 5–7 seconds,
and add a simple text label like “Clicking Save freezes here.” That one GIF can replace a 12-message back-and-forth.
How to Make Your GIF Smaller (Without Making It Look Like a Potato)
GIF optimization is mostly about removing unnecessary work the file has to do. Less canvas area, fewer frames, fewer colors,
fewer fancy effects. You’re basically putting your GIF on a sensible budget.
7 practical ways to shrink GIF size:
- Crop aggressively: Remove unused space around the subject (blank margins are silent file-size killers).
- Resize down: If it’s viewed in a chat bubble, it doesn’t need to be 1600px wide.
- Trim duration: Cut to the single moment that matters; loop it cleanly.
- Reduce frame rate: Many UI GIFs look fine at 10–15 fps; memes can go even lower.
- Reduce colors: Try fewer colors for line art, UI, and simple scenes.
- Use dithering carefully: It can help gradients, but it can also inflate file size.
- Remove repeated frames: Long “still” pauses waste space; shorten them or use fewer repeated frames.
Quick rule of thumb: start by shrinking dimensions and trimming length firstthose two moves usually give the biggest file-size wins
with the least quality pain.
Quality Checklist: A GIF Worth Sharing
- It tells one story (one joke, one reaction, one tutorial step).
- It loops naturally (no awkward jump-cut at the end).
- Text is readable on mobile (big fonts, high contrast, minimal words).
- File size is reasonable for where it’s posted.
- Motion isn’t frantic (fast flicker can be unpleasant; smooth beats frantic).
Troubleshooting Common GIF Problems
“My GIF looks grainy or banded.”
That’s usually the 256-color palette showing its limits. Try reducing gradients (or simplifying backgrounds), resizing smaller,
and adjusting dithering. If the content is photo-heavy, consider using MP4 for the “best-looking” version.
“The file size is gigantic.”
Start with the big levers: crop, resize, trim duration, and lower the frame rate. Then reduce colors. Finally, clean up repeated frames.
If you’re still stuck, your clip may simply be better as a short MP4 (especially if it’s long or high-detail).
“The loop feels weird.”
Choose an endpoint that matches the beginning. For example, if someone raises an eyebrow, end on a similar “neutral” face and loop from there.
If you’re exporting from slides, try making the last slide visually match the first.
“Timing is too fast or too slow.”
Adjust frame delay (for frame-based GIFs) or export frame rate (for video-based GIFs). For tutorials, slower is often clearer. For reactions,
snappier can be funbut don’t turn it into a hummingbird.
Experiences and Real-World Lessons from Making GIFs (Extra)
If you make GIFs long enough, you start to notice a pattern: the “hard part” is rarely the tool. The hard part is editing your idea down
to its funniest, clearest, smallest version. People don’t share GIFs because they’re technically impressivethey share them because they’re
instantly understandable. The most successful GIFs usually do one thing, and do it quickly.
One common experience: you think you need the whole clip for context, but you don’t. A lot of first-time GIFs have a long runway:
the cursor wanders, the menu takes a second, the person pauses, the action finally happens… and by then the viewer has already scrolled.
When you trim that same GIF to “click → result,” suddenly it feels satisfying. It’s the visual equivalent of removing throat-clearing
from a speech. Nobody misses it, and everyone is happier.
Another real-world lesson is that dimensions matter more than you expect. If you’ve ever wondered why your GIF looks
“fine” in an editor but “meh” in a chat app, it’s because most platforms shrink it. Thin text and tiny UI elements become unreadable
fast. In practice, bigger fonts and simpler shapes beat elegant details. If you’re making a tutorial GIF, zoom in on the relevant area
and make the cursor movement obvious. Your goal isn’t to document every pixelit’s to teach the action.
File size battles are basically a rite of passage. You’ll do the classic thing: export once, see a massive file, and briefly consider
moving to the mountains. The breakthrough is learning the order of operations:
crop → resize → trim → reduce frame rate → reduce colors. If you do those in that order, you usually get a dramatic size
drop while keeping the GIF recognizable. If you do it backwardtweaking colors firstyou’ll waste time and still end up with a large file.
Also, it’s surprisingly common to keep a slightly “less smooth” GIF because it loads faster and gets shared more. The internet rewards
speed.
GIF looping is its own mini art form. A perfect loop feels like it has no beginning or end. In the real world, the easiest way to get there
is to choose motion that naturally cycles: a wave, a nod, a loading spinner, a subtle bounce, a UI toggle turning on and off. For clips that
don’t naturally cycle, you can often fake it by cutting at a moment where the scene looks similar to the start. And if all else fails,
a very short GIF that loops quickly can feel “intentional” even when it’s imperfectlike a stylistic choice rather than an accident.
Finally, captions are the unsung hero. Even when a GIF is “obvious,” a short line of text can turn it into a shareable reaction or a
clear tutorial. Think of captions like street signs: you can technically drive without them, but you’ll miss the exit. Keep captions short,
place them where they don’t cover the key action, and use high contrast. If you’re making a work-related GIF (like a bug report),
labeling the key step (“Click Save”) can save everyone time and prevent misunderstandings.
After all that, here’s the most practical takeaway: a great GIF is usually shorter than you want, smaller than you expect, and simpler
than your first draft. Make one, test it where you’ll share it, then refine. That loop of “create → preview → shrink → improve” is how
GIFs go from “technically correct” to “instantly shareable.”
Conclusion
Creating an animated GIF is mostly about choosing the right workflow: online tools for speed, Photoshop for control, slides for clean explainers,
and screen recorders for tutorials and bug reports. Once you’ve got the basic steps down, the real superpower is optimizationcropping, resizing,
trimming, and simplifying until the GIF loads quickly and loops smoothly. Keep it short, keep it clear, and let the loop do the talking.