Finding an old iPod can feel like opening a small aluminum time capsule. The music may include forgotten playlists, questionable workout songs, and at least one album you once defended with unnecessary passion. Before you charge, repair, sell, or accessorize the device, however, you need to answer one important question: Which iPod generation is it?
Apple released several iPod families, including the original iPod, iPod classic, iPod mini, iPod nano, iPod shuffle, and iPod touch. Each family received multiple generations, storage configurations, colors, and mid-cycle revisions. Some models are easy to recognize, while others look nearly identical.
Fortunately, identifying your iPod does not require a degree in vintage electronics. You can usually determine the exact model by checking its model number, reviewing its serial and software information, or studying its physical design.
Why You Should Identify Your iPod Generation
Your iPod generation determines which cables, cases, docks, replacement batteries, screens, and internal parts are compatible. It can also affect software support, resale value, storage options, and repair instructions.
For example, later iPod touch models use a Lightning connector, while earlier versions use Apple’s wide 30-pin dock connector. An 80GB full-size iPod could be a fifth-generation video model or an early iPod classic. Although they look similar, some replacement parts are different.
Correct identification is especially important when you plan to:
- Buy a charger or syncing cable
- Replace the battery, screen, hard drive, or headphone jack
- Order a case, dock adapter, or faceplate
- Check software compatibility
- Estimate collector or resale value
- Verify a secondhand seller’s description
Understand the Numbers Printed on an iPod
Before identifying your device, it helps to understand three numbers commonly associated with Apple products.
Model number
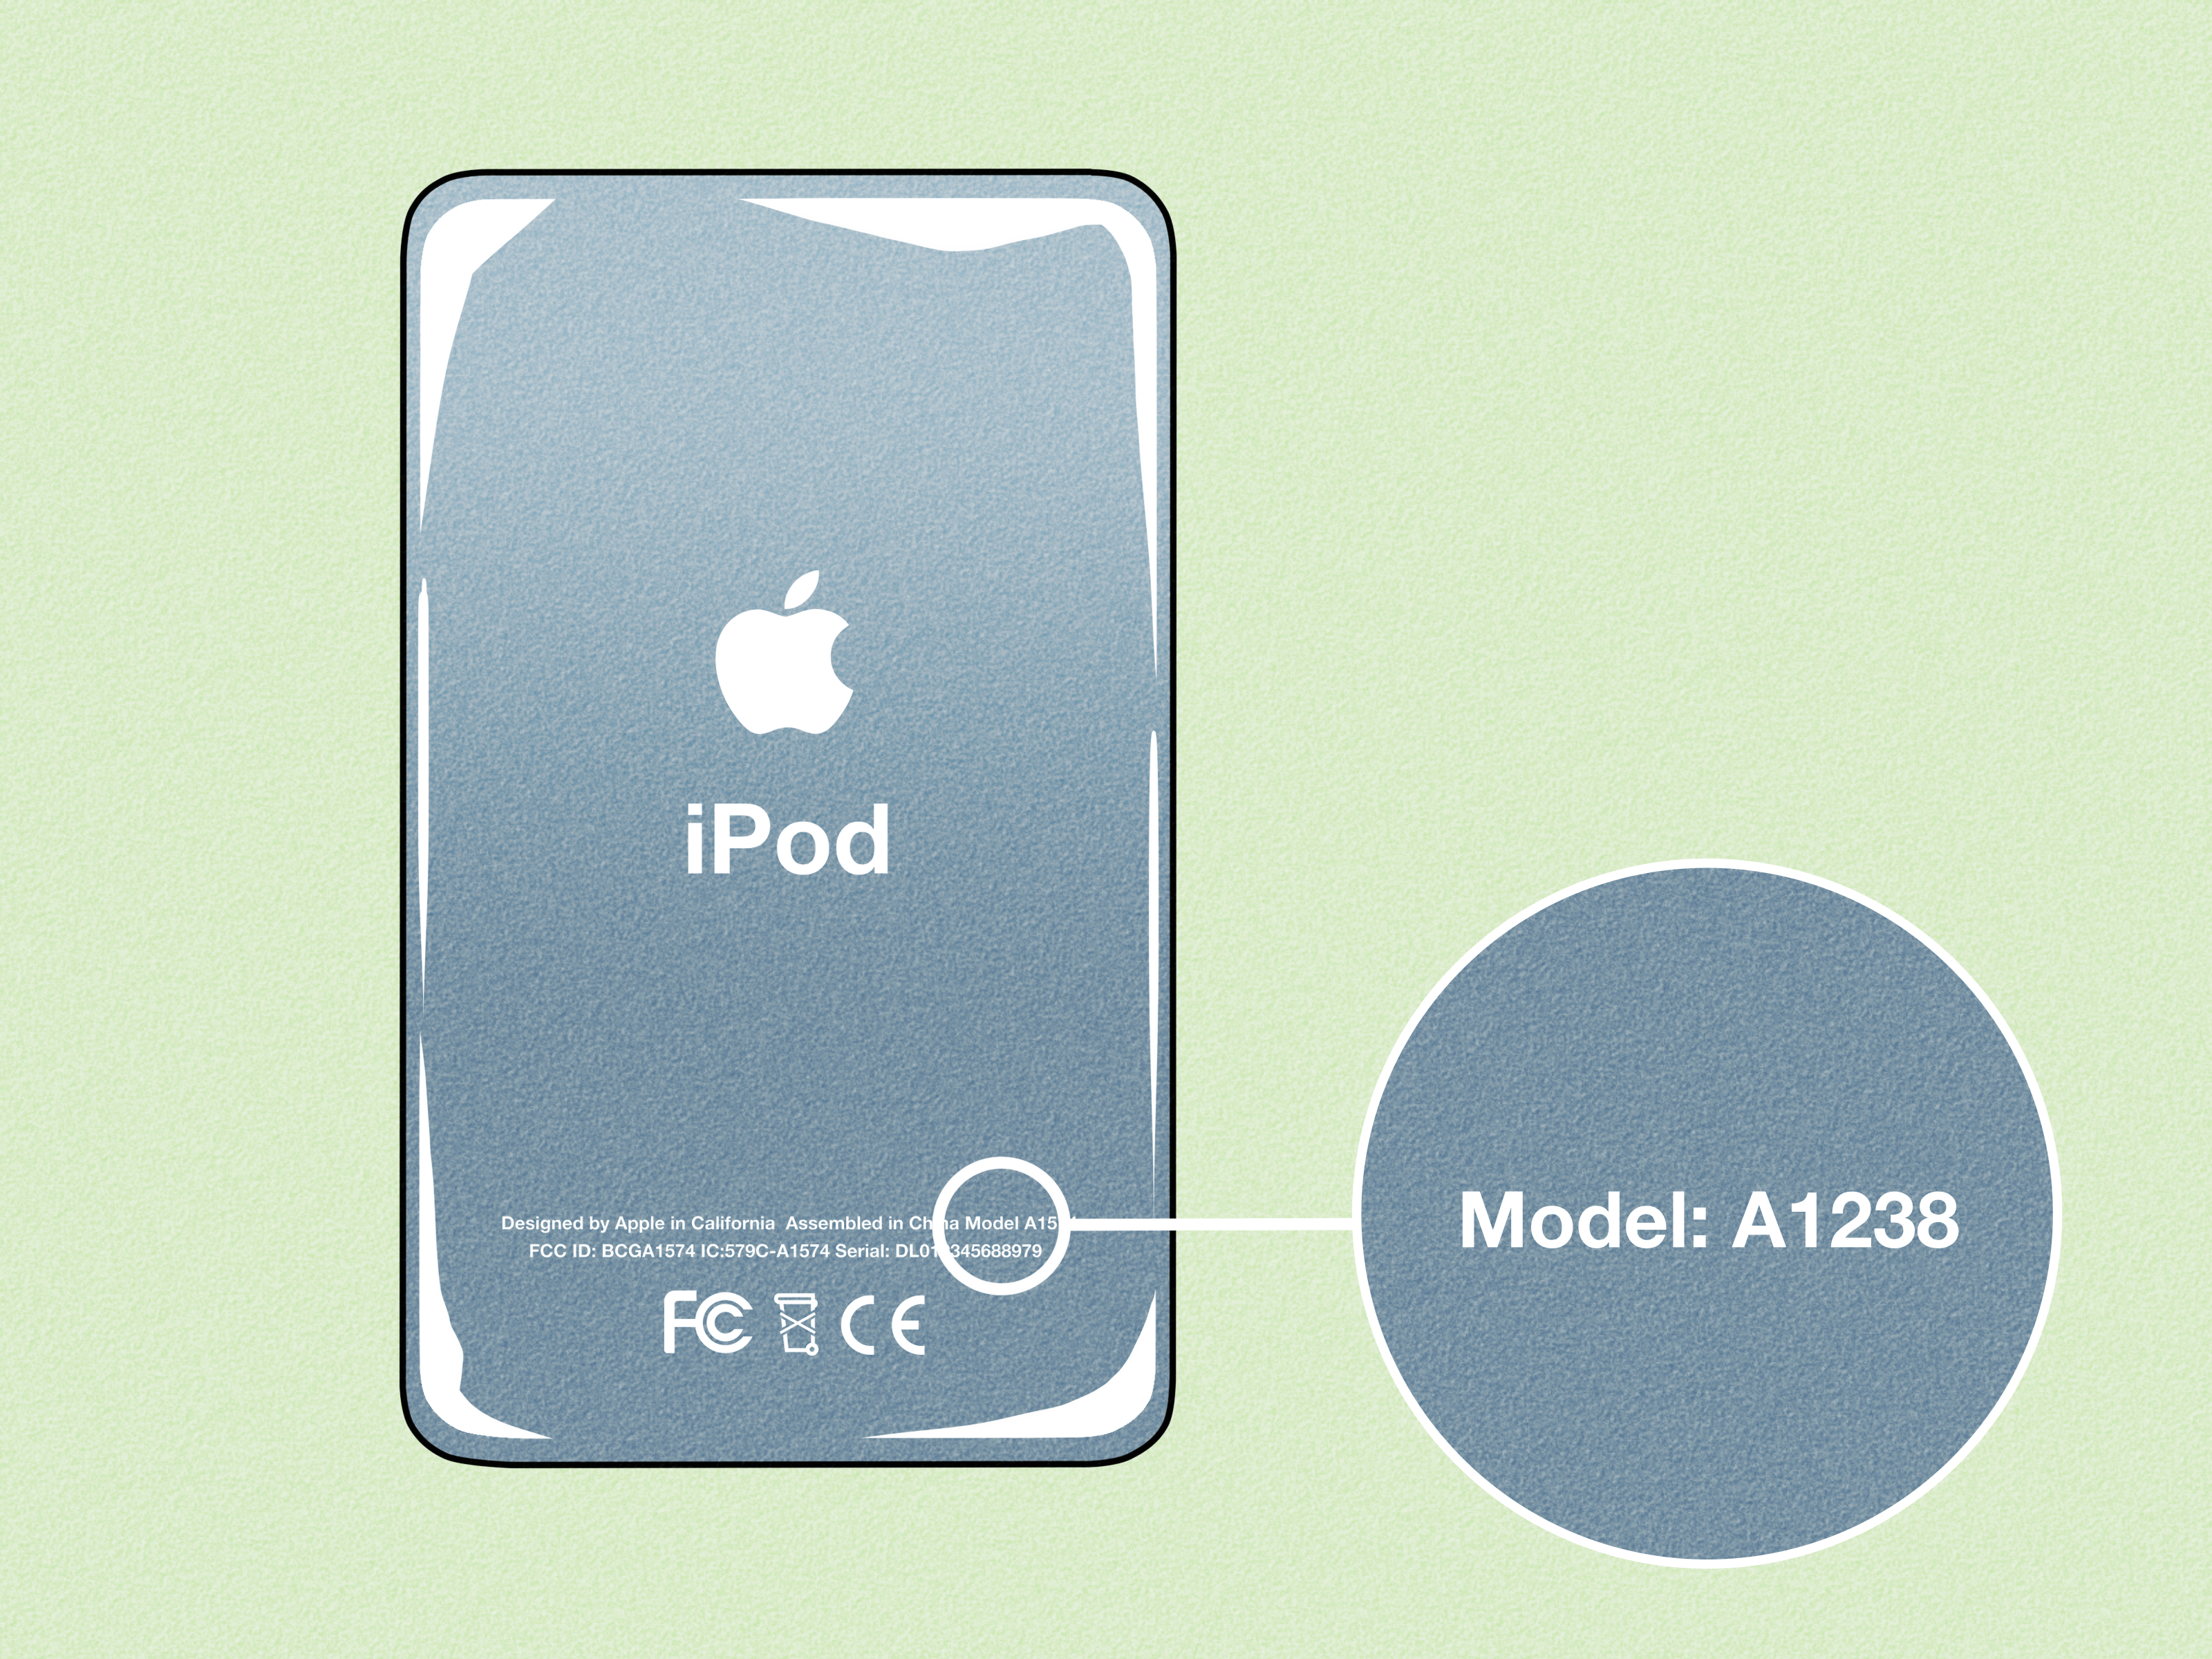
The hardware model number normally begins with the letter “A” followed by four digits, such as A1238, A1367, or A2178. This A-number is usually the best starting point for identifying an iPod generation.
Part or order number
A part number may resemble MC540LL/A or MA002LL/A. It can indicate a particular color, capacity, or sales region. On an iPod touch, the About screen may initially display this longer part number instead of the A-number.
Serial number
The serial number identifies an individual device. It may help distinguish revisions that share a model number. Read it carefully: Apple serial numbers can contain the numeral zero, but they do not use the letter O.
Way 1: Find the iPod Model Number
Checking the model number is generally the fastest and most reliable method. Look for an identifier written in the format A####.
How to check an iPod touch model number
- Open Settings.
- Tap General.
- Select About.
- Find Model Number.
- Tap the displayed part number if necessary to reveal the A-number.
The A-number may also be printed in tiny lettering on the back. Use bright, angled light or take a close-up photograph and zoom in. This is considerably easier than staring at polished metal until the numbers reveal themselves through pity.
Quick iPod touch model-number chart
| Generation | Model number | Recognizable feature |
|---|---|---|
| 1st generation | A1213 | No external volume buttons |
| 2nd generation | A1288 | Curved metal back and volume buttons |
| 3rd generation | A1318 | Similar to the 2nd generation; primarily 32GB or 64GB |
| 4th generation | A1367 | Front and rear cameras with a 30-pin connector |
| 5th generation | A1421 or A1509 | Taller 4-inch screen and Lightning connector |
| 6th generation | A1574 | Similar body to the 5th generation with upgraded hardware |
| 7th generation | A2178 | Final iPod touch, introduced in 2019 |
Finding the number on other iPod models
On most iPod nano, mini, classic, and full-size models, the A-number is engraved on the back case. On clip-equipped models, including certain iPod shuffle and nano versions, identifying information may appear on the clip or on the surface beneath it.
Compare the number with an official Apple identification chart, but also verify the listed capacity and physical features. Apple occasionally used one A-number for more than one closely related configuration.
A1238, for example, appears on certain late fifth-generation video iPods and iPod classic models. In that situation, storage capacity, case material, thickness, interface, and serial details provide the final answer.
Way 2: Use the Serial Number and Software Information
If the back engraving is scratched, faded, or covered by a case, look for the serial number instead.
Where to find an iPod serial number
- Back case: Many iPod nano and iPod touch models have the serial number engraved near the bottom.
- Clip: Check the clip or the area beneath it on compatible shuffle and nano models.
- Settings: On an iPod touch or iPod nano 6th generation and later, open Settings > General > About.
- Original box: The barcode label may list the serial and part numbers.
- Purchase records: Some invoices and receipts include the device serial number.
Confirm the model with a serial lookup
Enter the complete serial number into a reputable Apple-device database or compare its final characters with Apple’s identification information. Some older iPods have specific three-character serial endings that help separate similar generations.
Use the result as confirmation rather than relying on it blindly. Vintage iPods are frequently repaired or modified. A replacement logic board, custom housing, or swapped back plate can cause the serial information and exterior markings to disagree.
Connect the iPod to a computer
If the device powers on, connect it to a Mac or Windows computer. Depending on the operating system, it may appear in Finder, Apple Devices, or iTunes.
Record the displayed serial number, storage capacity, software version, and device name. These details are particularly helpful when identifying similar-looking iPod touch models or distinguishing an 80GB video iPod from an 80GB iPod classic.
Computer information reflects the internal logic board, not necessarily the case surrounding it. When buying repair parts, inspect both the software information and the physical hardware.
Way 3: Identify the iPod by Its Physical Design
A dead iPod can still reveal its identity. Apple changed wheel layouts, screens, cameras, clips, connectors, and body shapes frequently enough that each generation has recognizable design clues.
Original iPod and iPod classic
- 1st generation: Mechanical scroll wheel with four separate buttons surrounding it.
- 2nd generation: Touch-sensitive wheel with separate buttons around the outside.
- 3rd generation: Four touch-sensitive buttons in a row between the display and wheel.
- 4th generation: Menu controls integrated into the Click Wheel.
- 5th generation: Color screen designed for video playback, usually with a plastic front.
- iPod classic: Wide color display, aluminum front, Click Wheel, and commonly 80GB, 120GB, or 160GB of storage.
Online sellers often call the slim 160GB model a “7th-generation iPod classic.” That name is widely used by collectors, although Apple’s official naming may differ. Confirm the storage, thickness, and serial information before ordering parts.
iPod mini
The iPod mini has a narrow anodized-aluminum body, rounded sides, and a Click Wheel. It was sold in multiple colors, generally with 4GB or 6GB of storage. Its business-card-like shape makes it relatively easy to recognize.
iPod nano
The nano changed dramatically across seven official generations:
- 1st generation: Thin black or white plastic front with a polished metal back.
- 2nd generation: Rounded aluminum body in several bright colors.
- 3rd generation: Short, wide body with a larger video-friendly screen.
- 4th generation: Tall, slim aluminum design with a vertical display.
- 5th generation: Similar tall shape with a video camera on the back.
- 6th generation: Tiny square touchscreen with a rear clip.
- 7th generation: Tall touchscreen, circular Home button, Bluetooth, and Lightning port.
iPod shuffle
All shuffle models lack a screen. The first generation resembles a white stick with a built-in USB connector beneath a removable cap. The second generation is a small square with circular controls and a clip.
The third generation is a slim bar with no main playback buttons on its face because most controls were placed on compatible earphones. The fourth generation restored the circular buttons, presumably after users finished searching for controls that were not there.
iPod touch
The iPod touch resembles an iPhone without cellular service. The first generation lacks external volume buttons. The second and third generations have curved metal backs and can be difficult to separate without checking capacity or model number.
The fourth generation introduced front and rear cameras. The fifth generation added a taller 4-inch display and Lightning port. The sixth and seventh generations retained nearly identical exterior designs, so checking the A-number is the safest method.
Fast iPod Identification Checklist
- Determine whether it is an original iPod, classic, mini, nano, shuffle, or touch.
- Locate the A-number on the back, clip, or About screen.
- Record the exact storage capacity.
- Check whether it uses built-in USB, a 30-pin connector, or Lightning.
- Note the wheel, screen, camera, clip, buttons, and case material.
- Use the serial number when the A-number matches multiple revisions.
- Confirm at least two details before ordering parts.
Common iPod Identification Mistakes
Calling every wheel-based model an iPod classic
Many sellers use “classic” as a general term for any full-size wheel-based iPod. Apple began using the official iPod classic name in 2007. Earlier devices belong to numbered iPod generations.
Using capacity as the only clue
Several generations shared capacities such as 8GB, 16GB, 30GB, or 80GB. Storage is helpful only when combined with a model number or distinctive design feature.
Trusting the exterior completely
Collectors often install custom faceplates, larger batteries, flash storage, or replacement back covers. Exterior markings may no longer describe the hardware inside.
Confusing the part number with the A-number
An identifier containing a slash and regional suffix is probably a part number. The hardware model number normally begins with A and contains four digits.
Ignoring case thickness
Some full-size iPods were offered in thin and thick versions. Back covers, batteries, and headphone assemblies may differ even when the front panels appear identical.
Conclusion
To identify your iPod generation, start with the A-number, confirm it using the serial number or computer information, and then compare the device’s physical design. These three methods work across the iPod classic, mini, nano, shuffle, touch, and earlier full-size families.
Do not rely solely on color, capacity, or an online seller’s title. Confirm at least two independent details before purchasing a charger, case, battery, or repair component. Once the exact model is known, you can stop describing it as “the small silver one with the wheel,” which is already a meaningful technical achievement.
Practical Experiences When Identifying Older iPods
Real-world iPod identification is often less tidy than a product chart. Many devices have scratched backs, replacement housings, upgraded storage, or parts borrowed from another model. The most reliable approach is therefore a chain of evidence: identify the family, find the A-number, check the capacity, and confirm one physical feature.
The mysterious 80GB iPod
A common secondhand listing describes a device simply as an “80GB iPod Classic.” That description may refer to an enhanced fifth-generation video iPod or an early iPod classic. Both can carry the A1238 model number, which means the number and capacity are not enough by themselves.
The front material is a useful clue. Fifth-generation video models generally have plastic fronts, while iPod classic models use aluminum. The case thickness, interface, and serial-number ending can provide additional confirmation. Checking these details prevents buyers from ordering an incompatible battery or faceplate.
The iPod touch that looks newer than it is
The fifth-, sixth-, and seventh-generation iPod touch models share a similar tall design. Color and camera appearance are unreliable identifiers because Apple reused the basic shape and offered overlapping finishes.
The About screen resolves the question quickly. A1421 or A1509 indicates a fifth-generation model, A1574 identifies the sixth generation, and A2178 belongs to the seventh. A few seconds in Settings can be more accurate than comparing dozens of blurry marketplace photographs.
The engraving that appears to have vanished
Polished iPod backs collect scratches with impressive efficiency. On heavily used devices, the model and serial text may appear completely erased. Clean the surface gently and shine a bright light across it from the side rather than directly overhead.
Taking a high-resolution photograph and increasing the contrast can reveal engraving that is nearly invisible to the eye. When the text is truly unreadable, connect the device to a computer and combine the reported information with the wheel layout, connector, camera, or clip design.
The modified iPod with conflicting information
Enthusiast-built iPods may contain flash storage, oversized batteries, transparent faceplates, or replacement back covers. A back marked 30GB might contain 256GB of modern flash storage, while a logic board may come from a different donor device.
In this situation, the exterior identifies the chassis and case dimensions, while the software information identifies the logic board and current storage. Both matter during repairs. A battery must fit the installed back cover, while the display or headphone assembly must match the underlying generation.
The marketplace listing with an invented name
Online listings frequently use names such as “8th-gen nano,” “iPod Classic 7,” or “2014 iPod touch edition.” Some labels are collector shorthand, while others are enthusiastic guesses presented as technical facts.
Before buying, request clear photographs of the A-number, capacity marking, connector, controls, and About screen. Verify two independent clues. A model number plus a matching connector is useful evidence. A vague listing title plus optimism is not.
The practical lesson is simple: identify the device before purchasing anything designed to fit inside, around, or underneath it. Five minutes of checking can prevent days of returns, incompatible parts, and conversations with sellers who insist that every white Apple music player is “the original classic.”