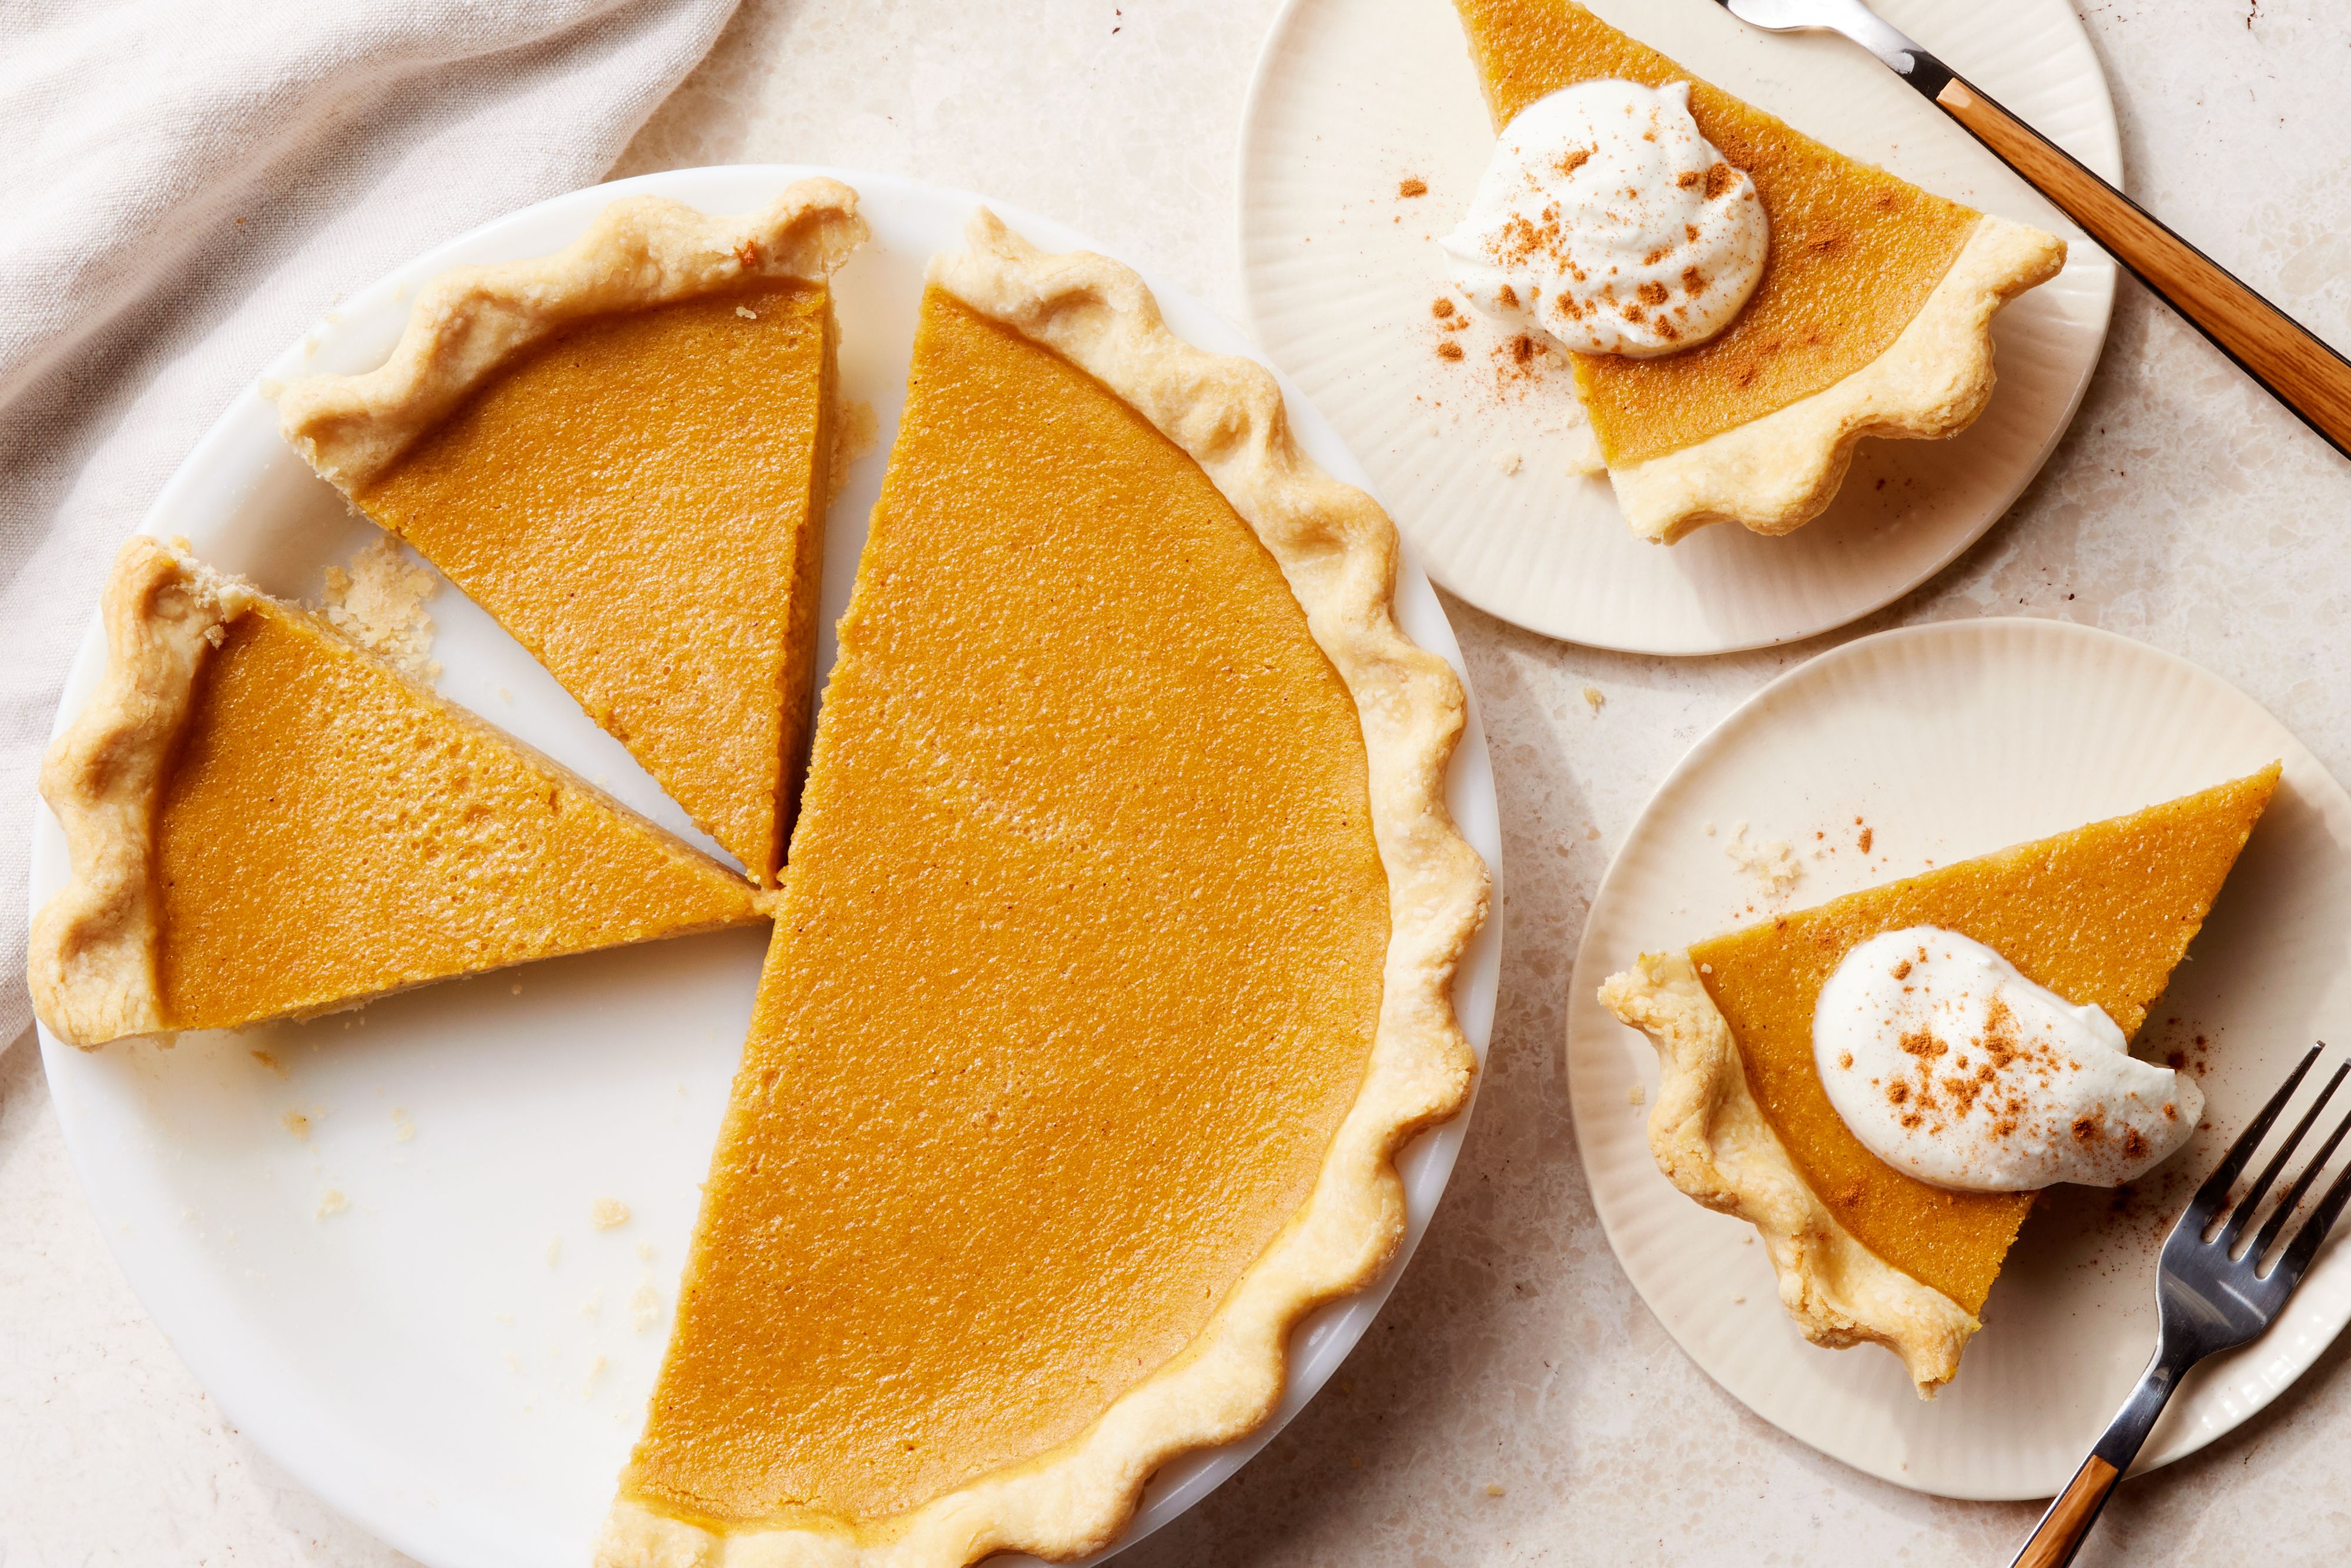
There are desserts that politely sit on the table, and then there is pumpkin piethe golden custard superstar that shows up wearing cinnamon cologne and immediately becomes the emotional support dessert of fall. This homemade fresh pumpkin pie recipe is for anyone who wants the cozy flavor of a classic pumpkin pie but with the extra pride of starting with an actual pumpkin instead of opening a can and calling it “harvest.”
To be clear, canned pumpkin is not the villain. It is dependable, smooth, and always ready for Thanksgiving drama. But fresh pumpkin pie has a softer, earthier flavor and a homemade charm that makes people ask, “Wait, did you really make this from scratch?” Yes. Yes, you did. And you may casually mention it three times before dessert is over.
This guide walks you through choosing the right pumpkin, roasting it for rich flavor, turning it into silky puree, building a creamy spiced filling, baking the pie without cracks, and storing leftovers safely. You will also find troubleshooting tips, make-ahead advice, serving ideas, and a long practical experience section at the end for anyone who likes learning from someone else’s pie victories and tiny kitchen disasters.
Why Make Pumpkin Pie from Fresh Pumpkin?
Fresh pumpkin pie has a lighter, more delicate taste than many canned pumpkin pies. The flavor is gently sweet, slightly nutty, and less dense. When roasted properly, fresh pumpkin develops caramelized edges that add depth to the filling. That roasting step is the difference between “nice pie” and “please leave me alone with this slice and a fork.”
Fresh pumpkin also gives you control. You can drain the puree for a thicker custard, blend it until velvety, adjust the spice level, and choose how sweet you want the final pie to be. For this recipe, the goal is a smooth, custardy pumpkin pie with a flaky crust, warm spices, and enough structure to slice neatly without turning into pumpkin pudding in a crust canoe.
Best Pumpkin for Homemade Fresh Pumpkin Pie
The best pumpkins for pie are small baking pumpkins, often labeled sugar pumpkins, pie pumpkins, or sweet pumpkins. These usually weigh about 2 to 5 pounds and have dense, flavorful flesh. Large carving pumpkins are better suited for jack-o’-lanterns and porch glory. They tend to be watery, stringy, and less sweet, which can lead to a bland filling.
What to Look For
- Choose a pumpkin that feels heavy for its size.
- Look for firm skin without soft spots, mold, or deep cracks.
- A dull, deep orange color usually indicates good maturity.
- Skip giant decorative pumpkins unless you enjoy watery disappointment.
One medium sugar pumpkin usually gives about 1 1/2 to 2 1/2 cups of puree, depending on size and moisture level. This recipe needs 2 cups of fresh pumpkin puree, so roast two small pumpkins if you want extra puree for muffins, pancakes, soup, or future pie-related emergencies.
Homemade Fresh Pumpkin Pie Recipe Overview
This recipe uses roasted fresh pumpkin, brown sugar, eggs, evaporated milk, cream, and a balanced spice blend. Brown sugar gives the pie a gentle caramel note, while evaporated milk adds reliable creaminess without making the custard too loose. A little cornstarch helps the filling set cleanly, especially because fresh pumpkin puree can vary in moisture.
Recipe Details
- Prep time: 40 minutes
- Cook time: 1 hour 25 minutes
- Cooling time: 2 to 3 hours
- Total time: About 4 hours
- Yield: One 9-inch pie, 8 slices
- Skill level: Easy to moderate
Ingredients
For the Fresh Pumpkin Puree
- 1 medium sugar pumpkin, about 3 to 4 pounds
- 1 tablespoon neutral oil, optional
- Pinch of salt, optional
For the Pie Crust
- 1 unbaked 9-inch pie crust, homemade or store-bought
- 1 egg white, lightly beaten, optional for brushing the crust
For the Pumpkin Pie Filling
- 2 cups fresh pumpkin puree
- 3/4 cup packed light brown sugar
- 2 large eggs
- 1 large egg yolk
- 3/4 cup evaporated milk
- 1/2 cup heavy cream
- 1 tablespoon cornstarch
- 1 1/2 teaspoons ground cinnamon
- 3/4 teaspoon ground ginger
- 1/4 teaspoon ground nutmeg
- 1/8 teaspoon ground cloves
- 1/2 teaspoon fine salt
- 1 teaspoon vanilla extract
Optional Toppings
- Fresh whipped cream
- A pinch of cinnamon
- Toasted pecans
- Maple whipped cream
- Vanilla ice cream
How to Make Fresh Pumpkin Puree
Step 1: Cut and Clean the Pumpkin
Preheat the oven to 375°F. Wash the outside of the pumpkin, then carefully cut it in half from top to bottom. Scoop out the seeds and stringy fibers. A sturdy spoon works, but an ice cream scoop makes the job easier and gives you a tiny sense of power.
You can save the seeds for roasting later. Toss them with oil, salt, and spices, then bake until crisp. Suddenly your pie project comes with snacks. This is what professionals call “kitchen morale.”
Step 2: Roast the Pumpkin
Place the pumpkin halves cut-side down on a parchment-lined baking sheet. Brush lightly with oil if desired. Roast for 45 to 60 minutes, or until the flesh is very tender and easily pierced with a fork. Smaller pumpkins may cook faster, while thicker pumpkins need more time.
Roasting is better than boiling for pie because it concentrates the pumpkin flavor instead of adding extra water. The edges may darken slightly, and that is good news. Those browned spots bring natural sweetness and a deeper fall flavor.
Step 3: Scoop, Blend, and Drain
Let the pumpkin cool until safe to handle. Scoop the soft flesh into a food processor or blender and blend until smooth. If the puree looks watery, spoon it into a fine-mesh strainer lined with cheesecloth or a coffee filter. Let it drain for 30 minutes to 1 hour.
This draining step is important. Fresh pumpkin contains more water than canned pumpkin, and excess moisture can make the filling loose. The finished puree should be thick enough to mound slightly on a spoon. If it looks like pumpkin soup, keep draining. If it looks like smooth mashed sweet potato, you are in business.
How to Make Homemade Fresh Pumpkin Pie
Step 1: Prepare the Crust
Fit the pie crust into a 9-inch pie plate. Crimp the edges, then chill the crust for at least 20 minutes. A cold crust holds its shape better and bakes up flakier. If you have time, blind bake the crust for 10 to 12 minutes at 375°F with pie weights, then remove the weights and bake for another 5 minutes. This helps prevent a soggy bottom.
For extra protection, brush the warm crust lightly with beaten egg white and return it to the oven for 1 minute. This creates a thin barrier between the crust and custard. Think of it as a raincoat for pastry.
Step 2: Warm the Pumpkin and Spices
In a medium saucepan, combine the fresh pumpkin puree, brown sugar, cinnamon, ginger, nutmeg, cloves, salt, and cornstarch. Cook over medium heat for 4 to 5 minutes, stirring often. The mixture should steam gently and become slightly thicker and fragrant.
This step deepens the flavor, blooms the spices, and cooks off a little extra moisture. It is a small move with a big payoff. Your kitchen will smell like a candle company made better life choices.
Step 3: Whisk the Custard
Remove the pumpkin mixture from the heat and let it cool for about 10 minutes. In a separate bowl, whisk the eggs and egg yolk until smooth. Slowly whisk in the evaporated milk, heavy cream, and vanilla extract. Add the warm pumpkin mixture gradually, whisking constantly so the eggs do not scramble.
For the smoothest filling, blend the mixture briefly in a blender or food processor, then strain it through a fine-mesh sieve. This is optional, but it gives the pie a bakery-style texture. If you have ever wanted pumpkin pie to taste like velvet took a vacation in November, this is the trick.
Step 4: Fill and Bake
Reduce the oven temperature to 350°F. Place the pie crust on a baking sheet. Pour the filling into the crust and smooth the top. Bake for 45 to 55 minutes, or until the edges are set and the center still has a slight jiggle when gently nudged.
If the crust browns too quickly, cover the edges with foil or a pie shield. Avoid overbaking. Pumpkin pie is a custard, and custard likes gentle treatment. The center will continue to set as it cools.
Step 5: Cool Completely
Transfer the pie to a wire rack and cool for at least 2 hours. Do not slice it hot unless you want the filling to sigh dramatically and collapse onto the plate. Once cooled, refrigerate the pie if not serving right away.
How to Tell When Pumpkin Pie Is Done
The best pumpkin pie is set around the edges with a center that wobbles slightly, not sloshes. A small jiggle is good. A wave pool is not. You can also insert a thin knife about 1 inch from the edge; it should come out mostly clean. Another method is checking the internal temperature, which should reach about 175°F to 180°F near the center.
Do not wait until the center looks completely firm in the oven. By then, the pie may be overbaked and more likely to crack. Cracks are not a moral failure, by the way. They are just an invitation to add whipped cream with confidence.
Tips for the Best Fresh Pumpkin Pie
Drain the Pumpkin Puree
This is the biggest difference between canned and fresh pumpkin. Homemade puree can be watery, and watery puree leads to a weak custard. Drain it until thick before measuring.
Use Brown Sugar for Better Flavor
Light brown sugar adds a caramel-like warmth that pairs beautifully with roasted pumpkin. Dark brown sugar works too, but it creates a stronger molasses flavor.
Do Not Overdo the Spices
Fresh pumpkin has a delicate flavor. Too much spice can cover it up. Cinnamon should lead, ginger should brighten, nutmeg should add warmth, and cloves should whisper from the back row.
Let the Pie Chill Before Serving
Pumpkin pie slices best after chilling. If you prefer it slightly warm, chill it first, then let slices sit at room temperature for 20 minutes before serving.
Common Mistakes to Avoid
Using a Carving Pumpkin
Carving pumpkins are bred for size and shape, not flavor. They are often watery and fibrous. Use sugar pumpkins for the best homemade pumpkin pie recipe.
Skipping the Cooling Time
Freshly baked pie smells unfairly good, but slicing too soon can ruin the texture. Let the custard set fully before cutting.
Overbaking the Filling
If the pie puffs dramatically or cracks across the top, it likely baked too long or too hot. Use the jiggle test and remember that carryover heat finishes the job.
Adding Too Much Liquid
Fresh pumpkin puree varies. If yours is loose, do not compensate by hoping the oven will “figure it out.” Drain it first, then measure 2 cups.
Make-Ahead and Storage Instructions
Pumpkin pie is a great make-ahead dessert. You can roast and puree the pumpkin up to 3 days in advance, then store it in an airtight container in the refrigerator. You can also freeze pumpkin puree for several months. Thaw it overnight in the fridge and drain off excess liquid before using.
Because pumpkin pie contains eggs and dairy, it should be refrigerated after cooling. Do not leave homemade pumpkin pie at room temperature for more than 2 hours. Store leftovers loosely covered in the refrigerator for up to 3 to 4 days. For the best texture, let chilled slices sit at room temperature for about 15 minutes before serving.
Can You Freeze Fresh Pumpkin Pie?
Yes, pumpkin pie freezes surprisingly well. Let the baked pie cool completely, then wrap it tightly in plastic wrap and foil. Freeze for up to 1 month for best quality. Thaw overnight in the refrigerator. The crust may soften slightly, but the flavor will still be lovely.
If you know you plan to freeze the pie, bake it in a metal pie pan. Metal freezes quickly and helps reduce ice crystal formation. Glass pie plates are beautiful, but they are not always thrilled about dramatic temperature changes.
Serving Ideas
Classic whipped cream is hard to beat, but fresh pumpkin pie also loves maple, pecans, caramel, and warm spices. Try topping each slice with maple whipped cream, a sprinkle of toasted pecans, or a tiny drizzle of salted caramel. If serving after a big holiday dinner, keep the toppings simple. Everyone wants dessert, but nobody wants to wrestle a five-story pie sculpture after mashed potatoes.
Easy Maple Whipped Cream
Beat 1 cup cold heavy cream with 2 tablespoons maple syrup and 1/2 teaspoon vanilla extract until soft peaks form. Spoon onto chilled pie slices just before serving.
Flavor Variations
Gingersnap Crust
Swap the pastry crust for a gingersnap cookie crust. The spicy crunch pairs beautifully with pumpkin custard and makes the recipe feel a little more playful.
Maple Pumpkin Pie
Replace 1/4 cup of the brown sugar with pure maple syrup. Because maple syrup adds liquid, make sure your pumpkin puree is well drained.
Extra Silky Pumpkin Pie
Add 2 ounces of softened cream cheese to the filling and blend until completely smooth. This gives the custard a lightly tangy, creamy finish.
Pecan Bottom Pumpkin Pie
Spread a thin layer of finely chopped pecans mixed with a tablespoon of brown sugar and melted butter over the bottom crust before adding the filling. It creates a nutty surprise under the custard.
Nutrition and Ingredient Notes
Pumpkin is naturally rich in color, fiber, and earthy sweetness. The pie itself is still dessert, of course, because sugar, cream, and crust did not arrive wearing gym shoes. But compared with many heavy holiday desserts, pumpkin pie offers a balanced custard texture and a satisfying flavor that does not need mountains of frosting.
Evaporated milk gives the filling body, while heavy cream adds richness. If you want a lighter pie, you can use all evaporated milk, but the texture will be slightly less luxurious. Avoid using pumpkin pie filling in place of pumpkin puree because it already contains sweeteners and spices, which can throw off the recipe.
Kitchen-Tested Experiences for Homemade Fresh Pumpkin Pie
The first thing you learn when making fresh pumpkin pie is that pumpkins have personalities. Some are sweet and dense, some are watery, and some behave like they were raised by soup. That is why the recipe works best when you treat the puree like an ingredient to evaluate, not just measure. If the puree is thick, smooth, and slightly sweet, you can proceed confidently. If it is watery, drain it. If it is fibrous, blend it longer and strain it. The pumpkin is in charge at first, but you can politely take control.
One of the most useful experiences is roasting the pumpkin cut-side down. This traps steam, softens the flesh evenly, and keeps the exposed surface from drying too much. After roasting, let the pumpkin cool before scooping. Hot pumpkin flesh is sneaky. It looks harmless, then suddenly your fingertips are questioning your life choices. Give it time.
Another lesson: homemade puree often tastes milder than canned pumpkin. That is not a flaw. It simply means the spices should be warm but balanced. When I tested fresh pumpkin filling with too much clove, the pie tasted less like Thanksgiving and more like a scented drawer sachet from 1892. A tiny amount of clove is wonderful. A heavy hand is how desserts become historical reenactments.
Cooking the pumpkin puree with sugar and spices before adding the eggs makes a noticeable difference. The filling becomes darker, more aromatic, and slightly thicker. It also helps remove the raw squash flavor that fresh pumpkin sometimes carries. This step only takes a few minutes, but it makes the pie taste more intentional, as if it had a meeting with itself and decided to be excellent.
The crust deserves attention too. Fresh pumpkin pie filling is soft and custardy, so a crisp base matters. Blind baking is worth it, especially if you are serving the pie for a holiday meal. Nobody writes songs about soggy crust. Chill the dough, bake it lightly before filling, and protect the edges with foil if they brown too quickly. A pie shield is helpful, but strips of foil work just fine and make you feel resourceful.
The biggest emotional challenge is waiting. Pumpkin pie needs cooling time. When it comes out of the oven, the center may look a little wobbly, and that can make you panic. Do not panic. Custards continue setting as they cool. If you bake until the center is completely stiff, the top may crack and the texture can turn grainy. Trust the jiggle. The jiggle knows things.
For serving, chilled pie slices most cleanly, but room-temperature pie tastes a little more aromatic. A good compromise is to refrigerate the pie, slice it cold, then let the slices sit for 15 to 20 minutes before serving. Add whipped cream right before bringing it to the table. If you add whipped cream too early, it can soften and slide around like it is trying to leave the conversation.
Fresh pumpkin pie also has a quiet advantage: it makes the whole process feel connected to the season. You are not just mixing filling. You are cutting a pumpkin, roasting it, smelling the spices bloom, watching the custard settle, and carrying a real homemade dessert to the table. It is slower than opening a can, yes. But not everything good needs to be instant. Some desserts are worth the extra steps, especially when the reward is a silky slice of pumpkin pie that tastes warm, honest, and completely homemade.
Conclusion
This homemade fresh pumpkin pie recipe gives you everything a classic fall dessert should have: a flaky crust, silky custard, roasted pumpkin flavor, cozy spices, and just enough homemade effort to make you feel like a kitchen legend. The key is choosing a sugar pumpkin, roasting it until tender, draining the puree, gently cooking the spices, and baking the pie only until the center softly jiggles.
Serve it chilled or slightly cool with whipped cream, toasted pecans, or a drizzle of maple syrup. Whether you make it for Thanksgiving, a fall dinner, or a random Tuesday that needs emotional support, fresh pumpkin pie brings comfort to the table one golden slice at a time.